Old-fashioned Maraschino Cherry Ice Cream Recipe


Marachino cherry ice cream picture 2

Happy Memorial Day!

Memorial Day in years gone by was often celebrated by parades and local festivals – and incredible homemade ice cream. An old-time favorite was Maraschino Cherry Ice Cream.

I tend to think of Maraschino cherries as a cocktail garnish (or an ingredient in canned fruit cocktail), but Maraschino cherries were a popular recipe ingredient in the early 1900’s. Back then the cherries were a pricey delicacy, and a popular ingredient that hinted of sophistication and class.

The recipe I adapted was in a hundred-year-old Pennsylvania church cookbook, and it was incredibly easy.  This ice cream recipe didn’t require any cooking; I only needed to combine cream, sugar, and lemon juice, and then chill for a few minutes before putting the mixture into the ice cream maker  (the cherries are added after the ice cream is frozen). I actually worried that the recipe was too easy, but my fears were totally unfounded. The ice cream was awesome.

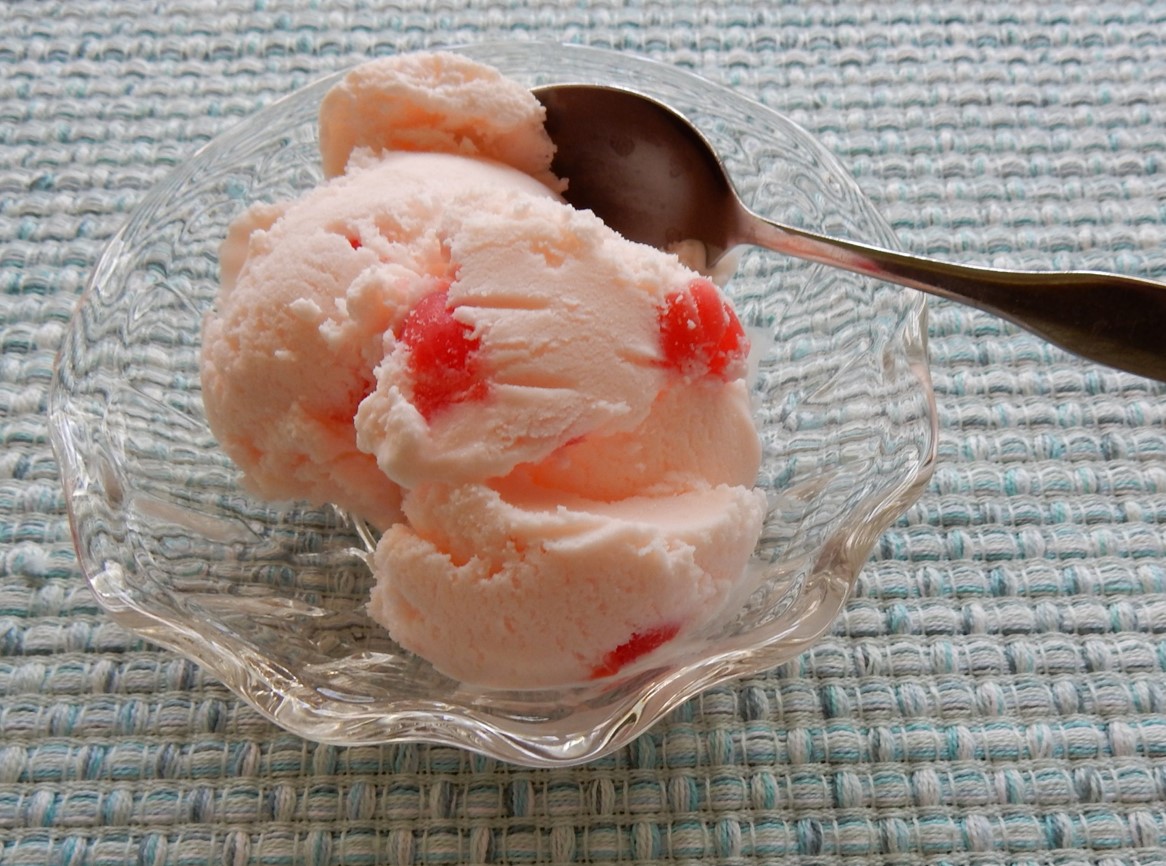
The festive Maraschino Cherry Ice Cream  was sooth and creamy, and oh so rich, with embedded pieces of  Maraschino cherries adding a fun texture and the wonderful nuanced tartness.

My husband and I did not eat all of the ice cream on the day we made it, so we put it into the freezer in our refrigerator – and had a wonderful treat for the next several days. The ice cream texture remained smooth (and unlike what happens when some homemade ice creams are stored, no large granules of ice developed).  The inclusion of lemon juice in fruit-flavored ice creams like this one is an old-fashioned way of minimizing the likelihood that large ice granules will develop – and it worked perfectly.

Here’s the recipe updated for modern cooks:

Maraschino Cherry Ice Cream

  • Servings: 6-8
  • Difficulty: moderate
  • Print

1 1/ 2 cups sugar

1/3 cup lemon juice

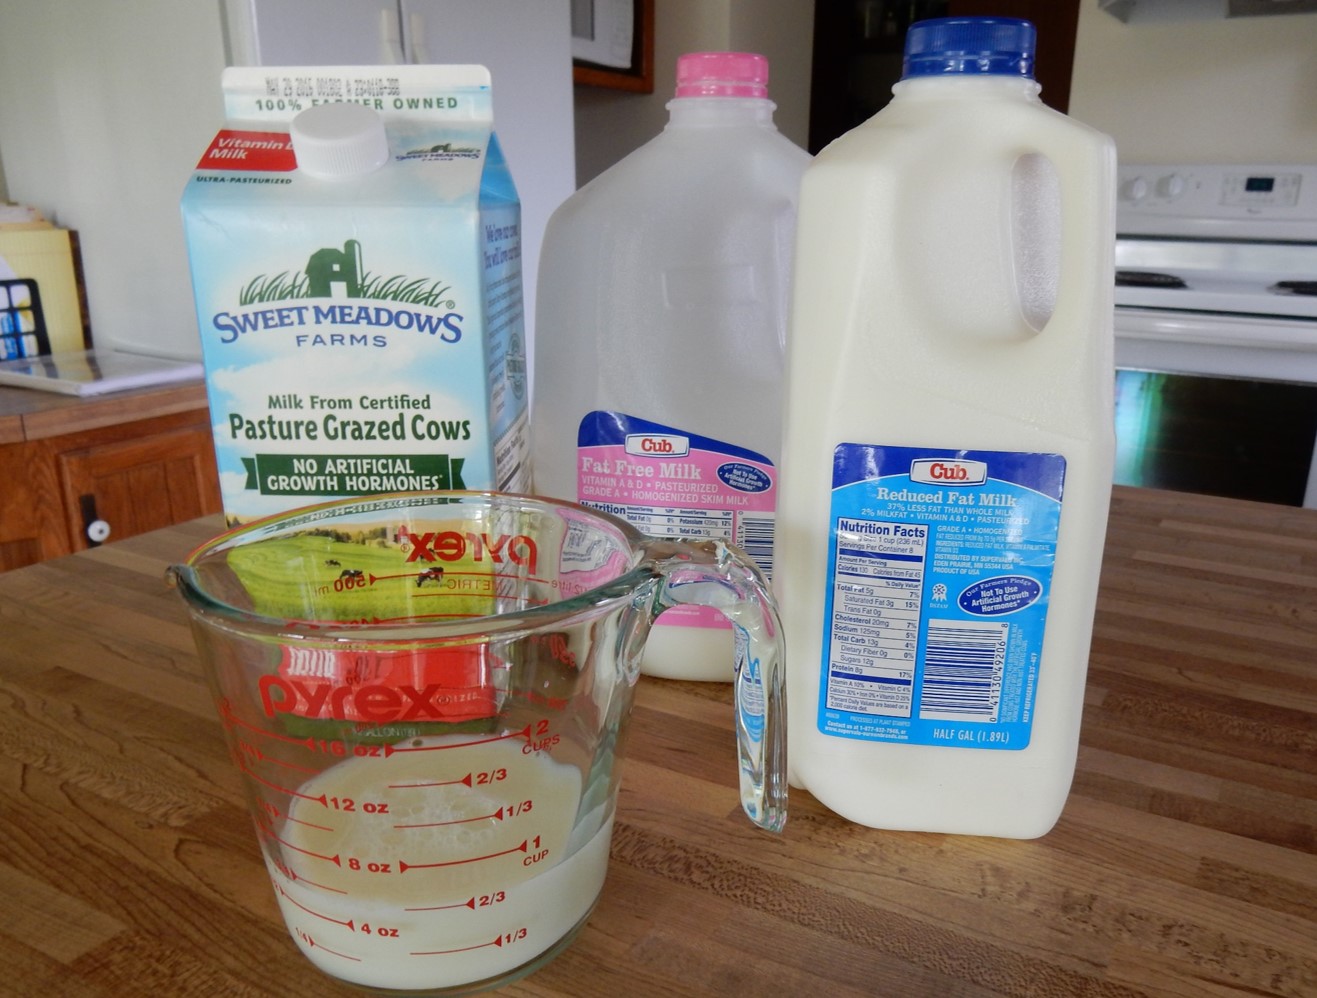
1 quart (4 cups) half and half

1 pint (2 cups) heavy cream

1/2 cup Maraschino cherries, coarsely chopped

In a large bowl, stir the lemon juice into the sugar. Add 2 cups of the half and half, and stir until the sugar is dissolved, then add the heavy cream and the remaining half and half. Stir to combine. Chill the mixture in the refrigerator (or put into the freezer for 15 minutes), then put the mixture into the ice cream maker, and follow the manufacturer’s directions.

After the ice cream is frozen, stir in the chopped Maraschino cherries. Repack in ice in ice cream maker (or put in the freezer) for two hours.

Note: This recipe is for a 4 quart ice cream maker. Adjust amounts if another size of ice cream maker is used.

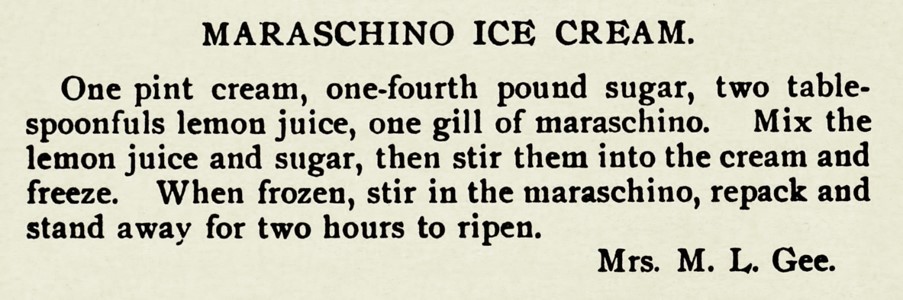
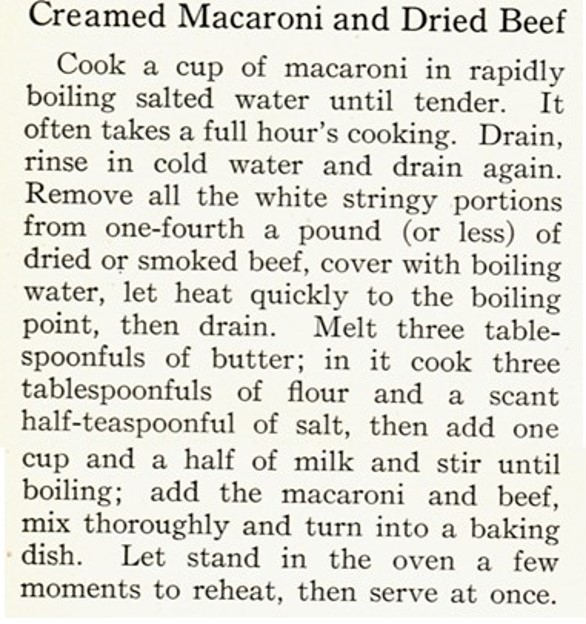
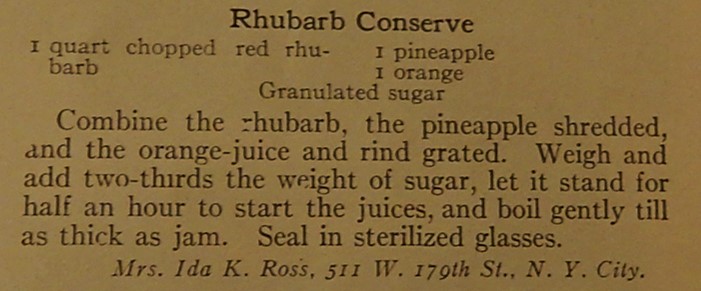
And, here is the original recipe:

Source: Lycoming Valley Cook Book, Compiled by the Leadies of Trout Run M.E. Church, Trout Run, PA (1907)
Source: Lycoming Valley Cook Book, Compiled by the Ladies of Trout Run M.E. Church, Trout Run, PA (1907)

Fresh Fruits and Vegetables Delivered in the Mail a Hundred Years Ago

farm produce heading 5 1916

farm produce d
Caption: Here is a “home hamper.” If you live in New York, Brooklyn, or elsewhere on Long Island, it is delivered to your door for $1.50. The four boxes each hold about four quarts. (Source: Ladies Home Journal – May, 1916).

I can get great locally-grown produce at the farmer’s market, or I could join a community supported agriculture (CSA) group and pick up wonderful local foods at a nearby drop point — but I dream of curated farm-fresh food coming right to my door on a regular basis.  I long for the good old days. A hundred years ago families in the New York City area could get fresh fruits and vegetables from Long Island in the mail.

Here’s some quotes from a 1916 article about it.

The farm-to-family-fresh idea is Edith Loring Fullerton’s, and a very clever idea it is. Mrs. Fullerton believed that a basket of fruits and vegetables, freshly picked, sent straight from the farm would appeal to the city housewife.

Evidently it did, for the “Home Hamper” is a great success.  The hamper itself is an oblong crate twenty-four inches long, fourteen wide and ten deep; it contains six baskets and weights from thirty to thirty-five pounds. In it the housewife finds such staples as potatoes, beans, peas, tomatoes, sweet corn, soup and salad vegetables, and in season strawberries, peaches, cantaloupes, eggplants, etc.

With the parcel post the hamper idea is being rapidly taken up by woman farmers, some of them adding eggs, poultry, butter or flowers to the hamper lists.

The housewife finds that not only does the hamper reduce the cost of living, but the difference between freshly picked vegetables and those picked unripe to ripen in transit is greatly appreciated by her family.

Mrs. Fullerton is one of the vice presidents of the new cooperative organization of woman gardeners — the Women’s National Agricultural and Horticultural  Association, which has for one of its objects to “bring together the producer and consumer.”

Ladies Home Journal (May 1916)

farm produce c
Caption: Freshly picked, and thoroughly washed and cleaned, carefully bunched and sorted, these vegetables, just right for use, are ready for packing into hampers. The hampers leave the farm at six thirty in the morning on Tuesdays and Fridays, reaching the housewives a few hours later.

I want to think that delivery services are faster and more efficient now than in the early 1900’s but apparently parcel post packages were delivered by the U.S. Postal Service much quicker and more dependably a hundred years ago than now (at least in urban areas). Parcel post began in the U.S. in 1913, and was seen as a way for farmers to get supplies, and for consumers to get farm produce. Trains, horse-drawn wagons, and trucks quickly transported the perishable parcel post hampers into the city from the outlying agricultural areas.

One-hundred-year-old Strawberry Soft Custard Recipe

Strawberry Custard 2

Fresh, juicy strawberries at the peak of the season are best served in simple desserts that celebrate their natural sweetness and nuanced tart undertones. If you are looking for the perfect summer dessert try Strawberry Custard. This classic soft custard has the consistency of a rich cream, and is heavenly when spooned over luscious sliced strawberries.

Here’s the original recipe, in a hundred-year-old cookbook:

Strawberry Custard Recipe
Source: Lowney’s Cook Book (1912)

I found this recipe to be more challenging  than I anticipated. The first time I made it, I ended up with a curdled mess.  After doing a little research I realized that I’d overcooked the custard. I think that I was picturing that the custard would get firm, like modern puddings – but this custard is quite soft and really a sauce (which probably should have been obvious from the name of the custard recipe, Soft Custard — but, somehow that slipped by me the first time around).

The second batch, I watched like a hawk when I cooked it, and removed the custard from the heat the instant the hot liquid coated the spoon that I was using to stir it. This time the custard turned out perfectly.

Here is the recipe updated for modern cooks.

Strawberry Soft Custard

  • Servings: 5 - 7
  • Difficulty: difficult
  • Print

2 cups milk

4 egg yolks

1/3 cup sugar

1/4 teaspoon salt

1/2 teaspoon vanilla

sliced strawberries

Put the milk in a sauce pan (use a double boiler, if available), and using medium heat,  scald the milk. This is done by stirring the milk continuously until steam begins to rise from the milk and small bubbles form along the sides of the pan. (Do not allow the milk to boil). Remove from the heat.

In a mixing bowl, combine the egg yolks, sugar, and salt; beat until the mixture is smooth and lemon-colored. While continuing to beat, slowly pour the scalded milk into the mixture.  (It is important not to add too much milk at a time since the hot milk could cook the eggs into scrambled egg clumps.)

Return the mixture to the sauce pan that was used for scalding the milk. Using medium heat, heat the mixture while stirring constantly. As soon as the mixture coats the spoon, remove from the heat and stir in the vanilla. Put the hot custard into a bowl and refrigerate until cold.

To serve, put sliced strawberries in a serving bowl or dessert dish; spoon the desired amount of custard over the strawberries and serve.

The original recipe calls for using only 1 cup of strawberries. For modern tastes, this recipe needs to be adjusted so that each serving lots of strawberries, so I didn’t specify the amount of strawberries.

Silverware Patterns a Hundred Years Ago

Source: Foods and Household Management: A Textbook of the Household Arts (1915)

Selecting silverware or other flatware is very personal, yet an indication of preferences and tastes. Before I got married I can remember agonizing over which pattern to select. Today, the decision might be easier since most people purchase inexpensive stainless steel flatware, but the design still gives clues to the buyer’s personality. Some styles are very formal and traditional; others informal and trendy.  Similarly, a hundred-years-ago people wanted to select the “right” silverware.

Here’s some excerpts of the advice in a hundred-year-old home economics textbook:

Silver and plated silver for knives, forks, and spoons, coffee and tea sets, all add to the charm of the table. Figure 70 shows some good designs in spoons. A simple design is easy to clean.

Three sizes of spoons, tablespoons, teaspoons, and coffee spoons, and two sizes of forks are all sufficient, with a few larger spoons for service and desserts.

Triple-plated ware lasts for years, if well cared for, and comes in good designs.

Pewter, familiar in olden days, is being used again in Colonial designs, and makes an attractive tea or coffee set, is less costly than solid silver, and has a better tone and color than plated ware.

Foods and Household Management: A Textbook of the Household Arts (1915)

Source: Oneida Silverware Advertisement in Ladies Home Journal (May, 1916)


Creamed Macaroni and Dried Beef

Creamed Macaroni & Dried Beef 3

When browsing through hundred-year-old magazines, I came across a recipe for Creamed Macaroni and Dried Beef. This dish has a creamy, rich, white sauce that works perfectly with the macaroni and dried beef to create a comfort food that simultaneously seems both new and old-fashioned.

Most varieties of dried beef that are available today are technically chipped beef. I always think of dried beef as a food that the military ate during World War II, but drying meat is historically a good way to preserve it and there are some really good hundred-year-old dried beef recipes.

Here’s the Creamed Macaroni and Dried Beef recipe updated for modern cooks:

Creamed Macaroni and Dried Beef

  • Servings: 5 - 6
  • Difficulty: easy
  • Print

1 cup macaroni

2 – 4 ounces dried beef

3 tablespoons butter

3 tablespoons flour

1 1/2 cups milk

Cook the macaroni in a large saucepan of boiling water until al dente (6 – 8 minutes).  Remove from heat and drain.

In the meantime, rinse dried beef to reduce the salt content, then drain well. Dice into 1/2 inch pieces.

Melt butter in frying pan; then add the diced dried beef and “frizzle” it until the diced beef curls and browns slightly. Stir flour into the dried beef and butter mixture. Slowly pour in milk, and bring to a boil over medium heat while stirring constantly.  Stir in the macaroni and cook for 3-5 minutes, or until the sauce has thickened and excess liquid is absorbed, while stirring occasionally. Serve immediately.

Here’s the original recipe:

Creamed Macaroni & Dried Beef
Source: American Cookery (Boston Cooking School Magazine) (March, 1916)

I did not use salt in the water that I used to cook the macaroni, nor did I add additional salt to the macaroni and dried beef mixture. The dried beef that I used was quite salty–even after I rinsed it, so additional salt was not needed.

Should whole, 2%, 1%, or skim milk be used in 100-year-old recipes?

Milk 5

Do you even get a question that stumps you? Well, I recently did. A friend asked whether whole, 2%, 1%, or skim milk should be used when making the hundred-year-old recipes that I post on this blog.

I replied that I use whatever kind of milk I have in my refrigerator–and that they all seem to work just fine. But, the question kept nagging at me. None of the milk varieties that are readily available today are exactly the same as the milk of a hundred years ago.

Cream floated on the top of milk a hundred years ago. Homogenization to prevent the separation of the cream from the milk was not widely available to until the 1920’s and 1930’s. Consumers may have stirred the cream into the milk before using–but they also may have skimmed much of the cream off for other uses before using the milk for cooking. Also, some consumers may have purchased semi-skim milk since farmers occasionally skimmed the cream off the milk to make butter before selling.

I have seen a few hundred-year-old recipes that call for “rich milk.” I take this to mean that the milk is creamier than most. This suggests to me that the recipe is calling for milk from cattle breeds that produce particularly high levels of cream (Jersey, Guernsey), but it might refer to whole milk.

A hundred years ago, there was wide variation from area to area in whether milk was pasteurized.  Unpasteurized milk was used rural areas, as well as in many towns and cities. Commercial pasteurization began in the 1890’s. In 1907, Chicago was the first U.S. city to require it;  in 1947, Michigan was the first state to mandate it.

The differences in the diets of the cows a hundred-years-ago affected the taste of the milk. The cows ate a diet that varied across the course of the year –  pasture during the warm-weather months; hay, corn, and oats during the winter months.  Growing up on a dairy farm, I can clearly remember how the taste of the milk changed each spring when the cows first went out to pasture.

Whew, there are so many things to think about. I still don’t know  whether whole, 2%, 1%, or skim milk is the closest to the milk called for in hundred-year-old recipes. But, I’m going to quit worrying about it, and start cooking.

Rhubarb and Pineapple Conserve

Rhubarb and pineapple conserve

It never seems quite like spring until I make a few rhubarb recipes, so when I saw a recipe for Rhubarb Conserve in a hundred-year-old issue of Good Housekeeping, I just had to give it a try. In addition to the rhubarb the recipe called for a pineapple (as well as for the juice and grated peel of an orange).

Source: Good Housekeeping (May, 1916)

The recipe turned out wonderfully, but it wasn’t quite what I expected. The conserve tastes more like a pineapple conserve than a rhubarb one with lovely sunny notes of pineapple that are slightly muted by the tartness of the rhubarb.

And, it wasn’t a bright red color like I anticipated. Instead the conserve is a blend of delightful shades of yellow, green, and brown. The rhubarb I used had a little red in the stalks–but much of the length was green. This may have affected the color. I also did a little research and discovered that rhubarb jam recipes often call for strawberry gelatin or other added coloring agents so I now think that the conserve color is exactly right given the ingredients I used.

Conserves are typically served with meat, and this conserve is lovely with pork or poultry, but I also enjoy using it as a marmalade on toast and English muffins.

Rhubarb Conserve meat

When I worked on this post, I pondered whether I should use the old name or whether that was misleading. In the end, I decided to add “pineapple” to the recipe title, but to keep the keep the word conserve.

The bottom line: Whatever this recipe is called, it is delightful and something that I would make again.

Here’s the recipe updated for modern cooks:

Old-fashioned Rhubarb and Pineapple Conserve

  • Servings: 5 one-half pint jelly jars
  • Difficulty: medium
  • Print

1 pineapple (approximately 4 cups shredded pineapple)

4 cups rhubarb, chopped

juice of 1 orange

grated rind of 1 orange

2 1/3 cups sugar

Core pineapple and remove flesh from skin, then shred into small pieces. Place in a large sauce pan.  Add rhubarb, orange juice, grated orange peel, and sugar. Let sit for 1/2 hour to allow the juice to start flowing; then using medium high heat, bring to a boil. Reduce heat to medium low and boil gently for 30-40 minutes or until the mixture is the consistency of jam. Stir frequently — especially towards the end of the cooking time.

A good way to tell if the mixture is the right consistency is to lay the spoon that is used for stirring on a plate. Allow the liquid clinging to the spoon to cool for a few seconds, and see if it has a jam-like consistency.

Pour mixture into hot one-half pint jars to within 1/4 inch of the top. Wipe jar rim and adjust lids. Process in boiling water bath for 5 minutes.