Rated “PG” for Pineapple Guava

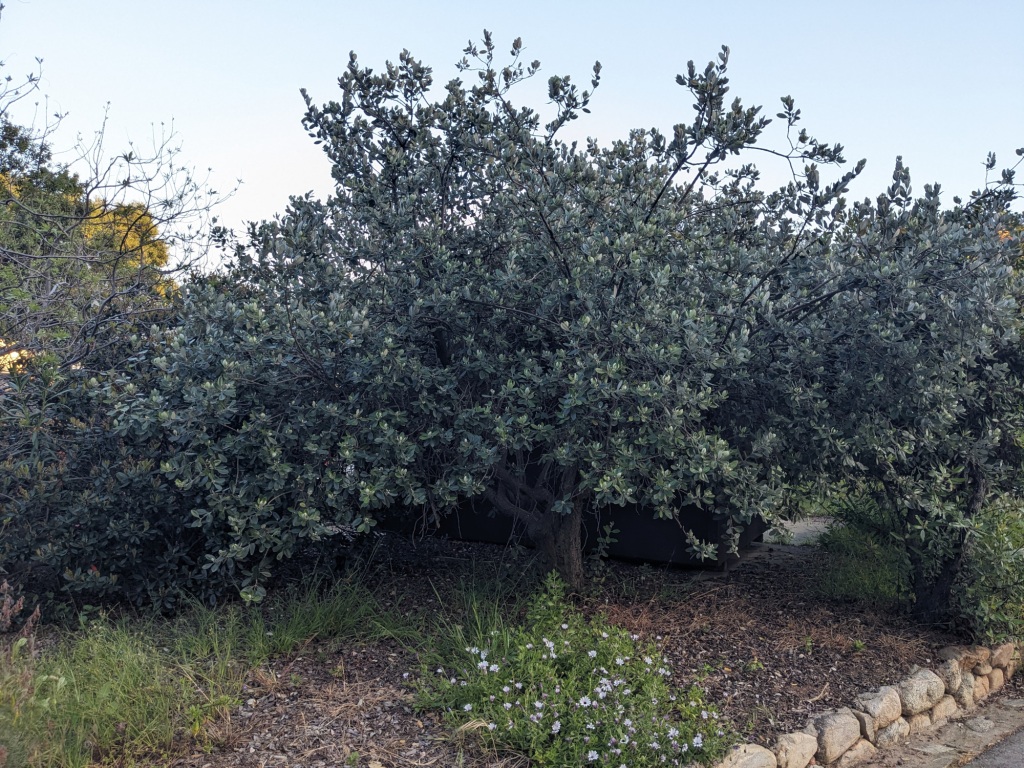
Even though I have lived here for nearly 16 years, I didn’t grow up in southern California, and so I’m always learning something new about the the kinds of fruits and vegetables that grow in this climate. Last fall, I noted a bunch of fruit on a tree adjacent to our home, and upon examination found that it was rather tasty in aroma. A little internet research revealed the source–feijoa, or pineapple guava!

green fruit with white bloom on the surface -- the fruit are somewhat egg-shaped, and laying on the ground

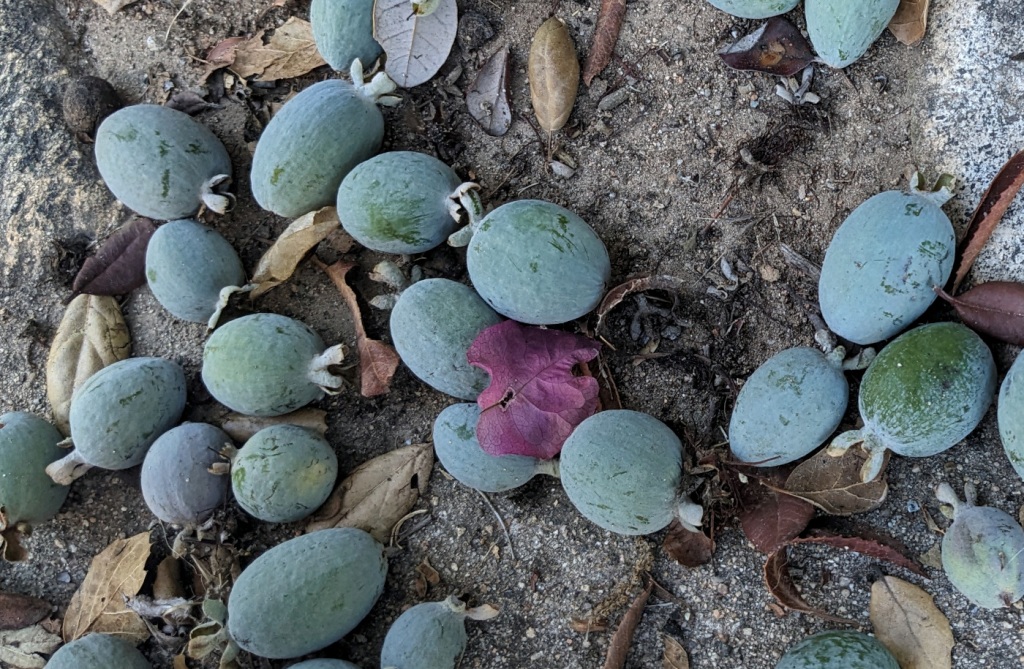
Pineapple guava (I’ll use that name throughout) are native to parts of South America, including Brazil, Argentina, Uruguay, and Paraguay, and have been cultivated in many areas with appropriate climate (apparently they are particularly popular in New Zealand). A member of the myrtle group, rather than a true guava, pineapple guavas produce a small (one to two inch across), green-skinned fruit that tastes and smells almost exactly how the name sounds. Somewhat counter-intuitively, they are not ready to eat until they drop from the tree and onto the ground!

Once I found this fruit, I knew that it would be perfect for enhancing a sour beer–something low abv, refreshing, and spritzy. I chose a Berliner Weisse-style grain bill (50% pilsner, 50% wheat malt), aiming for ~1.030 s.g. I didn’t want a highly hopped beer, so I used ~1 oz. of South Dakota Saaz hops. I didn’t know the alpha acid, but if I added them late enough it didn’t really matter. For this beer, I wanted an easy sour, with a clean character that would let the fruit shine through. Wildbrew Philly Sour was an obvious choice, enhanced by the fact that I wouldn’t have to worry as much about contamination of other batches. The fruit is a fair bit of effort to pick and process, so I stuck with a 2.5 gallon batch, aiming for one pound of fruit per gallon of beer.

The results were totally worth it! This is one of the best experimental brews I made in a long time, and it was really fun to highlight something that I picked from our yard.

Rated “PG” for Pineapple Guava

  • 2 lb. pilsner malt (Rahr)
  • 2 lb. red wheat malt (Briess)
  • 2 oz. rice hulls
  • 1 oz. Saaz whole hops (est. 3.5% alpha), 10 minute boil
  • 0.5 tsp. BrewTanB, 10 minute boil
  • 0.5 tsp. yeast nutrient (WLN1000), 5 minute boil
  • 0.5 pkg. Wildbrew Philly Sour yeast (Lallemand)
  • 2.5 lb. pineapple guava puree

Target Parameters

  • 1.031 o.g., 1.006 f.g., 3.2% abv, 8 IBU, 3 SRM
  • Full volume mash, no sparge, 152° mash for 60 minutes, 10 minute mash-out at 168°
  • Claremont tap water, neutralized with 88% lactic acid and treated with Campden tablet

Procedure

  • Starting with 4.75 gallons of tap water, I added 1/4 Campden tablet and 3.2 mL of 88% lactic acid to remove the carbonates. I heated the strike water to 156°, before adding the grains along with 0.7 mL of 88% lactic acid. I held the mash at 152° with recirculation for 60 minutes.
  • After the 60 minute mash, I raised the temperature to 168° for 10 minutes, before pulling the grains.
  • Overall, I collected ~4.5 gallons of runnings with a gravity of 1.025, for 76% mash efficiency.
  • I boiled for 60 minutes, adding finings and hops per the recipe.
  • After turning off the heat, I chilled the wort to 85° and transferred to the fermenter. I pitched a half packet of Philly Sour and sealed up the fermenter.
  • I brewed this beer on 2 April 2024. Starting gravity was 1.033, and I fermented the beer at 80°.
  • I picked the fruit way back in December, peeled it, and put everything into the deep freezer until beer time. I thawed the fruit or a day or two, pureed it, and then pasteurized at 161° for 30 seconds. I let it cool a bit, and then added to the fermenter. All of this happened on 3 April 2024, very early in fermentation.
  • I kegged the beer on 18 April 2024. Final gravity was 1.009, for 3.1% abv.
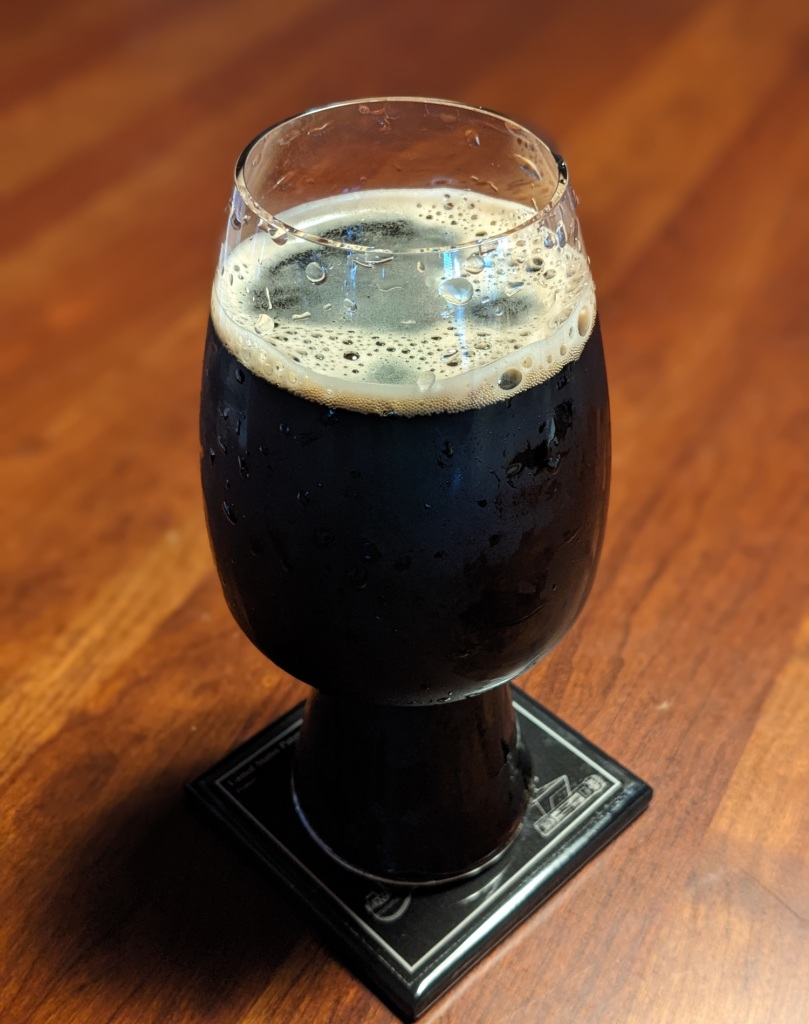
Tasting

  • Appearance
    • Hazy straw color, like the appearance of grapefruit juice. Pours with a thick white head that persists well.
  • Aroma
    • Quite prominent guava fruit aroma at the forefront, with a little doughy character behind that.
  • Flavor
    • The beer is fairly tart, but not puckeringly sour, at first impression. The tropical fruit character is definitely there, but it’s subtle–notes of guava (unsurprisingly) dominate. Some doughy wheat character hides behind it all, at a low level. Barely perceptible bitterness.
  • Mouthfeel
    • Light body, spritzy carbonation, slightly dry finish.
  • Would I Brew This Again?
    • Yes! This is a perfectly refreshing beer, well suited for the warming afternoons of spring. It is crisp, but not watery. The fruit is gorgeous on the aroma and perfectly restrained on the flavor. It’s that rare fruited beer where you can pick up the fruit character, but it takes a few seconds to process the flavor. This batch was a good bit of extra work in the fruit process, but absolutely worth it. I have sometimes seen some dismissive comments about Philly Sour being too one-note in character, but that is perfect for this beer as a way to let the subtle fruit notes take center stage. I know that I’ll never find a beer like this commercially, and that’s so much of the fun of homebrewing!
  • Overall
    • 10/10
dark green tree
The feijoa tree in all of its glory — the tallest branch is perhaps 8 or 10 feet off the ground

10 Years of All-Grain Brewing

Looking back through old blog posts, I realized that my first all-grain beer was just over 10 years ago! It was a little intimidating to get started–those days were before the now ubiquitous all-in-one systems, back when the most visible mode of brewing was a shiny (and expensive, and space-hogging) three-tier system. Thankfully, I discovered batch sparging, and this tipped the scales enough for me to try at all-grain.

I have learned a ton since then, so wanted to jot down some of the lessons for posterity. Here we go!

  • Crush is probably the most important factor for me. It can be make-or-break, especially when first learning process, and it has been so worth it to get a mill of my own so that I can dial in this variable. This has made my extraction efficiency quite predictable!
  • For those going into all-grain brewing nowadays, I would suggest either brew-in-a-bag (especially for smaller batches or smaller budgets), or an all-in-one. The Anvil Foundry has been a great investment, and makes my brew sessions all the more enjoyable. A three-tier system just isn’t worth it for me, and I would say even batch sparging is not a good route if you have the cash for all-in-one or brew-in-a-bag.
  • Mash temperature matters, but not as much as I thought. I used to obsess over being within a fraction of a degree, and that was not mental energy well spent. If you are 5 or 10 degrees off — sure, that’s going to affect your intended results. But if you are within 1 or 2 degrees, it’s almost certainly not going to be noticeable.
  • It’s worth having a stash of bulk base malts. At one point, I had three or four bags on-hand, and now I’m down to 2-row and pilsner as my usuals. Perhaps I should pick up a bag of Maris Otter and/or Vienna, but I just don’t brew enough for styles that require them. I don’t think I’ve ever gotten Munich in bulk, but it’s so strong as a flavor that I don’t use it much.
  • Decoctions can be fun. It’s worth giving a try sometime. Same for cereal mashes. But, you can make great beer without them.
  • The biggest benefit of all-grain brewing for me? I get endless recipe control, and it opens up a ton of (grain) ingredients and styles that would be hard to do otherwise.
  • All-grain brewing is no substitute for good temperature control.
  • Sometime soon, I need to do an extract batch. Just for fun, and to see if what I have learned will generate something awesome.

Above: A series of images over the years showing my evolution of all-grain brewing. From left to right, top row: my first mash tun; an early decoction effort; second row: grains ready for a brew; a full sack of malt; a very full mash tun for a high gravity beer; third row: checking temperature; the Anvil Foundry in an early brew.

Eagle Face Oatmeal Stout 2024

dark stout with tan head in tall, slightly bulged-out craft beer glass, sitting on table
Eagle Face Oatmeal Stout, in a Spiegelau stout glass. I know that beer can be enjoyed in nearly any glassware, but this sure does look pretty!

I have brewed this one many times before, and it is a house favorite. After a two-and-a-half year hiatus, I once again returned to my favorite oatmeal stout recipe. This version has two significant departures — firstly, I returned to the use of 2-row rather than Maris Otter in the recipe. The very first brew used 2-row, and I have more frequently used Maris Otter since. The biggest change here, though, was to try out BRY-97 instead of Nottingham or another higher attenuation English ale yeast. I figured it would be a worthy experiment, creating a more “American” take on the style.

Eagle Face Oatmeal Stout 2024

  • 8.5 lb. 2-row malt (Briess)
  • 1.25 lb. flaked oats (Quaker)
  • 1 lb. 80L caramel malt (Briess)
  • 1 lb. Victory malt (Briess)
  • 0.5 lb. chocolate malt (Bairds)
  • 0.5 lb. roasted barley (Crisp)
  • 0.25 lb. chocolate malt (Simpsons)
  • 1.1 oz. Magnum hops (10.1% alpha), 45 minute boil
  • 1 Whirlfloc tablet, 5 minute boil
  • 1 pkg. American West Coast Ale dry yeast (BRY-97, Lallemand)

Target Parameters

  • 1.058 o.g., 1.015 f.g., 5.6% abv, 35 IBU, 48 SRM
  • Full volume mash, no sparge, 156° mash for 60 minutes, 10 minute mash-out at 168°
  • Claremont tap water, treated with Campden tablet

Procedure

  • I mashed in with 7.75 gallons of Claremont tap water, heated to 163°. I also added 3 mL of 88% lactic acid.
  • I held the mash, with recirculation, at 156° for 60 minutes, before raising to 168° for 10 minutes and then pulling the grains.
  • I collected 6.75 gallons of runnings with a gravity of 1.050, for 72% mash efficiency.
  • I brought the runnings to a boil, adding hops and finings per the recipe. After 60 minutes, I turned off the heat and chilled to 68°.
  • I transferred the wort to my fermenter, pitched the yeast, and started it at ambient (~65°) in my back room.
  • I brewed the beer on 6 January 2024. The starting gravity was 1.056.
  • I kegged the beer on 18 March 2024. Final gravity was 1.020, for 4.8% abv.

Tasting

  • Appearance
    • Very deep brown & clear beer that pours with a fine tan head, with decent persistence.
  • Aroma
    • Clean, chocolate and coffee aroma, with a touch of roastiness. Not much for hop or yeast aroma.
  • Flavor
    • Roasty coffee in the malt profile, and a bit of subtle graininess behind that. Moderate level of bitterness.
  • Mouthfeel
    • Medium body, moderate carbonation, very slightly dry finish.
  • Would I Brew This Again?
    • This recipe is still a winner! My 2024 edition is a touch drier than I recall in past versions, likely because I went with BRY-97 rather than Nottingham. The return to 2-row also probably lightens the flavor a bit. I would consider this one an Americanized version of the style, but I’m ok with that. All of the past versions have been great, but this one is probably most “drinkable” (in terms of having more than one glass). I served the beer at a recent gathering, and it was certainly quite popular! It’s nice to know the recipe has a bit of flexibility–this version might be better for the warmer days of spring, and the “traditional” recipe targeted better for cold winter nights.
  • Overall
    • 9/10

Denny Kongish West Coast IPA

Last fall, I managed to snag a can of the Denny Kong West Coast IPA, which was brewed by North Park Beer Co. for the 2023 Homebrew Con in San Diego. It was an incredibly delicious beer, and because the recipe is readily available, I thought it would be worth a try!

The malts parallel the original reasonably well, but I made some adjustments for my hop stash and also made an adjustment to the yeast. It should be in the general ballpark, but as Denny Conn would say, my version is an homage and not a clone. The main innovations I applied here were the long mash rest and the massive dose of hops.

Denny Kongish West Coast IPA

  • 12 lb. pilsner malt (Rahr)
  • 1.25 lb. Vienna malt (Weyermann)
  • 0.5 tsp. BrewTanB, added to mash
  • 4 oz. dextrose, added to boil
  • 1.3 oz. Magnum hop pellets (12.6% alpha), 60 minute boil
  • 0.5 tsp. BrewTanB, 10 minute boil
  • 1 Whirlfloc tablet, 5 minute boil
  • 2.8 oz. Cascade hop pellets (7.5% alpha), 30 minute whirlpool
  • 1 pkg. California ale dry yeast (WLP001, White Labs)
  • 2 oz. Eclipse hop pellets (17.6% alpha), dry hop in primary fermenter for 3 days
  • 2 oz. Idaho #7 hop pellets (14.0% alpha), dry hop in primary fermenter for 3 days
  • 2 oz. LUPOMAX Azacca hop pellets (16.0% alpha), dry hop in primary fermenter for 3 days
  • 2 oz. LUPOMAX Citra hop pellets (18.5% alpha), dry hop in primary fermenter for 3 days
  • 2 tbs. (30 mL) Biofine Clear, added to keg
  • 2 oz. Nelson Sauvin hop pellets (12.9% alpha), dry hop in keg

Target Parameters

  • 1.063 s.g., 1.010 f.g., 6.9% abv, 65 IBU, 5 SRM
  • Full volume infusion mash, held at 149° for 120 minutes and 168° for 10 minutes
  • Neutralized Claremont tap water with Campden tablet, and mineral salts added to boil to achieve 55 ppm Ca, 12 ppm Mg, 54 ppm Na, 106 ppm SO4, 60 ppm Cl, 10 ppm CaCO3, RA=-38, alkalinity=8 ppm

Procedure

  • Starting with 7.9 gallons of tap water, I added 5.6 mL of 88% lactic acid as well as a Campden tablet, followed by 3 g of CaCl.
  • I heated the water to 155° and added the grains, along with 2.9 mL of 88% lactic acid for pH adjustment.
  • I held the mash at 149° for 120 minutes, with recirculation, and then raised the mash to 168° for 10 minutes, before pulling the grains.
  • In total, I collected 6.9 gallons of runnings with a gravity of 1.046, for 65% mash efficiency.
  • I brought the runnings to a boil, for a 90 minute total boil. After 30 minutes, I added the first round of hops, and then proceeded following the recipe.
  • After the 90 minute boil, I chilled to 170° before adding the whirlpool hops and letting them sit for 30 minutes.
  • Next, I chilled to 70°, transferred to the fermenter, and chilled down to 63° before pitching the yeast.
  • I brewed the beer on 2 March 2024, and it had a starting gravity of 1.062–nearly exactly on target!
  • I added the dry hops on 10 March 2024, in a boiled (sterilized) hop bag. It was a bit tight for the volume of hops, so I was a bit concerned about how much hop contact I would get.
  • I kegged the beer on 26 March 2024, into a CO2 purged keg. Final gravity was 1.007–that’s quite low, and results in a 7.4% abv! The 120 minute, 149° mash really did the trick for drying things out. Hop flavor and aroma were a bit lower than expected, probably because of the thick concentration of hops in the bag.
  • Once the beer was down to around 34°, I quickly added the Biofine Clear, and then re-cycled the CO2.
  • I put the beer on tap on March 30.
  • Because hop aroma was underwhelming, I added 2 oz. of Nelson Sauvin hops to the keg (in a baggie) on 12 April 2024.

Tasting

  • Appearance
    • Light gold color, slight haze. Pours w/ a thick and persistent off-white head that leaves beautiful lacing on the glass.
  • Aroma
    • Light citrus aroma, a hint of white wine (presumably from Nelson Sauvin hops).
  • Flavor
    • High level of citrus-pith bitterness. Clean, light malty character behind that.
  • Mouthfeel
    • Moderate carbonation, medium-light body, dry finish.
  • Would I Brew This Again?
    • Yes, but with different hop handling. I am underwhelmed by the hop aroma and flavor, especially relative to the commercial version I tried. It was dumb of me to use such a tightly packed hop bag! The hops just didn’t shine like they should. I would definitely try a variation in the future, though. I love the dryness on this, but it might be too much for some. The low temperature, extended mash really did the trick! The BioFine also worked its magic, resulting in a fairly clear beer. Other than aroma, though this is a nice American IPA!
  • Overall
    • 7/10

Note: I tasted this again on 25 April 2024, after nearly two weeks with the extra hops. It definitely helped the beer! Although the appearance is now a bit hazier, the aroma has a fantastic tropical fruit profile (kiwi, guava, a bit of sweet white wine, and more). The flavor is perhaps a bit harsher now (I suspect due to the hops in the keg), but it also has a more prominent tropical aspect overall. Not a bad end result!

No. 11 Bohemian Pilsner

According to my records, I have made 18 batches of German pils over the years (starting in 2016), but only five batches of the original pilsner beer, Bohemian (Czech) pils. After a more than four year hiatus, it was time!

Taking lessons learned from previous recipes, I went for very fresh Saaz hops (from Yakima Valley Hops). Furthermore, I built the malt bill to have a touch of melanoidin malt, to avoid messing with a decoction but also not overwhelming with the honey-character that melanoidin brings at higher percentages. I used the Rahr pilsner malt as a base–although it is not “traditional,” I have found it to be an absolutely excellent malt for my tastes.

This isn’t my 11th batch, but I brewed it on 11/11 (Nigel Tufnel Day!), so the name was unavoidable.

No. 11 Bohemian Pilsner

  • 10 lb. pilsner malt (Rahr)
  • 0.5 lb. Carafoam malt (Weyermann)
  • 0.25 lb. melanoidin malt (Weyermann)
  • 0.5 tsp. BrewTanB, added to mash
  • 3.5 oz. Saaz hop pellets (2.4% alpha), 60 minute boil
  • 1.5 oz. Saaz hop pellets (2.4% alpha), 10 minute boil
  • 0.5 tsp. BrewTanB, 10 minute boil
  • 1 Whirlfloc tablet, 5 minute boil
  • 1 oz. Saaz, 5 minute boil
  • 1 tsp. tsp. WLN1000 yeast nutrient, 5 minute boil
  • 2 pkg. Diamond Lager yeast (Lallemand)

Target Parameters

  • 1.049 s.g., 1.014 f.g., 4.7% abv, 37 IBU, 5 SRM
  • Full volume infusion mash, held at 154° for 60 minutes and 168° for 10 minutes
  • RO water built to hit target of 6 ppm Ca, 5 ppm Na, 6 ppm SO4, 6 ppm Cl, 14 ppm HCO3, RA=7 ppm

Procedure

  • To 7.5 gallons of RO water, I added 0.3 g gypsum, 0.3 g calcium chlorie, and 0.5 g baking soda, to hit my water target parameters.
  • I heated the water to 160°, and added the grains to hit a mash target of 154°. I added 4 mL of 88% lactic acid to adjust the mash pH, and recirculated for 60 minutes.
  • Next, I heated the mash to 168° for 10 minutes, before pulling the grains and starting the ramp-up to the boil.
  • In total, I collected 6.75 gallons of runnings with a gravity of 1.042, for 71% mash efficiency.
  • I boiled for 60 minutes, adding hops and finings per the schedule. Finally, I turned off the heat and chilled to 75° before transferring to the fermenter.
  • Once in the fermenter, I chilled the wort to 52° before pitching the yeast.
  • I brewed this beer on 11 November 2023. Starting gravity was 1.049, exactly on target!
  • I held the fermentation temperature at 52° until 2 December 2023, when I moved the beer to ambient (~60°).
  • I kegged the beer on 26 December 2023. Final gravity was 1.014, for 4.7% abv.
  • Because I’ve been a bit slow to finish kegs lately, this beer ended up lagering for a full three months before tasting.

Tasting

  • Appearance
    • Beautiful medium gold color, brilliant clarity, pouring with a long-lasting, creamy white head that leaves nice tracks on the side of the glass.
  • Aroma
    • A whiff of spicy Saaz at the front, at some maltiness (slightly bready) back of that.
  • Flavor
    • Bitterness-forward, which lingers on the tongue, followed by a subtle maltiness. Clean fermentation profile. Tiny bit of caramel. I feel like the melanoidin is perhaps too much in the background–I would like a tiny touch more.
  • Mouthfeel
    • Medium body, medium carbonation, off-dry mouthfeel.
  • Would I brew this again?
    • Yes! It’s probably the best Bohemian pilsner I have made to date! It has a nice mix of malt/hops….It maybe could be a bit deeper gold in color, and I wouldn’t complain with a touch more melanoidin character. It was well worth the (not entirely intentional) extended aging, too.
  • Overall
    • 9/10 (for color)