The best anti-glare screen protector or anti-reflective filter could only be anti-reflective & glare-free computer lighting. In spite of the proliferation of anti-reflective and antiglare products computer glare and reflections continue being a major cause of Computer Vision Syndrome, i.e. eye-strain, tired eyes, irritation, red eyes, burning sensations, dry eyes, blurred and double vision (Computer vision syndrome: A review; Jour. of Clinical Ophthalmology and Research; Bali, J. et al. 2014). Anti-reflective & glare-free computer lighting is tricky, goes beyond buying and installing a computer light, and requires some fine tuning to your eyes. But antiglare computer lighting is possible and it is neither difficult nor expensive once you figure it out. Below the principles of anti-reflective & glare-free computer lighting are explained; some specific solutions and products are suggested.
Who can benefit from anti-reflective & glare-free computer lighting?
Computer vision syndrome is a repetitive strain disorder with many possible causes such that its treatment needs to be tailored to each individual (ibid. p.61). If you haven’t done so already, consider looking into the different possible causes of your computer vision syndrome (you may refer to the cited research review, this post, or other sources. You may then experiment to understand what is causing your computer vision syndrome.
Is your computer vision syndrome caused by glare and reflections?
Computer screen glare and reflections are today among the major causes of computer vision syndrome and it is not clear that antiglare screen protectors are an effective remedy. “Bright illumination from large windows, over-head fluorescent tubes, table lamps, and office lighting implements can wash out screen character images and cause annoyance by reflection and glare. Similarly sharp contrast between the illuminated computer screen and hard copy written text leads to asthenopia [eye strain]. (…) For long it has been postulated that use of antiglare filters [antiglare screen protectors] can help alleviate the symptoms [of computer vision syndrome (…) however] conflicting reports on the intervention have been found. (ibid. p.64).”
This post assumes that you find computer screen glare and reflections very disturbing. Moreover, it assumes that you are not at ease staring at your screen at full brightness. This means that increasing computer screen brightness to reduce glare and reflections on computer screen is not an option for you, because it would worsen the symptoms of your computer vision syndrome. Perhaps you have even tried to change background color from white to a darker shade/color as white background felt too aggressive to your eyes (perhaps due to the high component of blue light emitted by a white screen?). The change felt soothing at first but brought about an undesired side effect: glare and reflections on your screen became more pronounced and started bothering you more and more. Taking this issue to an extreme, this post assumes that you would need to reduce the brightness of your screen to the very minimum by changing your background to black.
In summary the anti-reflective & glare-free computer lighting simultaneously complies with the following requirements:
- it removes direct glare from lighting completely
- it reduces to zero reflections and indirect glare from computer screen (with black background on it) and anywhere in computer user’s field of vision
- it reduces by near 100% blue light emitted by computer screen
- it provides sufficient brightness to comfortably see the keyboard and read printed documents on your computer desk
These requirements are extreme. They suppose what might be the most difficult anti-reflection and antiglare computer lighting scenario. If your eyes are not that sensitive (you don’t need to work with a black background, and reflection-free, and blue light free, and glare-free computer lighting setup) the anti-reflective & glare-free computer lighting principles remain the same but you may follow them more loosely.
The proposed anti-reflective & glare-free computer lighting is unfortunately not appropriate for all work environments (in face-to-face customer service, if you share your office with less glare sensitive people, if you cannot shut natural light out of your workspace, etc.). If that is your case you might also look for helpful information in the posts on how to reduce glare on computer screen:
- How to reduce glare on computer screen: What is the problem?
- How to reduce glare on computer screen: Direct sun glare
- How to reduce glare on computer screen: Natural light, no direct sun
Disclaimer: The anti-reflective & glare-free lighting setup described below is a result of several years of experimenting with my computer workstation lighting. I am not an expert on lighting nor eye sensitivity (to light, glare, reflections and blue light), although with time I’ve accumulated practical and theoretical knowledge on these subjects. In my case computer vision syndrome is highly (but not exclusively) associated with glare, reflections, and blue light. Prior to discovering anti-reflective & glare-free computer lighting setup severe computer vision syndrome symptoms had forced me to consider giving up computer-related work.
Disclosure: I would like you to know that I earn a commission (at no additional cost to you) if you use some of the links below to purchase a product. If you wish to support GLARminY, use the links containing text: Disclosure: commission link or use this link (Disclosure: commission link) to shop on Amazon.
The principles of anti-reflective & glare-free computer lighting
Anti-reflective & glare-free computer lighting works well for computer work – text editing and spreadsheet work (my experience). I imagine it would also work well for coding and other types of non-color sensitive computer work. For color-sensitive work I can’t say – you would need to use much higher screen brightness level for a sustained period of time than what my eyes can take.
I’d love to read in the comments below for what other types of computer activity you’ll have tried it, how it’ll have gone, what problems you’ll have encountered, etc.
The main idea of anti-reflective & glare-free computer lighting is to have everything in computer user’s field of vision illuminated reasonably, softly and evenly – no sharp contrasts in brightness – while keeping everything else as dark as possible, i.e. all objects the user could potentially see reflected on computer screen (including you, the user).
The principles of anti-reflective & glare-free computer lighting
Prerequisite: Matte computer screen
The only scenario in which a glossy screen (turned off or displaying black background) doesn’t produce reflections of objects facing it is if used in complete darkness. But such a computer vision syndrome causing situation of glare (bright screen, dark surroundings) is best avoided.
If what you have is a glossy computer screen you should either change it for a matte screen (it is best if you also get one with a matte mark around it) or, a cheaper alternative, try an antiglare screen protector, which in essence is a matte surface you put on top of your glossy screen. Some antiglare filter options are:
A $2 DIY antiglare filter
https://www.youtube.com/watch?v=Waj0Yq9b9_Y
You may buy the featured Quilters Template Plastic online:
on Amazon (Disclosure: commission link) or elsewhere (non-commission link).
Or buy an antiglare filter (Disclosure: commission link) designed to fit your computer screen.
Principle 1: Remove natural light. Completely.
Removing natural light was the most difficult step for me (love it). Eventually I realized I had no choice.
The problem with natural light is that it is impossible to stabilize to the point of comfortable computer lighting for a person with sensitive eyes (more on this here and here). [Am I wrong on this? Please, do let me know in the comments how it could be done!] If your computer vision syndrome symptomes call for anti-reflective & glare-free computer lighting you have to sacrifice natural lighting. Sadly, this is a not an option.
To make up for the loss of natural light you can place photos or art on your walls to rest your eyes on them (20/20/20/20 rule – short breaks) and walk to the nearest window, or outside (longer, hourly breaks) – see the post on apps that will remind you to take breaks to prevent computer vision syndrome. The habit of taking breaks will make you more productive by preventing eye strain and other repetitive strain injuries.
Principle 2: Position the light source closely behind the computer screen, out of your (computer user’s) view
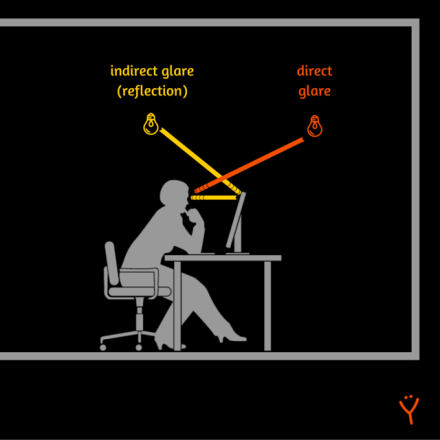
This principle eliminates the possibility of the light source causing direct or indirect glare, i.e. seeing the light source in your (computer user’s) field of vision, or its reflection on the computer screen.
Isn’t this bias lighting?
The principles explained above resemble very closely those of bias lighting. Bias lighting is intended primarily for video watching and gaming. Its aims are twofold: (1) to reduce eye strain from glare of a bright video screen in a dark room, and (2) to enhance picture color and contrast.

Unlike bias lighting, anti-reflective & glare-free computer lighting is principally intended for computer work such that it must provide enough brightness to comfortably see the keyboard and read printed documents on the table top which is normally not an issue in gaming or video watching.
Due to different uses of the two computer lighting methods, the remaining principles for anti-reflective & glare-free computer lighting diverge from those of bias lighting. The specifics have to do with how light is directed, the positioning of the computer screen, light color and some other blue light related issues.
Principle 3: Illuminate the part of the ceiling in front of you (computer user) and let it illuminate the rest
This concept is very important to having everything in your field of vision illuminated softly and evenly and everything else as dark as possible. Your computer light source should be directed upward into the ceiling. The resulting indirect light that bounces off the ceiling is dispersed (as in the case of an overcast day when compared to a clear sunny day) and hence easier on your eyes.
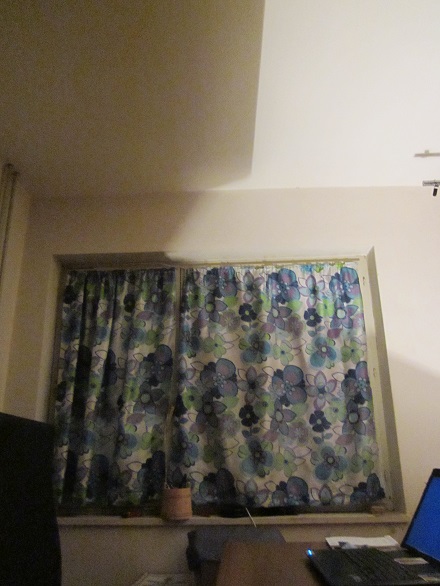
Since the source of light is behind the computer screen and close to it computer screen’s shadow is clearly seen on the ceiling.
The position of the shadow has two conflicting consequences:
- if moved back (with respect to the computer user) the table top becomes brighter, but you run the risk of starting to see the reflection of the lit part of the ceiling on your computer screen
- if moved forward, the illumination of the table top weakens, but you won’t get any reflections from the ceiling on your screen
Another influencing variable is the tilt of your computer screen. The more upright the screen the more you can push back the shadow without seeing any reflection on the computer screen. If your computer screen is tilted backward (as often happens with laptops) you won’t be able to move the dividing line as far back.
A good starting point is to position shadow’s edge directly above you (computer user).
How to move the shadow: if you move the light source back (with respect to computer user), i.e. closer to the computer screen (or down) the shadow will move forward, if you move your computer light forth, i.e. away from the screen (or up) the shadow will move back.
If you don’t see a reflection of the ceiling, but you do see a reflection of your face, shirt or something else on your computer screen, then it is likely because your computer light is too bright (Principle 9: Light source brightness level).
Principle 4: Make sure that the brightness/dimness of what you see behind the computer screen is not uncomfortable
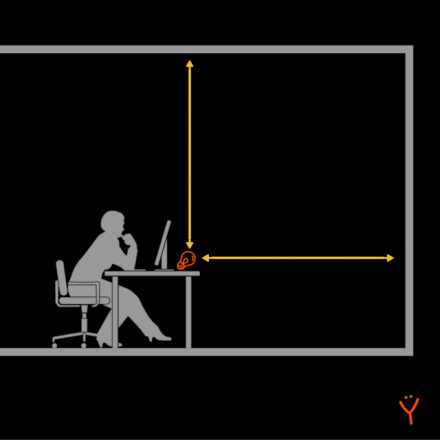
This principle insures that the wall (or other surface you – as computer user – are facing) is not too bright compared to your screen and table top – a situation of glare. Moreover the light reflected from the wall will illuminate you, the user. If it is too bright, you will see yourself on the computer screen. Your computer desk should be placed such that there is enough room between the light source and the surface you are facing. As a rule of thumb the distance between computer light and the wall should be similar to the distance from the computer light source to the ceiling (yellow arrows in the schema below).
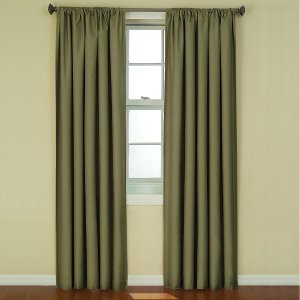
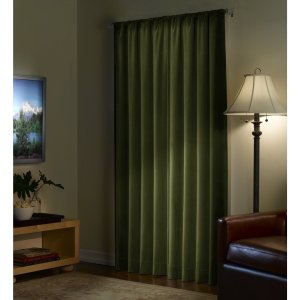
If your computer screen must be very close to a wall, you can reduce its brightness (avoid glare) by making its surface darker (absorbs light) and matte (disperses light). Your best option for this might be to cover the wall with a darker velvet/velour-like curtain (Disclosure: commission link):
or a darker photography backdrop (Disclosure: commission link) designed specifically for the purpose of absorbing and disperse the light (antiglare and anti-reflective).
Alternatively, you can restrain the light from the source from shining into the wall with a lamp shade (Disclosure: commission link). It will direct most of the light straight up into the ceiling and away from the surface in front of you and at the sides.
Anti-reflective and anti-glare computer light prototypes
I love natural light. For about half a year I tried all sorts of setups in an office with large windows. It helped me learn about light … but no improvement in terms of my computer vision syndrome symptoms.
Actually computer vision syndrome symptoms were worse than when I’d spent about 6 months working in another office without natural light (that was after I managed to tame the harsh office lighting – I shall write about it in another post). Having had a good (in terms of computer vision syndrome) no-natural-light office experience got me thinking that I might be better off without natural light.
To test the idea I provisionally moved my office into a basement. With natural light gone my anti-reflective & glare-free computer lighting setup slowly started to evolve.
Below I present five most representative setups that will hopefully help understand the principles of anti-reflective & glare-free computer lighting described in the previous post. Moreover they should give you some ideas for your compter lighting.
Setup #1: First I tried with a couple of desk lamps. I tried to accomplish three objectives: (1) I shouldn’t see the light bulbs, (2) the light should be dispersed – bounced off the ceiling, and (3) all the objects facing my computer screen should be dark.
(Sorry about the looks – it was a trial and error experimentation, so I used what I had at hand to avoid expenses):
It was a clear improvement over having natural light in the office. But after a couple of months working with this setup I wasn’t entirely happy with how my eyes felt. Perhaps it was the fact that I used directed light (reflector-like). I allude to it in Principle 6 (avoid reflector lamps). However, this principle took shape only after the third experiment with reflector lamps).
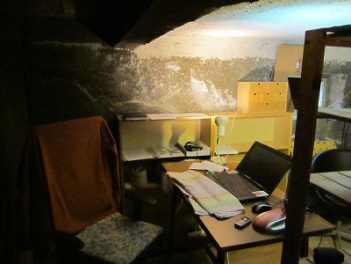
Setup #2: the second computer lighting setup followed the thought: what if I tried to accomplish the same three objectives by hiding the light source behind my computer screen:
The light was at roughly the same hight as the table top. Note the lamp shades (cardboard) I was using in order to keep direct light off the table top (Principle 5) and from other objects in my field of vision (Principle 4). With this setup my computer vision syndrome symptoms were slowly diminishing – as far as the principles go this was already an anti-reflective & glare free computer lighting setup.
 Setup #3: To make my computer light a bit better-looking I thought I could use a ceiling fixture for GU10 type reflector lamps (see image). I placed the fixture exactly where you see the light source in the image above (Setup #2) and directed reflector lamps at the ceiling (as in Setup #1). In less than an hour of work with this lighting setup I noted that as far as computer vision syndrome symptoms go, it was a step backward. Subsequently the use of reflector bulbs/lights is discouraged in Principle 6. (Unfortunately I don’t have photos of this setup).
I went back to the anti-reflective & glare free setup described in Setup #2.
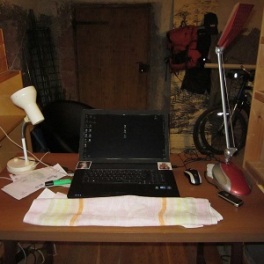
Setup #4: After several months of using Setup #2 I decided it was time to move back to my office (having first blocked out natural light). I kept trying to make improvements, but always returned back to Setup #2, except perhaps with some minor changes you can see in the images below.
Setup #4 embodies the ten principles of anti-reflective & glare-free computer lighting.
Over several months of working with this anti-reflective & glare-free computer lighting setup my computer vision syndrome symptoms have been slowly disappearing. For example, I have been able to give up hot & cold eye strain relief treatment completely – previously I’d had to do it several times a day to relax the tension arround my eyes.
Buying an anti-reflective & glare free computer light
Having a clear idea of what I want I searched the Web for an anti-reflective & glare free computer light.
Unsuccessfully!
Off-the-shelf, plug-and-play, computer light designed specifically for an anti-reflective & glare-free computer lighting does NOT exist!?
Have I missed it? Please, do let me know in the comments if you know of one!
Still, I have been able to find some products that you might be able to use to set up your anti-reflective & glare free computer light.
Please take a few moments to answer the poll below. Thanks! (If you are not sure, take a look at the commercially available options below and answer the same poll towards the end).
LED desk lamp: Close, but not it
Disclosure: I haven’t received any incentives to promote this lamp – bought mine.
This is the closest I’ve found to a plug-and-play light that may be used for anti-reflective & glare-free computer lighting. Its key feature that makes it more suitable than other desk lamps is the flexibility of its arm.
Here are some images of my anti-reflective & glare-free computer lighting setup with this LED desk lamp:
On the desk behind my computer screen (photos are taken with the ceiling light on – the intention is to show the setup – see the lighting effects further down):
On a (lower) shelf behind my computer screen (I tend to use this one – my desk is small):
Here is what my view looks like in the anti-reflective & glare free computer lighting mode (lamp at full brightness and warmest color temperature):
The image on the right is a snippet of a shot of a paper that was placed on the desktop – it may appear too dark/grey – forgive my poor photographic abilities – but in reality I can perfectly and very comfortably read it. Switching from white paper to black computer screen may present problems because the paper is brighter. If you do a lot of that, you might start by using an off white background instead of black and then fine-tune it.
Here are the pros and cons of this LED desk lamp:
Pros:
- color temperature control (2700K – 6500K)
- dimmable (maximum declared brightness 550 lm)
- very flexible arm positioning (may also be used for ambient lighting, reading, bias lighting, product photography, etc.)
- the light emitted is diffused and one-directional
Cons:
- the base is not stable enough for the full range of positions the flexibility of the arm allows – may tip over in some positions
Other considerations:
- the maximum brightness level at 2700K color temperature is at the lower end of what I need for my antiglare computer lighting setup – remember that I use black background on my computer screen (see image above). If you were to use a brighter background, the lighting from this lamp might be too weak.
- at the warmest color setting (2700 K) the light appears cooler (bluer) than that of a CFL, incandescent or a halogen light bulb
Where you can buy it
This LED desk lamp with exact same specifications is sold by various online retailers under different brands (pricing is similar, perhaps a bit pricier on eBay):
- Amazon.com (Disclosure: commission links): Saicoo, TaoTronics, OxyLED
- Aliexpress.com (no-commission links): US customers; EU market
- eBay (no-commission links): Saicoo, OxyLED, TaoTronics
Non-US readers: the lamp is also sold by various international Amazon stores: UK (Disclosure: commission link), India (no-commission link), Germany (no-commission link), etc. – order locally to get the right plug.
There are also several video reviews available.
DIY anti-reflective & glare-free computer light
Turn under cabinet light into your anti-reflective & glare-free computer light
 Disclosure: I haven’t purchased nor used this item. This recommendation is based on the description provided by the seller, customer reviews and this video review.
To turn this under cabinet light (Disclosure: commission link) into your anti-reflective & glare-free computer light you might put the four panels in parallel (as in the image) on a board.
You can then place what is now your computer light on the desktop behind your computer screen (light panels facing up).
If a shade is required (Principles 4 and 5) you can place the light inside a suitable box (cardboard / shoe box).
The dimmer is very handy for fine tuning and for those times you might need more or less light.
Pros:
- dimmable – maximum luminance/brightness 1080 lm!
- warm white light color (2700K declared on Amazon; according to this review: 3000K declared on box, reviewer’s guesstimate ~3200K) – this light is also available in cooler (daylight – 6000K) light color (Disclosure: commission link)
- wireless dimmer and controller
- short panel (11.8 inches; 30 cm) – should be easy to hide them behind most computer screens
- efficient (90 lm/W)
- power source: electric – regular plug
- may also increase/decrease brightness by connecting/disconnecting panels (see this video)
Cons:
- does require some work to set up (not very difficult)
- its final look (will depend on your imagination and ability)
If you find other under cabinet lights that better serve the purpose of a glare free computer light, do let us know in the comments.
Use a jar lamp adapter to hold the light bulb(s) of your glare free computer light
 This mason jar lamp adapter (Disclosure: commission link) is a solution that is relatively cheap and easily implemented.
Just place the jar lid (with appropriate bulb) on the table/shelf behind your computer screen.
Conveniently you can use the type of light bulb that is the most comfortable to your eyes.
You might consider using a dimmer or a socket adapter (see section Other products you might find useful below).
Clamp lamp turned glare free computer light

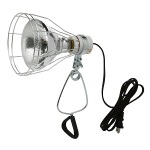
It might be the easiest for you to clamp a lamp to your desk behind computer screen.
With a clamp lamp you can also use the light bulb type that best suits your eyes.
However you might be limited in moving the lamp closer or further away from computer screen (Principle 3).
Also making a shade to avoid direct light on your desk (Principle 5) might require some ingenuity.
Other products you might find useful
I hope the selection of products below give you ideas about what material you could use to set up your glare-free computer light. Make sure you get appropriate sizes where applicable.
Lamp dimmer
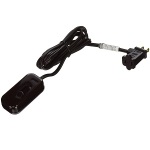
This dimmer (Disclosure: commission link) might be very useful if you switch often from a darker screen (e.g. editing) to a brighter one (e.g. video watching or photo viewing).
It may also be used as an on/off switch.
You simply plug it into an electricity outlet and then plug your computer lamp into the dimmer’s plug.
A socket adapter
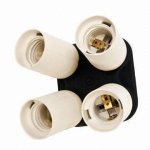
This 4 in 1 socket adapter (Disclosure: Commission link) is another way to get either more brightness out of one socket or a DIY dimming functionality (by screwing/unscrewing the bulbs).
If needed you can also get 2, 3 or 5 in one socket adapters. (Follow the above link and see other recommended products).
Blue light filtering light bulbs
If blue light is of concern (either because of computer vision syndrome or sleep cycle disruption) you might consider light bulbs that emit less/no blue light (due to a color coating which filters blue light).
 Yellow bulbs (Disclosure: commission link). A yellow coating should filter (blue) light up to about ~440-450nm*
 Orange bulbs (Disclosure: commission link). An orange coat should filter (blue) light up to ~500nm*, sometimes beyond that (~550nm – green part of the spectrum).
* Blue light emissions info tends not to be provided (more on blue light filters here). A simple way of judging a bulb’s blue light emissions is to lit a blue object (in absence of other light sources). If the object looks gray or black the bulb emits no blue light.
Lamp shades
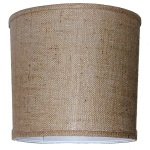
To avoid direct light from computer light in your field of vision (Principles 4 and 5) you can use lamp shades.
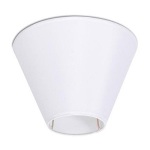
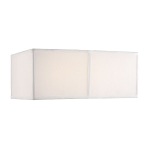
If you don’t want to make your own as I did you may buy one – click on an image below (Disclosure: commission links) to order one on Amazon.
Many lamp shades are wider at the bottom than at the top. The first three images were intentionally flipped upside down to suggest an alternative way of placing them arround your computer light. With a wider opening at the top you increase the area of the ceiling lit by your anti-reflective and glare-free computer light and hence get a softer, more evenly spread light.
If you’ve gotten this far (and haven’t responded to the question above), please, do take a moment to answer it here:
Ps: If you found the post Best anti-glare screen protector: Glare-free computer lighting useful, please consider LIKING, REBLOGGING, and/or SHARING it below.









This was by far the best and most extensive post on anti-glare and computer lighting that I’ve come across online. I started having blurred vision after extended hours of computer work at my office full of windows. I first thought I had damaged my vision somehow but 3 ophthalmologist confirmed that my vision is perfect and my eye health is normal. A month later, my blurred vision transitioned into eye pain which now can get triggered in seconds if there is strong glare or reflections. I had to go from working 12h a day to 30 minutes a day. If I ignore the pain, my vision becomes blurred again.
For the past few months, I’ve tried all sorts of blue light blocking glasses and expensive anti-glare filter for my Macbook and iPhone. It eases a bit but does not help enough. By coincidence, after moving, my new office had lots of light at the end of the room and almost no light where I stand working that can reflect off the screen. Suddenly, I was able to work half time again with minimal eye pain. It was a mystery to me why I couldn’t just work in a dark room if that was the case, until I found this post.
It all still doesn’t make perfect sense to me why I have this chronic eye strain that is only triggered by glare and strong lights, but at least I got a lot wiser after finding this site. Thank you for sharing this content that can help millions of people. I do believe that this new era of glossy displays will lead to a new epidemic of CVS.
I wish you the best of success with your business that you are creating around this new problem. You deserve to make millions because you provide such great value.
LikeLike
Nik, thanks for this comment and thanks for sharing your story!
LikeLike