
Learn how to grill a Spatchcocked Turkey with crispy skin and flavorful, tender meat in this step by step recipe. Flattening (butterflied) the bird allows the dark and white meat to cook evenly and more quickly. Grilling the Thanksgiving turkey infuses a smoky flavor in it, in addition to freeing up oven space for sides and dessert!
It's easy to do with a pair of kitchen shears and a grill. I give you comprehensive directions for spatchcocking and cooking the turkey on a wood pellet grill, propane gas grill, and charcoal grill!

I may never bake a whole turkey again! The naturally round sphere-shape of a turkey prevents the legs and thighs from cooking evenly with the breast meat. It's always a battle to make sure the breast doesn't become dry before the juicy dark meat is done.
Spatchcocking the turkey by removing the backbone and flattening it before cooking, whether it's on the grill or oven, solves this time consuming dilemma-with no basting!
A spatchcocked turkey may not have the Norman Rockwell picture-perfect look you're used to Grandma presenting at the dinner table. But, honestly, most people cut it up and put it on a platter anyway, right?
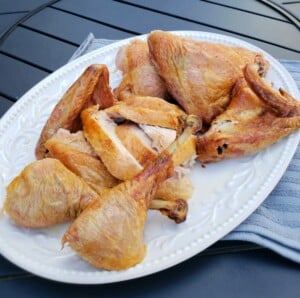
When you taste the moist turkey and crispy skin, you may never go back to the basted bird in the oven, either!
What does spatchcock mean?
Spatchcock is a funny word with a simple meaning. "Spatch" comes from the term dispatch which, according to Merriam-Webster.com means to take care of a task rapidly and efficiently. The word "cock" refers to a fowl or bird, which probably got its name from the sound a rooster makes early in the morning.
It makes sense since cooking a turkey, chicken, duck, or any bird with this method of flattening, cooks it much faster than a whole bird.
Butterfly vs. Spatchcock
Is butterflying a turkey the same as spatchcocking a turkey? Technically, no, but butterflying is often used to describe the flattening of the whole bird to grill or bake it. To butterfly a piece of meat actually means to cut a thick piece of meat partially in half horizontally, so it can be opened up to create one large thinner piece.
Shortcuts
- Flattening the turkey saves cooking time.
- If you use a wood pellet grill, the circulating air cooks it even faster than indirect grilling. It's like a convection oven/grill.
- Takes up less space in the refrigerator while brining which saves time trying to figure out where to store everything.
Equipment you will need
- Large cutting board
- Heavy-duty kitchen shears
- Latex or vinyl gloves (optional)
- Half sheet pan with wire rack that fits inside. (Not nonstick if you place it on the grill.)
- Pastry brush
- Instant read thermometer or meat probe
- Aluminum foil
- Gas grill, charcoal grill or wood pellet grill
- Long metal grill or griddle spatulas
- Potholders or silicone mitts
Ingredients
Scroll down to printable recipe for ingredient quantities.
This is a very basic seasoning blend that I actually prefer so the flavor of the turkey stands out. I give suggestions for substitution options below.
- Fresh or frozen turkey (completely thawed if frozen) (scroll down for poundage/time chart)
- Olive oil or melted salted butter
- Table salt or Kosher salt
- Garlic powder
- Onion powder
- Freshly ground pepper (optional)
How to spatchcock a turkey
Completely thaw the turkey in the refrigerator or in cold running water. Either method will work if you plan ahead. To thaw an 11 to 13 pound turkey in the refrigerator, allow 2 to 3 days. To thaw it in cold water, allow 5 to 6 hours. (Be sure to check and make sure water remains cold the entire time.)
Here's a detailed post from I Heart Naptime on how to thaw a turkey with a chart to help you determine when to start thawing your turkey and details about both methods.
Don't forget to allow time to dry brine in the fridge. (Keep reading.)
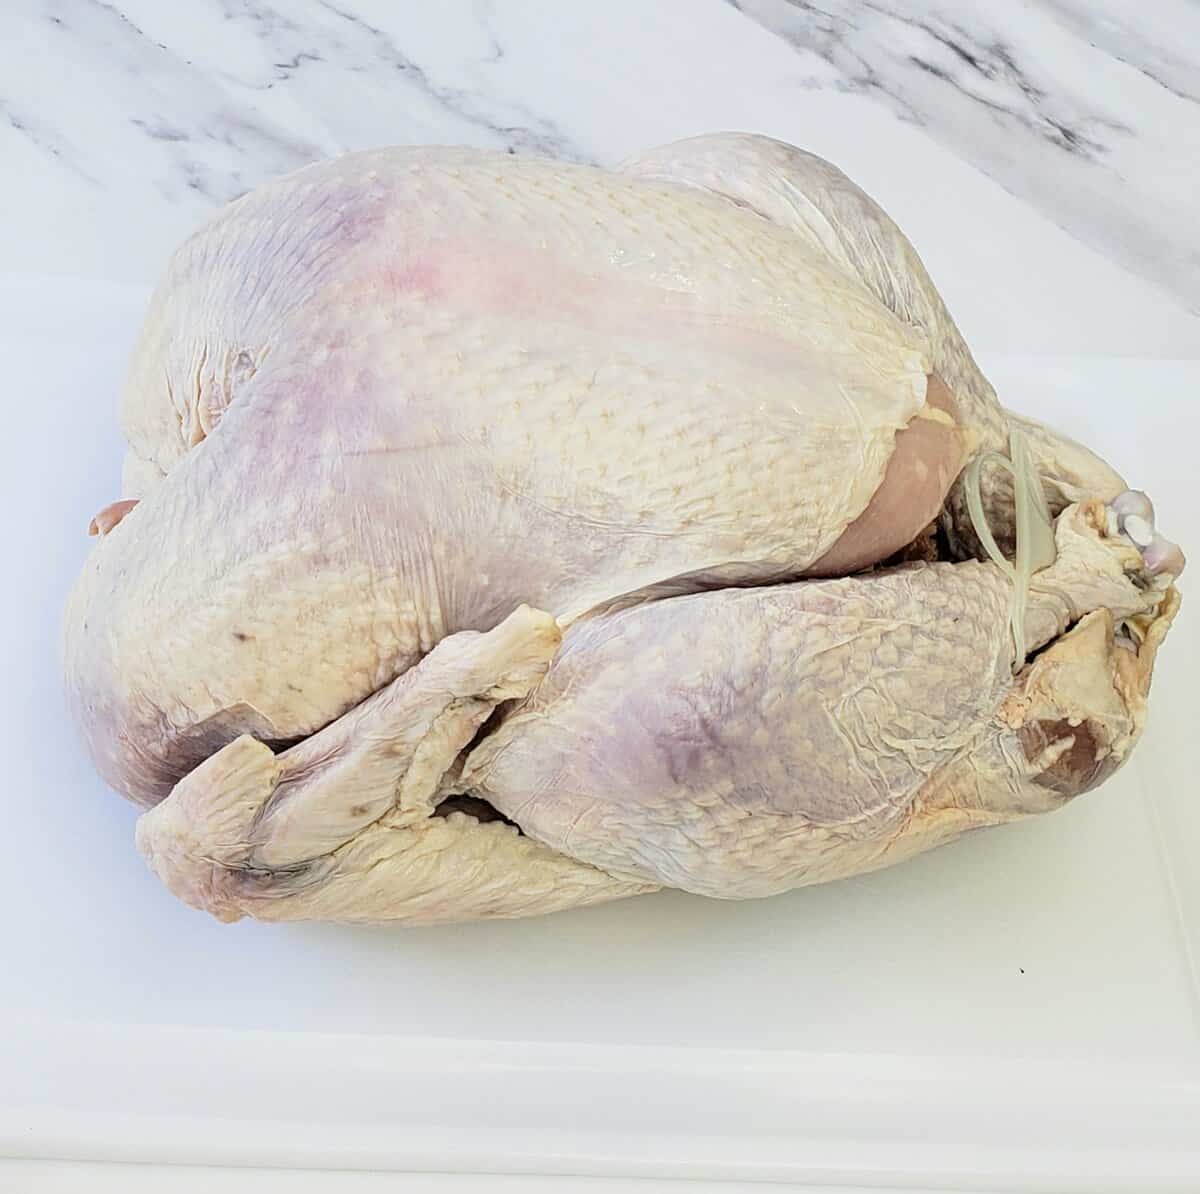
- First, remove any trussing that holds the legs together.
- If your turkey comes with a red plastic, pop-up temperature stick, I highly recommend getting rid of it! Gently pull it out now! Gently rub the skin where it used to be and it will almost disappear. Use an instant read thermometer at the end of cooking or a meat probe that comes with your grill instead.
- Remove the giblets and neck from inside the cavity and hidden under the flap of skin at the neck.
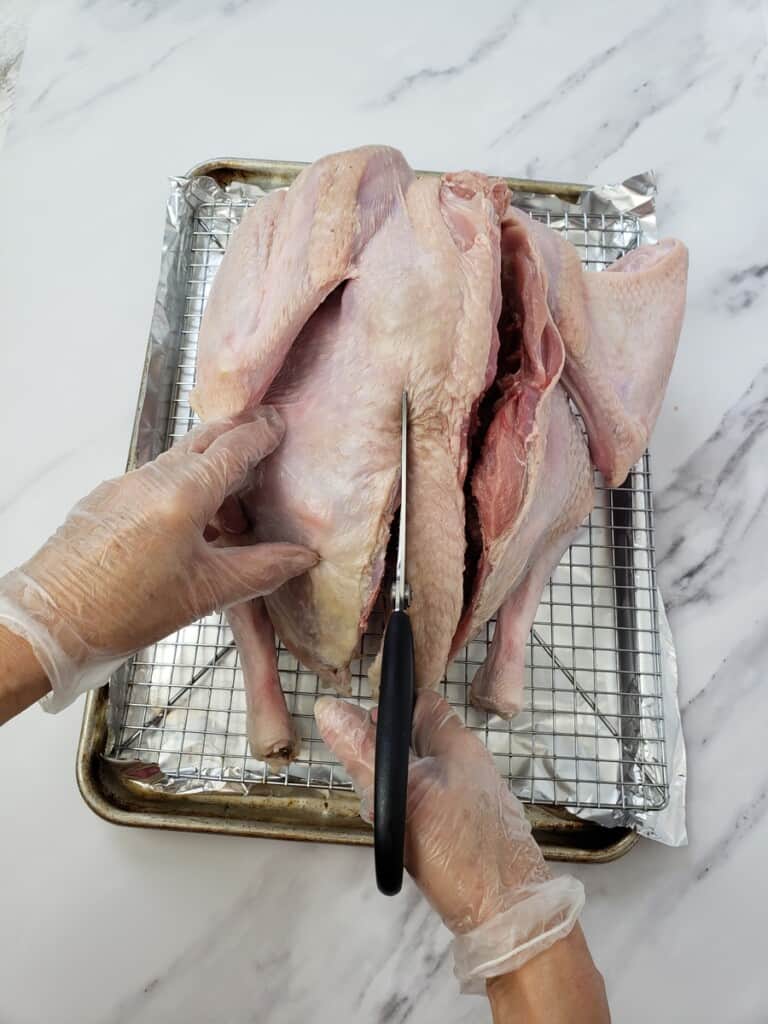
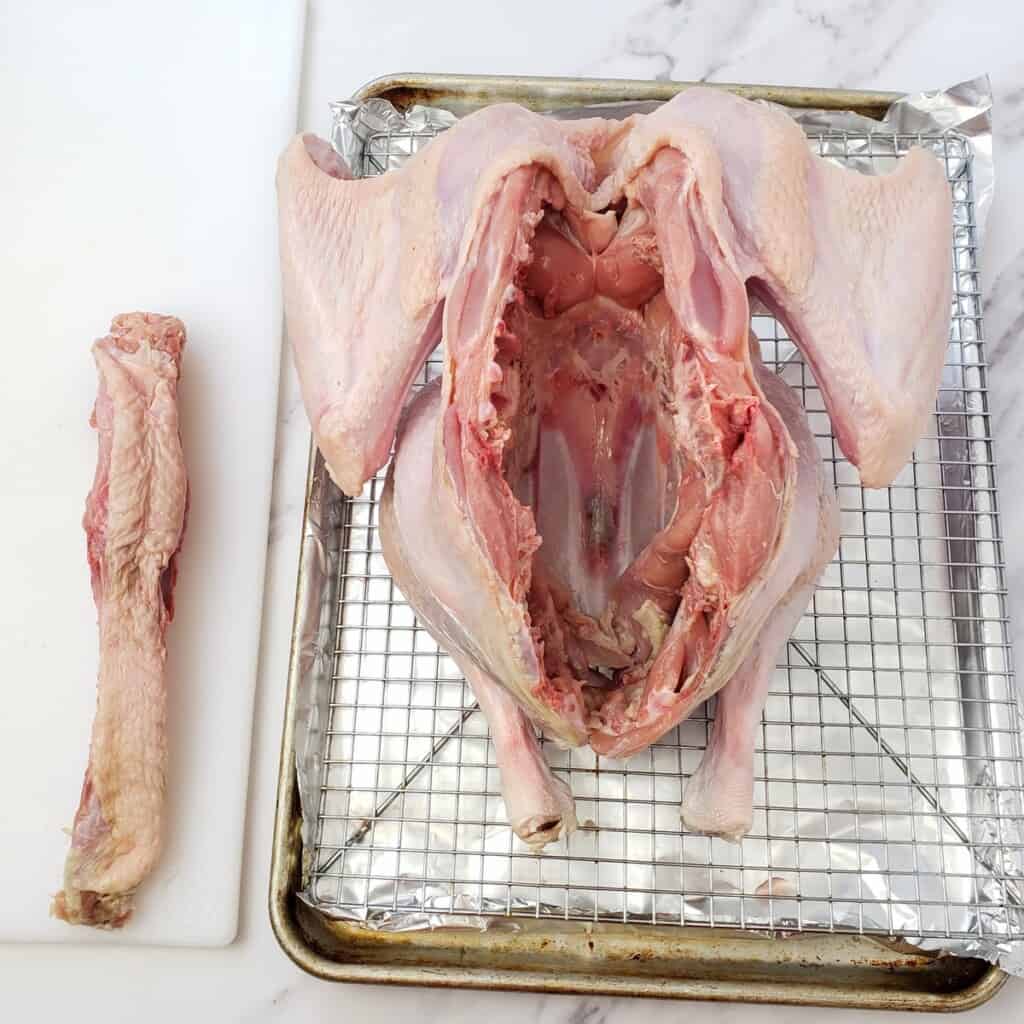
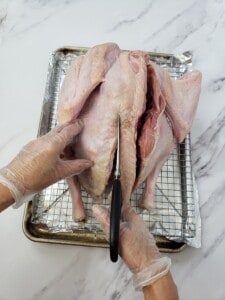
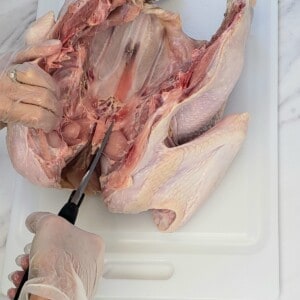
- Remove the backbone. With heavy-duty kitchen shears or a sharp large knife, cut along the right side of the backbone from the tail to the neck. Then, repeat the cut on the left side. On my first round of testing, I only had regular kitchen shears. For the second test, I made sure I had these OXO kitchen shears and they cut through the bones MUCH easier.
This is the most challenging part of spatchcocking a turkey. So, it's smooth sailing from here on!
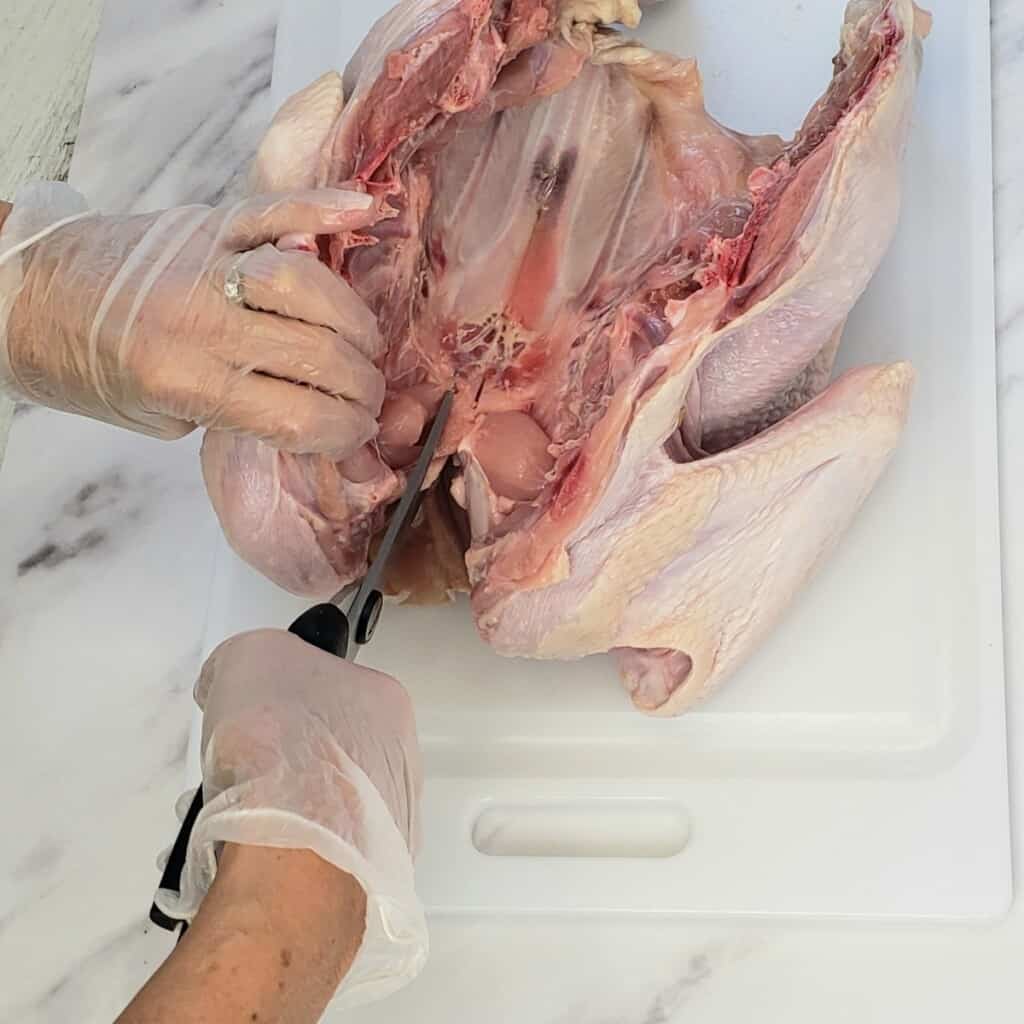
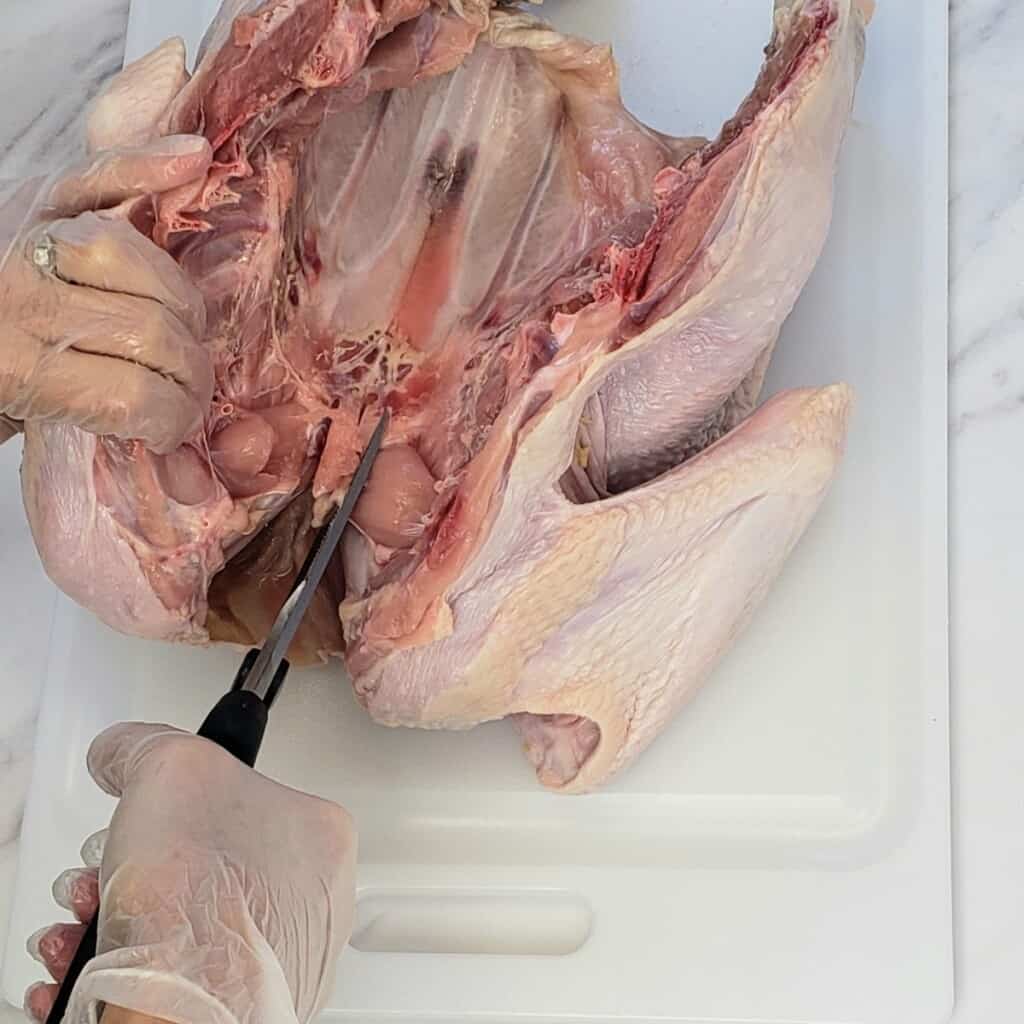
Clip either side of breast bone. You'll be glad you didn't skip this step.
Pro Tip: I was on my THIRD test of this recipe when I read somewhere that it would make it easier to flatten the breast bone in the next step if you clipped this first. It works!
Y'all know I'm short, so I was having a little trouble pressing down hard enough. This little trick was GOLD! You're welcome.

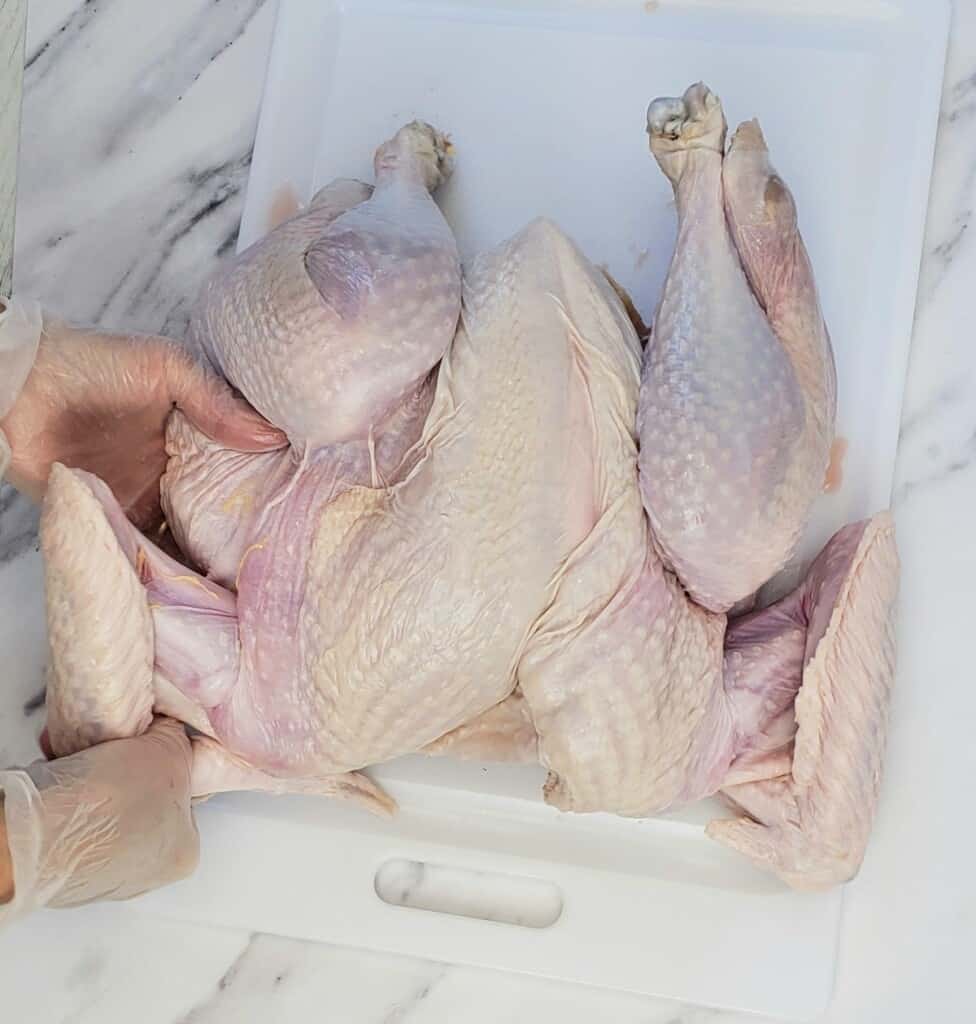
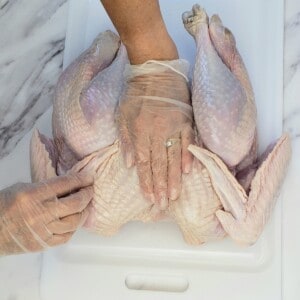
- Flatten the turkey. Flip the bird over and press down hard on the breast bone until it lays flat.
Hint: If you are short like me, try standing on a step stool to get more leverage. You can also put one hand over the other like performing CPR.
- Tuck the wings. To prevent the wing tips from being exposed to the high heat and burning later on, twist them under the breast.
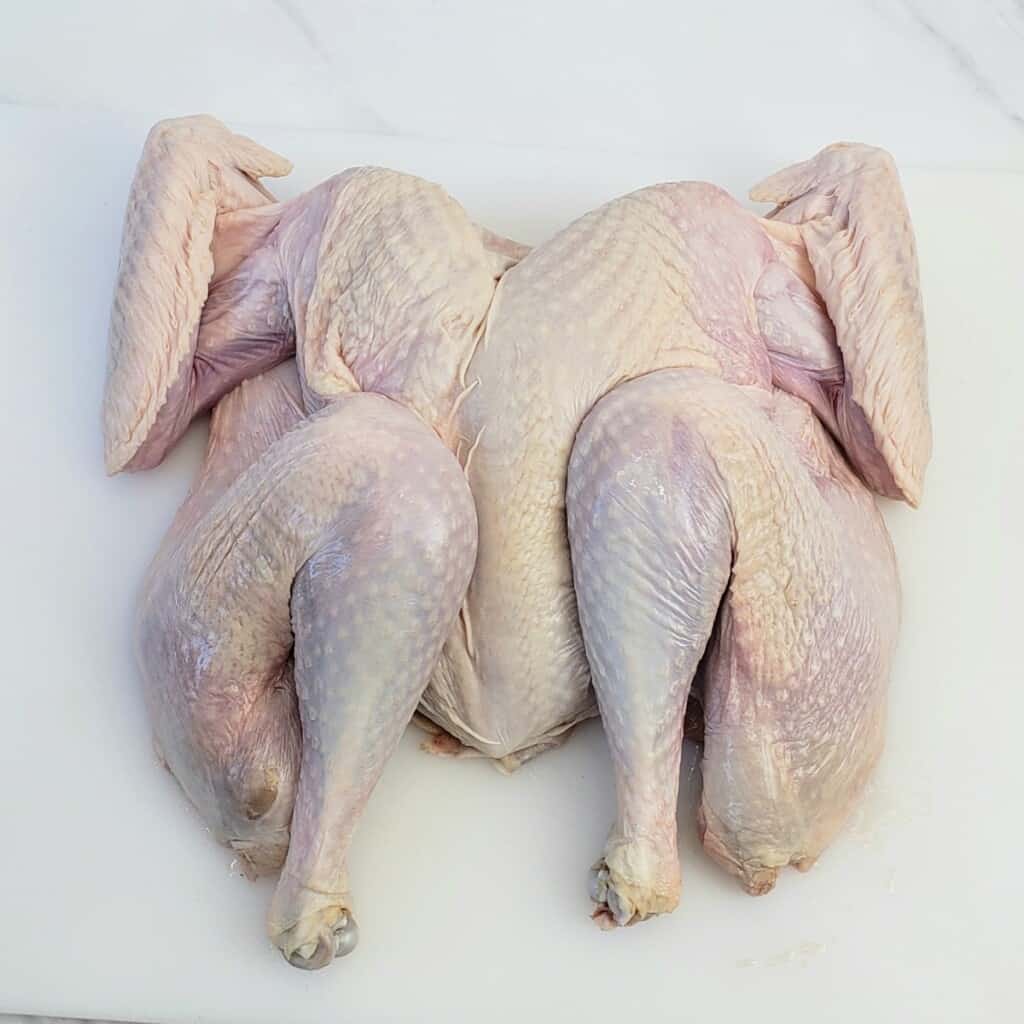
- Knees up or knees down. Here you see two options on how to place the turkey legs. There's no right or wrong way, but I will say the one on the right will cook the legs more evenly. The one on the left may look a little more "platter worthy" and compact, but the thighs will take a little longer to cook.
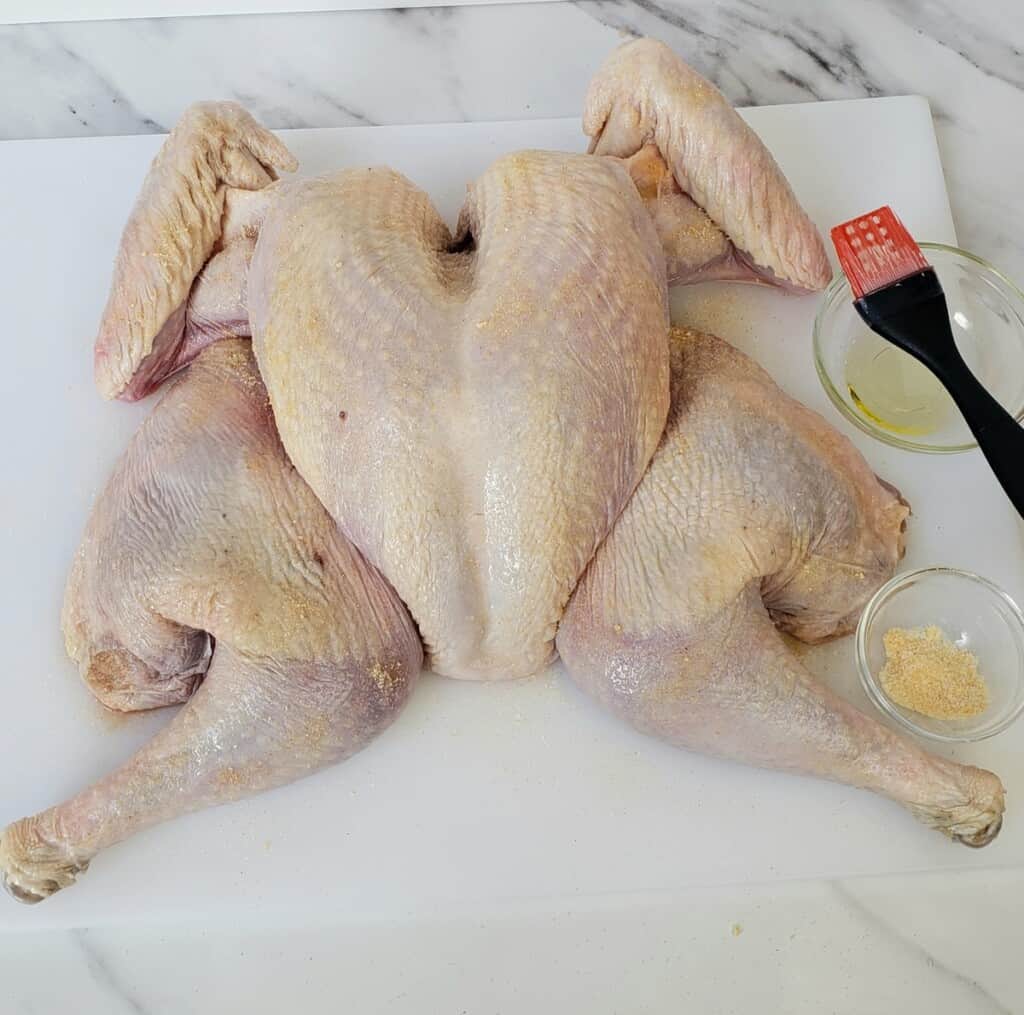
- Seasoning. Pat dry the entire bird, both sides. Rub or brush oil or melted butter all over the skin and underneath, too. Sprinkle with seasonings.
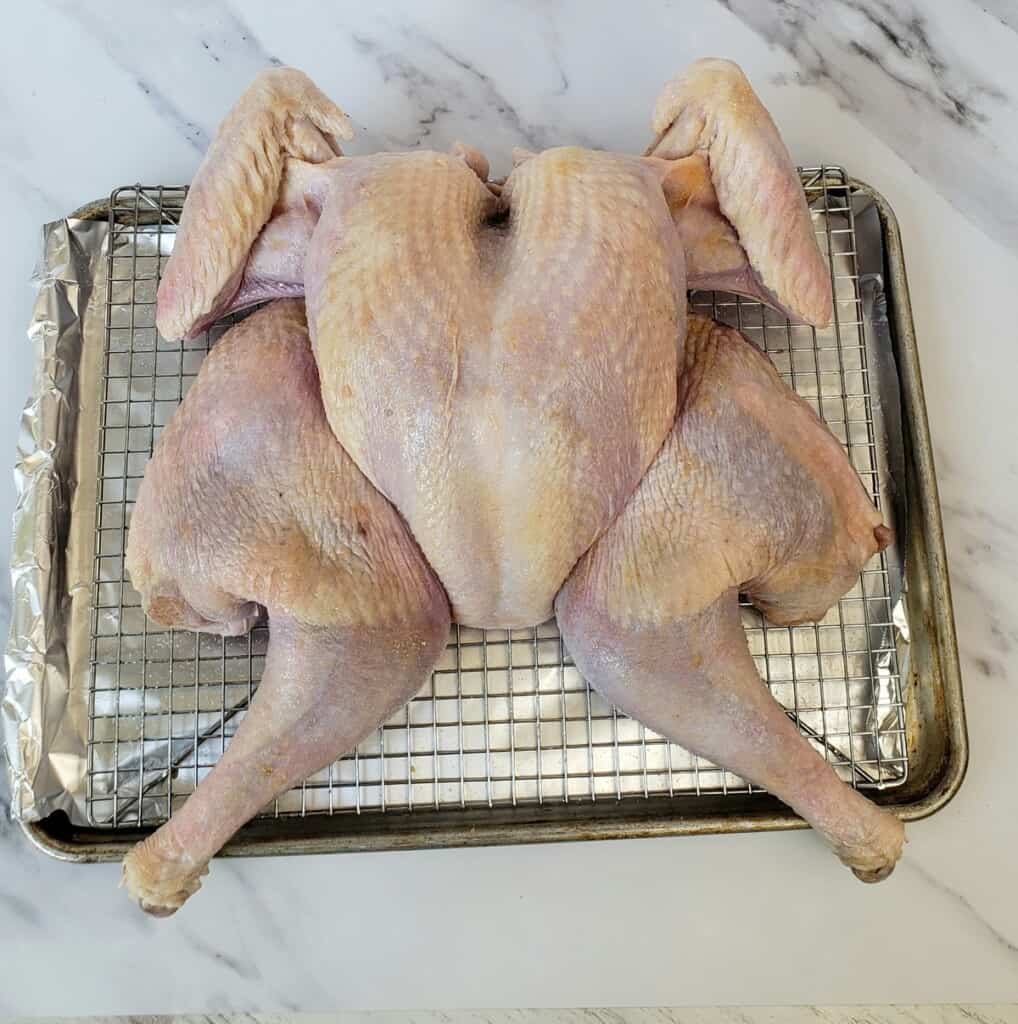

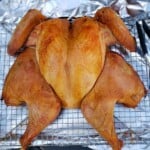
- The image on the left is the turkey before dry brining in the fridge.
- The turkey on the right is after dry brining, uncovered, for 24 hours in the fridge. It may look bruised and dry but it's OK! I have to admit, on my first round of testing, it worried me a bit, but it cooks up perfectly golden brown with crispy skin and moist and tender breast meat. Trust me on this one and press on!
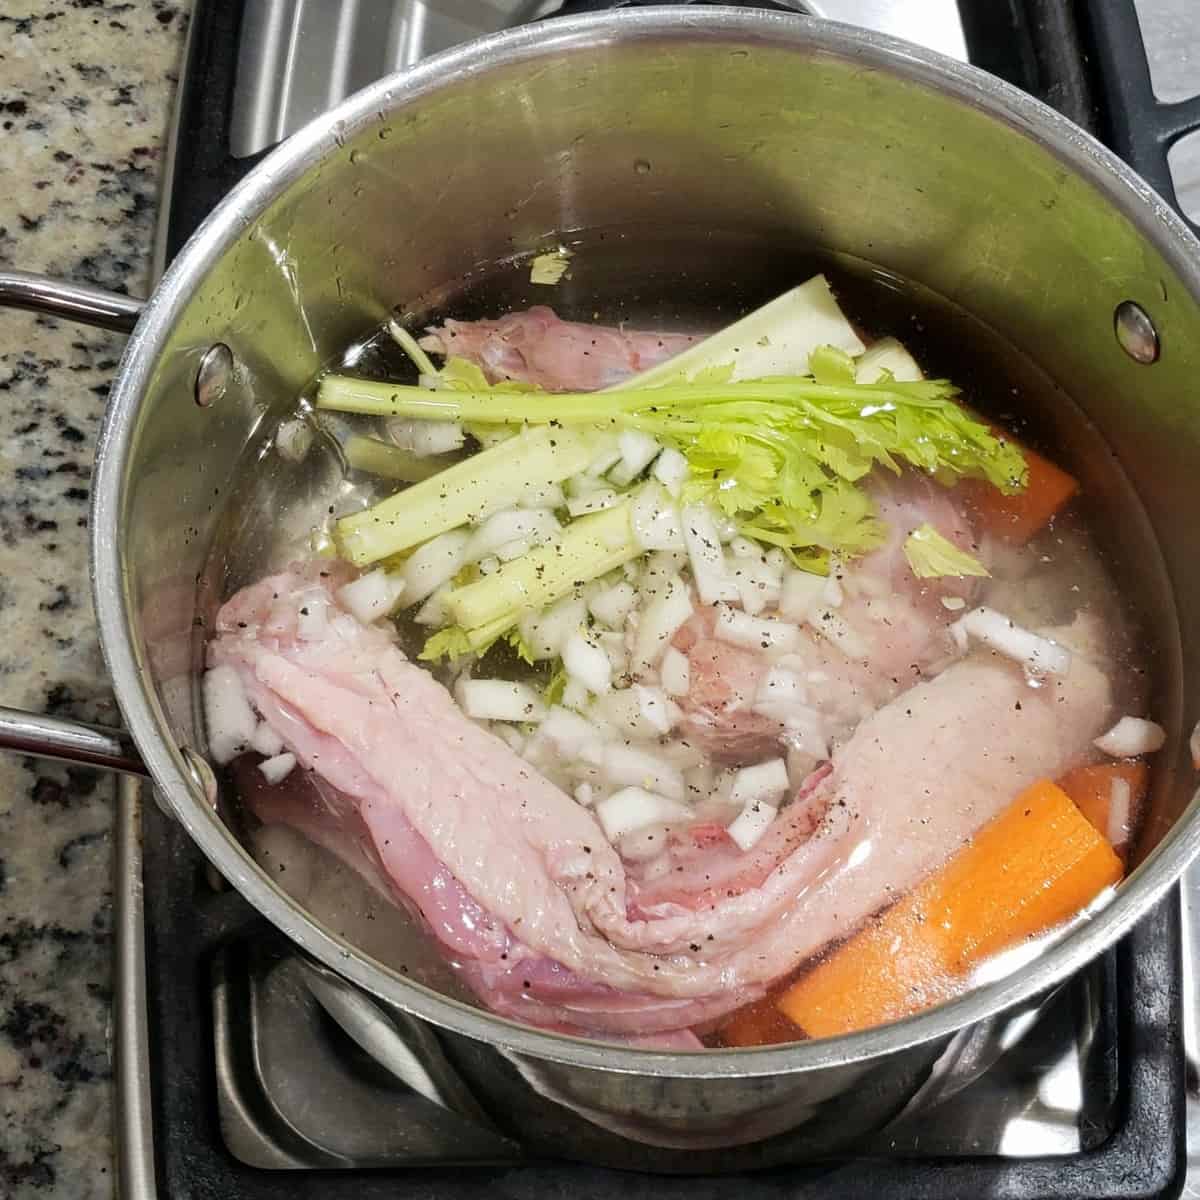
Pro Tip: Save the backbone and simmer it with the neck bone along with onion and celery to make homemade chicken broth.
Time to grill the spatchcocked turkey!
No need to wipe off the salt before grilling. Much of it will be absorbed and the rest will taste yummy. The oil and salt helps to prevent the skin from drying out in the fridge and creates that crispy turkey skin.
One of the best things I love about grilling a spatchcocked turkey is I can place the rack it brined on in the fridge right on the grill! I don't have to wrestle with a floppy, slippery bird or even put my latex gloves back on!
Tip: Now, be sure your metal rack is NOT nonstick. It needs to be able to withstand the high heat of the grill.

How to grill a spatchcocked turkey on 3 types of grills
I tested this recipe on 2 kinds of grills so you could make a spatchcocked turkey with whatever you already have available. I didn't test it with a charcoal grill but researched the time and method and I include it below. My husband also cooked one on the smoker with good results but that's a whole 'nother post and not my area of expertise.
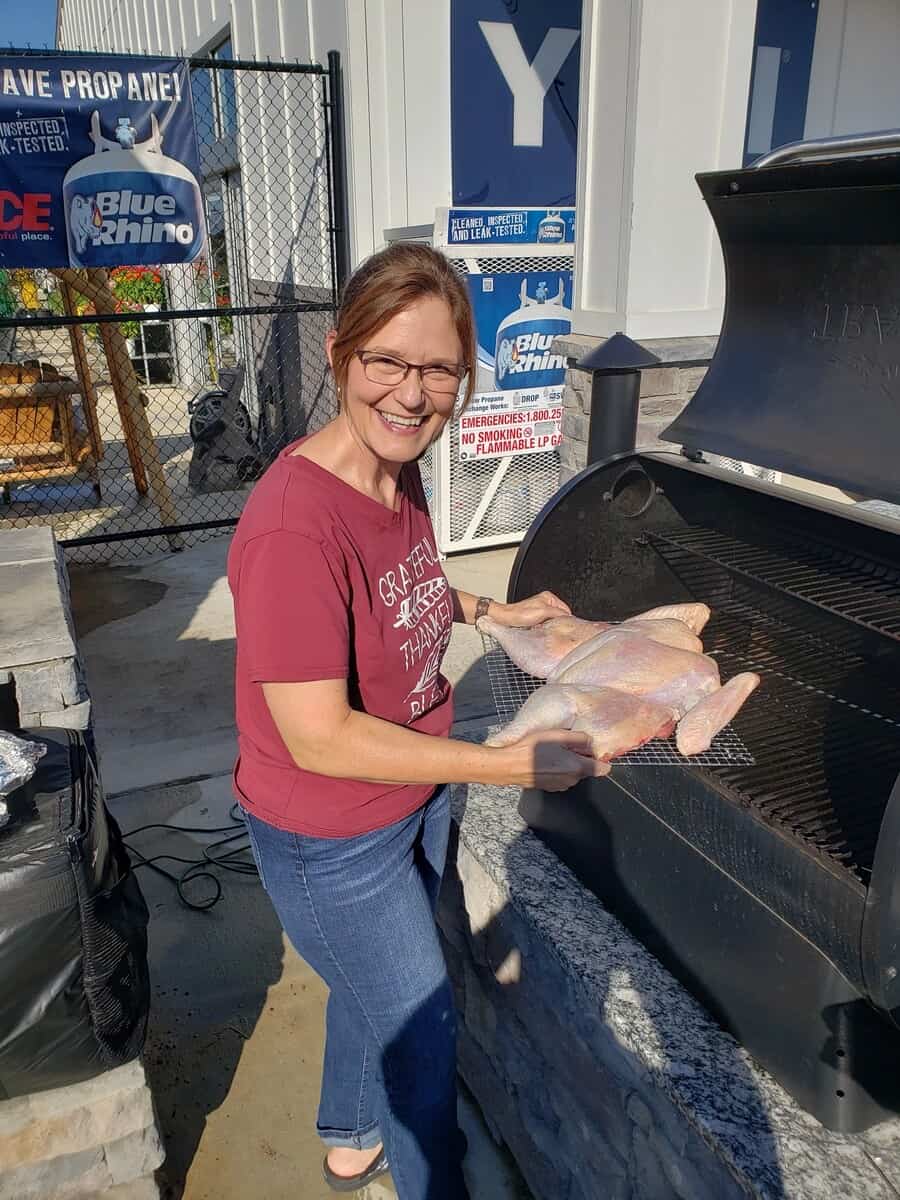
Wood Pellet Grill
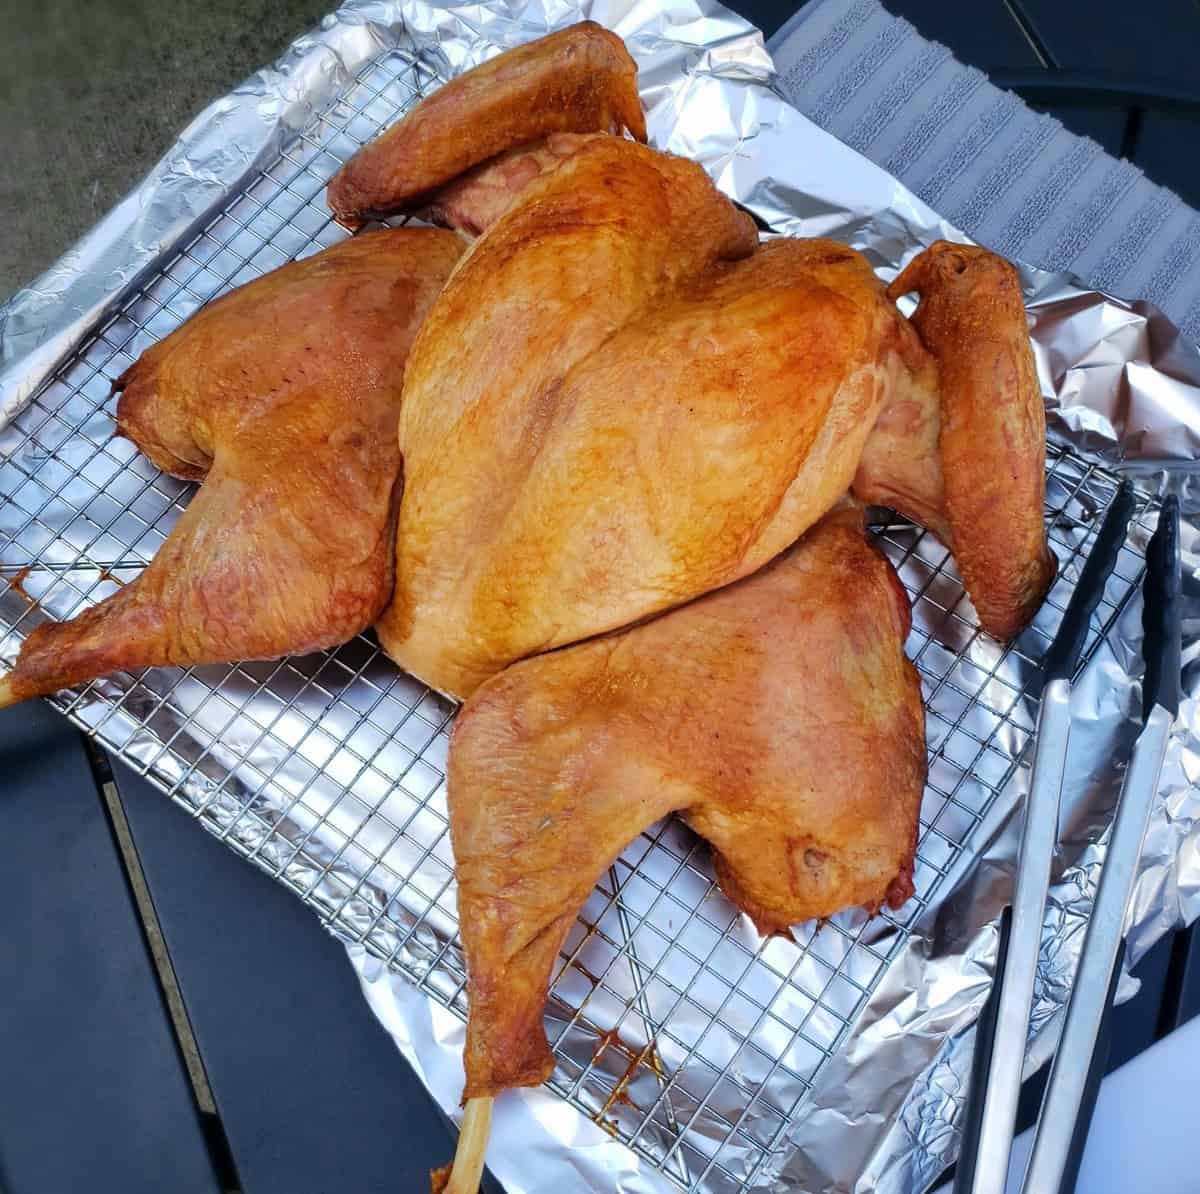
I do not own one of these (yet). My local Ace Hardware store (Ace of the South in Gardendale, AL) has an outdoor grill area set up where they had a Traeger demo model for customers to see them in action. They graciously allowed me to grill this turkey you see in the image above on this grill.
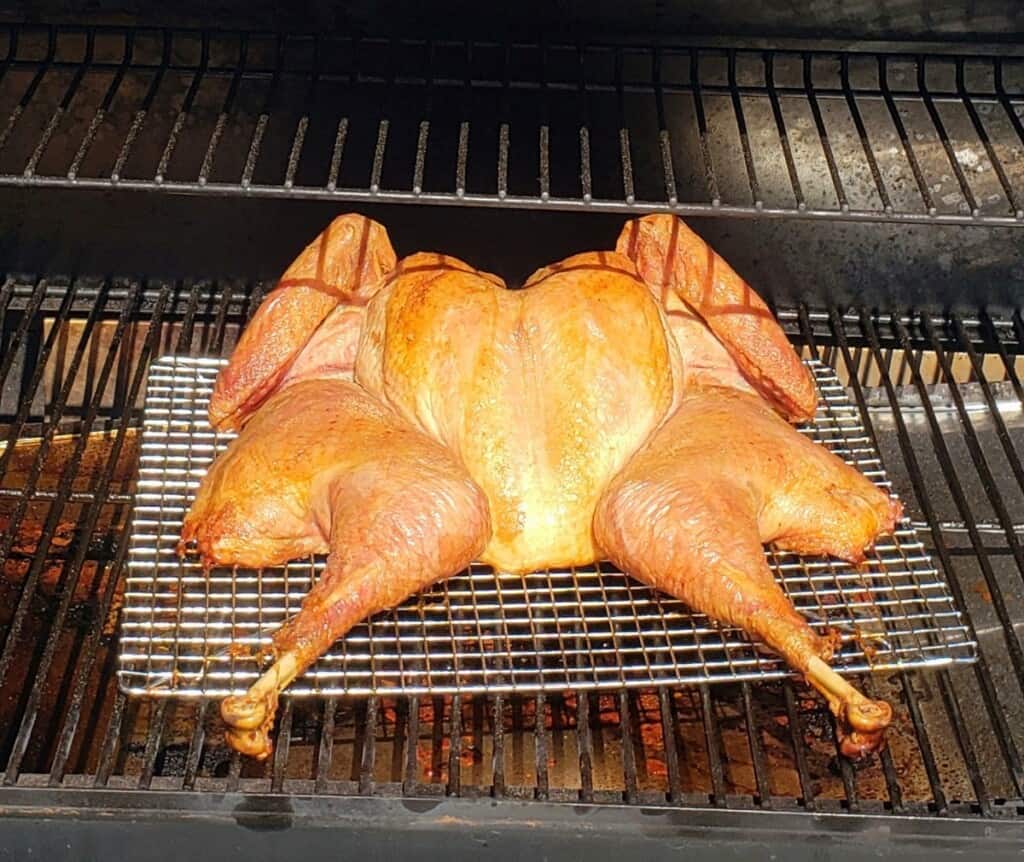
Heat the grill to 375F. Place the turkey (still on the rack from the fridge) over the drip pan, legs facing the front of the grill.
Close the lid and cook for about 1 hour. Using grill spatulas, grill tongs and silicone mitts, turn the rack (the one with the turkey on it, not the grill rack) around, with breast facing the front of the grill.
Close the lid and cook an additional 40 to 50 minutes, depending on the size of the turkey, or until an instant read meat thermometer registers 165F in the thickest part of the thigh but not touching the bone. The breast should register 155F.
Hint: Both of these temperatures are 5 degrees low because they will rise when resting.
Propane Gas Grill
I used indirect heat method here. Light the left 3 burners on medium-high heat 400F and placed the turkey (still on the rack) on the right side of the grill. Place the turkey with the legs and thighs facing the lit burners so they will cook a little faster than the breast meat. Place a drip pan or aluminum foil below the turkey and on top of the unlit burners.
If you have only 3 burners, light the left 2 and place turkey on the unlit burner facing the lit burners. If you turkey is extra large, try lighting just one burner, but you may have to turn the turkey (still on the rack) halfway through cooking. Watch internal temp.
Close the lid and cook for 40 to 50 minutes. Using grill spatulas, grill tongs and silicone mitts, turn the rack (the one with the turkey on it, not the grill rack) around so the breast is now facing the lit burners.
Close the lid and cook an additional 20 to 30 minutes, depending on the size of the turkey, or until an instant read meat thermometer registers 165F in the thickest part of the thigh but not touching the bone. The breast should register 155F.
Hint: Both of these temperatures are 5 degrees low because they will rise when resting.
Charcoal Grill
Use indirect heat method here on a large charcoal grill. Place about 6 quarts of ashy white charcoal (from a chimney or wait til they are white-hot coals) on one side of the grill. If desired, place a couple of pieces of apple or hickory chunks on the coals.
Place the grill grate in place on the grill. Place the turkey (still on the wire rack) on the other side of the grill. Place the legs and thighs towards the hot coals so they will cook a little faster than the breast meat.
Close the lid and cook at at 375F to 400F for 1 hour to 70 minutes. Using large metal grill spatulas, grill tongs or silicone mitts, turn the grill grate or the turkey rack (the one with the turkey on it) so the breast is now facing the hot coals. Check to make sure the coals are hot enough to maintain temperature. If not add more white ashy coals from a chimney, being careful not to allow ashes to float up to the turkey.
Close the lid and cook an additional 30 to 40 minutes, depending on the size of the turkey and the heat consistency of the coals. Check the internal temperature with an instant read meat thermometer registers 165F in the thickest part of the thigh but not touching the bone. The breast should register 155F.
Hint: Both of these temperatures are 5 degrees low because they will rise when resting.
What grill is best to cook a spatchcocked turkey?
The wood pellet grill was my favorite grill. The only downside was the cost of this high- end grill. I'll have to stick with what I have for now and put it on my wish list!
- It acts like a convection oven with hot air circulating inside the grill so it cooks even faster and evenly.
- It has its own drip pan in the bottom of the grill that runs into a bucket outside the grill.
- The wood pellets are feed into the grill with an auger so I don't have to add wood chips along the way.
- It's sort of a cross between a smoker and a grill so it makes it easy to add smokey flavor to the turkey without the effort of a traditional smoker.
I think my final answer to this question is the grill you have available to you is the best one to use. They all impart a smokey flavor to the turkey and produce a golden brown
Substitutions & Variations
The seasoning for this grilled turkey is similar to what I use in my Instant Pot Bone-In Turkey Breast without the paprika. I like to keep it simple, but here are a few flavor options to try.
Substitutions
- 2 tablespoons garlic salt in place of salt and garlic powder
- 3 tablespoons Kosher salt in place of table salt
- Lowery's Seasoned Salt in place of salt, garlic powder and onion powder
- Extra virgin olive oil, canola oil, avocado oil, grapeseed oil
- Unsalted butter is fine is using melted butter. There's enough salt in the dry brine.
Additions
- Stir in paprika, ground black pepper, dried herbs to the dry brine
- Kick it up with a little heat by adding 1/4 to 1/2 teaspoon ground cayenne pepper
- Put softened butter and fresh sage, thyme or rosemary under the skin before adding the dry brine.
Follow me on Facebook, Instagram, Pinterest and YouTube. Be social and share, y'all! Don't forget to sign up with your email so you don’t miss a single post on my Southern shortcut recipes!
If you make this recipe I'd love to see it! Tag me on social media with #gritsandgouda or @gritsandgouda. Leave a comment below the printable recipe if you have questions or tell me how you liked the recipe. Don't forget to give the recipe a rating of 5 stars if you love it!
Other Shortcut Thanksgiving recipes you will love
How to Grill a Spatchcocked (Butterflied) Turkey
Equipment
- Grill, sheet pan with wire rack, kitchen shears
Ingredients
- 11 to 13 pound fresh or frozen whole turkey (thawed if frozen-see Notes)
- 2 tablespoons olive oil or melted salted butter
- 2 tablespoons table salt or 2 1/2 tablespoons Kosher salt
- 1 teaspoon garlic powder
- 1 teaspoon onion powder
Instructions
- You can choose to not print pictures along with recipe after choosing to PRINT.
Spatchcocking
- If the turkey is frozen, be sure to completely thaw it. Remove the neck and giblets package from inside and save for gravy or broth, if you like.
- Place the turkey on a large cutting board or clean work surface. With a pair of good quality poultry or kitchen shears, cut alongside the backbone, starting at the bottom all the way to the neck of the bird. Then, cut very close to the backbone on the other side to remove the backbone.

- Pull the turkey apart where the backbone used to be to reveal the breastbone. At the triangle where the breast bone starts, use shears or a sharp knife to snip into either side of the triangle of cartilage. This will allow the breast bone to open up.

- Turn the turkey over and press down on the lower part of the breast to flatten the breast bone. Fold the wings up under the top of the breast.
- Pat the bird completely dry with paper towels. Rub the outside skin with olive oil or melted butter.
- Combine salt, garlic powder and onion powder; sprinkle over both top and bottom of turkey.
- Place a large cooling rack on a foil-lined, rimmed half sheet pan (NOT NONSTICK if going on the grill).
- Place the turkey breast side up, on the rack. Flatten the drumsticks by rotating the thighs to be in the center and the drumstick bones on the outside.
- Place the turkey, uncovered, in the refrigerator 24 hours and up to 48 hours.
Grilling with Wood Pellet Grill
- Heat the grill to 375F. Place the turkey (still on the rack from the fridge) over the drip pan, legs facing the front of the grill.
- Close the lid and cook for about 1 hour. Using grill spatulas, grill tongs and silicone mitts, turn the rack (the one with the turkey on it, not the grill rack) around, with breast facing the front of the grill.
- Close the lid and cook an additional 40 to 50 minutes, depending on the size of the turkey, or until an instant read meat thermometer registers 165F in the thickest part of the thigh but not touching the bone. The breast should register 155F.
Grilling with Propane Gas Grill
- Light the left 3 burners on medium-high heat400F and placed the turkey (still on the rack) on the right side of the grill. (You may have more or less burners.) Place the turkey with the legs and thighs facing the lit burners so they will cook a little faster than the breast meat. Place a drip pan or aluminum foil below the turkey
- Close the lid and cook for 40 to 50 minutes. Using grill spatulas, grill tongs and silicone mitts, turn the rack (the one with the turkey on it, not the grill rack) around so the breast is now facing the lit burners.
Grilling with a Charcoal Grill
- Place about 6 quarts of ashy white charcoal (from a chimney or wait til they are white-hot coals) on one side of the grill. If desired, place a couple of pieces of apple or cherry chunks on the coals.
- Close the lid and cook at at 375F to 400F for 1 hour to 70 minutes. Using large metal grill spatulas, grill tongs or silicone mitts, turn the grill grate or the turkey rack (the one with the turkey on it) so the breast is now facing the hot coals. Check to make sure the coals are hot enough to maintain temperature. If not add more white ashy coals from a chimney, being careful not to allow ashes to float up to the turkey.
- Close the lid and cook an additional 30 to 40 minutes, depending on the size of the turkey and the heat consistency of the coals.Check the internal temperature with an instant read meat thermometer registers165F in the thickest part of the thigh but not touching the bone. The breast should register 155F.
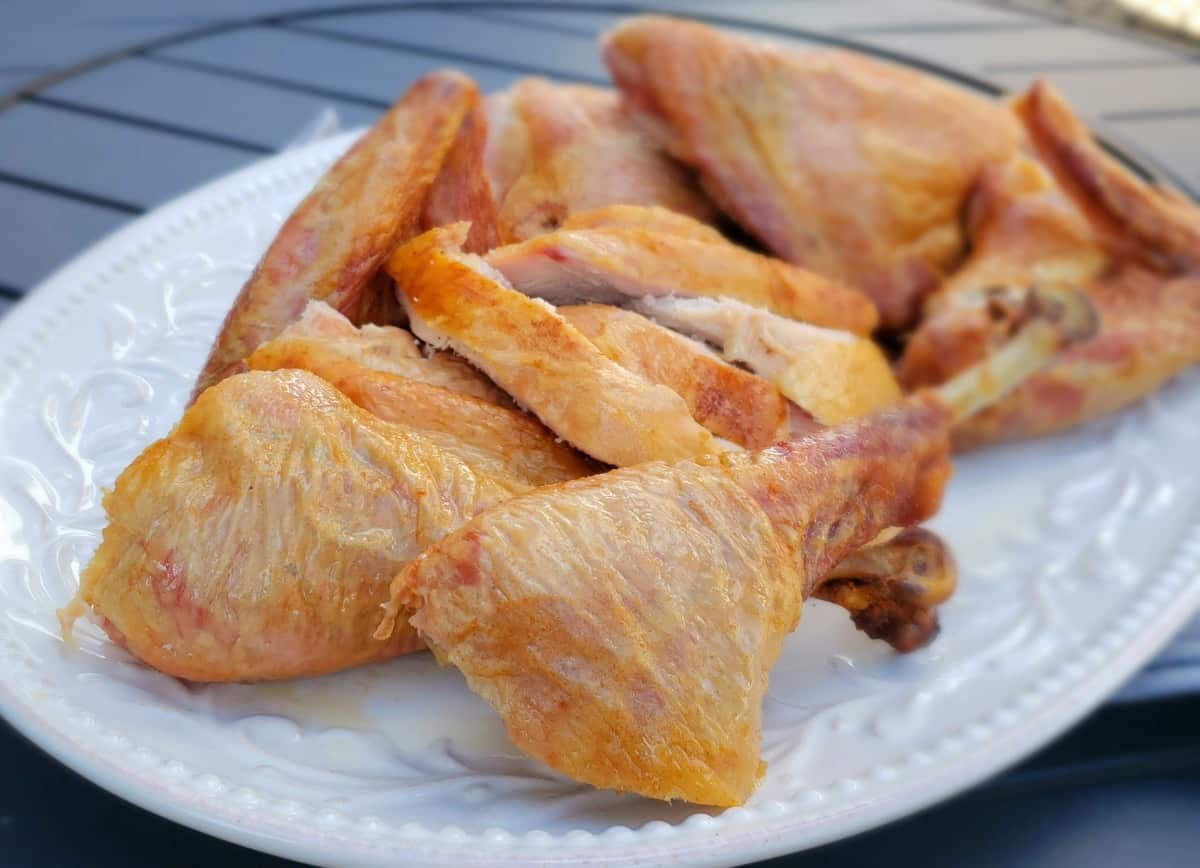
Transferring turkey to a cutting board to rest
- Carefully remove the rack the turkey is on with potholders and transfer to a cutting board or rimmed baking sheet. Cover tightly immediately with aluminum foil for 20 to 30 minutes to rest. The breast meat temperature will rise to 160F and the thigh meat will rise to 170F.
- Carve and serve the turkey.

Notes
- Flattening the turkey saves cooking time.
- If you use a wood pellet grill, the circulating air cooks it even faster than indirect grilling. It's like a convection oven/grill.
- Takes up less space in the refrigerator while brining which saves time trying to figure out where to store everything.

Judy
You give 3 different ways of grilling, wood pellet grill, propane gas grill, and a charcoal grill. I know this article is for grilling the bird BUT what if you wanted to put in into a stove oven and cook it this way. How would you go about doing this like temp, how long and if you had to turn the bird over. I like the term spatchcocked but since I cannot do the propane or charcoal grill and don't have a wood pellet grill what would your recommendations be?
gritsandgouda
Yes, this is a detailed recipe on how to grill a spatchcocked turkey. I have not baked a turkey this way, yet, but I did a quick search and see that one reference shows baking the turkey at 450F for 1 and 1/2 hours uncovered. I did not see any references to turn a baked spatchocked turkey over. I hope you will consider changing your recipe rating from 4 stars or remove the rating since you haven't made it yet and your question is for baking a turkey. I am always happy to try and help!
Clarence Dold
You said
The one on the right may look a little more "platter worthy"
But I think you meant "on the left".
My Weber propane gril is three burners, left, center, and right, so your method won't quite work. i'm going to try center off.
gritsandgouda
If you have only 3 burners, try lighting the left 2 and place turkey on the unlit burner facing the lit burners. If you turkey is extra large, try lighting just one burner, but you may have to turn the turkey (still on the rack) halfway through cooking. Watch internal temp. Let me know if you do turn the center burner off and how that worked with cooking the legs and breast evenly. Thanks!
Clarence Dold
My Weber grill isn't big enough to put my 14 lb turkey sideways.
I checked the fit of an oven rack. It just fit in the barbecue, but the lid didn't close fully, so I put the bird directly on the grill.
I put it across the grill, and put the two outside burners on medium, and the center burner under the breast on low.
After 15 minutes, the thighs were already warming more than the breast, so I increased the middle burner to medium-low. The hood-mounted thermometer was about 375°.
I checked each 15 minutes, and adjusted the burners a little, to try and get the breast to the same temp as the thighs. After 65 minutes, my bird was done, 160° in the breast, 168° in the thighs.
I lifted the brid with a large spatula and tongs, and my assistant slid a cookie sheet under the turkey for me to carry the turkey.
My dinner guests all complemented the presentation, and the flavor of the meat.
I wasn't able to slice it as well as I normally do, maybe because it was more moist than normal.
gritsandgouda
Thank you so much for sharing how you were able to use your Weber grill for this recipe! I know it will help others. Yes, this method creates super juicy meat and I love the crispy skin.
Adriana Gutierrez
I have a Cuisinart 3 in 1 grill. There is one continuous burner that can only be adjusted for temperature. Suggestions on how to grill a turkey? I don’t have a regular oven available.
Kathleen
I have never used this grill so my thoughts will only be suggestions since it doesn't have a way to indirectly cook it. I'm thinking it would work to grill it over a much lower heat, say 350F for a longer period of time and to rotate the turkey halfway through cooking. The main thing is to make sure the dark meat reaches at least 165F. I'd love to hear how yours turns out grilling it on the Cuisinart 3 in 1 grill!