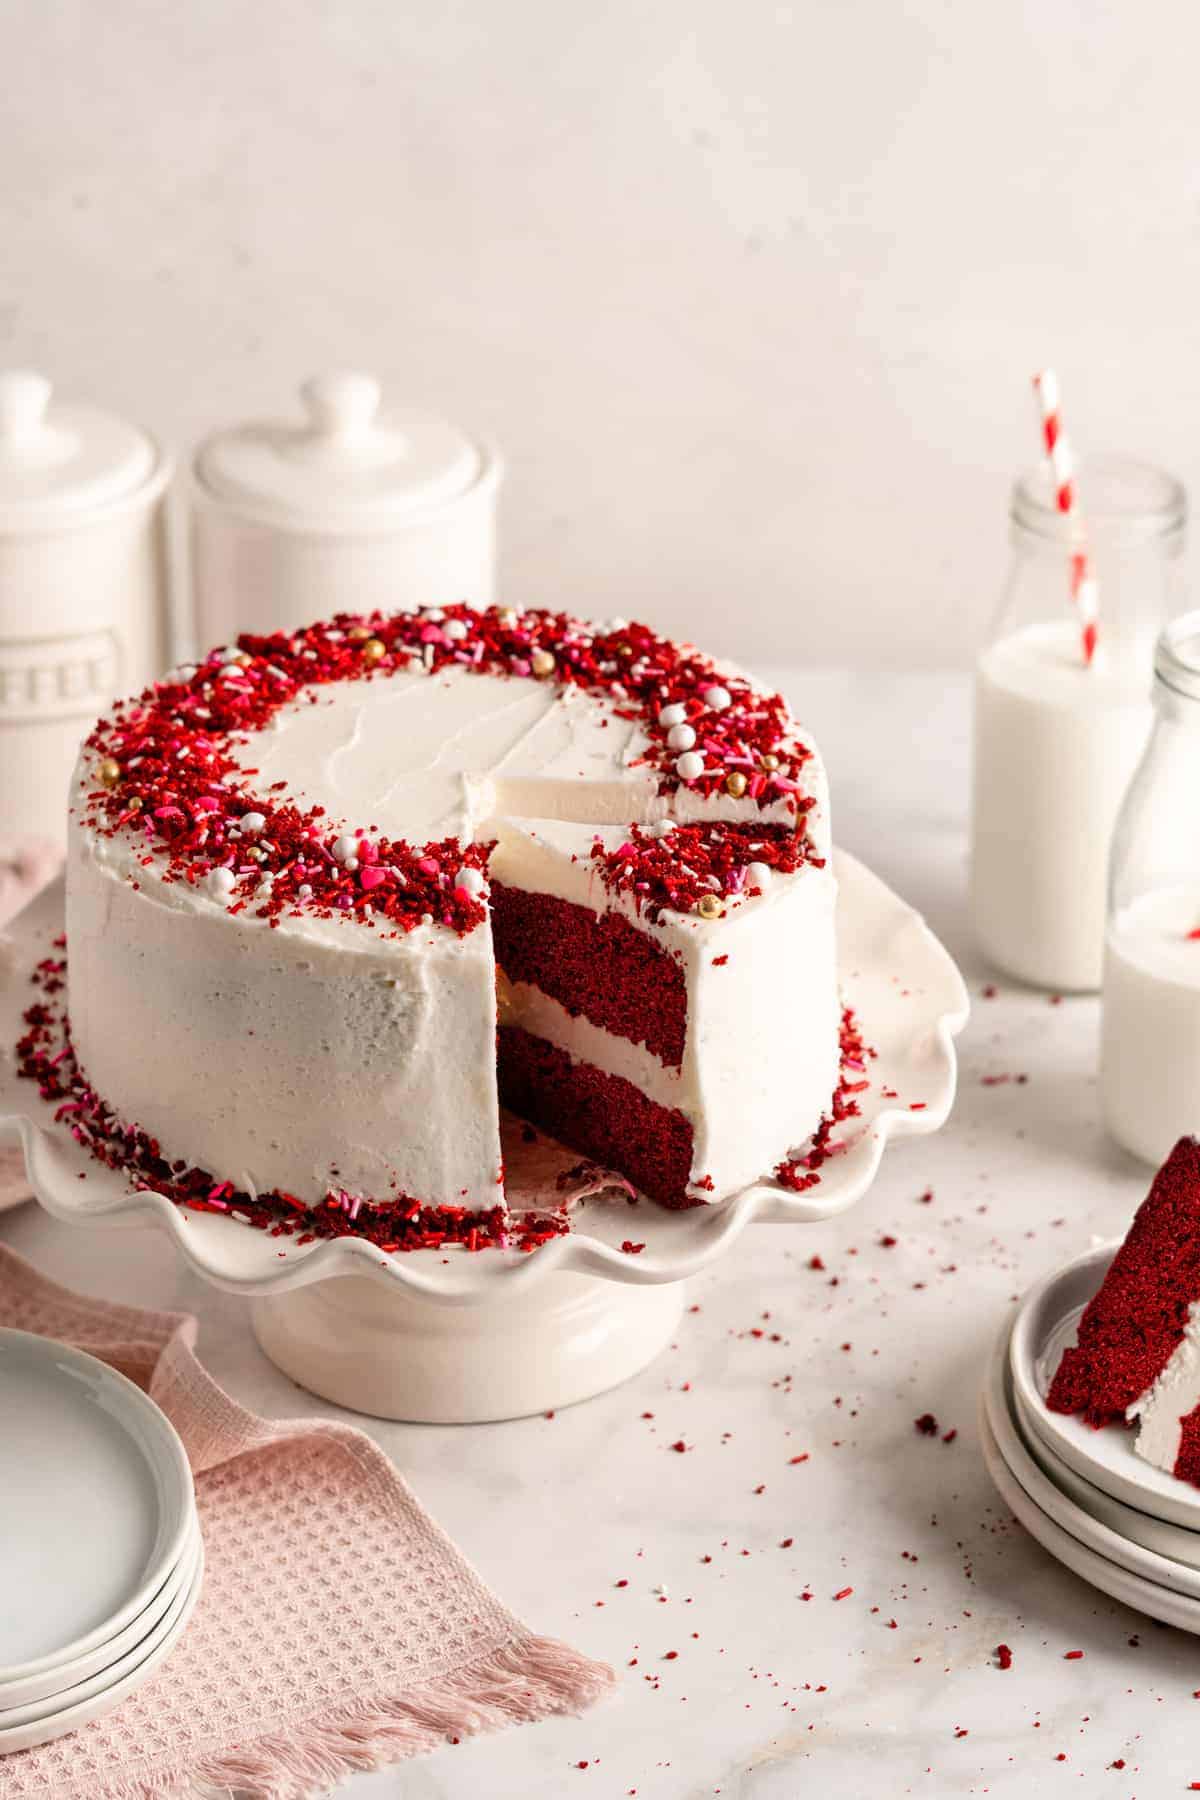
Vegan Red Velvet Cake
This vegan Red Velvet Cake is worthy of a celebration, but simple enough to make any day of the week! A moist chocolate cake with a vivid red colour is topped with vegan cream cheese frosting for a plant-based version of the Southern classic.
Red velvet cake may be something you figured you’d have to give up when switching to a plant-based diet. There’s the cream cheese frosting, which is essential for any red velvet cake worth its salt, but then there’s also the fact that the colouring traditionally used in this cake is usually extracted from beetles. (Yikes, right?)
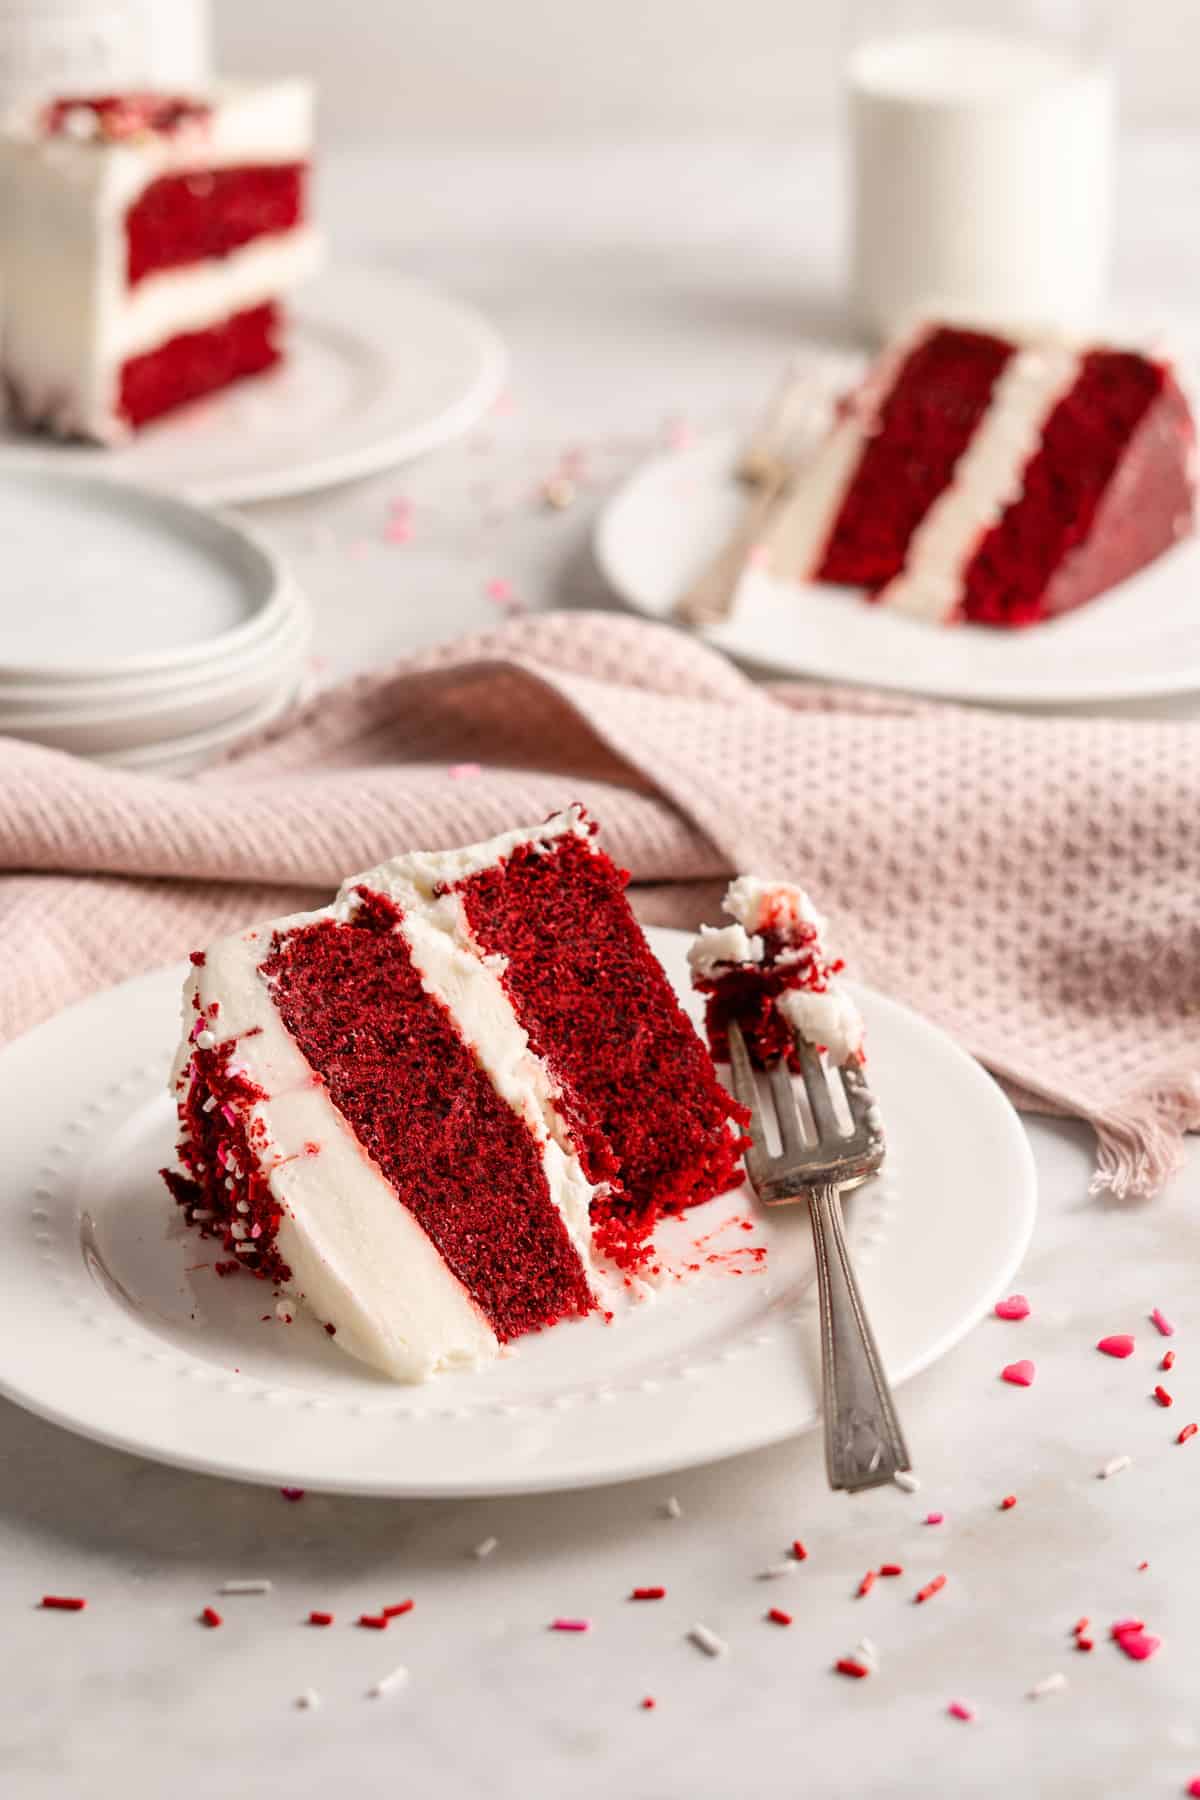
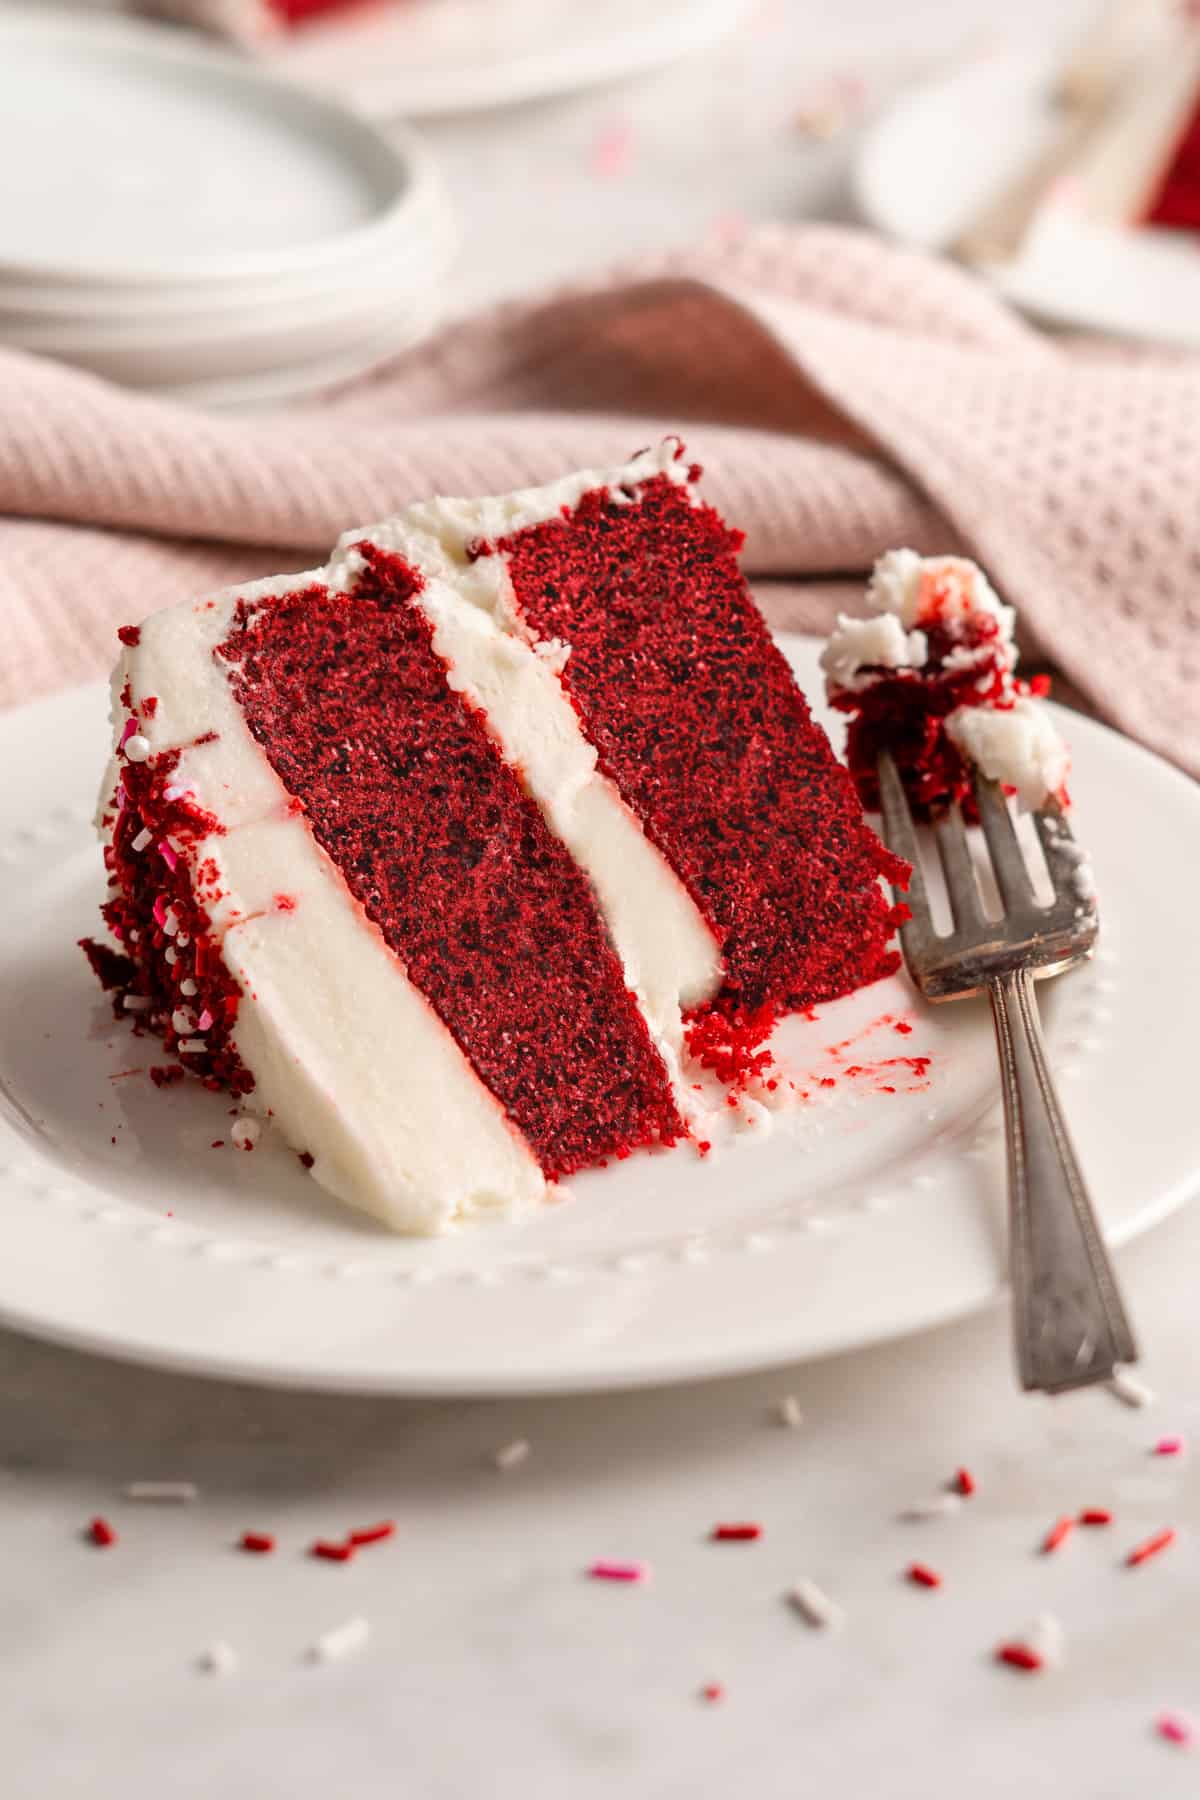
Well, I have good news for you: vegan red velvet cake is possible and it’s amaaaazing! This recipe is perfect for a holiday get-together or a birthday, but it’s surprisingly easy to make so you can totally whip it up on a weekend afternoon when you have a hankering for something sweet. The cake layers are a lovely deep red colour, moist and tender, and they have a subtle chocolate flavor thanks to the addition of cocoa powder. Plus that quintessential baking soda + vinegar addition for red velvet cake. This is the perfect foil for the rich, sweet cream cheese frosting, which you might just want to eat with a spoon!
Notes on Ingredients
Please note that this is important information on the ingredients and instructions and the FULL recipe with amounts and details can be found DOWN BELOW (scroll to it) in the recipe card.
For the cake:
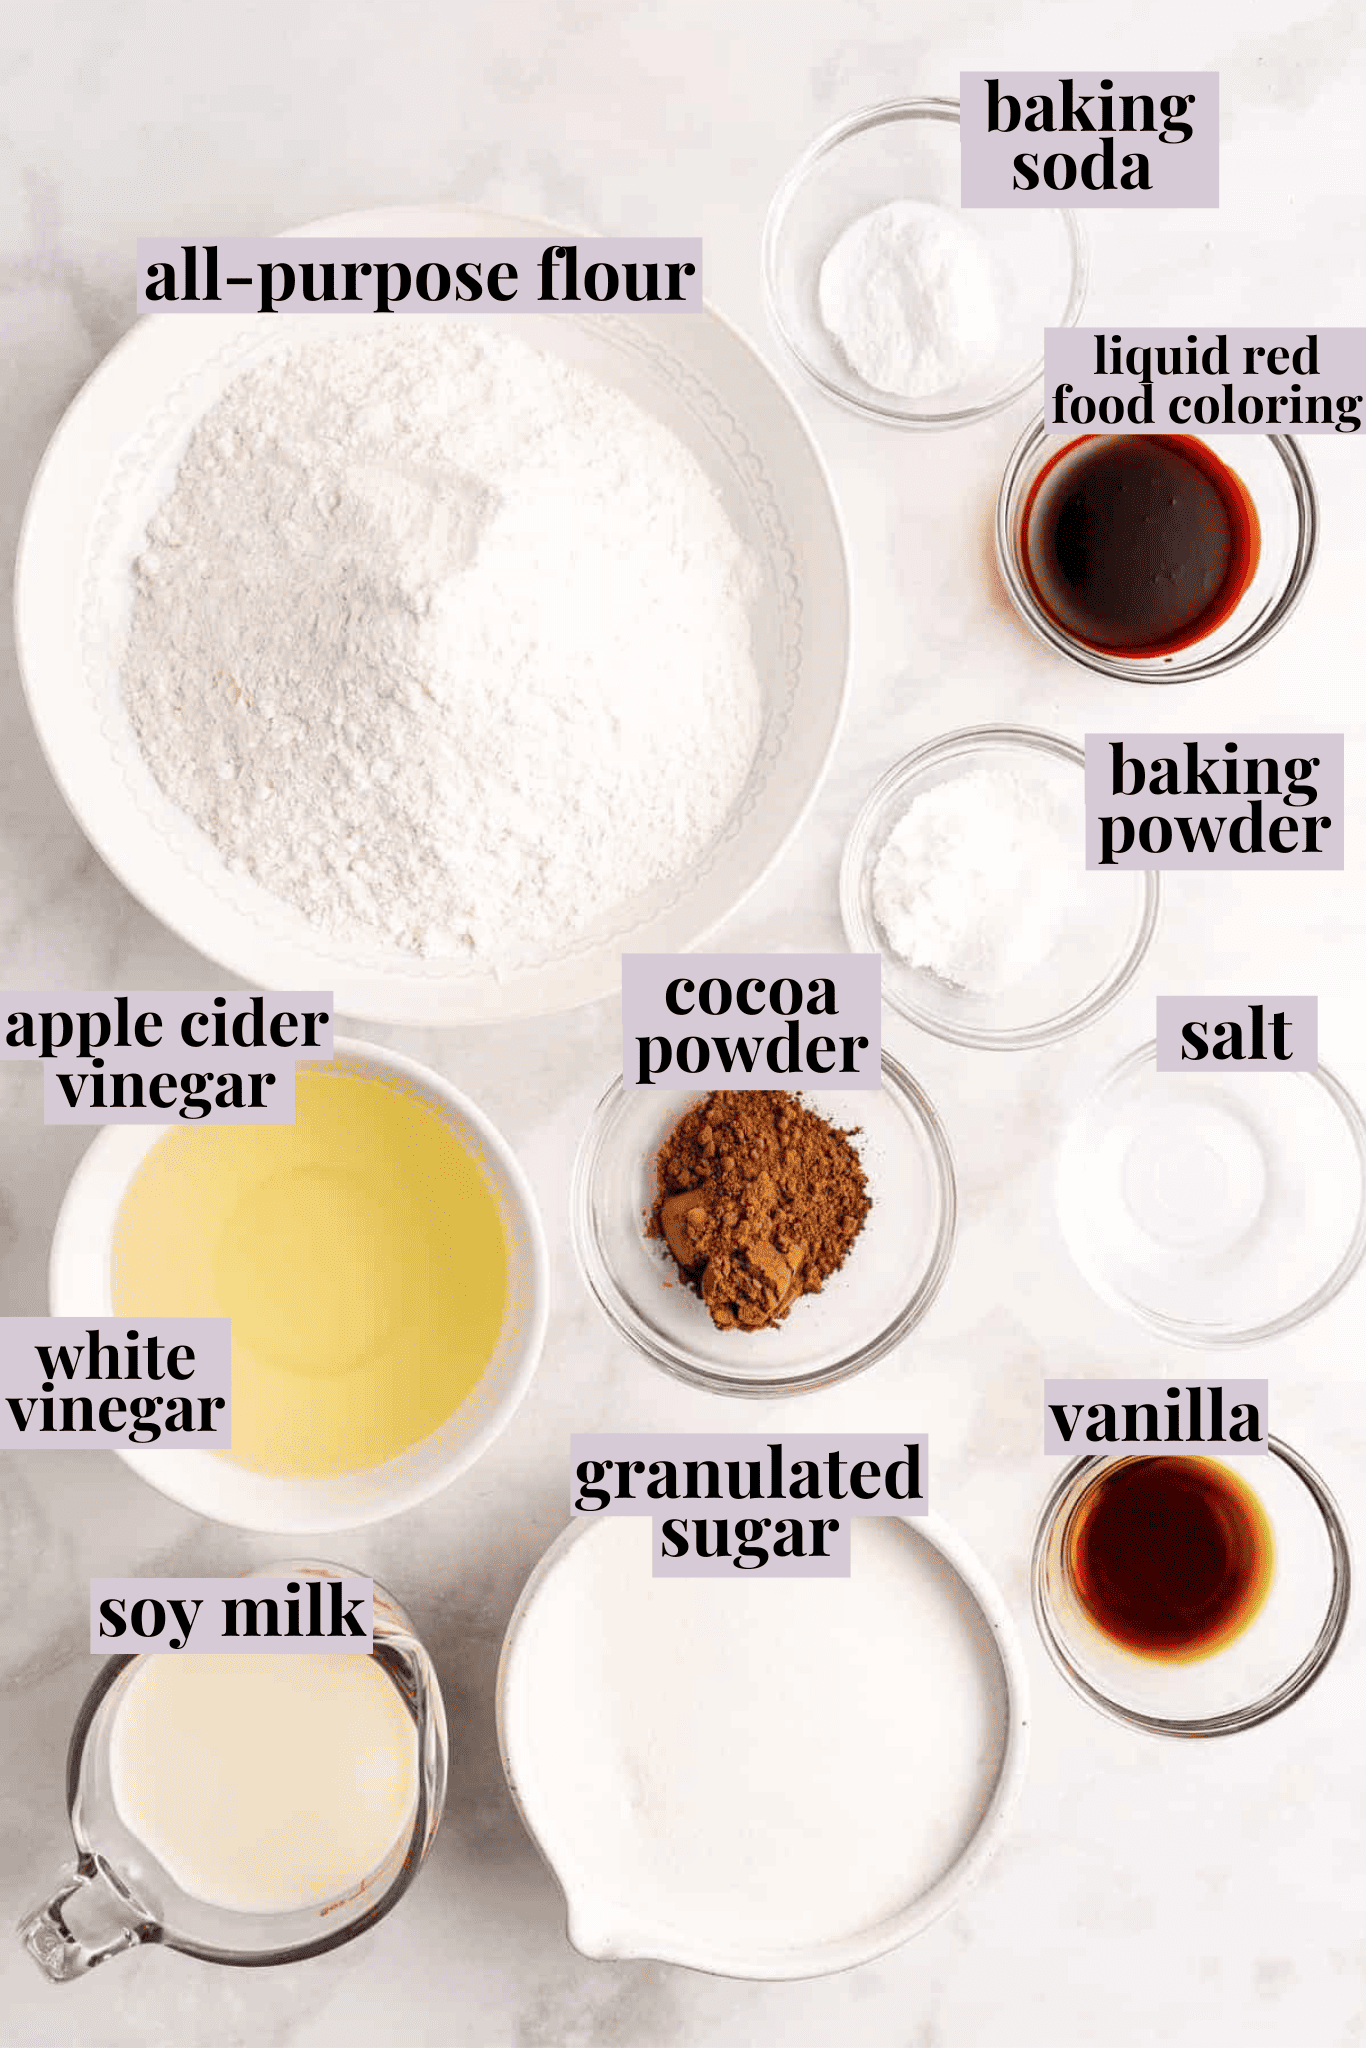
- Apple cider vinegar or regular vinegar – You’ll use this to make a vegan buttermilk.
- Soy milk or other vegan milk
- White granulated sugar
- All-purpose flour
- Unsweetened cocoa powder – Don’t use cocoa mix—it’s not the same! Cocoa mix has added sugar.
- Baking powder
- Sea salt
- Oil – Use a neutral-flavored cooking oil.
- Vanilla extract
- Liquid red food colouring – Make sure you buy one that is vegan! A good example is AmeriColor or Chefmaster. You can also buy natural food colouring (I like the 365 one from Whole Foods) but note that it won’t be as bright in colour, more a brown/purple shade. It’ll still taste delicious! Long story short, you’re trying to avoid ingredients such as cochineal and carmine.
- Baking soda
- White vinegar – This gives red velvet cake a light, airy texture.
For the frosting:
- Vegan cream cheese – This should be room temperature so it’s easy to whip up into a creamy frosting.
- Vanilla extract or vanilla paste
- Vegan butter sticks – Your butter should be room temperature too!
- Sea salt
- Powdered sugar – Also known as confectioners’ sugar.
- Cornstarch
How to Make Vegan Red Velvet Cake
Once you’ve gathered up the ingredients, it’s time to roll up your sleeves and start baking! Here’s what you’ll need to do.
Prepare. Grease and flour two 9-inch cake pans and line them with parchment paper. Preheat the oven to 350°F/180°C.
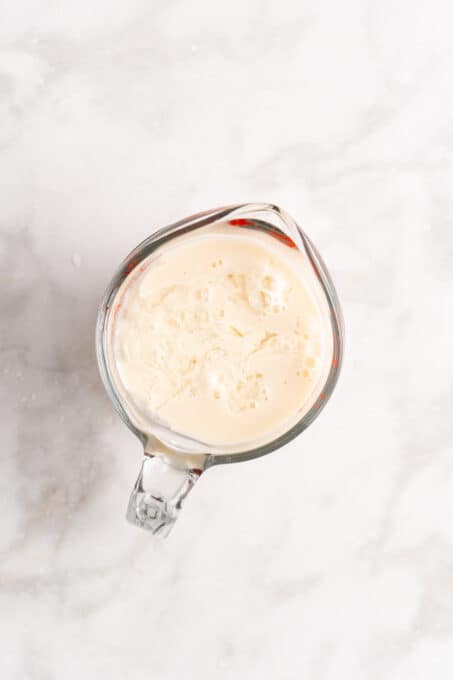
Make the buttermilk. Combine the tablespoon of vinegar and room temperature vegan milk in a jar; this will curdle the milk and it will thicken.
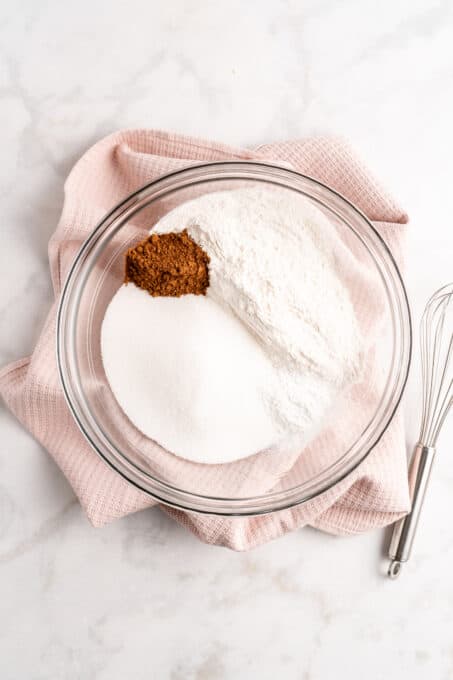
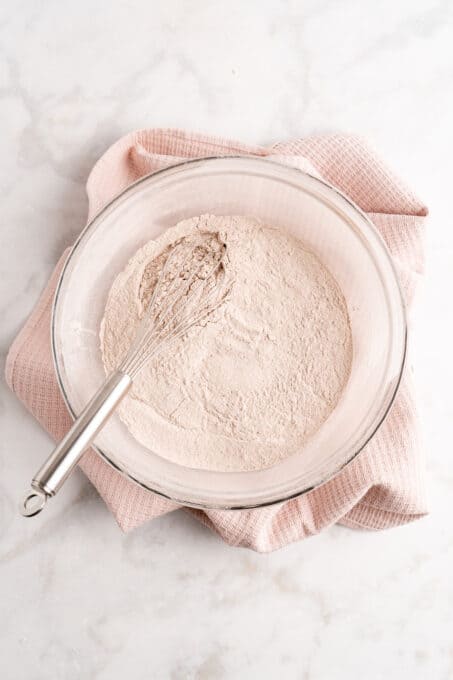
Mix the dry ingredients. In a large mixing bowl, whisk the sugar, flour, cocoa powder, baking powder, and sea salt.
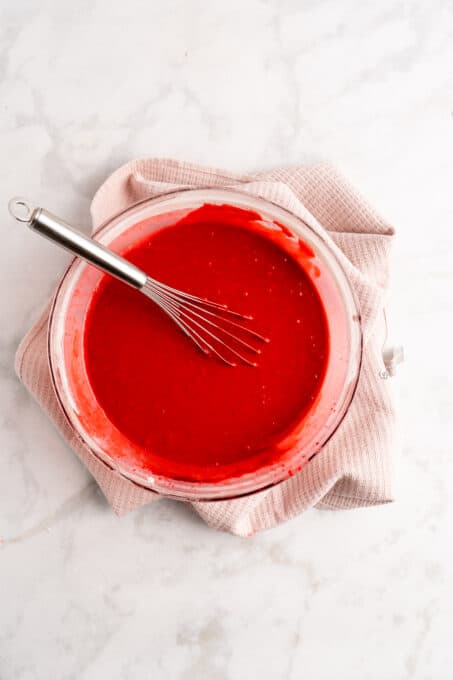
Add the wet ingredients. Pour in the oil, buttermilk, vanilla extract, red food colouring, and warm milk. Beat with an electric mixer on medium speed for no more than 1 minute, scraping down the sides of the bowl as needed.
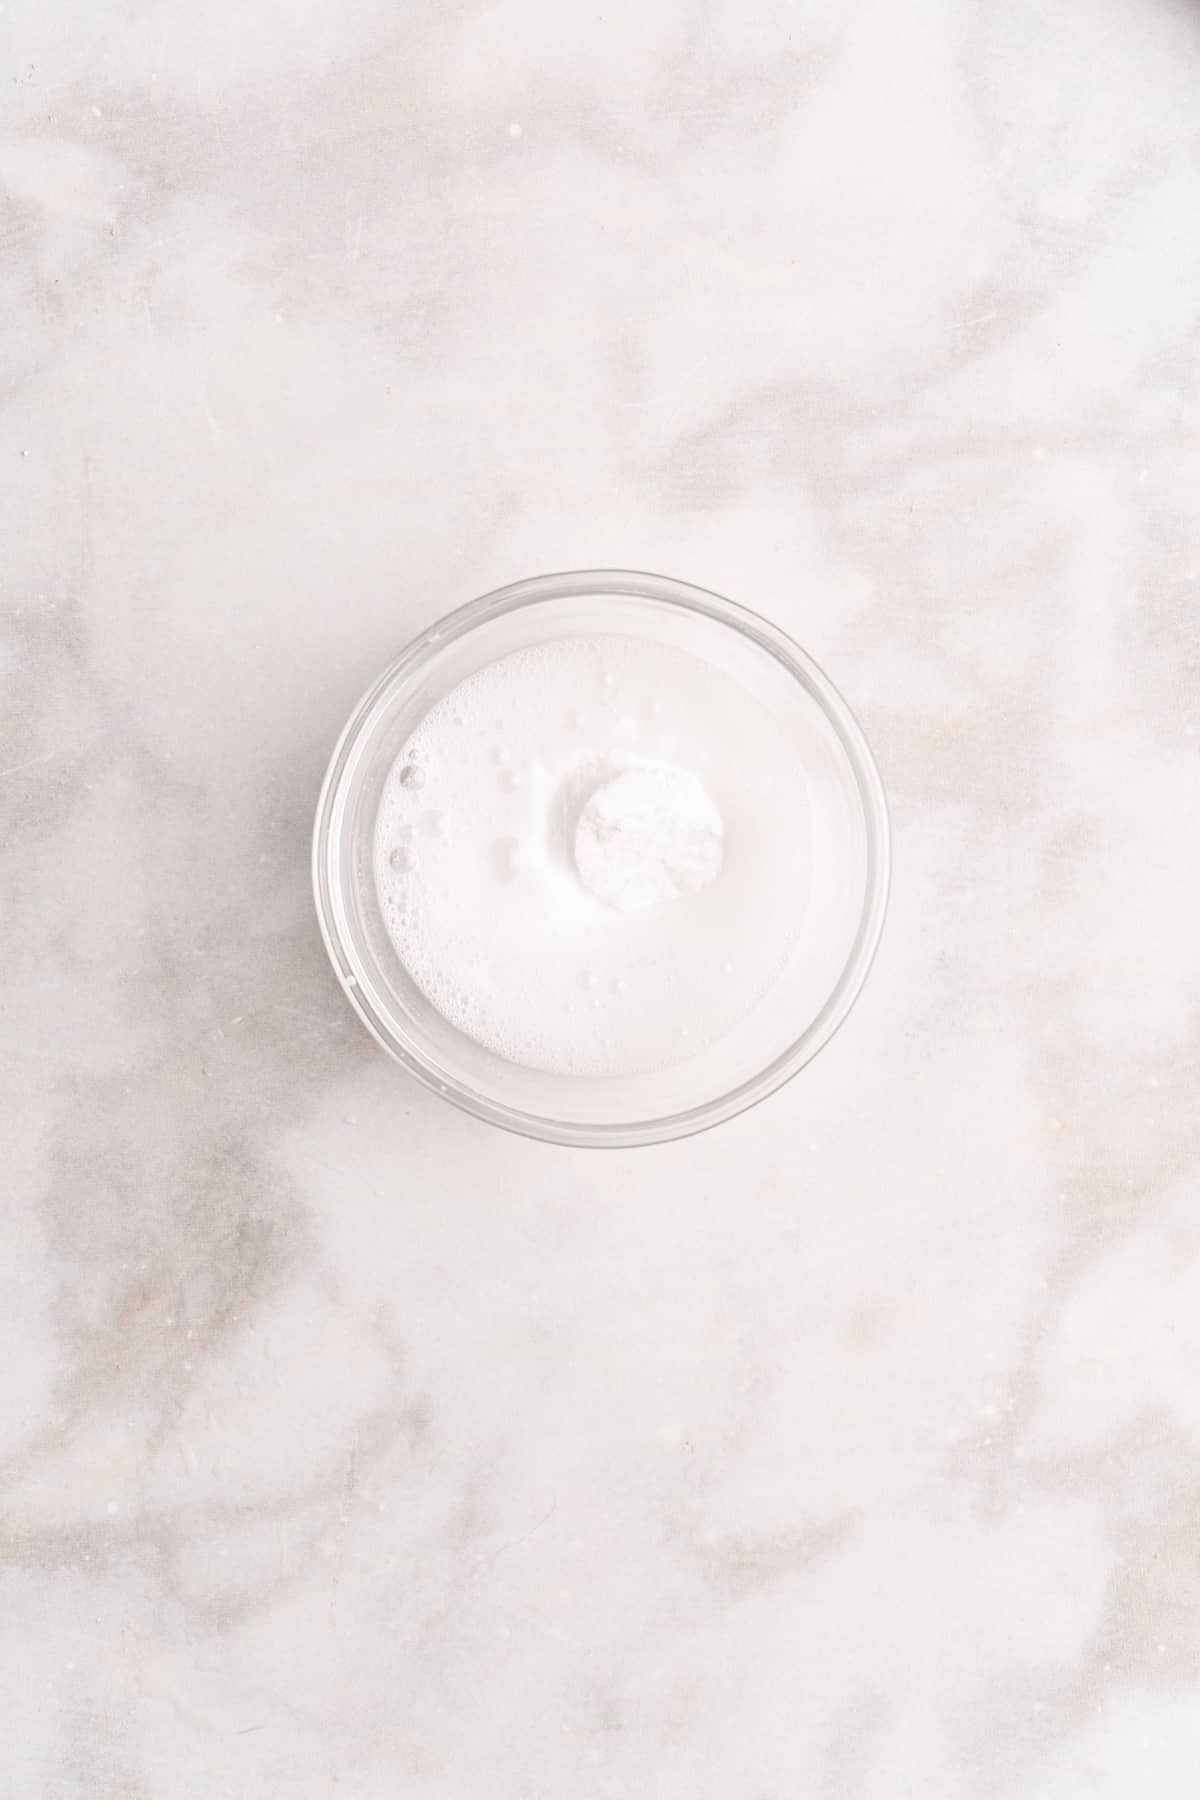
Combine the vinegar and baking soda. In a small bowl, mix together the white vinegar and baking soda. (It will fizz.) Pour into the cake batter and stir to incorporate.

Fill the cake pans. Divide the batter evenly between the cake pans and lightly tap them on the counter a few times to remove any air bubbles.
Bake. Place the pans in the center of the middle rack of your oven and bake for about 25 minutes, or until the centers of the cakes are baked through.
Cool. Let the cakes cool in the pans for 10 minutes, then carefully remove them and let them finish cooling on wire racks.
Make the frosting. Beat the butter and cream cheese together in the bowl of a stand mixer for about 2 minutes until fully incorporated. Add in the vanilla and a pinch of salt, then beat in a cup of powdered sugar and all of the cornstarch until well-combined. Add the remaining powdered sugar a cup at a time until the frosting has reached the desired consistency.
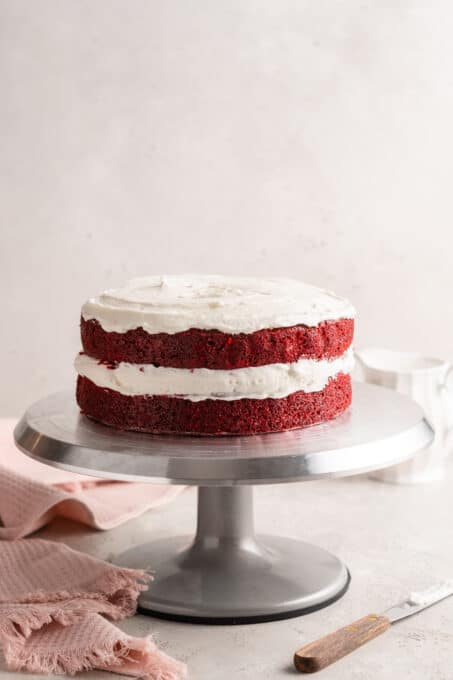
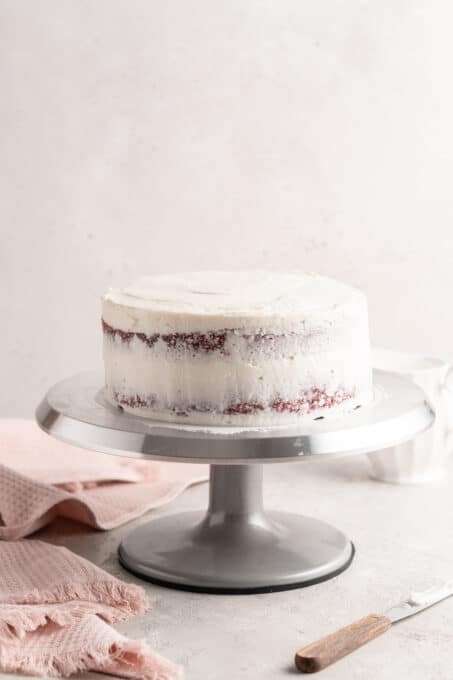
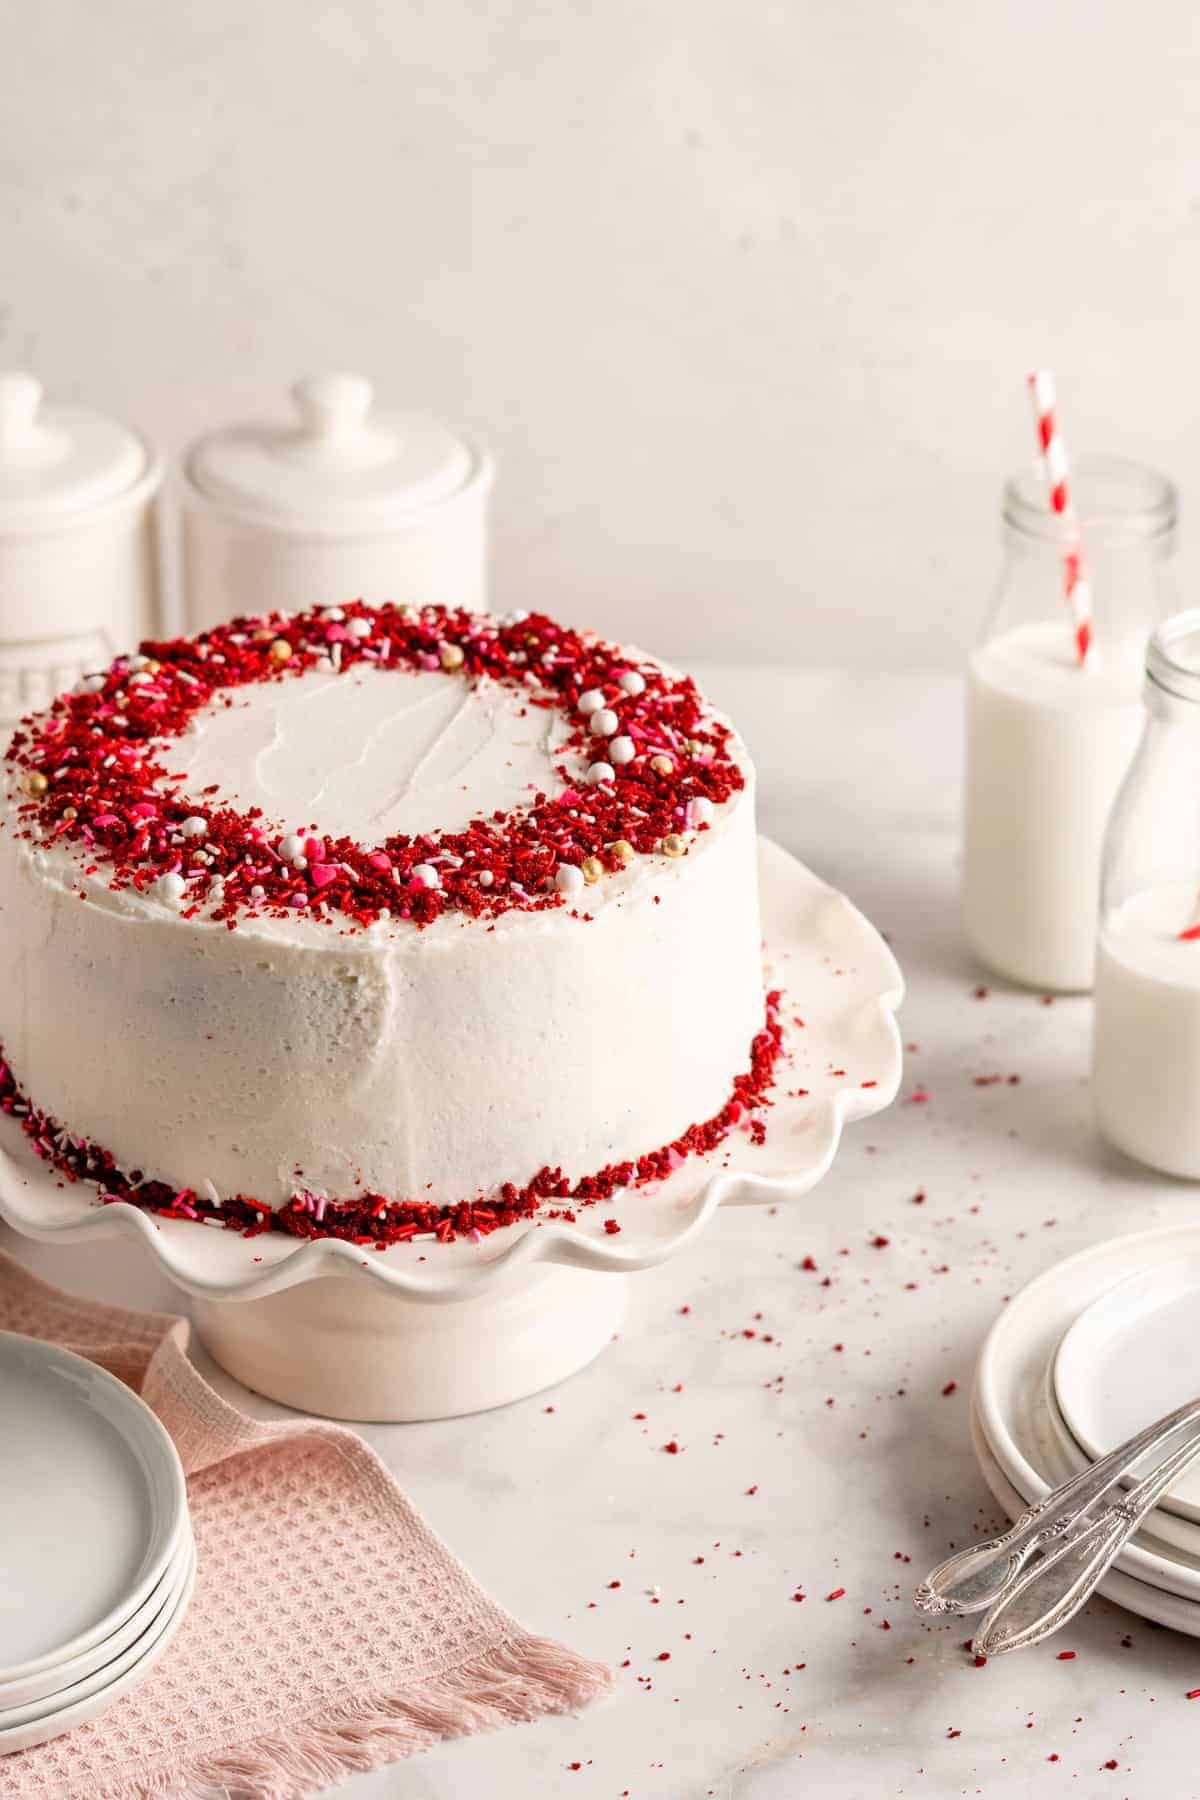
Assemble and frost the cake. After the cakes have cooled, apply a thick layer of frosting to the top of one cake and stack the other on top. Use an offset spatula to spread a thin layer of frosting over the sides and top of the cake. It should be thin enough that you can see the cake (and crumbs) through it. This is called a crumb coat and it’s used to help “catch” any stray crumbs so they don’t show through in the final layer of frosting. Once the crumb coat is dry to the touch, frost the cake again. Store the cake in the refrigerator until you’re ready to serve.
Tips for Success
Here are some suggestions for a perfect red velvet layer cake.
- Don’t over-mix. Once the ingredients are incorporated, stop mixing! Stirring too much will ruin the texture of the cake.
- Chill the frosting. While you can use the frosting right away, I recommend refrigerating it for at least 4 hours, which helps it solidify a bit so it’s easier to work with.
- Be patient. Don’t frost the cake until the layers are completely cool. A warm cake will melt the frosting and result in a big mess!
How to Store
Store red velvet cake covered in the refrigerator for up to 3 days. I recommend letting it come to room temperature before serving.
Can This Recipe Be Frozen?
To freeze this cake whole, place it on a plate or baking sheet lined with parchment or wax paper. Place it directly in the freezer, uncovered, until the frosting is solid. Once the frosting is hardened, you can quickly wrap the cake with plastic wrap, followed by a layer of foil, and freeze it for up to 3 months. Let it thaw in the refrigerator before serving. If you’re freezing leftovers, you can simply place the cake slices in an airtight container.
Enjoy friends! If you make this vegan red velvet cake recipe, please snap a photo and tag #jessicainthekitchen on Instagram! We’d also love it if you would leave a comment below, and give the recipe a rating! Thanks so much!

Vegan Red Velvet Cake
Ingredients
- 1 tablespoon apple cider vinegar or regular vinegar
- 1 cup soy milk or other vegan milk, (240mL), room temperature
- 2 cups white granulated sugar, (400g)
- 3 cups all-purpose flour, (360g)
- 2 tablespoons unsweetened cocoa powder, (16g)
- 2 teaspoons baking powder
- 1 teaspoon sea salt
- ¾ cup oil, (150g)
- 1 teaspoon vanilla extract
- 1 oz. liquid red food colouring, (bright red)
- 1 cup warm soy milk, (240mL)
- 2 teaspoons baking soda
- 1 teaspoon white vinegar
Vegan Cream Cheese Frosting
- 8 ounces vegan cream cheese* bring to room temperature
- ½ cup vegan butter sticks bring to room temperature, (4oz/113g)
- 1 teaspoon vanilla extract or vanilla paste
- pinch of sea salt
- 3 cups to 4 cups of powdered sugar sifted, (480g for 4 cups)
- 1/4 cup cornstarch sifted, (32g)
Instructions
- Grease and flour two 9” cake pans and line with parchment paper. It’s essential so that the cake doesn’t stick.
- Preheat the oven to 350°F/180°C.
- In a jar, add the tablespoon of vinegar and room temperature vegan milk together to curdle to form a buttermilk. Set aside.
- In a large bowl, add the sugar, flour, cocoa powder, baking powder and sea salt. Using a whisk, whisk all the ingredients together, removing any clumps that may form.
- Pour in the oil, the buttermilk mix from earlier, the vanilla extract and the red food colouring.
- Heat up that additional milk in the microwave for 40 seconds (or on stove top until warm, not boiling). You want it warm enough to dissolve but not boiling.
- Add it to the bowl on top of everything. Beat on medium speed of electric mixer for no more than 1 minute on medium speed, scraping down the sides of the bowl once in between to ensure that everything is incorporated. You want to mix until just combined.
- In a small bowl, mix together the white vinegar and baking soda. Yes, it will fizz! Add it to the cake batter and stir well to combine, for about 30 more seconds. Working quickly, divide the batter evenly between the cake pans and place them in the preheated oven.
- Tap the pans on the counter three times lightly to remove any air bubbles.
- Place the pans in the middle rack of your oven and in the center of that rack. Bake for 25 minutes until fully baked.
- Remove from the oven and allow to cool in the pan for about 10 minutes, then carefully remove them to a wire rack to finish cooling completely.
- After cooled, frost with vegan cream cheese frosting and some red velvet crumbs. Enjoy!
- Since Red Velvet can be very messy with crumbs going everywhere, it would help to do a crumb coating first to help “glue” down the crumbs before doing the entire cake.
- Using an offset spatula, spread a thin layer of frosting over the sides and top of the cake. It should be thin enough that you can see the cake (and crumbs) through it. Get your frosting as smooth as you can and let it dry slightly until it crusts over a little bit and is dry to the touch. Sometimes placing it in the fridge for 30 minutes helps too.
- After the coat is dry, you can apply the final layer of frosting.
- Vegan Cream Cheese Frosting
- In the bowl of a mixer, beat the butter and cream cheese together for about 2 minutes until fully incorporated.
- Add in the vanilla extract or paste and the pinch of salt.
- Add in a cup of sifted powdered sugar and all of the sifted cornstarch. Mix for about 1 minute or until incorporated. Add in the powdered sugar 1 cup at a time until the frosting has reached the desired thickness.
- Place the frosting wrapped or covered into the fridge for at least 4 hours or overnight, until being used. You can enjoy it right away, but it will thicken up beautifully in the fridge.
- You can apply it immediately to a cooled cake, then place in the fridge, or place the frosting itself, then apply to the cake later. Enjoy!
Notes
Disclaimer: Although jessicainthekitchen.com attempts to provide accurate nutritional information, kindly note that these are only estimates. Nutritional information may be affected based on the product type, the brand that was purchased, and in other unforeseeable ways. Jessicainthekitchen.com will not be held liable for any loss or damage resulting for your reliance on nutritional information. If you need to follow a specific caloric regimen, please consult your doctor first.


Hi Jessica, I’m so excited to try this! Do you have recommendations about how to make this as muffins? Like how long to cook them for or if anything else would be different?
Sorry I mean cupcakes!
Hi Emily! We’re excited for you. We do have the cupcake version on the site. I hope this helps.
Can you recommend a few kinds of cream cheese? I like the one from trader joes, but I’m open to others. I’m also going to try this out with beat root powder.
Kite hill and miyokos are always a good bet. Toffuti is really great as well. I hope this helps!
Hi there , how stable is this cream cheese frosting for piping ?
Hi Cheryl,
It depends on your environment (is it hot, central ac etc.) but I’ve found it very stable!
Can I just make this is one taller pan? Versus separating into 2 different pans?
Hi Madison,
I wouldn’t advise this! If you have only pan you can half the recipe or bake one half one at a time! Hope this helps!
Hi Jessica, I’m so excited to try this cake but I never did it so I’m a bit afraid about the cornstarch on the cream, why do you add this?
Does it leave a residual taste?
Thank in advance
Hi Carol,
It’s to help with thickness! There’s no taste at all but you can definitely leave it out! 🙂 Enjoy so much!
Does exactly what it says on the tin. You can’t go wrong with this recipe if you follow all the steps as directed. Everyone raves about it (even the non-vegans!)
In a word DELICIOUS.
Thank you Jessica
I have been buying Sprinkles vegan red velvet cupcakes and would love to make my own. Can this cake recipe be used for cupcakes?
Hi Phyllis,
Yes for sure! Just search “red velvet cupcakes” in my search bar you’ll find the cupcake version to this! Enjoy!