Piccalilli Recipe
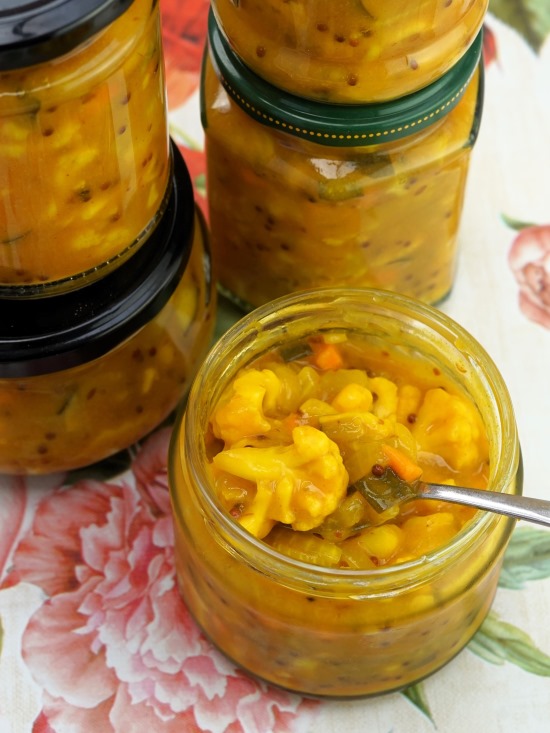
Piccalilli is a traditional British pickle of mixed vegetables in a thick, tangy sauce flavoured with mustard and turmeric. So easy to make at home, Piccalilli is a great addition to a ploughman’s lunch, eaten alongside pork pie, ham, cheeses, salads, or in a sandwich.

Although cauliflower and onion are usually included, you can add whatever fresh vegetables you like. Create your own mix by including courgettes, cucumbers, green or runner beans, peppers, baby onions, shallots, celery, carrots, white cabbage, nasturtium seeds, or whatever else is in season.
Jump to Recipe

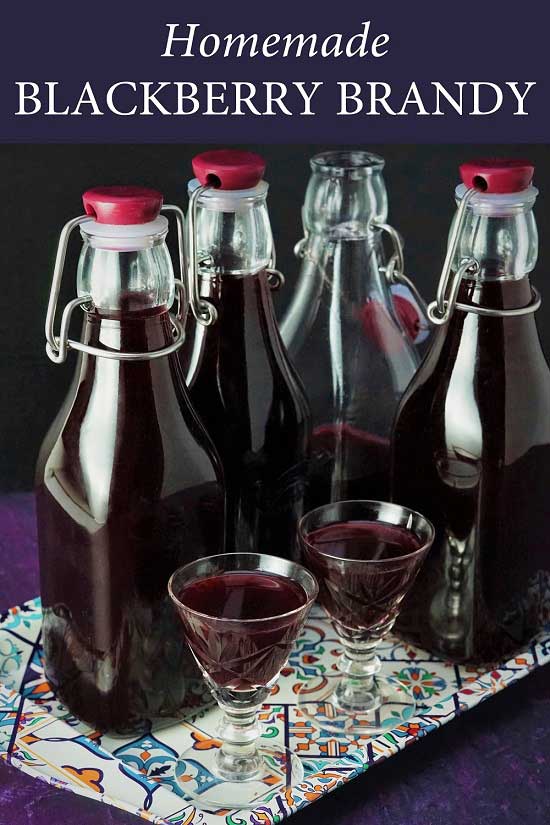
I love making jams, chutneys, pickles, and cordials. Almost any kind of preserve really. Apart from enjoying the process itself, preserves are a way of capturing the very best seasonal produce to enjoy months later. Or, in the case of some such as Blackberry Brandy, even years later.
One of the great things about Piccalilli is that you can include all sorts of different vegetables. I think this makes it perfect if you have smaller amounts of five or six varieties. But it’s just as useful for those with a glut of homegrown veggies.
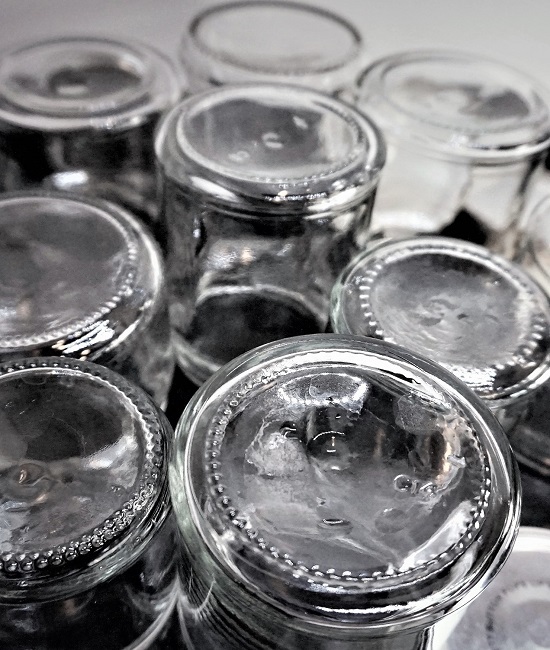
With a tangy, lightly sweet and spicy flavour, Piccalilli is incredibly easy to make. Salt the chopped veg twenty-four hours in advance, and your pickle can be in its jars with only 15 – 20 minutes of work the next day.

Although it’s tempting to eat your tasty creation right away, your patience will be rewarded if you can leave it to mature for 4 – 6 weeks. The vinegar used to preserve the vegetables will have mellowed and the spices have a more rounded flavour. Potted while hot and into hot, sterilized jars, unopened Piccalilli should easily keep for a year in a cool, dark place.
WHAT IS PICCALILLI?
Sometimes called mustard pickle, some form of Piccalilli has existed in England since at least the eighteenth century. Its name is possibly related to pickle and chilli. Its use of spices like turmeric is thought to haves roots in Britain’s trade with, and eventual direct rule of, India. Just like our other ever-popular pickles (onions, beetroot, red cabbage), Piccalilli gives a pleasant acidic zip to cold meats, cheeses, pork pies, salads, and sandwiches.

The earliest published recipe for a type of Piccalilli is usually regarded as Hannah Glasse’s paco lilla from 1747. She also calls it Indian pickle, as does Elizabeth Raffald in The Experienced English Housekeeper (1769). The latter also uses the term piccalillo. To further add to the mix, Mrs Beeton’s recipe (1861) is for Indian Pickle, although it’s illustrated with a jar marked piccalilly that’s captioned ‘India Pickle’.

VEGETABLES
Despite the varying names, all these early recipes consist of a mix of different vegetable varieties preserved in a highly spiced vinegar. The suggested vegetables include white cabbage, cauliflower, cucumber, radish, runner or French beans, gherkins, pickling onions, nasturtium seeds, peppers, and beetroot. Interestingly, instead of pickling all the vegetables at once, they suggest adding them ‘as the Thing comes into Season’ (Raffald).
SPICES & SEASONINGS
I think it’s fascinating that these old recipes contain many more spices and seasonings than modern versions. Yes, the mustard and turmeric that give today’s Piccalilli its striking yellow colour are there. But you’ll also find ginger, garlic, chillies, black pepper, long pepper (a spice originating in India that’s related to black pepper but apparently sweeter and a little like Szechuan), white pepper, allspice, cloves, cayenne, and mace.
But what we know today as Piccalilli is a much simpler affair. The big brands seem to contain mainly cauliflower, pickling onions and gherkin. However, it’s common for homemade versions to contain lots of different vegetables.
In terms of spicing, turmeric and English mustard powder still dominate. After all, can a pickle really be called Piccalilli without that distinctive yellow hue? But it’s unusual to find many more spices included, except perhaps ginger, a little cumin and/or coriander seed.
HOMEMADE PICCALILLI RECIPE
As with so many things though, simpler doesn’t necessarily mean duller. I think the Piccalilli recipe I’m sharing today allows the true flavour of the vegetables to shine through while seasoning them with a lightly sweet, tangy, spiciness. It’s based on a recipe from the River Cottage Preserves Handbook which is a great place to start if you’re a pickling, jamming, and chutney newbie.
You’ll find detailed instructions in the recipe card at the end, but I recommend you read the whole post first. As well as tips you’ll find step-by-step photos.

INGREDIENTS
My recipe makes 4 – 5 medium jars of Piccalilli. For this amount you’ll need around a kilo of vegetables after they’ve been prepped (e.g. peeled, topped and tailed).
As we’ve discovered, you can include almost any vegetables. The important thing is that they’re crunchy, good and fresh. I like a good proportion of cauliflower, around half the total weight. For the pickle you see in this post I also included a large onion, cucumber, carrot, and celery. Choose whatever you like from the list in the VEGETABLES paragraph further up the page.

The vegetables should be chopped in accordance with whether you want a chunky or finer Piccalilli. Chunky is good if you’re going to have a pile of it on your plate, finer works better in a sandwich. I tend to go for the middle ground.
The other ingredients you’ll need are:
- SALT. Not just for seasoning, this is an important part of the preserving process. Salt draws excess water from the vegetables which would otherwise dilute the vinegar. And it’s vinegar that allows the pickle to keep for such a long time. Ordinary table salt is all you need.
- VINEGAR. A mild tasting vinegar such as cider, rice, or white wine vinegar is best. As I use a lot of vinegar for preserving, I buy large containers of white distilled vinegar which are very economical. But whatever vinegar you use, check the acidity level stated on the label: it needs to be 5% minimum for pickling.
- SPICES. As well as the traditional mustard powder and turmeric, I include whole mustard seeds (mine happen to be black, but brown or yellow are fine too), plus coriander and cumin seeds lightly crushed in a pestle and mortar. If you want some heat, try adding chilli or Aleppo pepper flakes too.

- SUGAR & HONEY. Most modern Piccalillis temper the spices and vinegar with sweetness. Ordinary white sugar is fine, although I’ve followed the River Cottage idea of including a little honey for a more flavour complexity. Replace the honey with sugar if you like. Want a less sweet taste? You can reduce the total sweetener by 25 – 40 grams without affecting the pickle’s keeping qualities.
- CORNFLOUR. This isn’t found in old recipes, but cornflour (corn starch in the US) is needed to create the thick, smooth yellow sauce that cloaks the vegetables in the familiar Piccalilli. For a thicker sauce, you can add an extra 10 grams of cornflour to the amount in the recipe card.

EASY HOMEMADE PICCALILLI
The first step is to salt your prepared vegetables for 24 hours. All you do is put the chopped, washed and drained vegetables in a large bowl and stir in 50 grams of salt. Cover (I use a big plate) and put in the fridge.
The next day, you’ll see that the salt has drawn water from the vegetables and is now sitting at the bottom of the bowl. Some vegetables contain more water than others, so you might see a lot or a little depending on which varieties you’ve used.

At this stage the vegetables will be very salty. So tip into a colander or sieve and rinse really well under running cold water. Eat a piece and if it’s still unpleasantly salty keep rinsing. Do this as many times as needed until the veg seems edible, albeit still with some salt flavour. Then leave to drain.
I like a very crunchy Piccalilli, so don’t cook the vegetables. If you prefer it a little softer you can simmer them for 2 – 3 minutes before draining.
PREPARING YOUR JARS
Believe it or not, there’s now not a lot left to do in making homemade Piccallili. The final steps go pretty quickly, so you should prepare your jars and lids at this point.
Metal lids should be plastic-lined so the vinegar doesn’t corrode them. Most jars with lids you buy for preserving will meet this requirement. So will recycled jars that held shop-bought pickles, olives etc. which is what I tend to use.
Jars and their lids need to be scrupulously clean. Give them a good wash in hot, soapy water, then rinse and leave to drain.
For food safety reasons and a long shelf-life, the pickle must be potted into hot jars. I put them and the lids on a baking tray in a low oven to completely dry, heat up, and kill off any lurking bugs. I turn off the oven once the jars are hot, but leave them inside until I’m ready to pot up.
MAKE THE PICCALILLI SAUCE
The distinctive yellow sauce of this pickle is made by first stirring together the spices and cornflour. Into this, we add a little of the vinegar and whisk to a smooth paste. The rest of the vinegar then goes into a big saucepan along with the sugar and honey. While this comes to a boil, stir it to dissolve the sweeteners.

Now we take a ladleful of the hot, sweet vinegar and whisk it into the spice paste. This is then stirred into the pan and the contents brought back up to the boil. As it boils, stir all the time as it will thicken quickly. Allow it to bubble away for 4 minutes to cook the rawness from the spices.

Finally, tip in the drained vegetables and let them simmer for just 1 minute.

Your homemade Piccalilli is now ready to pot up. Wasn’t that easier than you thought?
POTTING UP & STORING
Ladle the hot pickle into the hot jars, filling up to the base of the neck. Protecting your hands with a cloth, screw on the lids. You don’t need to screw them completely tight at this stage – it’s much easier when they’ve cooled a bit. You should also find that once the jars are completely cold then the lids, if you press the top, no longer spring back. When they don’t pop back up, you know you’ve an airtight seal. If the jars aren’t airtight, then I tell you what to do in the Recipe Notes at the end.
You can now label your jars and put in a cool dark place to mature. A minimum of 4 weeks is recommended and a kitchen cupboard away from the oven or a radiator is usually fine. If you’ve followed all the tips, they should keep and continue to mature for at least a year. Once opened and no longer airtight, you should keep the jar in the fridge and use within a couple of weeks.
EASY & DELICIOUS PICCALILLI
I think it’s no wonder that this simple pickle has been a favourite in Britain for a few hundred years. Easy to make and adaptable to whatever vegetables you have, it’s so worthwhile making whether you grow your own or just want to make the most of seasonal vegetables in shops, veg boxes, and at street markets.
Add to that wonderful tangy, spicy and sweet flavour, crunchy texture, and Piccalilli is a great addition to your store cupboard. Perfect with cheeses, cold meats, salads and pork pies, it can turn a humble ham or cheese sandwich into something rather special.
HAVE YOU MADE THIS PICCALILLI? LEAVE A COMMENT, RATE IT, & DON’T FORGET TO TELL ME WHICH VEGETABLES YOU INCLUDED.

Piccalilli
A traditional British pickle of mixed vegetables in a thick, tangy sauce flavoured with mustard and turmeric. So easy to make at home, Piccalilli makes a great addition to a ploughman's lunch, eaten alongside pork pie, ham, cheeses, salads, or in a sandwich.
You'll need 5 medium sized jars. The inside of the lids must be plastic coated so the vinegar in the Piccalilli doesn't corrode the metal. Most preserving jars will have these, as will recycled jars from bought pickles, olives etc.
Ingredients
- 1 kg fresh mixed vegetables (weight after preparing) e.g. cauliflower, onions or shallots, green beans, runner beans, courgette, peppers, carrot, celery, nasturtium pods.
- 50 g salt
- 30 g cornflour for a thicker sauce, add an extra 10g
- 15 g whole mustard seeds brown, black or yellow
- 10 g mustard powder
- 10 g ground turmeric
- 1 tsp coriander seeds
- 1 tsp cumin seeds
- 600 ml mild vinegar with acidity 5% minimum e.g. distilled, white wine, cider, rice vinegar
- 175 g sugar reduce by 25 - 40 g for a less sweet piccalilli
- 50 g honey can be replaced with more sugar
Instructions
-
Salt the vegetables to remove excess water and firm them.
Skin, top and tail or otherwise prepare the vegetables then wash them.
Cut into similar sized pieces, small or medium depending on how fine or chunky you want the piccalilli to be.
Put into a large bowl, add the salt and stir thoroughly to coat all the vegetables.
Cover and leave in the fridge for 24 hours.
-
Rinse and drain the vegetables.
Tip the vegetables into a colander and rinse very well under cold running water. It's important to do this thoroughly or the piccalilli will be too salty. Taste a piece of veg and continue rinsing if it still seems very salty.
Drain well then set aside, still in the colander.
Tip: for a softer rather than crunchy pickle, you can simmer the vegetables for 2 - 3 minutes before leaving to drain.
-
Wash and sterilize jars.
Wash the jars and lids in hot soapy water, rinse, and drain.
Put them on a baking tray in the oven at its lowest setting.
Turn off the oven when the jars and lids are hot but leave them inside until you're ready to pot the piccalilli. If they cool before the piccalilli is ready, switch the oven on again.
-
Make the spice paste.
Stir together the cornflour, whole mustard seeds, mustard powder, and turmeric in a medium sized heatproof bowl.
Crush the coriander and cumin seeds in a pestle and mortar (or use a rolling pin) and stir these into the bowl.
Pour a little of the measured vinegar into the bowl and whisk to make a smooth paste.
-
Make the sauce.
Put the remaining vinegar in a large saucepan over moderately high heat and add the sugar and honey.
Bring to a boil, stirring to dissolve the sugar and honey.
Remove the pan from the heat and transfer a small ladleful of the hot vinegar into the spice paste. Whisk to combine.
Tip the contents of the bowl into the saucepan, put back on the heat, stirring well as it thickens and comes back to a boil.
Boil for 4 minutes.
-
Add the vegetables and pack in jars.
Stir the drained vegetables into the sauce, bring back to the boil then simmer for 1 minute.
Take off the heat and pour the hot piccalilli into the hot jars.
Protecting your hands with a cloth, screw on the lids and leave to cool. When the jars are cooler, it should be possible to tighten the lids a little more.
-
Once the jars are completely cold press down on the middle of the lids. If they don't spring back with a popping sound then you have an airtight seal.
Label the jars and store in a cool, dark, dry place for 4 - 6 weeks before using.
Don't have an airtight seal? See Recipe Notes below for what to do.
Unopened jars should keep for a year. Once open store in the fridge and use within 2 - 3 weeks.
Recipe Notes
WHAT TO DO IF JARS OF PICCALILLI AREN'T AIRTIGHT
If your jars do not have an airtight seal the piccalilli cannot be stored long term.
The most likely cause is that the piccalilli and/or the jars weren’t hot when you potted up. Alternatively, the jars or lids could be faulty. You have two options.
1) Store in the fridge and use within 2 - 3 weeks.
OR
2) Remove the piccalilli from the jars and bring it back up to a boil. Wash and sterilize the jars and lids as before. Replace with new ones if damaged. Make sure you pot up while the piccalilli and jars are hot. If you still don’t have an airtight seal once the jars are cold, then store in the fridge and use as 1) above.
Recipe adapted from The River Cottage Preserves Handbook.
RELATED RECIPES


I can’t rate it yet because I’m not all the way through it. Rinsing the salt from the vegetables is taking forever, and I mean forever. I’ve had water running over them, tossing with a rubber scraper, and tasting every so often. It’s been at least 15 minutes and they’re still too salty for me to want to proceed. I used the right proportions, weighed with a scale, and left them in the fridge for 24 hours. Veggie mix listed by proportion is cauliflower, patty-pan squash, white onion, green beans, and carrots, chopped fairly small. Next time I think I’d use half the salt.
If you’re positive you’ve used the correct amount of salt I’m surprised the veg tastes very salty after 15 min rinsing – although of course tastes naturally vary and what is ‘too salty’ for one person won’t be for another.
Salt is an important part of the preserving process so reducing it isn’t advised. While the raw, unpickled veg may be salty, you’ll find that once the rest of the ingredients are added (almost another kilo) the whole batch will taste considerably less salty.
As you’ve got this far, I hope you continue with the recipe and let me know how it goes.