Now that you are familiar with creating an order type, the next most important piece of configuration is the number range. Without the number range, your order type is pretty much useless. So in this lesson I’m going to over the transaction OION, which the service order numbers range in configuration.
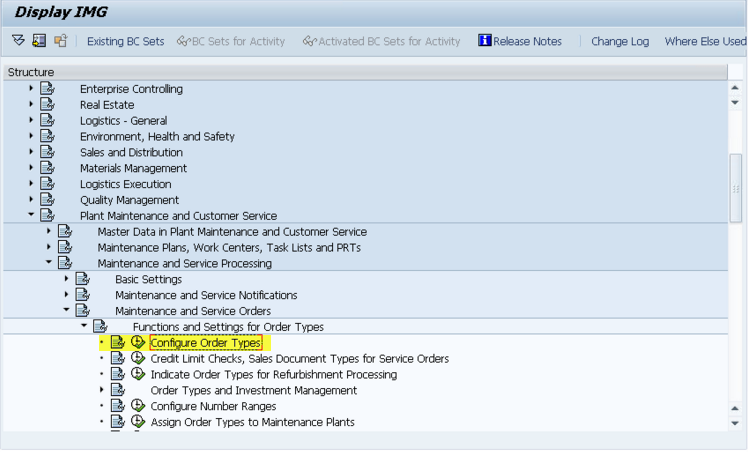
IMG->Plant Maintenance and Customer Service->Maintenance and Service Processing->Maintenance and Service Orders->Functions and Settings for Order Types->Configure Number Ranges
Now once you enter the transaction, there are several key areas to visit. Since I’m a fan of going backwards in configuration, why change tradition 🙂 The first thing I recommend is pressing the mountain button (Overview). This will show you what number ranges are assigned to each group. It’s rare that you will create a new group or a new number range, but if you need it, have at it. This will show what’s been used where.
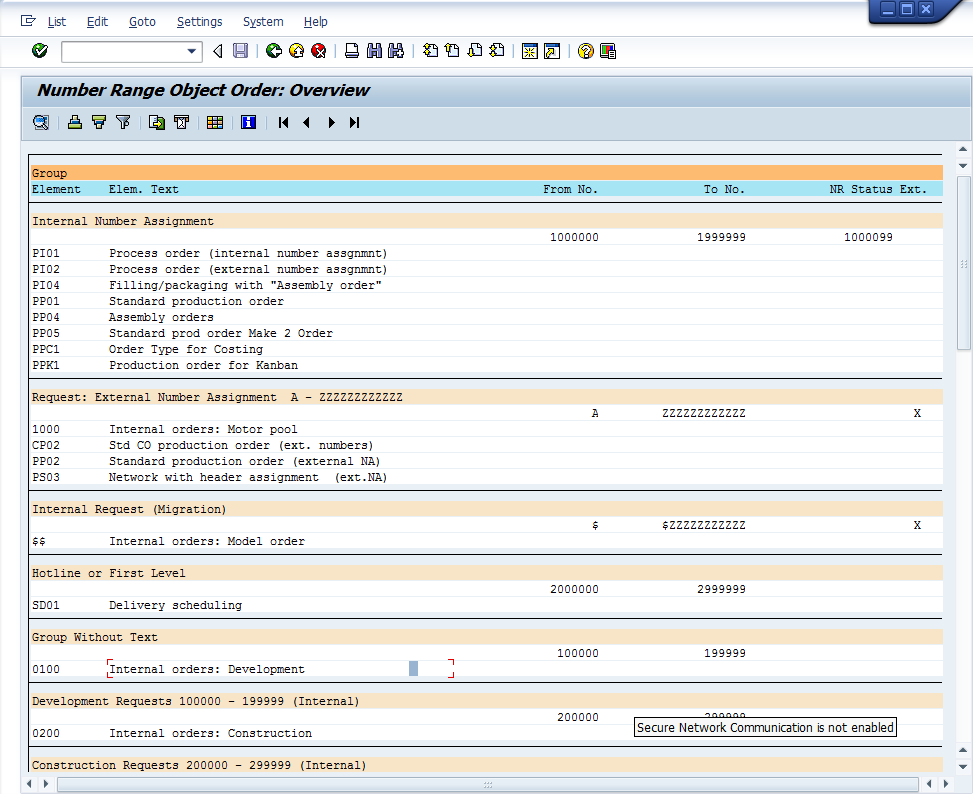
For example, the standard service orders get connected to Modules. If you didn’t know that, you could quickly find out here because you can see that the standard SM01, SM02 & SM03 along with the PM and QM order types are all part of this number range.
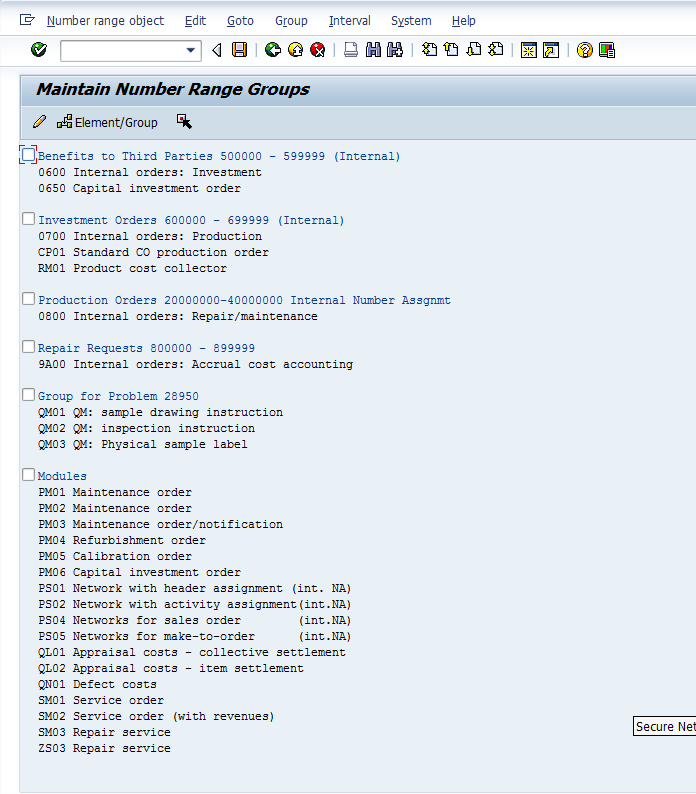
Now that you know what range you’d like to assign your service order to, you come into the maintain groups.
If you scroll all the way to the bottom, you will find any order types that haven’t been assigned to a number range. Take special note, even if you copy from an existing service order type, the number range is NOT assigned to the order type. This must occur every time (and in every system, since transporting a number range is usually a big no-no, unless it’s a new implementation with no data in it).
So in that case, find your order type. Click on it, and press the select element button  . Then scroll up until you find the group you want to assign it to. Check the box in front of the group name and press the Assign Element/Group button
  and save.
Now, in the event you need a new group, you can use the menu group–>insert. But, make sure the number range exists before you do this (since it will be required to create the new group).
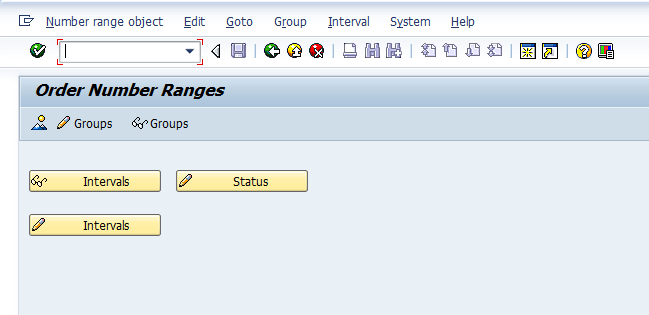
So for giggles, here’s the number range screen if you haven’t seen it before:
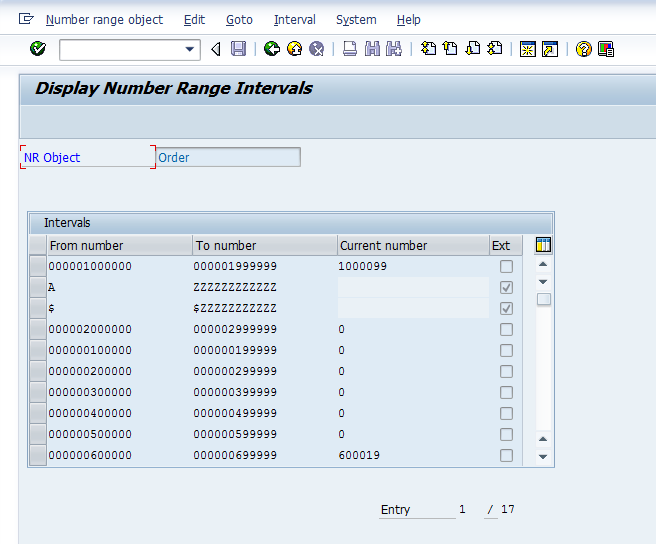
You would just need to go into edit interval to create a new number range interval. Remember, it can’t overlap with any existing ranges, so in this screen, it could be challenging since there are so many different number ranges already. Regardless, this is all there is to setting the number range for your service order.
Thanks for reading,