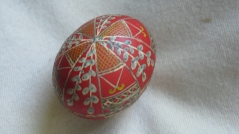
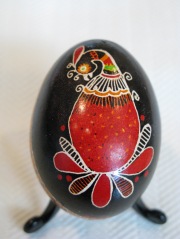
It’s time to start decorating Ukrainian Easter eggs!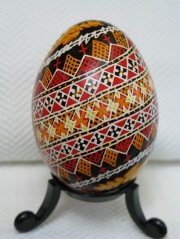
With Easter just over two weeks away, an early start ensures that you will have plenty of time to get your supplies together and time to think about what designs you want to create.
Ukrainian Easter egg decorating has been handed down through the generations. Over 2000 years ago, egg decorating held powerful beliefs which included the promise of Spring, the end of cold, wet winter, new hope, prosperity and the rebirth of plants and animals.
In the Christian faith, Easter eggs symbolize the Resurrection and the promise of eternal life. Legend has it that as long as pysanky are decorated, goodness will triumph over evil throughout the world.
I started decorating eggs with my mom when I was only 2 years old. As I reflect back I recall looking forward to getting out the kistkas and the beeswax and making our own egg that we could add to the family Easter basket. On Easter Sunday, the pysanky were exchanged and given as gifts to the priest and to our friends.
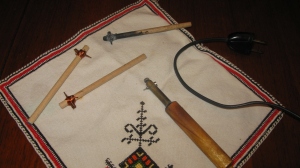
Mom made the kistkas out of a branch from a willow tree and the little round metal hook from an old calendar. She’d roll the metal up to form a funnel and then tie it to the small twig with a piece of fine wire from a grocery store twist tie. Today, kistkas are available to purchase and they are not made from a tree twig!
To make the pysanky in your own home, ensure that you have a quiet, well-lit place to set up your materials.
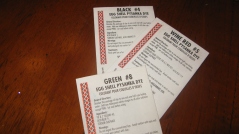
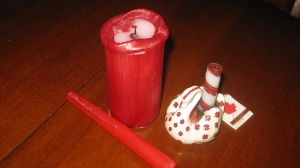
Supplies include raw, clean white eggs; writing stylus (kistka); beeswax; pint jars containing various colours of dyes; vinegar, candles, drying rack and varnish.
To begin, always select an egg and inspect it for any hairline cracks or bumps on the shell. Give the egg a rinse with a bit of white vinegar and water. Pat gently to dry, but do not rub.
Prepare your dyes ahead of time according to the directions on the packages. I reuse my dyes and they can be kept for several years.
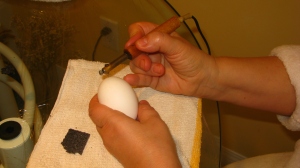
Some people begin their designs by drawing light lines with a pencil. I prefer to not use pencil and as with everything, with time and practise, I am becoming more adept at using only the kistka. Hold the egg in one hand and rotate the egg as you draw your design. The beeswax will melt in the funnel of the kistka and come out through the tiny hole. Do not worry if too much wax drips where you do not want it. Just incorporate the drip into your design.
I use an electric kistka so I do not need to stop and heat up the kistka as I work. Add a small amount of beeswax to the funnel. If you use a candle, heat only the head in the flame for a count of 5 seconds. It may smoke and can catch on fire. If the kistka catches on fire, do not panic; just blow out gently.
As you draw, the beeswax will look dark. Wherever you place the wax, the dye will not adhere. It’s like a crayon resist. The lines you draw on the white egg will stay white on the finished egg.
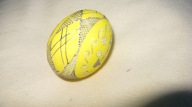
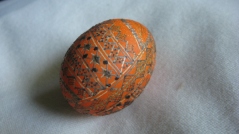
Always start with the lightest colour and progress to the darkest i.e. yellow, orange, red, green, blue and black. When ready, dip the egg into the yellow dye. Draw once again on the egg and everything under the wax this time will stay yellow. Continue decorating with the kistka and then dip into the red dye.
The last colour I use is usually a blue or a black. Again there are many variations and it all depends on your own personal preference.
Each year for the past 25 years, I have set up egg decorating stations in various school classrooms and taught children as young as 5 years to create Ukrainian egg designs. It takes a bit of pre-planning, but with the classroom teacher’s assistance, every child takes home a colourful, “authentic” Ukrainian egg.
When the parents see the eggs their children made, they often ask where to purchase the supplies so that their family can make more at home. I have several in-store as well as on-line sources from where I purchase my supplies. Please contact me if you need this information.
© 2013
4 Comments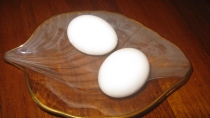

Hi Petrosha,
Thanks for your info. I would like to order a lightweight electric kistka (because I have small hands), do you know where I can order? Any brand to suggest? What kinds of tips you mostly prefer?
In case I need to order some other related supplies, do you have some websites to suggest?
Thanks.
LikeLike
Hi there,
Here are a couple of online suppliers.
http://www.ukrainianbookstore.com
http://www.pysanky.ca
I use a variety of tips depending on the project. Use the fine ones for detail;larger tips for fill in.
Hope this helps,
Good luck,
Petrosha
LikeLike
Hello, I have been having trouble getting the dye to stick well and consistently to the eggs. I get them from the farmer so there cannot be a problem with chemicals. Any ideas? BTW: Your eggs are lovely!
LikeLike
Thank you for checking out my blog. Be sure you are using dyes specifically for dying eggs. There are many Ukrainian supply stores around. Not sure of your location so go on the internet to check “where to buy dye for decorating Ukrainian eggs (Pysanky)”. Also you always need to wash the eggs in a vinegar bath prior to writing on the eggs. Just pour some white vinegar into a bowl, add the egg and then dry with a soft cloth. Do not rub the egg dry. If you have any oil, lotion etc. on your hands, this too many affect how the dye adheres to the eggs. Good luck.
LikeLike