Travel PhooD: Istanbul – Not a Turkey in Sight

Travel PhooD: Istanbul – Not a Turkey in Sight

Ab in den Urlaub!  Florian and I headed off to Istanbul to attend the wedding of two of our good friends, Nazende and Emre.  Thanks to a five-hour layover in Detroit in June 2011, I had $600 to blow on a flight anywhere, courtesy of Delta, and what better way to spend it than to pay for our flight to the wedding of our good friends Nazende and Emre!  We’d never been to Turkey before, so it promised to be quite the exotic adventure…

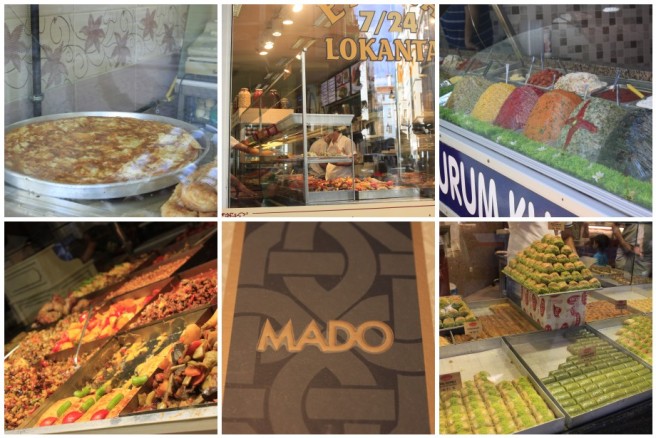
First thing we noticed when we landed in Istanbul was that it was boiling hot and humid like crazy, even at 1am in the morning!  After a well-deserved sleep, a hearty Turkish breakfast with honey, cheese, olives, bread, and copious amounts of apple tea, we hit the obligatory tourist spots in Sultanahmet: Hagia Sophia, Blue Mosque, the Basilica Cistern, Grand Bazaar, and Egyptian Bazaar.  A quick break for lunch found us sitting next to a giant plastic bucket of sliced bread and a somewhat pricey but rather tasty kebap platter from some place near one of the back exits of the Grand Bazaar (it was hard to tell where we were…).  The owner was a Dortmund fan and we had a chat about the Bundesliga with him over lunch.

istanbul1
This appeals greatly to the tourist in me.

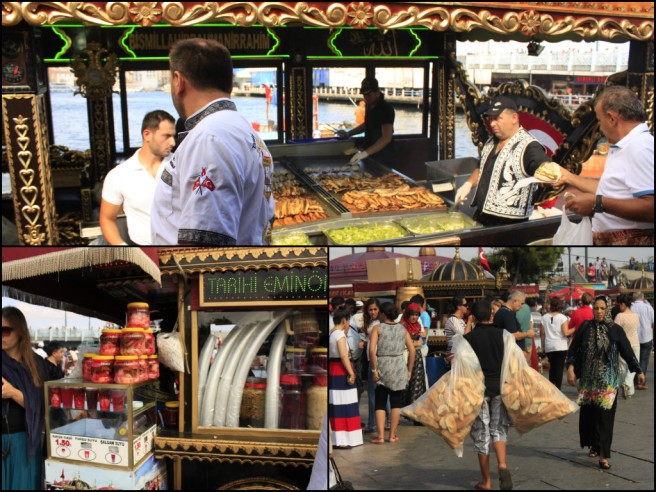
A few hours, lots of calories burned on our way to Süleymaniye Mosque and a 5€ shoe shine later, we stopped at the harbor of Eminönü, which looks out over the Golden Horn.  What a great place to be on a hot day!  A nice cool breeze, the sun glistening off the top of the waves, and the smell of fresh and fried fish saturating the air is just indescribable.  The romantic in me was reminded of the movie “Im Juli”.  And of course, we had the mandatory balık ekmek (balık = fish, ekmek = bread).

istanbul2
We’re going to need a lot of buns, son.

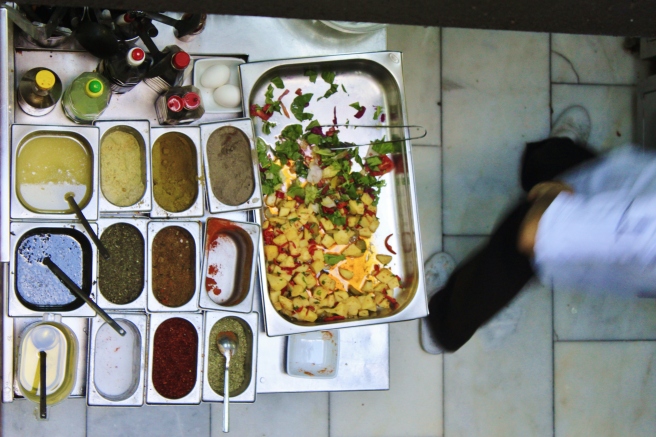
The wedding took place at a lovely hotel in on the outskirts of Istanbul so we spent the night before in Sarıyer after Bosphorus day-trip cruise to Anadolu Kavağı.  There were so many mouthwatering food stands – kumpir (baked potatoes overloaded with olives, corn, sausages, and other goodies) in Ortaköy, nohutlu pilav (chickpeas on rice) – and also lokantasi and pide and cheese pie, oh my!  In Sarıyer, we ordered some random delicious fish (between the waiter’s marginal English and our non-existent Turkish, we worked something out) with a very interesting potato salad.  We even managed to find time for a midnight baklava tasting session courtesy of Mado in our hotel room…

istanbul 3
Food to go

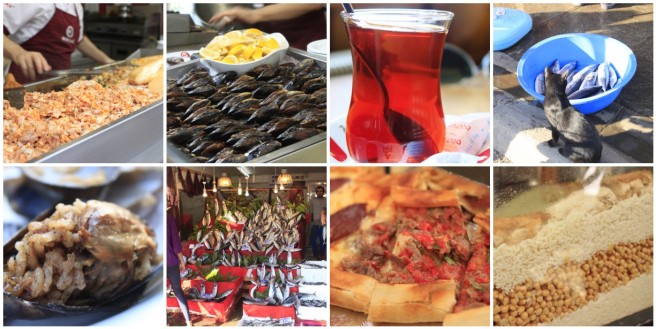
On the way back to the city, we took the opportunity to stop by Şile.  We’d heard that Istanbulers like to come out here to escape the city, so we took a day out of our crazy schedule to unwind on the shores of the Black Sea.  Lots of fresh seafood here, right off the boat!

istanbul4
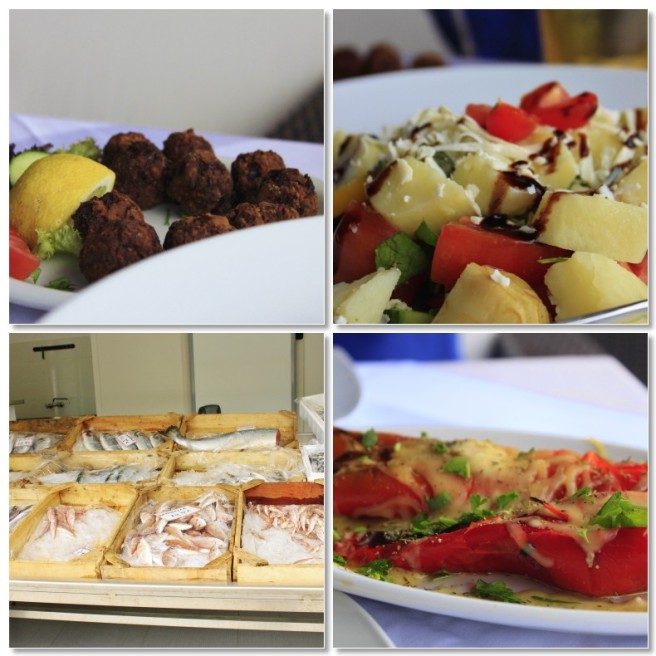
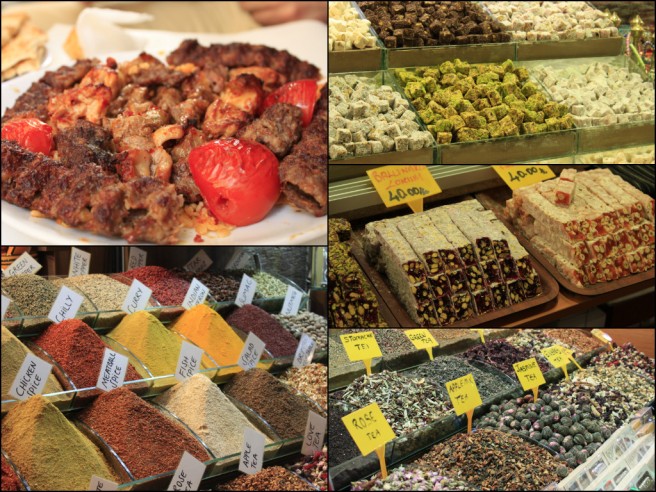
Top: Kokoreç, midye dolması, apple tea, cat with fish
Bottom: Filling of midye dolması, fresh fish in Şile, pide, nohutlu pilav

On our last night in Istanbul, we met up with Gulsah, Flo’s soon-to-be roommate in Marburg (small world!).  She took us around Karaköy and then took us by ferry to Karıköy on the Asian side.  It’s a completely different world out there – a lot of alternative bars, shops selling a random assortment of clothes and trinkets, and a plethora of street food stands.  Florian and I finally satisfied our kokoreç curiosity, a toasted baguette loaded with spiced fried pork intestines.  Glad Flo didn’t know that beforehand…Gulsah also introduced us to midye dolması, fried mussels in rice with onions and other spices, all packed into two mussel shells.  You add a squeeze of lemon on top and, using one half-shell, push the whole mass into your mouth.  What an unexpectedly delicious surprise and a fantastic, handy idea!  After some bar-hopping through the back streets, we ended our night at an outdoor bar with a huge terrace and a spectacular night view over to the European side of Istanbul.

Chic restaurants in Karaköy

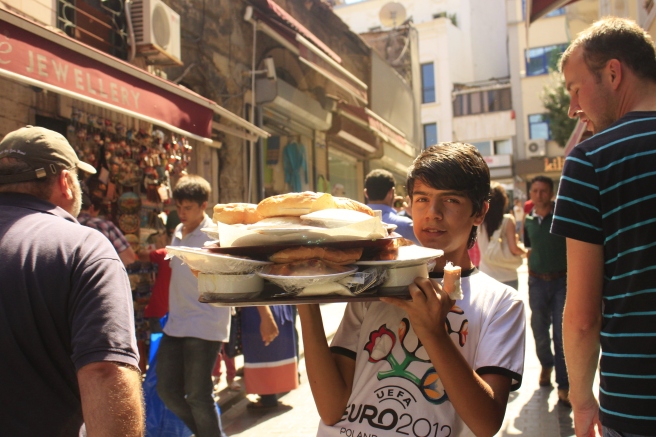
On our last morning in Istanbul, we headed back to the Grand Bazaar to pick up some souvenirs for the folks back home.  I couldn’t resist eating another nohutlu pilav and Flo had to have another pide before we left with our bags packed to the brim with spices, baklava, and apple tea…but I’m sure we’ll be back in Turkey at some point!

istanbul 6
See you next time!

Janet’s Istanbul Top 5

5. Enjoy a balık ekmek at Eminönü while watching the boats go by.   You might even get lucky and catch a glimpse of a dolphin!

4. Nohutlu pilav from anywhere – cheap, filling, delicious!  Chicken optional.

3. Midye dolması in Karaköy or Kadıköy.  Bargain with the vendor to get a fixed price for all the mussels you can eat.

2.  Winding down the evening with a beer or tea at a bar in Kadıköy.

1. Eat as much seafood as you can.  It’s ALL good.

Next on Travel PhooD: China!

Solid Phase Extraction And The Orange Bavarian Cream Connection

Doughnuts probably come into mind from the first mention of Bavarian cream. Try to go to doughnut stores (such as Krispy Kreme, Dunkin’ Donuts, Tim Horton’s) and purchase one of each kind of their custard cream-filled doughnuts (i.e. Boston cream, Long Johns, etc.) including the Bavarian cream. Chances are you will conclude that the members of this doughnut family only vary according to the type of exterior frosting because their fillings have the identical decadently sweet taste and oozingly creamy texture to the confectionary sugar-dusted Bavarian cream doughnut. So what is a Bavarian cream then?

Bavarois or Bavarian cream in English is a cold unmolded custard cream or crème anglaise that has been thickened with cornstarch and gelatin. Unfortunately, the term has become a misnomer and thus, is misused nowadays in the American kitchen. Authentic bavarian creams are less fluid because their gelatin to custard ratios are higher than that of the doughnut filling. At a semi-solid state under cold temperatures, the hydrolyzed collagen fragments in the gelatin increase the viscosity and the rigidity of the custard. Hence, try piping a true Bavarian cream into a warm empty doughnut. You will probably feel either a resistance in the flow of the Bavarian cream or no flow at all.

Since Bavarian creams contain gelatin, it is also easy to mistake them as mousse in the culinary context. Actually, the “mousse” layers in cakes are Bavarian creams because a true mousse does not have any gelatin. This dessert (bavarois) is not to be confused with creme bavaroise (or simply bavaroise) either. Although both words literally translate to Bavarian cream, the former was introduced in Germany by a French chef who was working in Bavaria (Larousse Gastronomique 1977). The latter is a hot crème anglaise and tea beverage that was invented in France to appease the demands of visiting Bavarian princes (Larousse Gastronomique, 1977). If the Bavarian cream mold is hexagonal in shape, the nationality changes to Russian and becomes a Moscovite (Larousse Gastronomique, 1977).

Much like ice cream, Bavarian cream can come in different flavors. The repertoire includes chocolate, strawberry, vanilla, mocha/coffee, almond, raspberry, apricot, peach, pear, pistachio, applesauce, champagne, lemon and cloves (a.k.a. perfect love), hazelnut, banana, orange, chestnut and even roses. For this blog entry, I will focus on Orange Bavarian Cream (from Mastering The Art of French Cooking) because one of its steps has a scientific aspect that is not found in other flavors – extraction of the orange flavor using sugar. The procedure may sound bizarrely sophisticated but it is simple and intelligent by design.

While laboratory techniques taught in organic chemistry may prove useful, obtaining orange oil/flavor through steam distillation or solvent infusion (soaking) of the orange rind/peel are both unreasonable and impossible to perform inside an ordinary kitchen for safety and toxicity reasons. Liquid nitrogen can be used but this method demands high costs and accessibility issues – pretty impractical for isolation of orange oil at home. Dry ice will work as a cheaper substitute but this requires high pressure and high temperature such as being done in a pressure cooker and there is the potential of the oil imparting a metallic flavor and taste. Decoction or boiling the orange peel in milk is a feasible method but the loss of orange flavor through vaporization from boiling cannot be controlled.

I was impressed with Julia’s instruction of rubbing the orange peel with sugar until the sugar is “impregnated with orange oil”. For the first time, I get to perform a kitchen method that employs solid phase extraction of an essential oil or flavor. (Well ok, Julia said preferred rubbing with sugar lumps, followed by grating the orange peel into the mashed sugar. I modified her instruction by using teaspoons of granulated sugar out of practical purposes. However, you will be able to skip the grating step.) By taking place under room temperature, sugar scrubbing is a suitable method for the extraction of the flavor in the kitchen. What is also fascinating is that I searched the Web of Science and I did not find any significant search hits on a purely solid sucrose being a solvent for extraction. (Note: I might have made a mistake in my search parameters. If I do, feel free to point it out.)

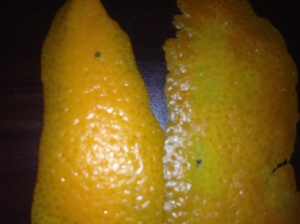
The photo above shows you the difference between orange peels before (left) and after (right) being scrubbed with sugar. Pardon my photography skills with an iPhone but you may notice yellow regions on the right orange peel. Before rubbing with sugar, the peel does not only have the orange color but the surface also feels wrinkled. When the oil is transferred into the sugar, the surface of the peel loses the orange color and thins out to a smoother layer. This is somewhat similar to skin exfoliation. The white sugar, on the other hand, will turn yellow (from the carotene of the orange peel), smell citrus (from the limonene found in oranges) and appear syrupy.

So how does this state-of-the-art method work? I suspect a domino effect of sugar-scrubbing. Rubbing introduces friction into the orange peel, the friction produces heat and the cells burst (cell lysis) from the heat to release the oil. Another possible reason behind this extraction is the accumulation of sugar in the orange peel causing the cell lysis. (Of course, I could be wrong with my speculations that these guesses have to be proven and tested.)

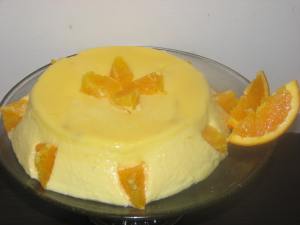
After all this science and linguistic talk, you are probably hungry and curious on how my Orange Bavarian Cream turned out. Though the dessert looked jiggly, the dessert was decadently creamy and smooth. Once I had a sample inside my mouth, I felt the softness that the custard was melting inside my mouth. The fluffiness of the custard made the dining experience felt like eating a cloud. The flavor was not overpowering to the sweet taste of the custard even with the combination of the orange juice, orange liqueur and orange oil. I died and went to heaven from having this bavarois and I can’t wait to do it all over again.

Orange Bavarian Cream (Taken from “Mastering The Art Of French Cooking”)

Orange Flavoring
2 large brightly colored oranges
2 large sugar lumps (2-3 teaspoons of granulated sugar)
1 1/2 tablespoons gelatin powder

Custard Sauce
7 egg yolks
1 cup granulated sugar
2 teaspoons cornstarch
1 1/2 cups boiling milk

Egg Whites
5 egg whites
1 pinch of salt
1 tablesppon granulated sugar
Ice bath

Orange Flavored Whipped Cream
1/2 cup whipping cream
2 tablespoons orange liqueur

Garnish (optional)
Peeled orange segments

1. Wash and dry the oranges. Rub the sugar over the skin of the orange. If lumps of sugar are being used, mash the sugar lumps and zest the orange peel into the sugar. If granulated sugar is being used, the oil will definitely get into your hands. To solve this problem, scrape the oil from your hands with a spatula.
2. Squeeze the orange juice and sprinkle gelatin over the orange juice.
3. Beat the egg yolks into the orange flavored sugar. Gradually add the granulated sugar while beating until the mixture is pale yellow. Beat in the cornstarch.
4. Pour the milk into the beaten egg yolk mixture in a thin stream of droplets.
5. Return the resulting custard sauce into the saucepan. Thicken the mixture over moderate heat. Make sure to stir with a spoon or a spatula. (Tip: To find out that the custard is thick, coat the spoon or spatula with the custard. If you run your finger on the custard sauce and the coating does not fill the line that you made, then the custard sauce is thick.) Do not overheat or overcook otherwise, the egg yolks will curdle and will separate from the milk.
5. Dissolve the orange juice-gelatin mixture into the custard sauce immediately after removing the saucepan from the heat. Pour into a mixing bowl.
6. Beat the egg whites, salt and sugar until stiff peaks are formed. Fold the egg whites into the cooling custard.
7. Transfer the bowl to the ice bath. Fold the mixture frequently to prevent separation of the custard from the egg whites. When the mixture is cold, set aside.
8. Place a mixing bowl containing the whipped cream under ice bath. Beat the cream until volume doubles.
9. Fold the cream and orange liqueur into the custard.
10. Transfer the entire Bavarian cream into mold. Cover with wax paper and chill the mold for 3-4 hours or overnight.
11. To unmold, dip the container into hot water for one second. Run a long thin knife around the edges of the cream. Reverse on the serving platter.
12. Garnish with orange segments.

The Coulibiac Project

When you go to SWANKY dinner parties or restaurants, the stereotyped servings of salmon are either slices, fillets, slabs, or the whole fish itself. If you prefer the chewy slices, salmon is prepared typically by smoking or salt-cured or simply as the raw sashimi or carpaccio. For the (usual) dry, overcooked and flaky salmon, the fillet is either served grilled, broiled, braised, baked, roasted, seared or sautéed. For events that call for a large gathering, the slab or the whole salmon is either baked, poached, roasted, broiled or grilled.

However, appreciation of salmon dishes should not be boring, lest we forget that the salmon is an adventurous and diadromous fish. Adult salmon have to brave through waterfalls and predators to return to their freshwater spawning grounds before they turn pink and die. Salmon smolts have to survive natural enemies before they can reach and spend their adulthood in the sea, which also does not guarantee their return to spawning grounds. If the salmon can be fearless in their life cycle, then why not take a risk in preparing an unknown salmon dish? No, I am not talking about using a dishwasher to cook your salmon (although you could) but rather I am talking about coulibiac. Basically, this is a pot pie filled with alternating layers of rice, salmon, diced mushrooms and cream.

Salmon is not a traditional French seafood ingredient especially when you think about fish mousse, quenelles, fish stews and pâtés. Instead, salmon is used in Nordic and Russian cuisine. Coulibiac is actually a Russian dish (Cyrillic: кулебя́ка; Pronunciation: kulebyáka) with French roots because the Russian nobility (in St. Petersburg), being inspired with the culture from Western Europe, imported French chefs in the late 17th century to innovate new dishes. The French chef, Auguste Escoffier, then brought the dish from Russia to France during the early 20th century. This was also featured in the second season of Julia Child’s celebrated show, The French Chef. Since I do not have the DVD nor video files of the series, I am clueless on whether she learned this in Le Cordon Bleu or she got the recipe from Escoffier’s book Le Guide Culinaire. I got to try her recipe because I bought her “The French Chef Cookbook”.

Based from my own experience, the coulibiac took seven hours to complete. This includes kneading and preparing the pâte demi-feuilletée a.k.a. the mock puff pastry case. I know seven hours sounds horrific but what I can I say? I am a culinary purist who prefers to start everything from scratch. But fear not and let us learn from the salmon life cycle! After all that long grueling work, the dish is all worth my time. One, the dish is heavy, rich and flavorful that taking a half-inch slice can easily make me full. Two, since I eat coulibiac alone, it takes AT LEAST 6 meals to finish the entire thing, which saved me a lot of time cooking for the following few days. Three, coulibiac is such a handsome dish that it makes a good addition to a dinner party. Leaves are the typical decorations but you can be creative with your design. Four, this is a new and elegant way of preparing and enjoying salmon that I am certain you won’t get bored with this project.

Before I divulge the recipe for coulibiac which includes the pâte demi-feuilletée. Here are my tips/recommendations:
– If you are not a culinary purist, you can “cheat” by buying a puff pastry dough from a grocery store. Then, prepare the filling by yourself. This will save you five hours in the kitchen. However, the bottlenecks of a store-bought puff pastry are less flavor (because it is completely made with vegetable shortening rather than butter), less puff, and more expensive than the homemade puff pastry.
– If you are a culinary purist, the trick to make the perfect pâte demi-feuilletée is to roll the dough immediately after a two-hour chilling in the fridge. My educated guess is that this has something to do with the phase transition of butter. I think the fat in the butter at this stage is at the liquid crystal phase. (I will discuss this further when I write about puff pastries and tart doughs.)
– When you cook the salmon filling, you might want to sear the fresh salmon fillet for 1-2 minutes on both sides and cut into 1-inch cubes. After all, the salmon will be heated again. Contrary to the mainstream belief, a flaky fillet is the worst thing that can happen when you are cooking fish. The juicier the fish, the better it will taste and the more flavor it will have. Otherwise, you may also use leftover salmon.
– Once the pâte demi-feuilletée is sealed, it is IMPERATIVE that you have an opening at the top of the pastry. You may insert METAL pastry tips or foil funnel to introduce holes. The holes prevent your coulibiac from exploding caused by the build-up of steam and the expansion of the cream sauce.
– Before baking, the pastry case can be brushed with egg glazes. Egg glaze (depending on how you prepare them) gives a colorful and shiny appearance to the surface of the pastry.

Coulibiac (taken from “The French Chef” by Julia Child)

Ingredients:
Mock Puff Pastry Bottom Case (Interior dimensions: 13-14 inches long X 3 inches wide X 2 inches deep)
Mock Puff Pastry Cover
4 1/2 cups braised rice
6 cups salmon and mushroom filling
2 cups well-flavored cream sauce (salmon juice and heavy cream)
Salmon juices (optional)
Egg glaze (1 egg beaten with 1 teaspoon water)

1. Preheat oven to 220°C (425°F).
2. Place the pastry case on a lightly buttered baking sheet.
3. Layer the bottom with a third of the braised rice. Layer with half of the salmon and mushroom filling. Spread with half of the cream sauce.
4. Repeat again with half of the remaining braised rice, half of the salmon and mushroom filling and half of the cream. Top with the rest of the braised rice. If the filling overflows the case, mound the rice layer into a dome.
5. Roll the mock puff pastry cover. The dimensions should be 1 1/2 inches longer and wider than the bottom case.
6. Paint all sides of the case with egg wash. Lay the mock puff pastry cover over the pastry case and seal firmly.
7. Mold the leftover dough from puff pastry cover into garnishes. Decorate the cover and paint with egg wash. Draw crosshatch markings around the sides of the cover using the tines of a fork.
8. Poke two holes in the cover using pastry tips. If the tips are metallic, leave the tips in the cover. If the tips are plastic, replace with with aluminum foil that has been shaped into a funnel.
9. Bake in the middle of the preheated oven for 45-60 minutes, or until the pastry is nicely browned and you hear bubbling sounds from the funnel-shaped openings.
10. Serve a slice with butter, lemon butter, light cream or mock-Hollandaise (bâtarde) sauce. (See the last photo.)

Pâte Demi-feuilletée (Mock Puff Pastry Dough)
Ingredients:
4 cups all-purpose flour (leveled and sifted)
1 3/4 sticks chilled butter
4 tablespoons chilled vegetable shortening
2 teaspoon salt, dissolved in 3/4 cup cold water
Loaf pan (Dimensions: 13-14 inches long X 3 inches wide)
1 or more tablespoon cold water (optional)

1. Blend the chilled butter, shortening and the flour in a large mixing bowl, until the mixture looks and feels coarse.
2. Add the cold water. Press the dough together using the cupped fingers of one hand.
3. Roll the dough into a ball. Place on a board. Push the dough away from you using the heel of your hand into a six-inch smear.
4. Press into a bowl. Wrap in waxed paper. Refrigerate for two hours.
5. Once chilling process is over, preheat oven to 220°C (425°F).
6. Mock Puff Pastry Bottom Case. Roll two thirds of the dough into a 1/8 inch thick rectangle. Butter outside of loaf pan. Turn the loaf pan upside down and fit the dough over it. Trim dough evenly all around and prick all over with a fork. Bake inside the oven for 6-8 minutes. Cool and unmold.
7. Mock Puff Pastry Cover. Roll the dough into a rectangle. Spread bottom half with a tablespoon of butter and fold over top half. Repeat this step with another tablespoon of butter. Cover with wax paper and chill.

Braised Rice
Ingredients:
1 1/2 dry, raw, plain rice
2 tablespoons butter
3 cups fish or chicken bouillon
2 tablespoons minced onions
Salt
White Pepper

1. Sauté the onions in butter for 5 minutes. Do not allow them to brown.
2. Stir in rice until the grains look translucent.
3. Add the bouillon and bring to a boil. Stir once.
4. Cover and bring to a simmer without stirring for 18 minutes.
5. Season with salt and pepper.

Salmon and Mushroom Filling
2 cups mushrooms, finely diced and sautéed in butter
2 tablespoons butter
1/2 cup shallots or scallions, finely minced
1/2 cup dry white vermouth
1/4 cup cognac
2 1/2 cups skinless and boneless cooked salmon (or 1 1/2 pound salmon fillet, seared and cut into cubes)
1/2 cup fresh parsley, minced
1 teaspoon oregano or tarragon
Salt
White Pepper

1. Cook the shallots or scallions in butter for 2 minutes under low to moderate heat.
2. Stir the mushrooms, vermouth and cognac. Raise the heat to medium and boil for several minutes to remove the alcohol.
3. Reduce to a simmer and add the salmon, tarragon and parsley. Cook for several minutes under low heat.
4. Season with salt and pepper to taste.
Travel PhooD: Going Greek

So it’s been a while since any of us have checked in and since I have to finish a talk for a conference next week, it’s naturally the perfect time to post about my adventures in Greece.  I was there in April this year with a friend, travelling from Athens to Naxos, Santorini, and Crete, before returning to Athens.  Expectations were relatively high to begin with – I love Mediterranean food (well, all food in general) – and we were travelling over Easter, so we were off, with open minds and empty stomachs…

Our flight landed at 2am and we had a very interesting, stray-dog laden walk to the hostel.  Not much on the food front on the first night, but the orange trees lining the streets gave off the most incredible scent.  Alas, the oranges were not for eating but rather to throw at the police…

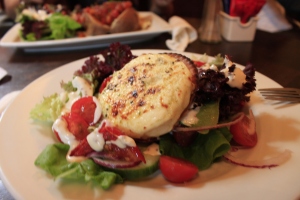
Our tour guide, whose name now escapes me – Yannis? – let us have lunch at Monastiraki.  Yes, it’s very touristy, but we were hot, hungry, and short on time.  We both had a souvlaki pita at Thanassis and I’d have to say, in retrospect, it was probably one of the best things I ate in Greece.  I had some pretty amazing food but I can still remember the juicy texture of the souvlaki after 4 months.  YUM.  Hands down, best investment of 2€ the whole day.  We couldn’t get enough of it, so we went back for dinner and had moussaka and a large Greek salad with pita and tzatziki.  Everything was fresh and fantastic, and the salad had the most generous piece of cheese I’ve ever seen on any salad.

Two days later, we boarded a late afternoon ferry for the island of Naxos.  I had pretty low expectations, I must admit – I’d never heard of it.  Now that I’m wiser, I can highly, highly, HIGHLY recommend that you visit!  What an amazing place!  We arrived shortly before midnight and people running off the ferry and whisked away into cars headed to (orthodox) Easter midnight mass.  Firecrackers everywhere!  Our driver from A1 Soula Hotel dropped us off at his church (so nice of him!) so we got to watch the festivities for a bit.  The next day was Easter Sunday, so I woke up with absolute determination that I was going to have roasted lamb for dinner.

We woke up bright and early on Easter Sunday and took a walk along the St. George Beach and in town.  Somewhere along the way, we ran into the lovely Sunni, whom we’d met the night before because we were picked up at the same time from the ferry.  After a full-day photo tour of the island, we sat down for coffee at one of the cafes along the harbor and indulged in some dessert – kadaifi, moist orange cake, and a cream horn. We later met Jeff (?) from the States and the four of us went to dinner together.  Our server was a bit standoffish, but the owner/promoter was really charming and I’d promised him earlier that we’d go back and try his roasted lamb.  Joanne and I both had it, Sunni had roasted vegetables (a-MAZ-ing), and Jeff had a large salad.  The lamb was crispy, fatty, and just…fantastic.  They even gave us four red eggs – you’re supposed to knock your egg against everyone else’s and the last person with an intact egg wins.  Sadly, I didn’t get a chance to try the local liquer, kitron.

The next morning saw us off to Santorini, where there was more souvlaki-ing at Lucky’s, along the main boulevard through Fira, ice cream waffles at Perissa beach, and a nice dinner at Mama’s House – stuffed peppers and catch of the day.  A sailing trip to the volcano took us out to Restaurant Tonia on the island of Therasia before we headed off to Crete.

The ferry ride from Santorini to Crete was by far the most horrifying boat ride I have ever been on.  It was even worse than the sometimes-sketchy ferry ride between Hong Kong and Macau, where the ferry tends to skip over the waves.  No, this was probably 100x worse.  There’s nothing like the feeling of dread when you see massive 4 m waves rolling toward your boat as you’re trying to navigate through a storm – yay, window seat!  Now, the Greeks have been sailing for millennia, so I figured they wouldn’t have tried to sail through this thing if they thought it was dangerous…but I couldn’t help feeling that there was a very real chance we could all drown in the Aegean Sea.  Needless to say, we were in no mood to eat when we arrived in Heraklion.

Our appetites returned the next day and we went out for lunch at Mouragio Maria in Rethymno, which I noticed actually has a lot of bad reviews online.  The waiter in front is really slimy, so I can relate a bit, but since it was off-season, they didn’t try to pressure us into having fish (though they did lie about the free drinks – good thing we didn’t order anything other than the one bottle of water) and let us sit there for as long as we wanted.  We had a Cretian salad, stuffed peppers, and meatballs, and the bill came out to be 40-50€, I think.  Pricey, for sure, but it was worth it for the view.  Would I go again, though?  Probably not.

We were on the overnight ferry back to Athens, which was a relatively painless night, and spent our last day in Greece eating more souvlaki at Othanassis, running into our Argentinian friends (whom we’d met by chance twice on two different islands on the trip), and having dinner at Oinomageirio to Paradosiakό in Plaka.  What an amazing end to the trip – grilled halloumi, seafood risotto and deep-fried fish with roasted garlic spread.  Highly recommend this place!

Were my expectations of Greece fulfilled?  It’s a hearty YES from me.  Friends, do yourself (and the Greeks, given the current economic situation) a favour and book your next vacation to Greece.  If you’re not dazzled by the crystal clear blue seas and friendly people, you can always occupy yourself with ouzo and wonderful food.

Next stop: Istanbul!

Thanassis: Mitropoleos 69, Monastiraki, Athens

Oinomageirio to Paradosiakό: Voulis 44A, Plaka, Athens

Lucky’s Souvlakis: Fira

Mama’s House: Main Square, Fira

Ode to Brussels sprouts

No, this is not a poem about the tiny cabbagehead. It’s a short note about this particular cruciferous veggie and how it had suffered injustice in the hands of too-eager cooks.

Brussels sprouts have been described in not so flattering terms as a detestable vegetable in terms of texture and taste, as stereotyped by kids hating the stuff more than broccoli. And this stereotype only exists in the Western side of the world, as it is very rare (or even nonexistent, as far as I know) in Asian cuisine.

Recently, this has been the case: Asian grad student (i.e., me), meet Brussels sprouts–Brussels sprouts (or in Dutch, spruiten), meet Asian grad student. Grad student goes “WTH is this tiny cabbagehead?!”

How can something so tiny and cute be so maligned in pop culture? One word: overcooking. This little one is soooooo easy to overcook.

(Courtesy of Wikipedia, because my camera died on me)

(Courtesy of Wikipedia, because my camera died on me)

This tiny veg has sinigrin, which is responsible for the disagreeable taste of overcooked sprouts (it gets degraded in high heat, splits off from its sugar molecule…and did I tell you that it has a sulfur atom or two in its structure? Hence the smell and taste).

But…its propensity to be easily overcooked is a plus for a harried grad student–this only means that it has an absurdly short cooking time, so whipping up a simple leafy side dish (or a main) is just under 8 minutes of cooking time (go past it–ugh!).

Here’s one treatment of this veggie that I did, without looking for an actual recipe. My kitchen philosophy lately is–grab whatever and go.

Simple sauteed sprouts in sesame oil
Materials
– Brussels sprouts, bases chopped, spotty/brown/hole-y outer leaves removed (if head is too big, cut in half)
– Garlic, minced (amount is variable, but I love garlic!)
– 1 Tbsp (or thereabouts) peanut oil or RBD coconut oil (or any mild, bland oil)
– Black sesame oil
– Salt and pepper, variable

Methodology
– Blanch prepared sprouts in boiling salted water for 2-3 mins. or until the heads turn bright green. Pour in a colander and cold-shock the batch with cold running water from the tap. Drain well.
– Heat peanut or coconut oil in a big frying pan or wok (medium high). Toss in minced garlic until it turns light golden brown and the garlicky smell is apparent.
– Toss in the drained sprouts. Season with salt and pepper. Stir-fry them for 2-3 minutes, or until they are lightly coated with hot oil and garlic.
– Drizzle with black sesame oil, toss and remove from heat immediately.

Discussion
Cooking time. When you do the math, the total cooking time is 6 minutes, tops. That’s little under 8 mins, after which you’re past the point of no return and the veggie turns into something hateful and a complete waste of time and resources.

Cold-shock. This is a measure to ensure that the veggie is not overcooked. Sprouts are notorious for storing heat in their compacted leaf-heads, so even though they’re drained from the blanching liquid, the heat will cook them from the inside. As you may notice, I did not score the bottom of the sprouts before blanching–damaging the veggie in that manner increases the risk of overcooking. Might as well cut the sprouts into half before blanching, so you’d get to see how the inside looks while cooking.

Peanut or coconut oil? And what’s RBD? Peanut oil is actually tasteless. And can withstand high heat without getting degraded. Coconut oil is better–that is, RBD (refined, bleached and deodorized) coconut oil because it doesn’t degrade into trans-containing oil at high heat and is bland. Using a mild, bland oil brings the natural flavor of the key ingredients (sprouts, garlic, sesame) to the fore.

Properly cooked sprouts taste–? Wonderful. Au naturel, it has a pleasant nutty flavor to it, which complements well with the aroma of fried garlic and sesame oil. The bitterness is absent, or, if you choose to focus on it, a very minor note that gives an earthy dimension to the dish.

I like pairing this dish with a simple main one–like pan-grilled sausage, or a serving of well-aged chicken-and-pork adobo. And lots of rice, of course.

Apple Snow: Golden and Delicious

October is not just a bacchanalia of overflowing beer in pubs, bars and festivals. October is certainly the time of the year where you can keep the doctor away. Why? October in the United States is National Apple Month according to the U.S. Apple Association. As autumn starts to shed the leaves of the deciduous trees, apples also become ripe for picking in fruit orchards. Because it’s the season of the apple, they will also cost cheaper in groceries (at least here in the United States) and they will also taste a lot better than apples picked “outside” of its season.

If you are a fan of mythology, literature, the classics and arts, you would probably notice that apples typically have become either a sacred, indulgent or seductive symbol. The golden apple of discord caused three Greek goddesses to clash and compete in a beauty pageant title of being the “fairest one”, indirectly precipitating into the Trojan War. The “tomboy” Atalanta lost to Hippomenes in a race after the latter threw three irresistible golden apples of joy in order to outrun her in exchange for her hand in marriage. The golden apples of Hesperides/Hisbernia bestow immortality in Greek mythology and eternal youth to the gods of Norse and Celtic mythology. Renaissance painters use apples in their paintings as emblems of condemnation and redemption in their re-imagination of Biblical stories from the fall of man to sin to the salvation by Jesus’ loving sacrifice- depending on the persona who holds the apple.

As of this month, there are 7,500 cultivars of apples based on the place of origin and their ancestors. This does not only mean that there are 7,500 apple genomes out there but this may also imply that if your tongue has a has a detection limit of 1/7500, then tastewise, it would be able to distinguish how subtly different the cultivars are. Of course there is no human tongue that is gifted enough to achieve that feat! That is why these apple cultivars are gastronomically classified according to their use – eating, cooking and cider. Not that you have to be anal retentive, but you need to plan ahead what apple cultivar you are going to use in your recipe before you buy them in the grocery.

I must confess though that I am not much of a fan of apples, I had only come to appreciate them during the celebration of National Apple Month thanks to this marvelous recipe – Apple Snow. This dessert is simply a combination of applesauce and egg whites as the latter are beaten into stiff peaks. What’s pretty slick about this dish is how the applesauce and egg whites complement the taste and the texture. The applesauce gives the mildly zesty flavor and the sweet taste while the egg whites are responsible for the creamy texture. The addition of caramel sauce finally enhances the rich taste.
But how do you address the issue of apple cultivar for the applesauce? I highly recommend the Golden Delicious (United States) which according to the U.S. Apple Association is third most popular cultivar. While the Granny Smith (Australia) is ideal for withstanding the cooking temperatures, it is not suitable for this dessert because of high malic acid content, resulting to a sour taste (Wu J, Gao H, Zhao L, Liao X, Chen F, Wang Z, Hu X. "Chemical Compositional Characterization of Some Apple Cultivars" Food Chem., 2007, 103, 88-93. doi:10.1016/j.foodchem.2006.07.030). In fact, I learned this the hard way from the first time I tried preparing the applesauce from Granny Smith apples. Golden Delicious is also advisable for the applesauce not only because its low malic acid content has been consistently reported from literature but also because it contains a high sugar content in comparison to sorbitol-devoid apple cultivars like the Gala (New Zealand) and the Gravenstein (Denmark) (Hecke K, Herbinger K, Veberic R, Trobec M, Toplak H, Stampar F, Keppel H, Grill D. "Sugar-, Acid- and Phenol Contents in Apple Cultivars from Organic and Integrated Fruit Cultivation" Eur. J. Clin. Nutr., 2006, 60, 1136-1140. doi:10.1038/sj.ejcn.1602430). Finally, it just makes the experience of enjoying your apple snow both golden and delicious!

Apple Snow (taken from “The Way To Cook” by Julia Child)

Ingredients:
6 to 8 Golden Delicious apples
1 medium lemon
1/2 teaspoon cinnamon or 1 cinnamon stick
1/2 cup sugar or even less
1/2 teaspoon pure vanilla extract
4 large egg whites
1/2 teaspoon cream of tartar
1/2 cup homemade caramel sauce

1. Wash, quarter and core out the seeds of the apples. Keep the peel in the apples to retain the flavor and the body of the sauce.
2. Place the apples in the saucepan along with the zest of the lemon and the cinnamon. Sprinkle the apples with lemon juice. Cover the pan and soften the apples under moderately low heat for 30 minutes. Make sure to stir and mash them frequently.
3. Remove from heat. (If you are using the cinnamon stick, remove the cinnamon from the saucepan) Transfer the apples into a food processor, purée and return the applesauce into the pan.
4. Boil the apple sauce, gradually adding the sugar. Stir in the vanilla.
5. Cover and chill inside the refrigerator for at least one hour.
6. Set the electric mixer at moderately low speed and beat the egg whites until they start to foam. Add the cream of tartar and increase the speed until stiff shining peaks are formed.
7. Reduce the speed and add the apple sauce into the beaten egg whites. Raise the mixer speed again until the mixture is stiff enough to hold its shape.
8. Drizzle or layer with caramel sauce any way you like it

Caramel Sauce
1/3 cup sugar
5 teaspoons water
1/3 cup cold heavy cream
3/4 teaspoon vanilla extract
Salt

1. Blend the sugar and the water in a saucepan and let them simmer.
2. Remove from heat and swirl to completely dissolve the sugar.
3. Return the pan to the stove at moderately high heat and boil for several minutes. Make sure peek into the pan. Once the bubbles look thick, uncover the pan and swirl it by its handle.
4. Boil for a few more seconds. Remove from heat and continue swirling.
5. When caramel has cooled but remains in the liquid state, add the heavy cream.
6. Whisk over moderate heat until the congealed caramel dissolves. Stir in salt and vanilla.

We came, we saw, we drank beer…

Veni, vidi, vici.  We came, we saw, we conquered.

This is the apt aphorism for last Spring’s impromptu beer run to Sint-Sixtus monastery in Westvleteren—home of the world’s rarest (and tastiest) beer, the Trappist ale Westvleteren 12.

It was amusing, it was epic, it was hilarious and burp-inducing. This is what usually happens when a small band of beer lovin’ grad students (hi, Kookie and Janet!) and a willing Japanese postdoc, all from Germany, who decided to rent a car and cross two country borders (Luxembourg and Belgium), pick up another grad student from Leuven (me!) and drive all the way to a faraway pocket of polderland in West Flanders.

West Flanders' polderlandCOW!

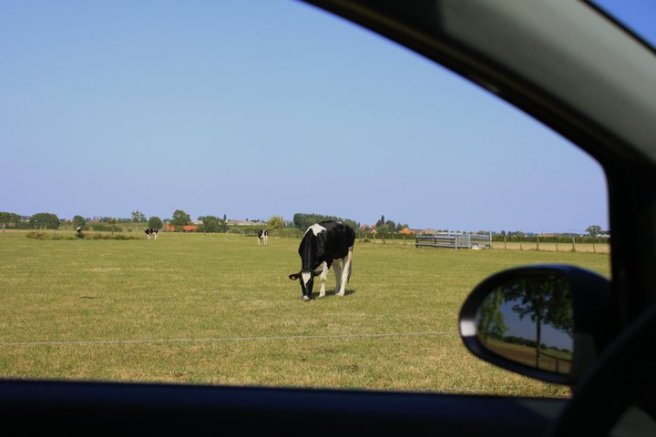
We saw cows along the way.

Since it’s a Trappist abbey, no visitors were allowed inside the premises, except at the beer house (located outside the abbey walls) and the visitors’ center/café “In de Vrede” (Dutch, “in peace”, referring to being “in the shadows of a monastery”).

Instead of narrating everything, I’ll just post photos, with some captions.

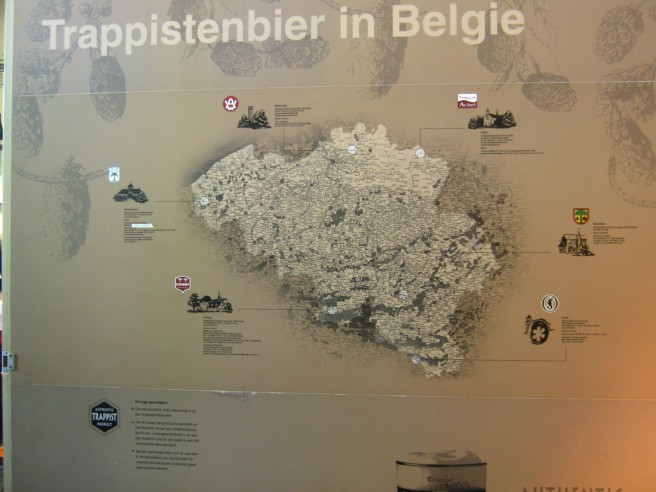
Location of all Trappist monasteries producing beer, in Belgium

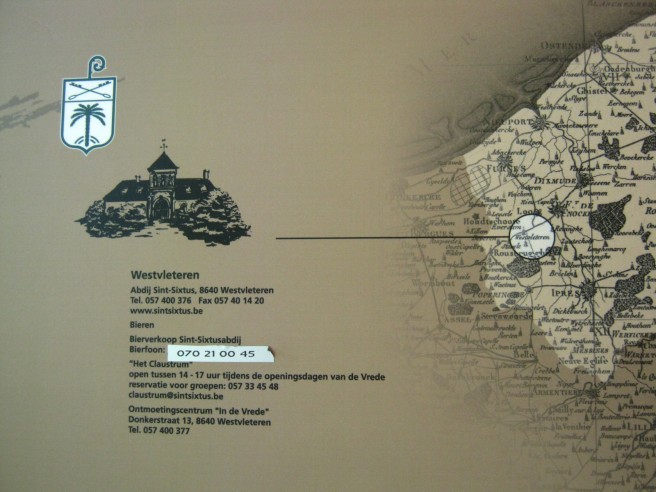
Westvleteren
The abbey in the map!

Inside "In de Vrede" cafe / visitors' center
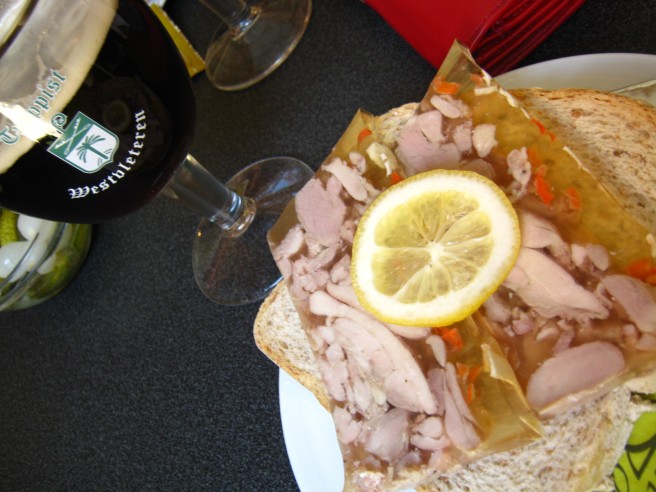
Food!
Simple monks’ fare in the cafe


The abbey gate
The abbey gate
The abbey facade
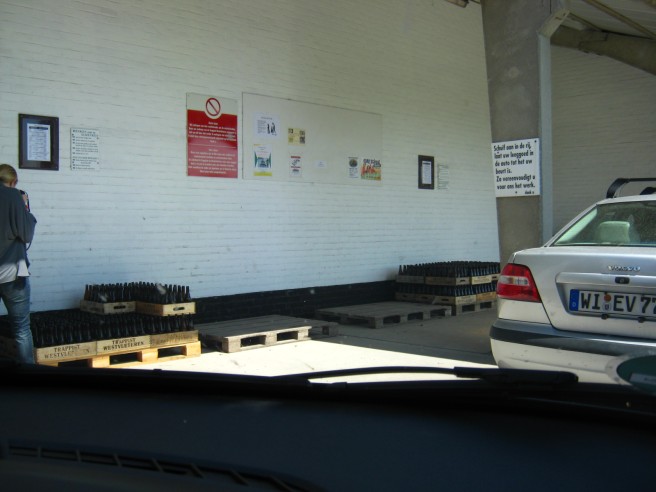
Beer drive-thru!
Beer drive-thru!

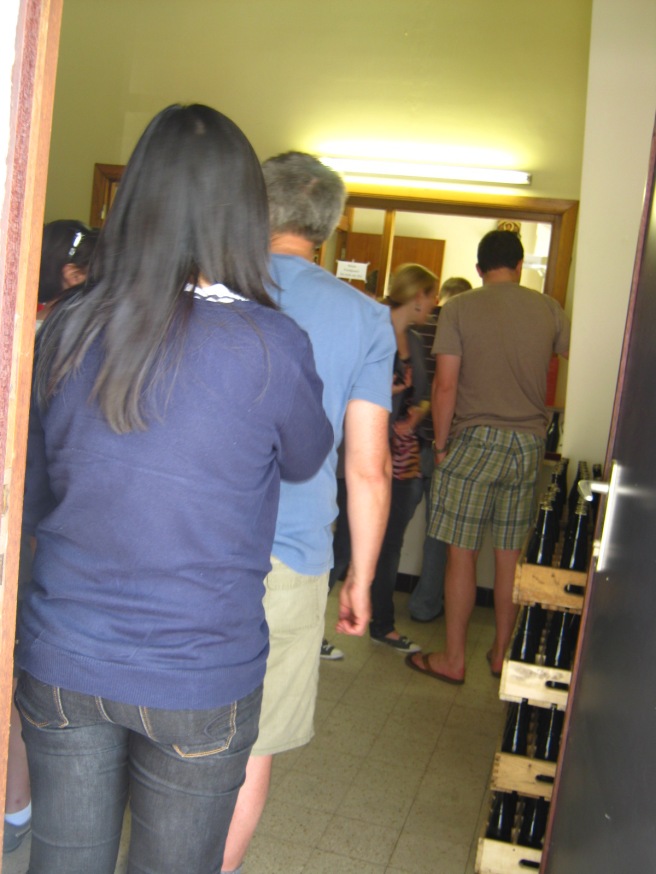
Janet lining up
Lining up to claim the case of beer


The Westvleteren 12 was the beer produced that day. We were lucky!
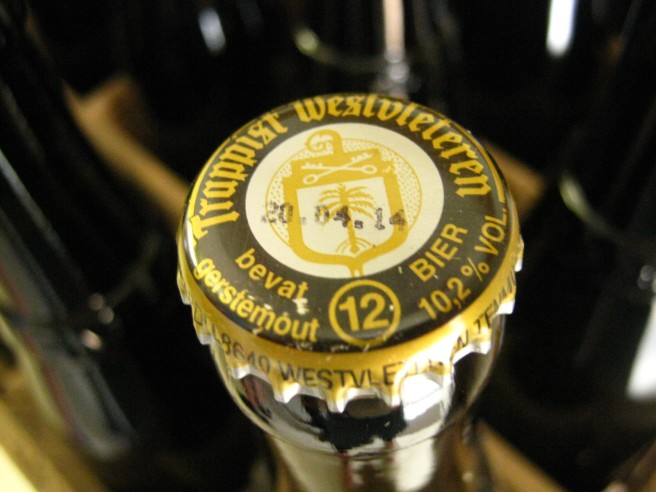
The beautiful beers! Left, Westvleteren 8 (a sprightlier sister to Westie 12), and the Westvleteren blond (nicely bitter)

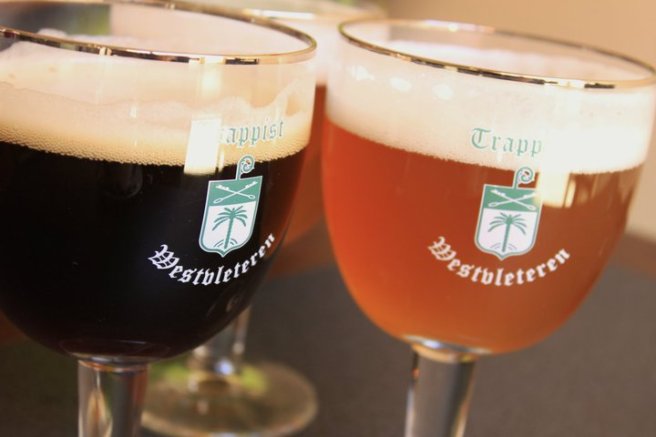
But one thing worth noting (aside from their beers, which you can get at the café in degustation boxes) is the café’s signature item—coupe “In de Vrede”, which is a scoop of Westvleteren 12 ice cream (yes, beer ice cream!) with chopped nuts, a tiny merangue and whipped cream, served in a beer goblet with the insignia of the abbey.  Now, before you get weirded out by the idea of beer ice cream, let me assure you—it actually works!  As I’ve reviewed this beer before, the Westvleteren 12 is a heavy-bodied beer, rich with the flavor of roasted nuts and toasted caramel, possibly a hint of vanilla.  The sweet and nutty notes meld well with milk and cream, thus making the idea “beer-flavored ice cream” a real thing.

I scream for beer ice cream!

The only tedious thing about the beer run is that it’s a 2 hour drive. Long, in Belgian standards. But for a degustation box of the rarest beers in the world, and a goblet of that ice cream…the trip’s worth it!

Goodies!


Santé! The PhDJ Girls conquered Westvleteren!

(Photos courtesy of Janet and myself.)