


What is Monochrome Photography? (+Examples & How to Shoot it)
Become a monochrome master with this photography guide! Learn about monochrome, black & white, how to convert photos, pro tips and more.
Learn | Photography Guides | By Greg Cromie
In this guide to understanding monochrome photography, we’re going to take a closer look at this inspirational artistic style.
Plus, we’re going to address the common misconception that monochrome and black and white photography are the same thing. There are some essential differences between the two that we need to explore.
We’ll also take the time to understand the best approaches to creating monochrome photos in terms of equipment, composition, and even the editing process involved.
Most importantly, I want to focus on how you can create amazing monochrome photographs with the camera you already have.
Let’s take a closer look at all there is to know about monochrome photography and how it can enhance your enjoyment and mastery of the art.
What is Monochrome Photography?
As a noun, the word monochrome is defined as ‘a painting or drawing in different shades of a single colour’.
The same definition applies in photography with the exception that it’s a photo and not a painting or drawing.
Monochrome photography involves creating images – either in-camera or in post-production – that are variations of one colour only.
You will often hear the terms ‘colour tint’ and ‘hue’ to describe the base colour that monochrome photos consist of. (See also: how do you describe color in photography?)
Some of the old school terms include ‘sepia‘ for warmer red-brown tones or ‘cyanotype’ for cooler cyan-blue tones.
These are classic examples of monochrome applications in photography and have been around for quite a long time. These warmer and cooler images were created through chemical toning processes used in developing film.
Now, of course, we rely on digital applications such as editing software to create these and other looks.
Despite the shift to new technology, you can still create exceptional monochrome images that will be the envy of your photography community.
What’s the Difference Between Black and White and Monochrome Photography?
If you’ve ever asked yourself, “Is black and white photography the same as monochrome photography?”, you’re not the only one!
Let’s start by answering this question: What is black and white photography?
A black and white photo is one created either in-camera or via editing software that only uses black, white and variations of grey. A common term you may hear is that black and white photos use a greyscale.
(See our guide to monochrome vs grayscale photography for more on this topic.)
Black and white photos are incredibly compelling, persuasive and follow the style of the earliest photography applications. Before the introduction of colour film, the only option was to shoot black and white photos.
Some of you younger readers may be shocked to learn that before colour TV we only had black and white TV. And before the internet, we had books.
As seen with early film reels, adding colour to a black and white image required hand painting and hand-staining each frame. Later colour film and processing techniques were developed, and now, of course, we enjoy colour in full digital glory with access to millions of colours.
How Much Do You REALLY Know About Photography?! 🤔
Test your photography knowledge with this quick quiz!
See how much you really know about photography...

A common misunderstanding is that monochrome photography and black and white photography are the same things.
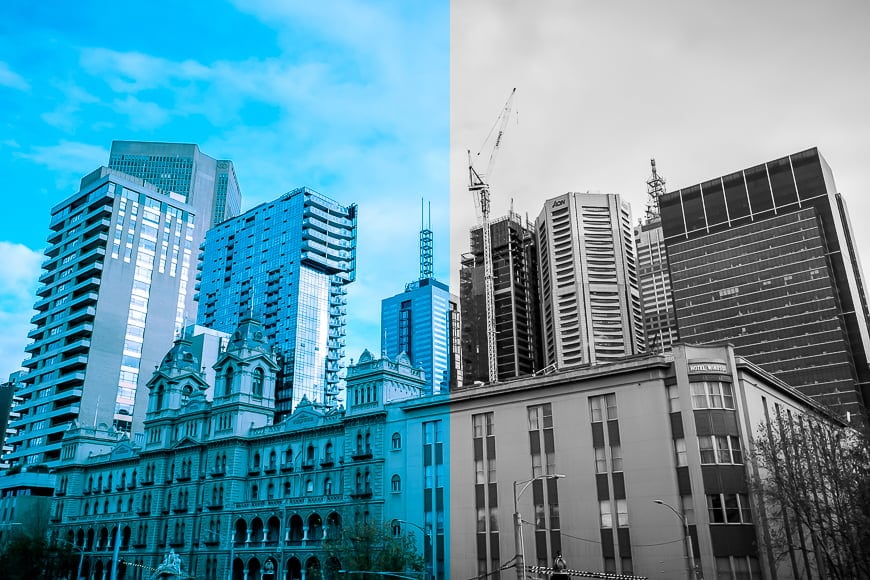
It’s correct that a black and white photo is classed as monochrome due to the use of a single colour or variations of it. However, a monochrome photo can be created with variations of blue, red or any other colour in the spectrum.
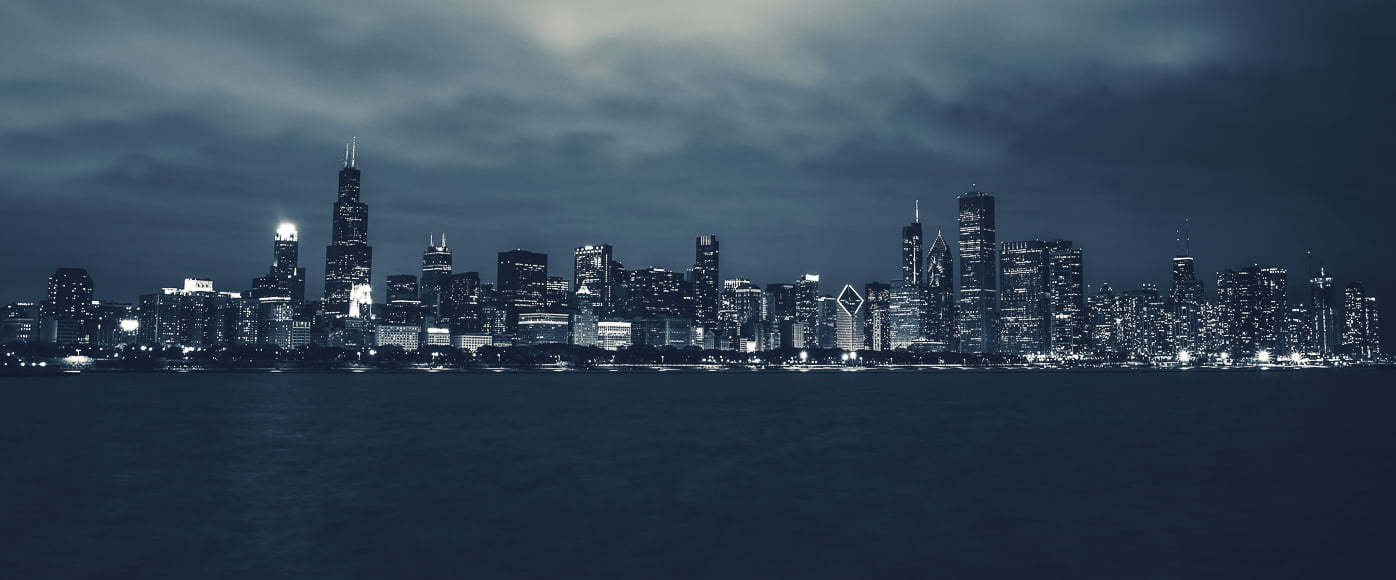
While black and white photos are compelling, especially when contrast is strong, using a single colour for monochrome images can apply mood and narrative to an image.
With this effect, you can take a dull and flat image and boost it to a super shot.
How Do You Shoot Monochrome Photography?
There are different ways to create a monochrome image, and we’ll cover those in more detail below so you have lots of options available to you. But, as promised, it’s important to remember that you can create monochrome pictures with the camera you already have.
You can even do it with your mobile device and a filter or two – but let’s keep that one for another article on mobile photography.
The other option is to just shoot with your device set up the way you usually use it. Go about your business taking colour photos, knowing that you can simply amend the image quality later in post-processing.
In-Camera Monochrome Photography
Whether shooting with a cheap point and shoot or an expensive DSLR, you can create monochrome images within your camera without having to even touch editing software.
-
Camera Settings
The very first step is to ensure that you set your camera to shoot in RAW format. Most cameras will shoot in JPEG and RAW formats.
JPEG is a smaller sized file due to only capturing just enough image data to create a reasonably detailed digital image. RAW, however, is a much larger file because it retains pretty much all the image data that the sensor captured.
As a result, you can edit your RAW copies of the image with built-in software and convert this to a JPEG for ease of use.
Most cameras will have some form of in-camera RAW editing and conversion application. These can be a great benefit when you are shooting on the go or while on travels. You don’t need access to a computer to edit or convert the images.
Plus, should you want to edit on a computer anyway, the RAW files will retain that extra rich data including information on the colour profile.
Some cameras will also allow you to shoot in a monochrome capture mode. Mirrorless cameras will present you with a live-view of the scene in monochrome either on the LCD or the viewfinder.
In these cases, you can change the settings to monochrome and control the warm and cool tones. Alternatively, you can even apply a film simulation or preset to affect the same look.
The beauty of this is that when you look through the viewfinder, you see the world in monochrome. This way, you can train yourself to identify scenes that work best with monochrome photography.
Finally, the camera can record a JPEG with the monochrome look already applied, plus, you get a copy of the RAW file with the original colours and tones.
-
Filters
As with any photography genre, there are occasions where you need to apply physical filters to your lens. This is often to accommodate harsh light, reduce highlight blowout, manage slower shutter speeds and create a specific look.
Filters are especially handy when shooting monochrome and black and white photos. With neutral density or ND filters, you can reduce the amount of light hitting your sensor, especially during long exposures.
Long exposures can deliver fantastic results in landscape photography. You may want to slow your shutter speed down so that a waterfall appears to be smooth, for example.
But doing so results in the whiteness of the water being over-exposed. An ND filter gives you greater control of managing those harsh white tones in your composition.
The different colours of the filters block different coloured light and consequently change the tonal values of blacks, whites and greys to your liking.
While colour filters exist that can manage the contrast in black and white or monochrome images, these only work with cameras that shoot in monochrome. They won’t work on a camera that shoots in colour even if you set it to shoot in black and white.
-
Monochrome Cameras
Digital cameras are available that will only shoot monochrome. Some people even take a perfectly good digital camera and ask a technician to convert it to monochrome only.
While I don’t recommend this, there’s something magical and pure about the idea of only being able to see and shoot in black and white.
Such cameras sound good, but they can be incredibly expensive to buy or to convert from a colour camera. The best approach is to shoot with what you have and later edit your RAW files with monochrome effects.
Using Lightroom to Create Monochrome Photos

As mentioned, there are some straightforward ways that you can use editing software to create different looks with the same photo.
I know photographers that will take a photo and then edit it twice – first as a refined colour image and then as a black and white image. The annoying bit is that they always ask me to pick which is better.
While most editing software can create monochrome photos, we’re going to take a closer look at how Adobe Lightroom does it.
Lightroom is a very comprehensive and powerful RAW image editing application. Along with Photoshop, it’s part of the Adobe range of imaging tools available for both desktop and mobile.
Split Toning
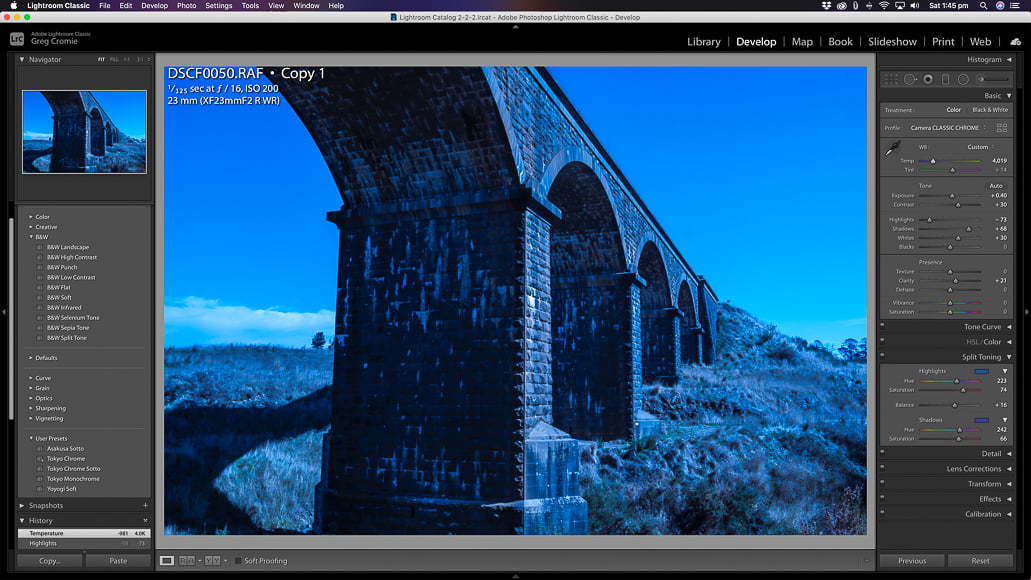
The first action we can take a look at is Split Toning. This is an excellent tool for selecting the colour tone of both the highlights and the shadows.
Plus, you have access to the full range of Lightroom editing tools to make your photo shine. Start with your photo to edit and jump over to the Develop tab, so you have access to the editing tools.
About halfway down the menu stacks on the right-hand side is the Split Toning expanding menu item
The first step is to select the colour or hue of the Highlights and then select the Saturation or strength of the colour.
Next, we do the same with selecting the hue for the Shadows and again control the Saturation.
Ideally, for a perfect monochrome photo, you want the hue of both the highlights and the shadows to be the same. That way, the dark and light elements of your image have the same colour.
With Split Toning, you can go heavy-handed for a dramatic composition, or you can go lightly for a more moody look – here’s a full tutorial of how to do Split Toning in Lightroom.
HSL/Hue Saturation Luminance
The alternative action in Lightroom is with the HSL or Hue Saturation Luminance tool. This controls the tone and strength of colour within a photo.
It’s not as simple to use as the Split Toning option, but you can achieve monochrome images with it.
This is also located in the Develop tab of Lightroom, and its expandable menu is just above the Split Toning one – be sure to click on the HSL option.
With HSL, you can fine-tune the quality, vibrancy and intensity of each colour in an image. Some photographers claim this is the best way to create monochrome pictures out of your colour ones. I find it incredibly fiddly and frustrating.
If anything, it’s an excellent tool to use after Split Toning has been applied to further tune your colour.
Presets
Thanks to Lightroom’s built-in presets, as well as those you can create yourself, there’s a super simple way to create a monochrome image.
Presets are basically formulas that someone has developed to achieve a distinct look with a photo.
Presets are applied to the full photo at the simple click of the mouse. You can use presets much like filters in mobile photo apps, and they dramatically change the image qualities.
A monochrome preset will automatically convert a colour photo in an instant.
The best thing about presets is that if you create your own editing and export settings in the Develop tab of Lightroom, you can save this as a custom preset. That way, you can apply it to any photo at any time in the future.
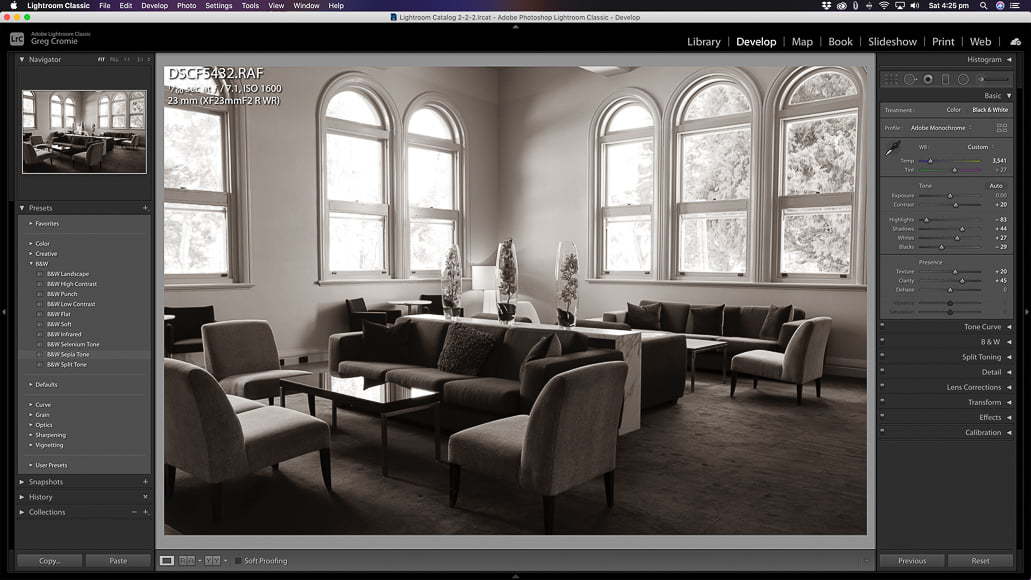
Creating Black And White Images

Creating black and white pics in Lightroom is just as simple as the process for creating monochrome photos which we described above.
In the Develop tab, the very first set of editing tools on the right-hand panel live in the Basic menu. The very top line allows for you to switch between the Treatment for Colour and Black And White.
Click on the Black and White option and the Adobe Monochrome profile will instantly convert your colour image to black and white – so simple.
Then, once again, you have access to all of Lightroom’s powerful editing tool to create a dynamic and dramatic black and white image.
9 Tips for Amazing Monochrome Photography
1. Find the right scene to build a composition

By all means, take a scroll through your existing catalogue of pics and convert them from colour images to monochrome. At the very least, it’ll be great to practise and enhance your overall knowledge of post-processing and editing.
Keep in mind that some colour photos and compositions that have been edited to look like monochrome just don’t work.
But the real challenge in monochrome photography is to find the right scene or setting to capture an intentional image. And by intentional I mean the sort of composition that’s well suited to monochrome photography.
First and foremost, you want to pick the best time of day to capture your photo. Understanding the magical hours such as golden hour and blue hour can go a long way to helping you work with the scene.
Capturing landscape, cityscape and even portrait photos during these times results in more compelling photographs. Plus, despite their names, the quality of light during these times can equally enhance monochrome pictures.
For example, shooting a landscape during blue hour, where the light is cooler in hue, can enhance a blue monochrome composition.
So the key to success here is to always keep in mind that you have the option to deliberately create a monochrome composition.
As part of your landscape or cityscape shoot, you may be focusing on the play of light and colour. But, by keeping in the back of your mind that you want to also frame a monochrome shot, you may just find what you’re looking for.
Another tip is to frame up a composition and consider if the colours work. You might love the subject matter, contrast, foreground and background elements, but if the colours are off, you may just avoid the shot.
But what if you consider going monochrome and make the most of the elements you love by removing the one you don’t?
With greater practise and patience, we can all become exceptional at finding compositions to suit monochrome photography. Over time you’ll train your eye so that you can easily spot a scene that just sings monochrome.
This is exactly how street photographers have trained their eye to spot unique characters or a composition.
The rules of composition don’t change for this style of photography. They’re still just as important, but in some cases, monochrome works better.
2. Use contrast to elevate your photo
Monochrome and black and white photos are so interesting and compelling as they rely on contrast within a single colour to deliver depth.
The composition is packed with varying tonal levels of the same colour, and getting these right draws the viewer into the image.
If you photograph a landscape and find that the flanks of the mountains may be too dark, reconsider trying to recover the shadow detail. I’d recommend this especially if you have a sharp contrast with the snow-capped mountain tops.
The play between shadow and contrast in monochrome photography is especially important as you cannot rely on colour to provide a narrative.
Bumping up the contrast in post-production a little more than you would otherwise be comfortable with is perfectly acceptable too.
Stronger contrast portrays greater strength and character in a monochrome photo. So please don’t be afraid to push it to the extreme to see what results you get – you can always rewind it a bit.
This can be especially powerful if you have a subject in silhouette as the line between the bright background and the super dark subject is stark.
Equally, don’t be afraid to reduce the level of contrast from your original image to soften the story and mood of the composition.
3. Maximise subject separation
An excellent tip for monochrome photography is to make your core subjects stand out.
You’d still use the rules of composition to achieve a visually appealing balance between the foreground and background. Plus, you’d always use your aperture to control depth of field and make a noticeable subject separation.
But you can’t use contrasting colour and tone to make your subjects pop out of the photo.
To optimise this ‘limitation’, you can create compositions where your subject is in stark contrast to your background. Imagine a portrait shoot where your subject is dressed in white, but the background elements are very dark – instantly dramatic.
If you’re shooting a landscape and you have a dark mountain range in the background, compose your shot so that a single tree with a much lighter tone occupies the foreground.
This kind of approach creates exciting and dynamic compositions that lead the viewer’s eye around the frame.
4. Work with long exposure

Perhaps it’s the intense focus on contrast, but long exposure shots in monochrome are very appealing.
The principles and practices of long exposure work in photography are universal – they apply the same to colour, black and white, or monochrome.
But there’s an excellent reason to consider it, especially when creating monochrome compositions. A waterfall cascading down a cliff-face frozen in time with fast shutter speed is magnificent. But the same scene shot with a long exposure turns that water into a silky, milky texture that’s far more fascinating to see.
Equally, shooting a beach scene with waves washing on the shore can be turned to black and white smoke floating like a giant ghostly ocean.
The point is, the combination of the contrast, distraction-free tonal qualities and long exposure delivers admirable photographs.
The feeling of movement and a dynamic scene is undisputable when compared to the same scene shot at high speeds.
5. Highlight the textures and patterns in your composition

If you’ve been interested in imagery and art to any degree, you’ll have no doubt seen the work of M.C. Escher.
Escher was an illustrator who could create amazing drawings using realism, forced perspective, puzzling context and exciting textures and patterns. Most of his famous work was created in monochrome tones of the same colour.
The same can be said for compelling monochrome photography and how the use of textures, patterns, linework and shapes can enhance an image.
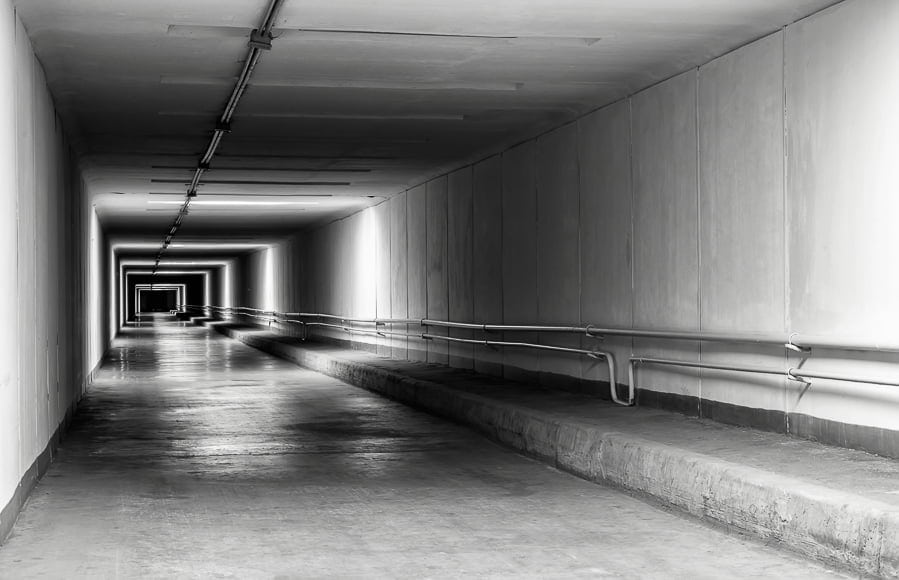
Strong shapes and lines help to direct the viewer’s eye around a composition – a fact that applies to all forms of photography. But where monochrome photographs stand out is with the contrast between where shapes meet and where lines lead.
Converging straight lines, such as train tracks disappearing into the distance, pull you into the composition. These are made even more compelling when the tacks are silvered and glistening against the darkness of the gravel and surrounding forest.
Curving shapes that flow from one point in the image to the other also direct the viewer’s gaze.
Textures and patterns work exceptionally well within a monochrome or black and white photo. With the absence of colour as a means of distraction, the contrast in a texture pops.
Imagine the scales on a brightly coloured fish – you’re immediately drawn to the intensity of the colour rather than the texture. Switch the colour off and convert it to black and white and immediately you’re drawn to the texture and how the contrast shows the overlapping of one scale against the next.
Repetitive textures and patterns – another trademark of Escher – are especially interesting to view as your eye gets caught in following the same shape over and over.
Again the fish scales are a great example. But consider the texture of someone’s skin or hair in a portrait shoot where each strand of hair or facial mark is evident.
6. Use the whole tonal range

A bad habit to get into with monochrome photography is to believe that everything must be black or white or dark and light.
There’s an infinite range of tonal values between the extreme black and white of an image. While that level of contrast certainly has its place in our art, it’s by no means the only option.
Creating pictures that use the entire range or even just a small range of the monochrome spectrum is just as valuable. The shades inherent in every available colour are countless – and thanks to modern digital technology, you have access to employ them all.
Being able to employ subtle tones of the same colour in an image can significantly dictate the emotion and flow of that pic. Images that avoid over 50% of the darkest of tones can have a very light and airy feel. If your composition is going to benefit from such an approach, then go with it.
While there’s a risk that images that stick to a small range of middle tones will appear flat and lifeless, they can also be beneficial.
The biggest take away from this tip is that the tones you use should work in harmony with the composition and subjects.
Imagine two photos of a child playing: one uses sharp and intense contrast, and the other has a more balanced application of tone. One may appear concerning and menacing, and the other will feel calmer and balanced.
7. Convey emotions

As creatives, we’re emotionally invested in our photography and equally capture emotions in our work.
Some would think that by removing the colour from a photograph, you’re removing the emotional value as well. This couldn’t be further from the truth.
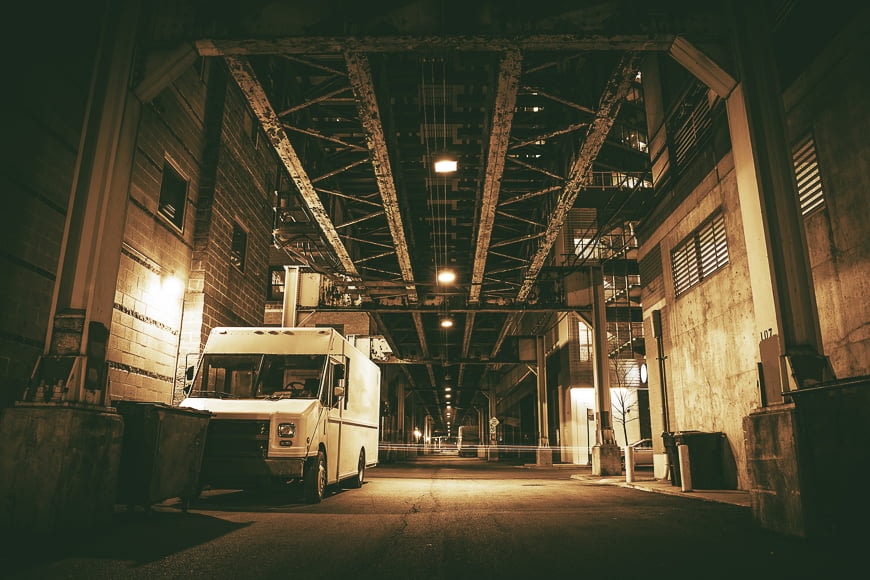
Suppose you recall our examples earlier where we applied monochrome as a single colour. The warmer tones of red and orange added a considerable amount of emotion to the composition. Applying sepia to an image conjures feelings of nostalgia and simpler times.
Equally, using a cooler blue colour in a composition delivered a colder, more moody experience.
You can also add both blue and its opposite color, orange, to your images to create balance and contrast at the same time.
As humans, we’re very attuned to how colour makes us feel – those with Synesthesia can certainly attest to that. But that doesn’t mean we have to experience a whole orchestra of colours to have an emotional response.
Sometimes, with the right composition, a monochrome image can convey emotions in a far more powerful way.
8. What we do in the shadows

Some may think that the use of shadows in a composition falls into the same category as contrast. That’s partially true, but shadows also play an essential part on their own.
In monochrome photography, the use of shadow can be employed to express several things. We have an inherent curiosity with what shadows hide – just watch a few horror movies to prove this. Why do they always walk into the shadows and never turn the light on?
Capitalising on this is as simple as not revealing the details held within an area of shadow. While it can be easy to use an editing tool like Lightroom to pull out the shadow detail, I’d recommend to hold off.
Shadows play an integral part in story-telling in photography. By leaving the details hidden in a shadow, the viewer builds their idea of what’s in the darkness. Instantly, you have a compelling composition that the viewer is drawn to interact with.
Of course, this is not going to be applicable in every monochrome image.
Sometimes taking the opposite approach and revealing shadow details can create a sense of ease in your viewer. Sometimes, a picture needs you to reveal all its mysteries without complexity.
9. Practice makes perfect
As much as I fear sounding like a broken record, I cannot stress this point enough.
No matter what genre of photography you’re attempting or what level of challenge you want to try, practice always makes perfect.
If you believe that you can pick up a camera for the first time, or attempt monochrome photography for the first time and deliver amazing results, you are sorely mistaken.
No pursuit is worth it if it’s handed to you without effort. Without effort and failed attempts, we don’t learn a darn thing.
The way to ‘make perfect’ is to get out there with your camera and experiment with monochrome and black and white photography. Don’t be shy about it – shoot everything and review the results.
Even when you’re out and about without your camera, tune your eye to seek out exciting objects, lines, textures and compositions that are ideal for monochrome photography.
Monochrome Photography FAQs
What does monochrome mean in photography?
It means that the photographs use only one colour (or, more accurately, variations of one colour). For example black and white, sepia, and cyanotype are all considered to be monochromatic as they’re each composed of different shades of the one colour.
Is a black and white photo monochromatic?
Yes. Black and white photos are monochromatic. However, not all monochromatic photos must be black and white – they can also use a single other colour such as blue or orange.
How do you take monochrome photos?
There are several options. You can create monochromatic shots in-camera using your camera’s settings or by attaching a physical filter to the lens. Alternatively, you can shoot in colour and apply a monochromatic effect later in post-processing. See above for more details on each option.
Final Thoughts on Monochrome Photography
As we’ve discovered here, there’s a lot more to it than merely taking black and white photos. Monochrome photography is a step up the challenge ladder when it comes to mastering photography.
But with the knowledge that we’ve provided you with today, along with your skill-set, you’ll be able to see, compose and capture incredible monochrome photos in no time.

Check out these 8 essential tools to help you succeed as a professional photographer.
Includes limited-time discounts.


I’m a Melbourne-based street photographer and blogger. I love to travel to Japan to photograph and document its dynamic people and culture.


