
If you don't want content reviewers to accidentally change your PowerPoint presentation, you can use formatting and editing restrictions.
Note: To further restrict reviewers from making changes to your document or spreadsheet, you can make the file read-only or you can password protect it.
Restrict permission to content in files
-
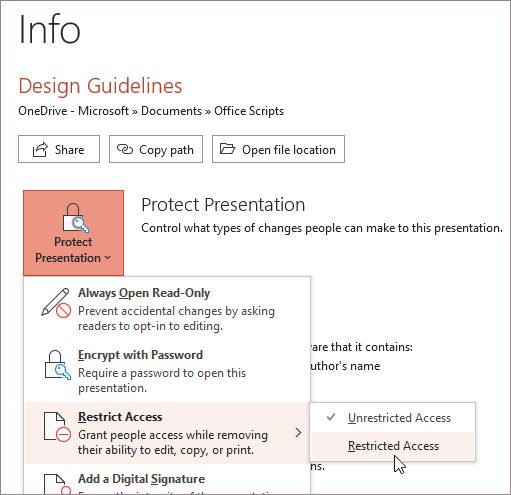
Select File > Info.
-
Select Protect Presentation, point to Restrict Access, and then select Restricted Access.
-
In the Permission dialog box, select Restrict permission to this presentation, and then assign the access levels that you want for each user. There are separate lists for users whom you give read access and whom you give change access.
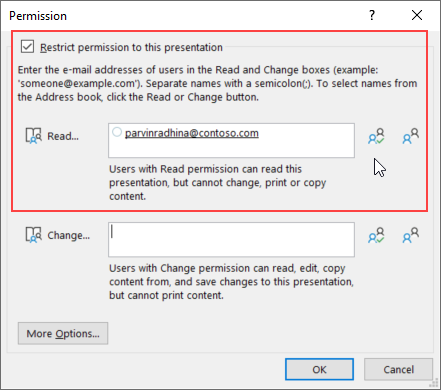
You can also select the icon at the far right of either option to select Give everyone in my organization read access or Give everyone in my organization change access.
-
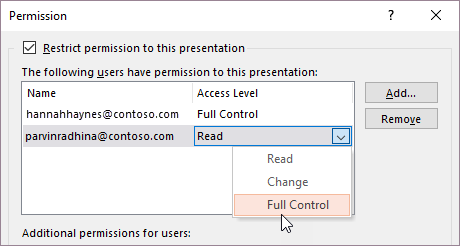
To give someone full control permission, in the Permission dialog box, select More Options, and then in the Access Level column, select the arrow, and then select Full Control in the Access Level list.
-
After you assign permission levels, select OK.
The Message Bar appears, indicating that the presentation is rights-managed. If you must make any access permission changes to the presentation, select Change Permission.
If a presentation with restricted permission is forwarded to an unauthorized person, a message appears with the author's e-mail or website address so the individual can request permission. If the author doesn't include an email address, unauthorized users get an error message.
Set an expiration date for a file
-
Select File > Info.
-
Select Protect Presentation, point to Restrict Access, and then select Restricted Access.
-
In the Permission dialog box, select Restrict permission to this presentation, and then select More Options.
-
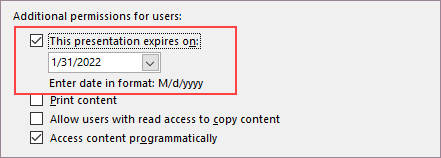
Under Additional permissions for users, select the This presentation expires on check box, and then enter a date.
-
Select OK twice.


