
I love breakfast. Sweet. Savoury. Sweet and savoury. Bring it on.
Nowadays, I often eat cereals with nuts and fresh fruit, accompanied by yogurt or milk, or oats. But when I visit my family and friends in Italy, this is never the case.
Whenever I’m in Italy, I go back to an old habit, and I do what most people do every single day: have breakfast at a café. This probably doesn’t sound so original, but the thing is that there’s only one breakfast you can have at a café in Italy, cappuccino and croissant (also called ‘cornetto‘, even if the real ‘cornetto’ recipe differs from the classic French croissant). You could have another type of flaky pastry of course, but 1) many cafes don’t even offer any other option and 2) it’s just not the same as having a croissant or cornetto. This type of breakfast is so rooted in the Italian culture that often people cannot even imagine having anything else to eat in the morning.
Anyway, whichever version you get at your local café doesn’t really matter. A buttery croissant or cornetto filled with vanilla or chocolate pastry cream or apricot jam – these are the most common fillings – and paired with a foamy and warm cappuccino puts the smile on any face (at least in Italy).
For this recipe, I wanted to pay tribute to the traditional Italian breakfast, but of course with a twist. Brewing a coffee didn’t sound such a great baking inspiration after all.
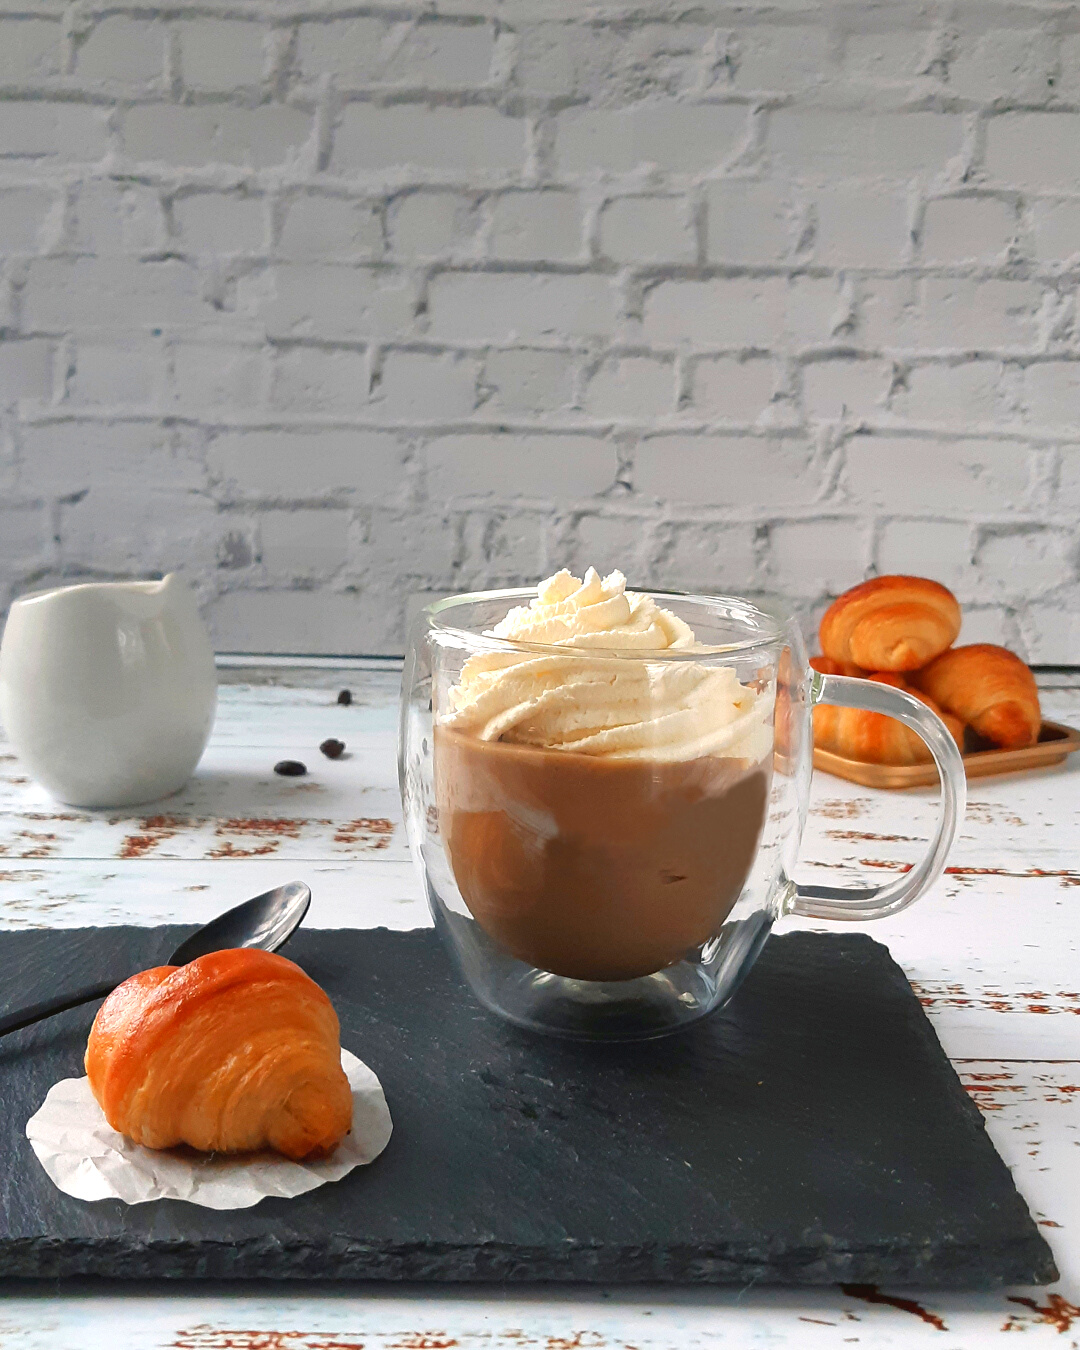
Here you have it, my Italian breakfast, ‘cappuccino’ and ‘croissant’. I went for the French version this time as this is what I used to get at my local café in Venice, and I wanted to stay truth to the story (but don’t worry Italian ‘cornetto’ will have its own celebrative page). An indulgent coffee pastry cream topped with whipped cream which brings all the lovely and comforting flavours and aromatic notes of cappuccino, and a mini-all-butter-flaky croissant that you can dip in the silky cream. Croissant dough made from scratch, no shortcuts, so make sure you plan ahead (but of course if you’re in a hurry and you’re craving the Italian breakfast, you can always buy some ready made croissant dough. You’ll just make me cry a little, but that’s ok).
This is a recipe that goes particularly well at tea time thanks to the one-bite size of the croissant. It’s just going to be a coffee time instead. But you can enjoy your Italian breakfast at any time during the day.
Note: the bad thing is that you’ll probably want more mini croissants after your first bite. But don’t worry. The good thing is that you can always make an extra batch of dough ahead, and chill the croissants in the refrigerator until the day of serving.
Are you looking for more tea or coffee time dessert inspiration? Try these scrumptious salted caramel and lemon jam sandwich biscuits, or go for a mouthwatering cake such as this apple and peanut financier traybake, or impress your guests with these pick-me-ups tiramisu bites.

Makes 12 mini croissants and 600g of coffee pastry cream
Ingredients
FOR THE CROISSANT DOUGH
- 250g plain flour
- 135g milk
- 25g caster sugar
- 5g salt
- 4g dry active yeast
- 125g unsalted butter, cold
- egg wash for brushing
FOR COFFEE PASTRY CREAM
- 400g whole milk
- 100g egg yolks (about 5 to 6 egg yolks)
- 120g caster sugar
- 40g corn flour
- ½ tsp coffee extract
- ½ tsp vanilla extract
- 2.5g instant coffee (about 2 tsp)
TO FINISH
- 300g whipped cream
SPECIAL EQUIPMENT
- ruler
- food thermometer
Method
MAKE THE CROISSANT DOUGH
- Cut a piece of cling film at least 40 cm long and place it on the work surface. Place the butter on one side of the cling film and fold the other side over. Bash the butter to flatten it with a rolling pin and form a 15cm square (it should be about 1 cm thick). Wrap the square in the cling film and refrigerate for 2 hours.
- Meanwhile, make the dough. Activate the yeast in the milk according to pack instructions. Sift the flour into a bowl, add the sugar and salt and mix to combine. Make a well in the centre and pour the yeast and milk mix. Start mixing with a fork until a shaggy mass forms and no dry bits are visible, then turn it over a lightly floured work surface and knead for about 10 minutes until the dough is smooth. Perform a ‘windowpane‘ test to ensure proper gluten development. Form a rough square, wrap in cling film and leave to rest in the fridge until the butter has completely chilled (see point 1).
- Take the rested dough and cold butter out of the fridge. Flour the work surface and roll out the dough until you get an even rectangle measuring 32 x 16cm. If necessary, trim the sides to even out. During the whole process, it is very important that you keep the dough size as regular and tidy as possible, to achieve a perfect lamination. Place the square of butter in the middle of the rectangle and fold both ends of the dough over to cover the butter. If you got your sizes right, they should neatly meet in the centre of the square and wrap it entirely.
- Now perform a ‘single turn’. Turn the dough 90 degrees and roll it to a long rectangle measuring 45 x 15cm. Keep the sides nice and flat by adjusting them while you roll them out. Fold the top third of the dough onto the middle third, and then fold the bottom third over the other two. You should end up again with a nice 15x15cm square. Wrap it in cling film and place in the fridge to chill for 1 hour.
- After 1 hour, perform other two single turns, one after the other. After the second turn, you will notice the dough is getting stiffer and the butter is starting to soften. Refrigerate the dough for 1 hour. Repeat this whole step, so that in the end you will have done 5 single turns. Put the dough to rest in the refrigerator for 1 more hour.
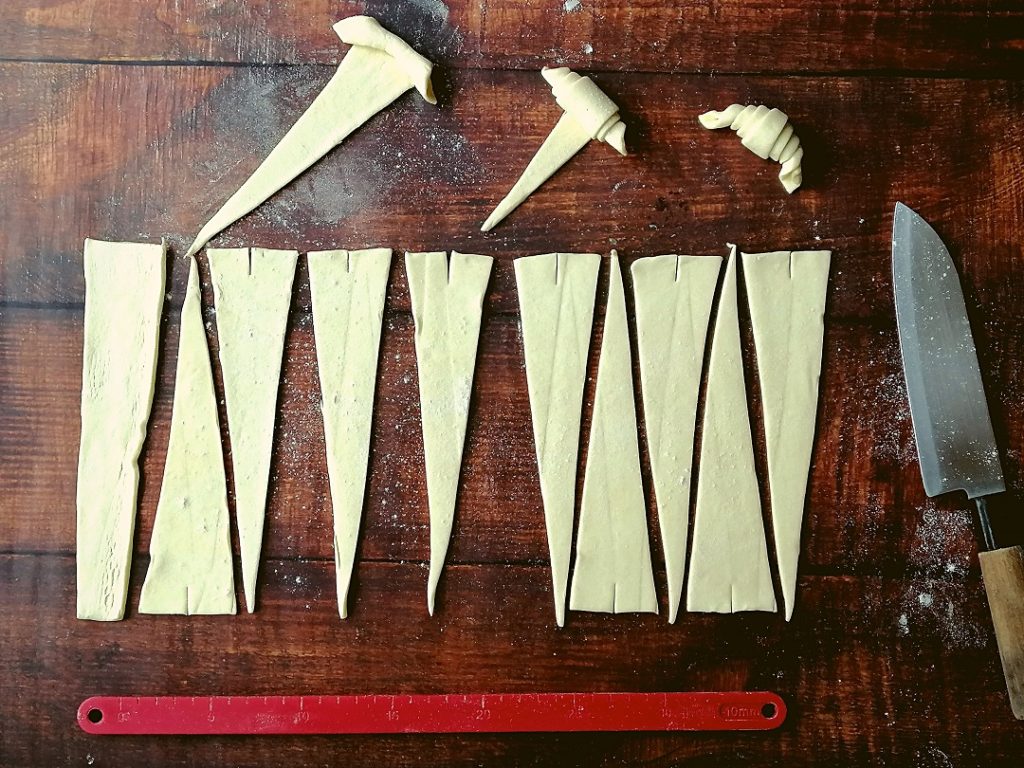
- Take the dough out of the fridge and roll it out to a 35x20cm rectangle and cut it into 12 triangles (see picture below). Note: for this step, I use a ruler and measure 5cm as the base length of each triangle. This means that you will have to start marking at 2.5cm on the opposite side of the dough, and you will end up with some leftover pastry. Using a ruler and a knife (or a pizza cutter), cut straight lines across the pastry, joining the marks on the two sides, to form 12 triangles. Make a small incision on the base of each triangle.
- Take one triangle and place it, tip facing you, on the work surface. Slightly pull to elongate the sides of the base and roll it towards you with both hands to form a tight spiral. Tuck the tip underneath the croissant (otherwise it will unravel while cooking) and slightly bend it if you like. Set aside on a tray and repeat with the rest of the triangles.
- At this stage you can freeze some or all of the croissants if you like. They will be perfectly fine for a few months. If you are baking them on the same day, space them out onto a tray, loosely cover them with some cling film and leave them to proof at room temperature (make sure that the temperature is not above 28°C or the butter will melt) until the croissants have at least doubled in size. In the meanwhile, you can make the coffee cream.
MAKE THE COFFEE PASTRY CREAM
Before making a start, place a metal tray or bowl in the freezer.
- Pour the milk into a saucepan. Add the vanilla and coffee extract and bring to the boil on a medium-high heat. In the meanwhile, mix the sugar and cornflour in a bowl with a whisk, then add the egg yolk and keep whisking gently until fully incorporated and smooth. Do not whip.
- As soon as the milk boils, remove from the heat. Add the instant coffee and stir until dissolved. Put a strainer over the bowl containing the egg mixture and pour half of the hot milk onto it. Whisk gently until smooth to ensure no lumps form, then add the remaining milk and stir with the whisk again to combine.
- Pour the mix back into the saucepan and start heating again on a medium heat, whisking gently. As soon as the cream thickens (it will happen quite suddenly) remove from the heat and continue whisking for about 1 minute. Transfer to the cold tray or bowl and keep whisking vigorously to break any lumps and until it becomes shiny and glossy. Keep whisking until the cream temperature decreases at least below 50°C.
- Once glossy, shiny and smooth, transfer to a piping bag if using immediately, or cover with some cling film (make sure that it touches the surface). Let cool down to room temperature and then refrigerate for up to 3 days. When you’re ready to use it, take it out of the fridge and whisk vigorously for a minute or two to bring it back to a silky and pipeable texture.
TO ASSEMBLE
- Pre-heat the oven to 180°C. Lightly brush the risen croissants with egg wash, line them up regularly on a tray to ensure even and equal baking and bake for 15 minutes. When ready, leave to cool for a few minutes.
- Whip the cream to a firm consistency and transfer it to a piping bag (make sure you have some extra cream, just in case you want to have more – I can’t resist whipped cream).
- To finish your dessert, pipe about 50g of coffee pastry cream into coffee cups or small bowls. Top with some whipped cream and serve accompanied by a mini croissant, for a perfect little treat.
This is a recipe that goes particularly well at tea time. It’s just going to be a coffee time instead.