Factoring is one of those skills that students must know how to do since they will use it in every high school math class. This skill is one of the most important skills and unfortunately some students never really get it. I hear calculus teachers complain about how their students can’t factor. Students should already know how to factor before entering calculus but why don’t they? Factoring will be in all the college entrance exams too because students need to know how factor for their college math classes. I know in Texas that students can know very little about factoring and still pass the Algebra EOC. Questions on the EOC can be figured out by working backwards from the answer choices. There usually is one question each year where students have to find one of the factors which does make it a tougher question. Students really do not learn how to really factor until Algebra 2.
When I was in high school the method that was taught was guess and check. We got pretty good at it but back then you knew your multiplication facts very well. When I first started teaching math, I honestly had no clue how to teach factoring. I’ve done every method or fad that came along but I have settled on a method after realizing that this is how it is taught in many college algebra classes. The method I use is GROUPING! I focus heavily on finding GCF’s and factoring by grouping and then when it’s time to factor the tough trinomial problems, we turn them into grouping problems.
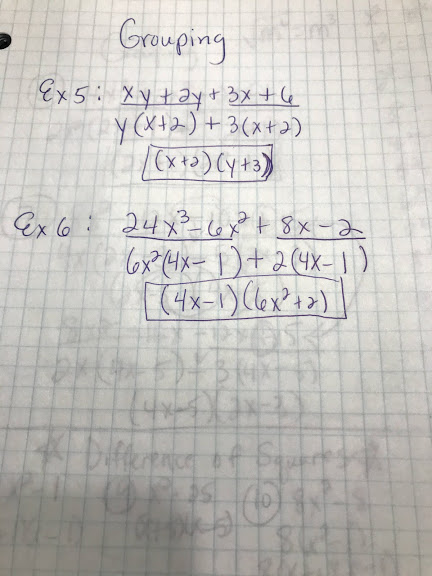
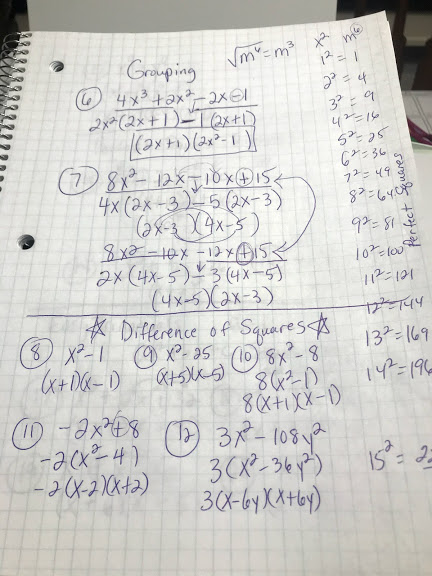
I start the factoring unit by teaching the students how to factor out a GCF. To help them understand, I’ll sometimes call it “undistributing”. Once they understand how to factor out a GCF, then I give the students grouping problems. They are taught to group the first two terms and the last two terms and then factor out a GCF. I tell them that if they get the same answer in both parenthesis then they have worked the problem correctly. They factor out the common parenthesis and make another parenthesis with the leftovers. Once they get good at this then I talk about differences of squares and perfect square trinomials.
These are my notes from my Algebra 2 classes this year:

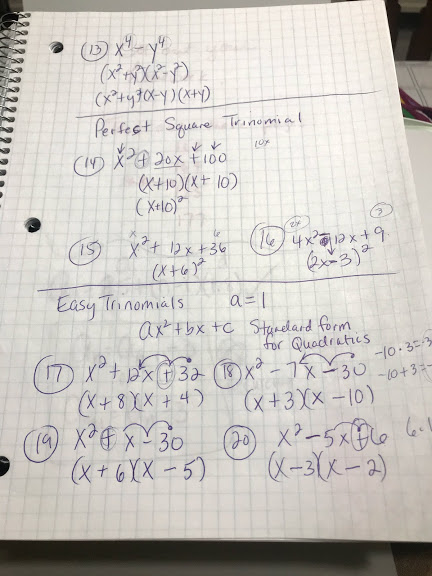
Next I teach them to spot easy trinomials and hard trinomials. I later explain that they are problems that either have an “a” equal to one or an “a” greater or less than one. I discuss how the signs work in trinomials:
- + + = ( + )( + )
- – + = ( – )( – )
- – – = ( – )( + ) the larger number gets the –
- + – = ( – )( + ) the larger number gets the +
When I teach the a = 1 problems, I tell the students to go to the last number and ask, “What multiplies to get the last number that will add or subtract to get the middle term.” Students can do this pretty well…especially if they know their multiplication facts.
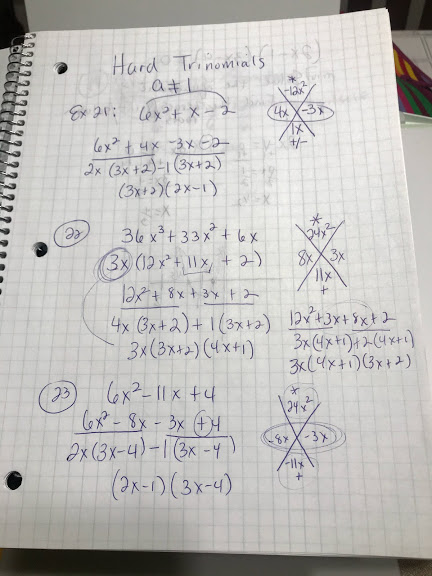
When I teach the hard trinomials (a>1 or <1), I have the students draw a big X to the side of the problem. The students are directed to multiply the first term and the last term in the trinomial. They write that at the top of the X. The middle term goes at the bottom of the X. Next, they ask that same question about what multiplies to get the top number that adds or subtracts to get the bottom number. The students write it on the left and right side of the X. Now it’s time to turn the problem into a grouping problem. The students are told to write the first term of the original problem, then the two monomials they just found and the last term of the original problem goes on the end. Factor by grouping and they are done.
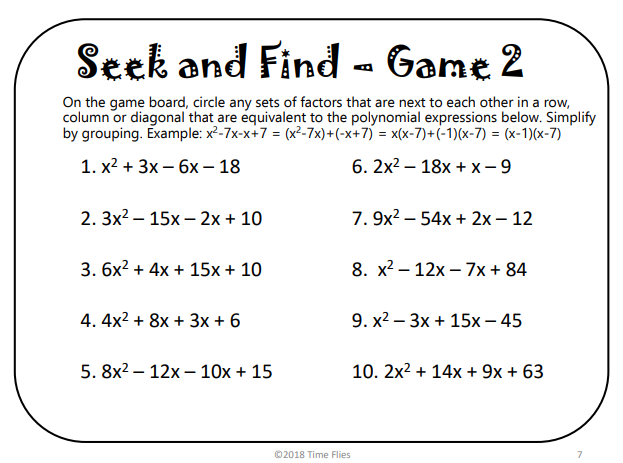
I know students should know this by the time they are in Algebra 2, but many of them don’t. I usually try to break these notes up into two days. I assign Games 1 – 6 of my Factoring Using Seek and Find. I love this activity because the students know if their answers are correct or not by finding the answers in the puzzle.
A quick tip on helping students that aren’t good with their multiplication facts. If they want to know for instance what multiplies to give you 300 that would subtract to get 44…Have students type 300/x into a graph of a graphing calculator, then go to the table. The table contains all the factors. I tell them to ignore all decimals. They will see a 50 and a 6 in the x and y columns. They can reason that if they subtract, they can get 44.
Factoring is a very important concept and students need this skill to survive in their upper level math courses. I finally feel confident that my students understand it since I now stick with a certain way of presenting it to them. I truly believe in the way I teach factoring and I hope that I have given you some ideas on how best to help your students successfully learn this concept!
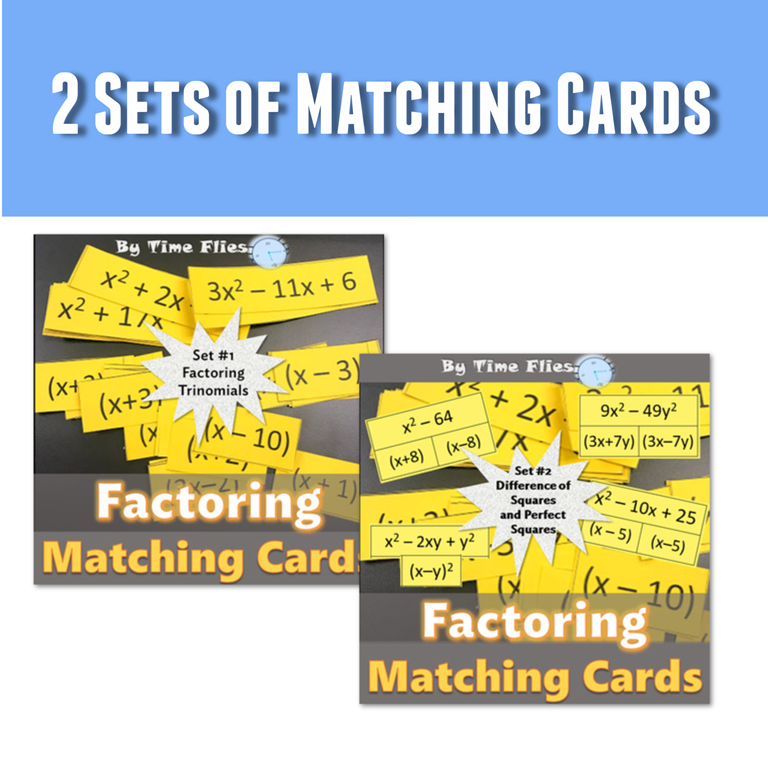
For my Algebra I classes, I made some factoring matching cards you might be interested in: Factoring Matching Cards #1 and Factoring Matching Cards #2.
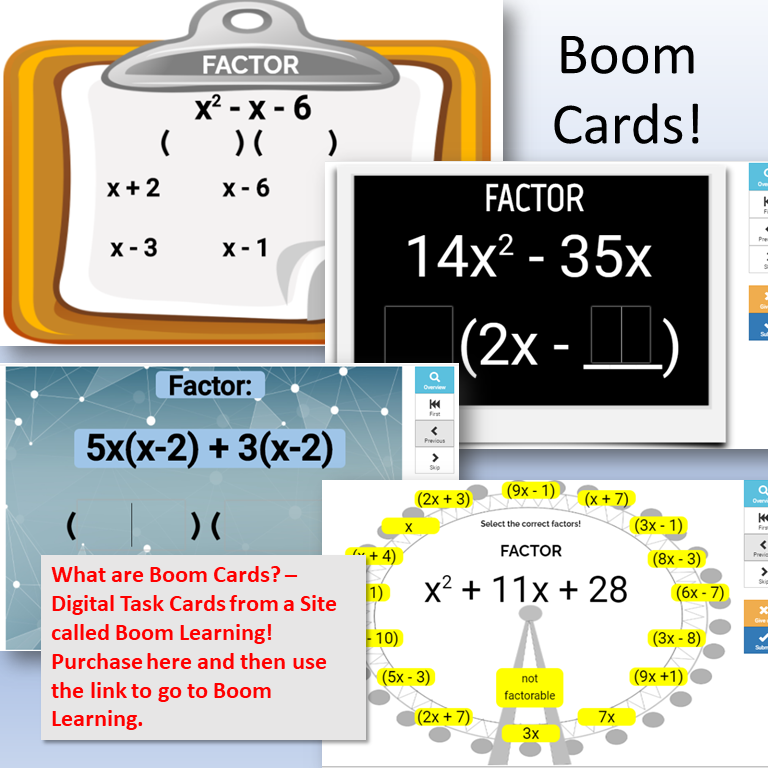
I also made 4 sets of Boom Cards. Boom Cards are awesome because you can have your students work through them as many times as they want until they understand. They are great for digital learning!
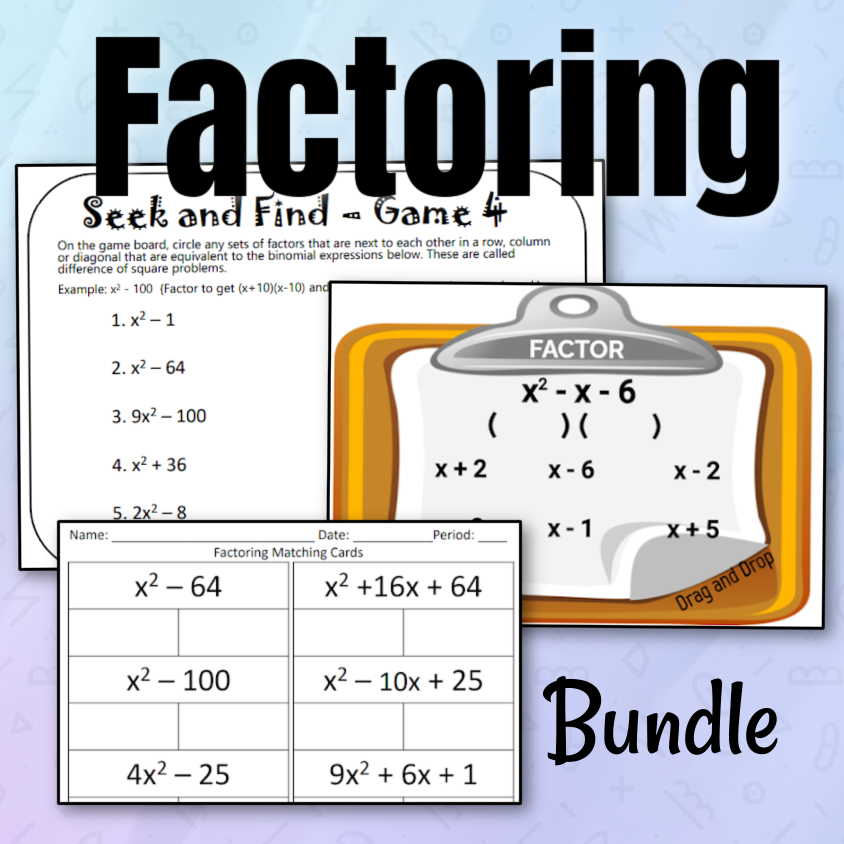
I finally have all of my factoring activities together in one bundle. You can never have too many factoring options. Factoring is a biggie and we all know how students tend to be weak in this area. The calculus teacher at my school is always telling me how students forget how to factor. This skill needs to constantly be recycled until it finally sticks!


One thought on “How I teach Factoring”