
For Japanese people, who have been eating fish and vegetables as staple food, fish is something familiar. Especially, dried fish is a typical family meal either now or then.
We usually see dried fish at fish shops or supermarkets. However, in fact, we can simply make dried fish at home. Today we are going to tell you how to make overnight dried fish.
What are Needed

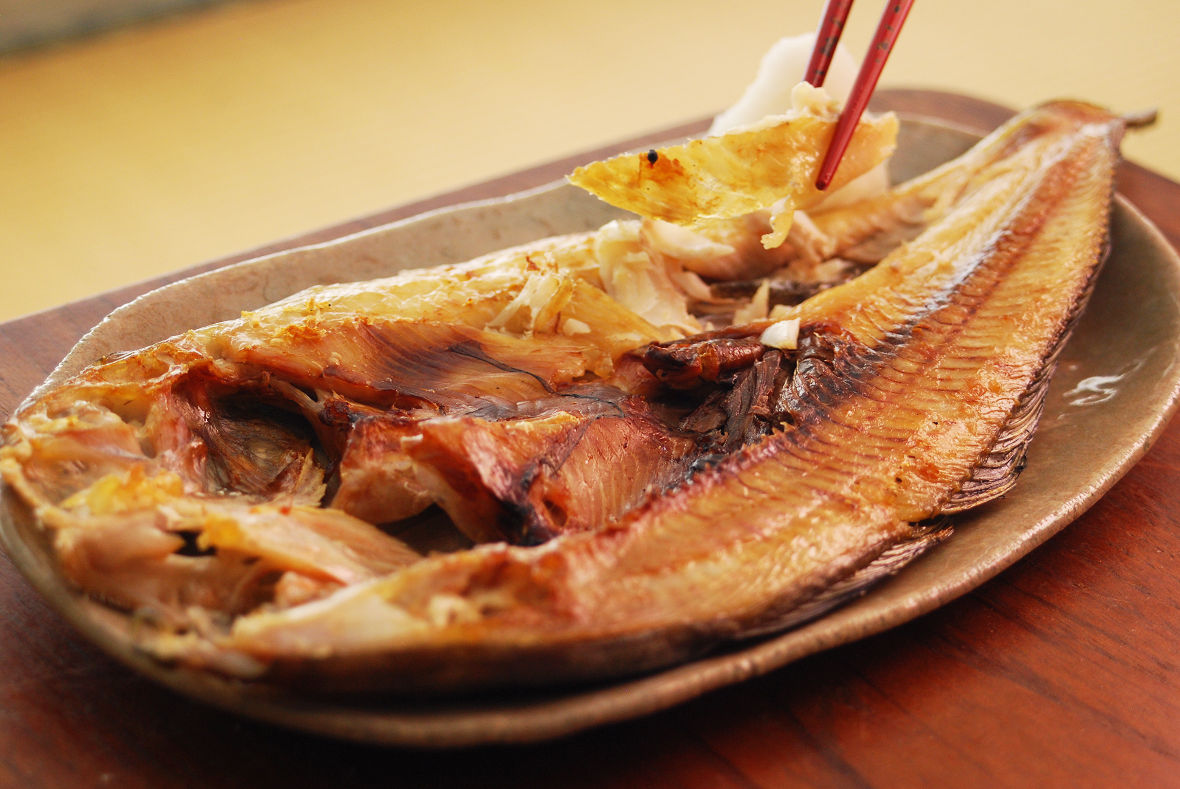
To make dried fish, first cut and open the fish, and then salt it and dry. Various kinds of fish can be used including sardine, horse mackerel, flatfish and sea bream. This time we use an Atka mackerel.
We also need salt to pickle the fish.
For more efficiency, it would be good if you have a fish scaler, Deba knife, bamboo strainer and drying basket.
How to Make Dried Fish
Let’s get started. Choose as fresh fish as possible.
1. Scale the fish

First scale the fish. It can be done by using a knife, but using a fish scaler would be more efficient. If you are going to make dried fish very often in the future, you should get one.
2. Open the fish

Make a cut in the fish to open it in half (Be careful not to cut it fully with a sheet of skin left).
There are two ways to open fish – “back side opening” and “belly side opening”. Either would be fine, but let’s see advantages and disadvantages for each.
An advantage of back side opening is that the fish won’t bend or collapse when grilled and the final looks will be beautiful. However, we need to cut the head in half, which is very hard.
On the other hand, for belly side opening, cutting starts from the jaw, which is easy to cut. However, it is difficult to grill it while keeping the final looks beautiful.
Apart from above, there is no big difference. This time we will show you backside opening.
Insert the knife along the back. It is important to do it carefully so that you won’t hurt the guts.

The head is hard, and be careful not to put too much strength. If the knife goes wrong, it may cause serious injuries. There is a spot in which you can easily put the knife in, so find the spot while sliding the edge of knife slowly.

When the fish is opened with a sheet of skin left uncut, it would be like above in the picture.
3. Remove the guts

Remove the guts and gills. Make sure to handle the guts carefully as bad smell will transfer from then guts if they get hurt. If you cut the fish with belly opening method, it will be like above.

4. Soak the fish in salt water

Put salt water in a big container to soak the fish. Although you can sprinkle the salt over the fish, soaking it in salt water will be easier to control saltiness and the salt will spread evenly.
The concentration of salt should be 3 to 10%. Higher concentration can keep freshness of the fish longer, but the fish will be too salty, and vice versa.
For overnight dried fish, it will be enough soaking the fish for 20 to 30 minutes.
5. Dry the fish

For drying the fish, it will be ideal doing it in a shadow on a sunny day. If ventilation is good, it will be done in an hour. It will take 5 to 6 hours at most. It will be complete if the surface of fish does no longer stick to your finger when you touch it.

Using a drying basket would be convenient. It will protect the fish from flies and birds. A bamboo strainer, which has high anti-bacterial effects, is also recommended. Turn the fish upside down and repeat it several times to dry evenly.

When it gets moderately dry, it’s done. If it gets too dry, the texture will be not good when eaten. However, it can be preserved longer. You can adjust as you like.
Summary
Dried fish is originally valued as preserved food. In modern era, where refrigerators are commonly used and we don’t really need preserved food, recommended salt concentration and time for drying are around 3% and 2 to 4 hours, respectively.
It should be eaten as soon as possible, but if not, it can be preserved in a freezer. Making of dried fish is more profound than expected as we need to take account into kinds of fish, concentration of salt, time for drying, etc. Let’s find your own recipe!