

Introduction: How to Make Outside Corner Molding Trim

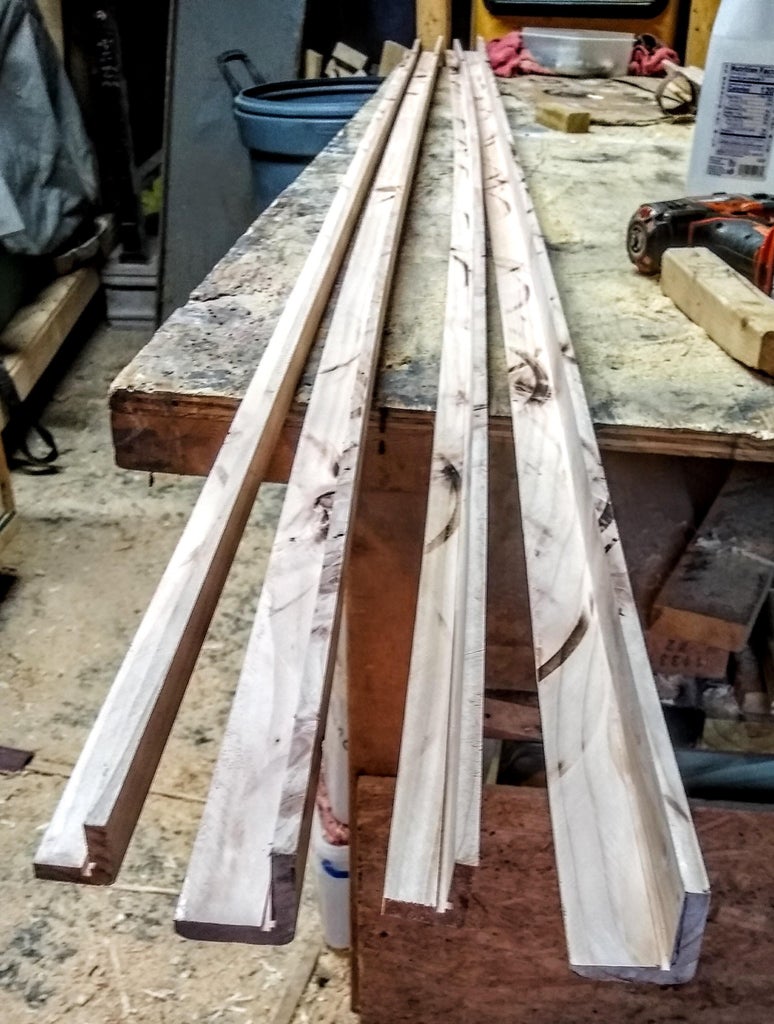


This instructable is how to make your own outside corner molding trim for the price of a 2x4 instead of $3 or more per foot at a big box store. It will be a total of two 1 1/2" x 1 1/2" x 98" and two 1 3/16" x 1 3/16" x 98" with a possible two more at 7/8" x 7/8" (8 foot piece not shown in this instructable).
BEFORE YOU BEGIN:
Pictures in the steps of this instructable are used with a scrap piece of 2x4 to make it easier for taking pictures. Which I suggest you use at first too so step 6 can be avoided for the full 8 foot lengths.
Supplies
TOOLS & SUPPLIES NEEDED:
(1) 2X4X98" (8 feet)
(1) Table Saw
(1) Combination Square or tape measure (optional)*
(1) Push block or Push stick, hearing & eye protection for safety
* = I used the thickness of the wood that's in this Instructable and didn't need to use any kind of measuring tool.
Step 1: Rip the 2x4 to Size*


*You could skip this step by buying two 2x2's but those in my opinion are extremely difficult to find relatively straight.
First, set any 2x3, 4, etc. piece of scrap wood as shown in the first picture on your table saw to make two 2x2's (they're actually 1 1/2" x 1 1/2") as shown in the second picture. The middle piece shown in the second picture is 1/4" thick and used as the thickness of the L's.
The third picture is a tip and where I put my left hand to keep pressure on the piece of wood so it keeps touching the rip fence. The feather board I have is garbage and it's just easier for me to do this step with hand pressure.
Step 2: Make the Markings


Make L shaped markings on one end as shown in the picture that are 1/4" thick.
I put the factory rounded edges towards the fence to have the option of rounded edges (pictures 2 & 3) or a flat edge (picture 4) for picture frames around my wooden US flags. Picture 5 shows the factory rounded edges (top) and the flat edge (bottom) from a finished 2x2 outside corner molding trim.
To make the markings for the height of the blade I just use the thickness of the left over 1/4" piece from the cut 2x4 (picture 6).
Step 3: Adjust the Table Saw Fence

Adjust your table saw fence to 1/4" as this will be the thickness of the L. Making it thinner could make the corner molding too flimsy and possibly snap.
I use that 1/4" thick piece of 2x4 left over for the L thickness (see picture) because the Ryobi table saw fence and ruler are TERRIBLE at making adjustments easy.
Step 4: First Cut or Kerf


I move the fence to put the 2x2 (with a line on top) behind the blade as shown in the first picture. But you could put all the blade height markings on that left over piece of 1/4" thick scrap from the 2x4 so you don't have to keep moving the fence.
Make the first cut with the L marking behind you or to the right as shown in the second picture.
Step 5: Second Cut or Kerf

Flip the piece 180 degrees and rotate it so the line is toward and lined up to the blade (as shown in the picture) then make the second cut.
Step 6: Adjust the Blade Height Gradually If Needed


If your 2x2 looks like what's shown in the first picture that's fine. Just raise the blade a little bit and make the 2 cuts again until the excess 1 3/16" left over becomes separated.
If the blade is too height as shown in the second picture that's ok too it still works.
Step 7: Repeat Previous Steps for the Second 2x2


Repeat previous steps for the second 2x2
Step 8: 1 3/16" Outside Corner Molding Trim

Get the left over 1 3/16" x 1 3/16" pieces and start the process again by making new height and L markings on it and continue the previous steps.
Step 9: Finished


Congratulations you just saved yourself a small fortune.
NOTE:
I didn't try the 8 foot 7/8" piece yet and not sure I will as it will probably snap and it being so small there isn't much to hold on to after experimenting with the shorter piece. I may cut them to 4 feet and try it but as of this instructable I haven't.
Step 10: Example Projects


Here are 2 projects that I used the 2x2 outside corner moldings on.
The first picture is the rounded edge towards the US flag while the second picture has the flat edge towards the US flag.
Step 11: Conclusion
Ripping 2 by lumber and making the outside corner molding DOES get easier and faster the more you do it.
Please be nice with your comments as this is my very first instructable.


