Table of Contents
Advertisement
Quick Links
Advertisement
Table of Contents

Related Manuals for Acer MP-S10


Summary of Contents for Acer MP-S10
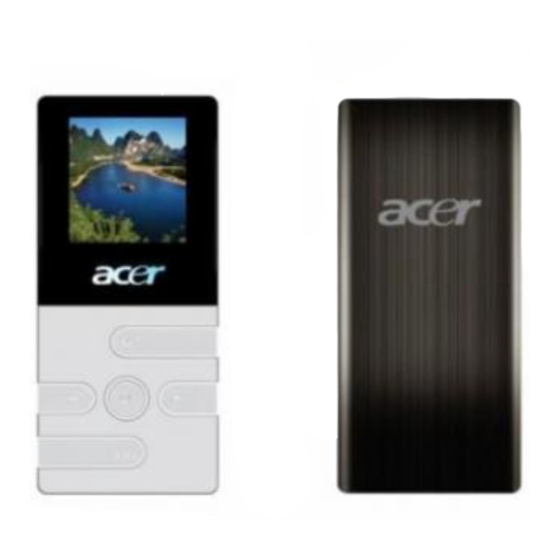
- Page 1 Acer MP-S10 User’s Manual Ver 1.0...
- Page 2 Copyright Copyright 2006 by Acer Inc., All rights reserved. No part of this publication may be reproduced, transmitted, transcribed, stored in a retrieval system, or translated into any language or computer language, in any form or by any means, electronic, mechanical, magnetic, optical, chemical, manual or...
-
Page 3: Table Of Contents
Contents 1. SAFETY DECLARATION..............................1 2. PRODUCT DESCRIPTION..............................1 2-1. M ................................1 EATURES 2-2. B ................................2 UTTON OCATION 2-3. P ..............................3 ACKAGING CCESSORIES 2-4. I USB D ............................3 NSTALLATION OF RIVER 2-5. USB C ........................... 5 ONNECTION AND EMOVAL 3. -
Page 4: Safety Declaration
1. Safety Declaration Please carefully and thoroughly read this safely guide Please keep this manual secure for future reference. III. Please keep the unit dry. Please avoid exposing this unit to sunlight. Don’t pour any liquid into this unit: otherwise it will cause damage or electric shock. Please contact with a professional for handing this: MP-S10 Player if the following situations occur. -
Page 5: Button Location
● GUI (Graphic User Interface) Menu - Vivid animation menu with corresponding characters for easy and visual operation. 2-2. Button Location Description LCD display Play / Stop / ON/OFF button Next track/Forward ( ) MENU button Volume control button (VOL) Headphone jack USB port Previous track/ Rewind ( ) -
Page 6: Packaging/Accessories
2-3. Packaging/Accessories Please confirm the packaging and accessories have the contents below: Acer MP-S10 Player Installation CD Earphone Quick Star Guide 2-4. Installation of USB Driver The installation is only needed for windows98 and windows 98 se computers. The steps are as follows: Insert the accessory CD driver and it will work automatically. - Page 7 Plug-in the MP-S10 device, the system will search the driver software automatically. Please Specify a location to save the driver software. (The original location is C:\program Files\MP-S10\Win98 Driver) According to the following steps shown in the PC screen, then it will finish the installation of Win98 Diver.
-
Page 8: Usb Connection And Safe Removal
2-5. USB Connection and Safe Removal The player supports standard USB disk function with operating system of Windows98 (driver needed), Windows 2K and above (driver free), Mac OS 10.3 and above, Linux 2.4.2 and above. The player’s power can be supplied through the USB cable. In waiting Mode, press MENU to activate main menu, then select to enter desired mode. - Page 9 ○Browsing music files or menu options: Short press button ○Fast forward or fast backward when playing Long press button Volume Control In music mode and voice mode short press VOL buttons to enter the volume control interface and then press the button to adjust volume.
-
Page 10: Music Mode
3-2. Music Mode I. Interface Description S/N Description S/N Description 1 EQ mode Lyric icon 2 Replay mode Battery indication 3 File format / bit rate 10 ID3 information 4 Folder name 11 Playback time S/N of Current music/voice Length of time with file current music Quantity of music/voice files... - Page 11 III. EQUALIZER Mode 1. While playing music, press the MENU button to enter Play Submenu: 2. Press button to choose Equalizer option: Press the MENU button to enter EQ selection menu. IV. Lyric Display This player supports “*.LRC” lyric files (user can download from http://www.51lrc.com), and lyrics may be synchronously displayed with playing music.
-
Page 12: 3-3.Movie Mode
3-3.Movie mode 1. Enter the main menu and press the button to select “MOVIE” mode. 2. Press the MENU to enter. 3. Press the PLAY button to start playing AMV files. 4. Choose music: button: previous file. button: next file. 5. -
Page 13: 3-5.Playing Recorded Files
4. Press Play again to pause recording 5. Press Play to continue recording. 6. Long press Play to stop recording. II. Selecting REC type 1. In the record mode stop interface, press MENU to enter record submenu: 2. Press button to select ‘REC type” option 3. -
Page 14: E-Book Function
2. Press MENU button to enter Voice mode interface and press PLAY button to start playing. 3. Choose music button: to choose previous record file button: to choose next record file. 4. Volume control Short press the VOL button to enter volume control interface and the press the / button to adjust volume. - Page 15 Play set 1. At the text file menu 2. Press MENU button to enter the submenu of text file that you would like to select: 3. Press button to choose “play set” option: 4. Press MENU button to enter this option: 5.
-
Page 16: 3-7.Photo Album
3-7.Photo Album This function supports all JPEG format pictures 1. From the main menu, press button to choose the “Album” option: 2. Press the MENU button to enter picture selection menu (if there are no pictures, the display shows “No files” on the OLED). 3. -
Page 17: 3-8.Games
3. Press MENU to enter the following interface: 4. Press (button to choose “Manual play” or “auto play” options, press MENU button to confirm. 5. When choosing “Manual play” options, enter this interface as follows: 6. Press button to adjust “auto play” speed. Press the MENU button to confirm. Remark: when viewing pictures, long press MENU to fast exit from picture interface and return to the main menu. - Page 18 Press MENU to enter System Setting interface as follows: I. Parameter(s) Introduction System Time: Set the date and time when recorded files are saved. LCD set: Set the period of time (in seconds) when Backlight stays on without any operation. Language: Select the language under this mode.
- Page 19 3. Press Play to set time in sequence of “YY-MM-DD” 4. Push button to adjust numbers 5. Press MENU to confirm and exit. “LCD set” setting Operating steps are as follows: 1. From System Setting interface: 2. Press key to select “LCD set” option: 3.
- Page 20 Black mode Set fixed period of time (unit: second) so that when no key operation is performed, the players screen will turn black automatically. If “0” is selected, function is invalid. “Language” Setting Operating steps are as follows: 1. From System setting interface, press button to select “Language”...
-
Page 21: Other Setting
The Firmware Version information that the player uses can be obtained here. Firmware Upgrade The Player has been specially designed so that it is Firmware Upgradeable. DRM Time: Set DRM Time. The operation is same as set system time. If the DRM time is wrong, the music files with DRM will not display. - Page 22 4. Press buttons to choose folder. 5. Press MENU to enter the next folder. Press the PLAY button to confirm the folder to be selected. Select the “\” folder and then press the MENU button to return to previous folder. Note: Independent folders can be set at corresponding modes i.e.
- Page 23 4. Press MENU button to enter Delete file folder: 3. Press MENU button to enter Delete file folder submenu 6. Press button to choose “Delete” or “Delete all” and Press MENU button to confirm and deletion begins Remark: “Delete All” means to delete all the relevant files in the current mode from the current folder. (For example, in Music Mode executing “Delete All”, all the music files in current folders will be deleted, while recorded files will not be affected).
- Page 24 IV. Tempo Rate (Play Submenu) When playing music (MP3 format only) or recorded files, different tempo rate can be set (faster or slower) without changing the tone and sound. 1. When playing music 2. Press MENU button to enter Play Submenu as follows: 3.
- Page 25 Press MENU to enter Play Submenu. Press to select “Replay” Press MENU key to enter “Replay”. “A” flickers in Replay Mode icon and start point is set Press to set “A”. Press to set “B”. After “A” is set, “B” flickers in icon , and endpoint B needs to be set.
-
Page 26: The Convert Tools Install
After recording, the icon changes to , and the original sound is played. Press button to enter Comparison. Note: In this mode, pressing button returns to A-B Replay Mode. Comparison (This function does not exist in Voice Mode) Enter this mode and the Replay icon changes to and the original sound is played. - Page 27 3. Click the button; it will jump to this picture 4. Select the file which the audio file that this tools can support 5. Selected file and confirm, then it will appear the following picture 6. Select the path where the file will convert finished...
- Page 28 7. Click button, it will start convert 8. Finish converting file. 9. You can play it in your player Remark: The format of converting tooling of the player is AMV, and the format that can be converted directly is MPEG, DAT and WMV.
-
Page 29: For Drm Music Downloading
4. For DRM music downloading To operate DRM10.0, OS is required: Windows XP + Server Pack 1, Windows Media Player 10.3646 (WMP10) or above. Note: At first please turn on the new player before downloading DRM10 songs. If you do not use the player for a long time, you should turn on the player before downloading DRM10 songs. - Page 30 (Synchronizing…) After finished (as follows), pull out the MP3 directly Now the Media database and License will begin to be loaded to the MP3 automatically.
-
Page 31: Trouble Shooting
Picture as follows: a).Loading: b) .Loading finished and license renewed: c) .Loading failure: (only in the failure condition) d) .Low battery: (only in the low battery condition) After synchronization DRM songs, users need to set the DRM time in SYSTEM SETTING if users’ operation system is XP or lower (Details please see 3.5.12 DRM Time) If users’... -
Page 32: Specification
6. Specification Dimension 39*89*7mm Weight 43.5g LCM Window 26*28mm PC connection USB2.0(FS) Read: 1000K Byte, Write: 1000-900K Byte Memory 128MB, 256MB, 512MB, 1GB, 2GB Max Play time: 10 hours Battery Sample rate 8KHz Record Recording format WAV ACT MP3 Recording time 35 hour ACT 128M Flash MP3 WMA WMV ASF Max output of headphone L 10mW... - Page 33 http://www.acer-euro.com...