
Related Manuals for LG RC9055AP3Z


Summary of Contents for LG RC9055AP3Z
- Page 1 OWNER’S MANUAL LG HEAT PUMP DRYER Please read this manual carefully before operating your dryer and retain it for future reference. RC9055AP3Z / BP3Z RC9055AP2Z / BP2Z RC9055AP1Z / BP1Z RC9055APZ / BPZ P/NO. : MFL63749075...
-
Page 2: Table Of Contents
Ultra Big Capacity Drum The ultra big 9.0kg capacity drum on this LG dryer allows you to dry more washing at once, saving time! Lower Energy Consumption Energy LG Heat Pump dryers use less energy than conventional dryers due to an optimized heat exchanger and auto cleaning technology. -
Page 3: Safety Instructions
• It is strictly forbidden to use the product for anything other than the manufacturer authorized usage. LG doesn't take full responsibility for the damage by inaccurate and improper use. • Do not repair or replace any part of the dryer or attempt any servicing unless specifically rec- ommended in the user-maintenance instructions or published user-repair instructions that you understand and have the skills to carry out. - Page 4 afety Instructions • Do not use if power cord, • Keep pets away from the plug or socket is damaged. dryer. May cause fire or electric Pets may damage the dryer, shock. or may receive an electric shock. • Do not install or store the •...
- Page 5 afety Instructions • If this appliance is supplied with power from a cord extension set or an electrical connector, the portable outlet device must be positioned so that is not subject to damp or splashing. It may cause an electric shock, a fire, malfunction or deformation. •...
-
Page 6: Installation Instructions
Stacking Installation Instructions Your LG dryer can be placed on top of a front loading washing machine and securely fixed with a stacking kit (see following page for instructions). This installation must be conducted by an experienced installer to ensure it has been installed correctly. - Page 7 • Do not operate if the dryer is disassembled. This dryer may only be stacked on top of an LG wash- 3. Align the stacking kit holes and the rear cover er. DO NOT attempt to stack this dryer on any other holes.
-
Page 8: Additional Grounding Procedure
nstallation Instructions Earthing Instructions Note This appliance must be earthed. In the event of - The damper in the door lock assembly malfunction or breakdown, earthing will reduce and the packing for the rack assembly in the risk of electric shock by providing a path of the drum should be removed before use. -
Page 9: Level The Dryer
nstallation Instructions Level the Dryer 1. Levelling the dryer prevents unnecessary noise and vibration. Place your dryer on a solid, level floor. Place the dryer in an area free from flammable materials, condensation and not liable to freezing. 2. If the dryer is not properly level, adjust the front levelling feet as necessary. -
Page 10: Appearance & Design
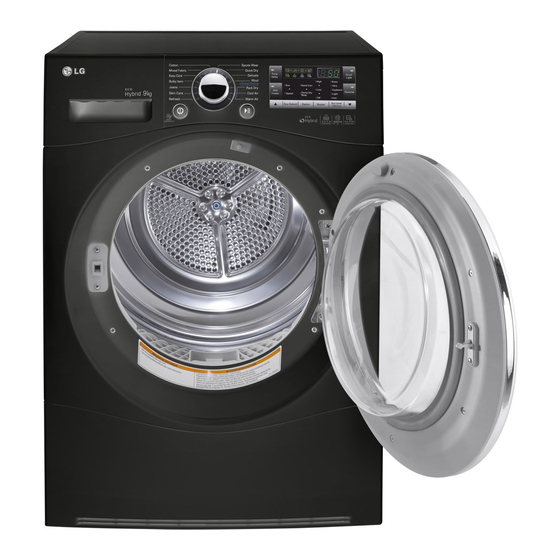
& Design Product Layout RC9055AP3Z / BP3Z RC9055AP1Z / BP1Z RC9055AP2Z / BP2Z RC9055APZ / BPZ Control Panel Water Container Glass Door Opaque Door Air Ventilation Grill Control Panel Smart Diagnosis™ function is available only for the products with a Smart Diagnosis™ mark. -
Page 11: Operating Your Dryer
perating Your Dryer Cycle Selection Table Sensor Dry Cycle Cycle Laundry Type Drying Level Detail Towels, dressing gowns and bed For thick and quilted fabrics Extra linen For thick and quilted fabrics that do not need to be Terry towels, tea towels, towels Very ironed and bed linen... - Page 12 After removing the packaging, please carry out the following checks to ensure the LG dryer is correctly installed and ready for use. (See installation instructions) 1. Check the dryer is well balanced by using a spirit level. If not, adjust the feet of the LG dryer until the machine is balanced.
- Page 13 perating Your Dryer 5. Close the door. Select the Before you close the door, make sure fab- desired rics are placed well inside and that foreign cycle. objects, especially flammable ones, are not caught around door. CAUTION - Be careful not to trap laundry between the door and rubber seal.
-
Page 14: Rack Dry
perating your dryer Rack Dry The dryer rack is placed inside the dryer like the Note picture. Remove and discard packing material before use. Check the filter and remove any lint The Rack Dry is designed for use with items that accumulated from items dried on the Rack. -
Page 15: Additional Functions
dditional Functions Option buttons Power Cycle Start/Pause Additional programme Selector buttons Power Additional Programme • Press the Power button to turn power on • Use these buttons to select the desired and off. options for the selected cycle. • To cancel the Time Delay function, the power button should be pressed. -
Page 16: Time Delay
dditional Functions Time Delay Option You can use the Time Delay option to Hand Iron delay the finishing time of drying cycle. This function keeps the garments more moist Maximum Time Delay is 19 hours. than the standard Iron dry level. Minimum Time Delay is 3 hours. -
Page 17: Caring For Your Dryer
aring for Your Dryer Caring for your Dryer is very Important Empty Water Container It’s not difficult to care for your dryer but it is important Condensed water is collected in the water container. that you do care for it to get the best out of it. Empty the water container after every use. -
Page 18: Moisture Sensor
aring for Your Dryer 3. Connect Ventilation Grill and Cool Air drain hose Inlet Grill to the kit. Vacuum the front ventilation grill 3-4 times a year to make sure there is no build up of lint or dirt that may cause improper air flow. Moisture Sensor? The device senses the moisture level of the laundry during operation, which means it must... -
Page 19: Additional Tips For Smart Use
dditional Tips for Smart Use Drying Guide Display Drying Time (Including Cooling Time) CYCLE Capacity of dryer Speed 9 kg Extra 200min 125min Very 9 kg 190min 120min 9 kg Cotton Cupboard 180min 115min Light 9 kg 170min 103min Iron 9 kg 160min 97min... - Page 20 Tips for Smart Use Product Specification LG AUTOMATIC CLOTHES DRYER Maker LG Electronics Model RC9055**** Rated Capacity Dryer Type Condenser Household Tumble Dryer Energy Efficiency Class Annual Energy Consumption (AE kWh/yr Automatic Tumble Dryer EU Ecolabel Award 2.20 1.15 Power Consumption at Full Load -.
-
Page 21: Spare Parts
4. Model number and serial number of your top plate size 550mm and 600mm for dryer. both. 5. Date of Purchase. If stacking is needed, you must stack the dryer upon LG washing machine. A stacking kit is sold separately. -
Page 22: Troubleshooting Guide
roubleshooting Guide Troubleshooting Tips To save you time and money, the following page will help answer your questions before service call. Questions What to do 1. Check dryer is plugged in. Dryer won’t run 2. Check "Start/Pause" button is pressed. 3. -
Page 23: Error Mode
roubleshooting Guide Error Mode • : The door must be closed and Start/Pause button must be pressed for re-operation.If error message continues to occur, unplug the power cord and call the service center for advice. • : If error message continues to occur, unplug the power cord and call the service center for advice. -
Page 24: Using Smart Diagnosis
LG does not guarantee that Smart Diagnosis would accurately troubleshoot any given issue.”... -
Page 25: Technical Data
echnical Data 850 mm 640 mm 600 mm Net Weight : 55.9kg ,Opaque Door 57.4kg ,Glass(Cr) Door Ventilation Requirement Electrical Requirements Alcove or Volts Hertz Watts Closet under counter Ensure air flow of Closet door must have 230 V 50 Hz 1800 112 cu.ft./min 2 (louvered) openings,... -
Page 26: Warranty
arranty Disposal of your old appliance 1. When this crossed-out wheeled bin symbol is attached to a product it means the product is covered by the European Directive 2002/96/EC. 2. All electrical and electronic products should be disposed of separately from the municipal waste stream via designated collection facilities appointed by the government or the local authorities. - Page 28 For U.K. Customer CUSTOMER SERVICE Tel : +44- (0) 844 847 5454 Fax. : +44- (0) 844 847 1413 LGEUK SERVICE WEB-SITE : http://uk.lge.com...