


We may receive a commission when you use our affiliate links. However, this does not impact our recommendations.
Bowl Gouge Sharpening
Do it by hand, just like you turn.
By Alan Lacer
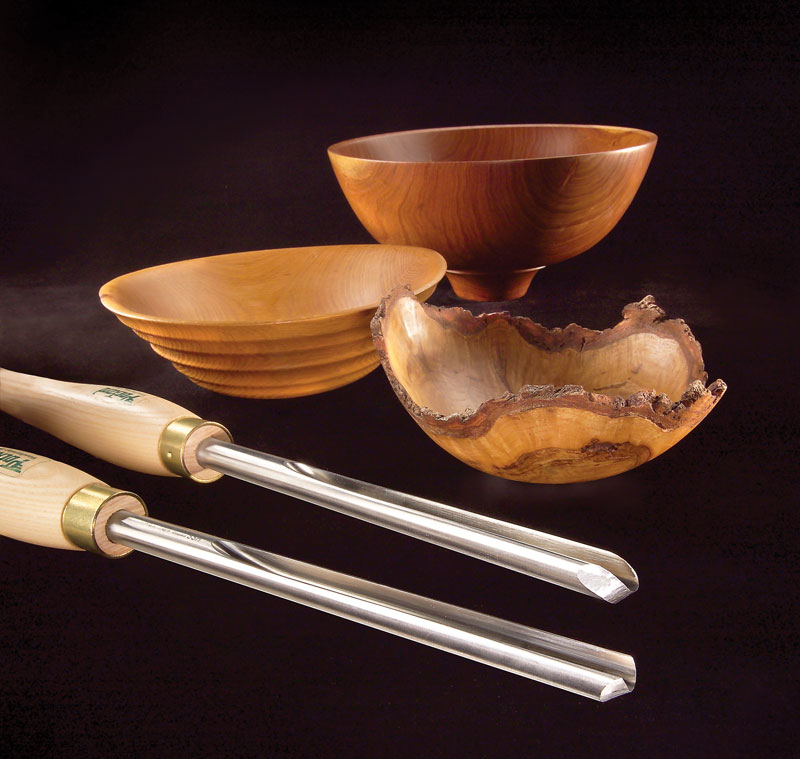
How do you make a velvety smooth bowl with evenly thick walls and crisp details? Well, it’s not done by sanding the heck out of it. The secret is to use a bowl gouge that is properly shaped and very sharp.
Most bowl gouges aren’t ready to do this kind of fine work right out of the package. They must be shaped, sharpened and honed. Shaping a bowl gouge means altering its profile, also called its grind. Sharpening maintains the profile and renews a dull edge. Honing further sharpens the edge. I’ll cover how to do all three operations freehand style.
I prefer sharpening freehand, as opposed to using a jig, because it’s similar to turning a bowl. When you sharpen, the tool sits on a rest and meets a round object—in this case, the grinding wheel. You rub the bevel on the round object and manipulate the edge. That’s what turning is all about, too. Once you’ve learned to sharpen freehand, you’re all set to make a fantastic bowl.
How to Sharpen 3 Profiles
Woodturners shape their bowl gouges into three basic groups of profiles: traditional, fingernail and swept-back. Any gouge can be modified on the grinder to match these profiles. Your choice of profile depends on your skill level and preference.
I use a coarse wheel for shaping a bowl gouge and a finer one for sharpening (see “Equipment,” below). The basic procedures for shaping and sharpening are the same. After you shape the profile, you grind a bevel to follow the shape.
Most bowl gouges are made from high-speed steel (HSS). If your HSS gouge turns blue as you grind, don’t worry. This change won’t soften the steel. If the tool becomes too hot to hold, don’t quench it in water. Let it cool in the air or lay it on a metal surface to dissipate the heat.
When you’re sharpening a gouge, it’s important to grind the entire bevel, rather than just the edge. To find the correct position, contact the heel of the bevel first, and then raise the tool’s handle until the entire bevel contacts the grinding wheel.
1. Traditional Profile
The traditional profile is the easiest to sharpen. It’s created by rotating the tool. To begin, set the tool rest to create a 45- to 60-degree bevel. Lay the tool on the rest, positioned to start at one side (Step 1). Slowly push the gouge toward the wheel. When you contact the wheel, rotate the gouge until you reach the other side, and then reverse direction. As you grind, hold the gouge firmly on the rest and keep its end square to the wheel.
The traditional profile works well in general but has some limitations. It’s good for shaping the outside of a bowl that’s mounted with its opening facing the headstock. But if the bowl is mounted the other way, facing the tailstock, this profile doesn’t work as well. The traditional profile is good for opening up most of a bowl’s interior, but not too good at the transition from the sides to the bottom unless the tool is ground with a very steep angle. This profile doesn’t have drawn-back sides, so it’s more difficult to make the fine finishing cuts that are possible with the fingernail and swept-back profiles.
Click any image to view a larger version.

Top view. The end of a traditional profile is straight across.

Side view. The cutting edge is approximately vertical.

Step 1. Shaping and sharpening the traditional profile is very easy. Simply start at one side and rotate the tool on the grinder’s tool rest. Stop grinding when sparks flow evenly over the cutting edge. These sparks indicate the edge is sharp.
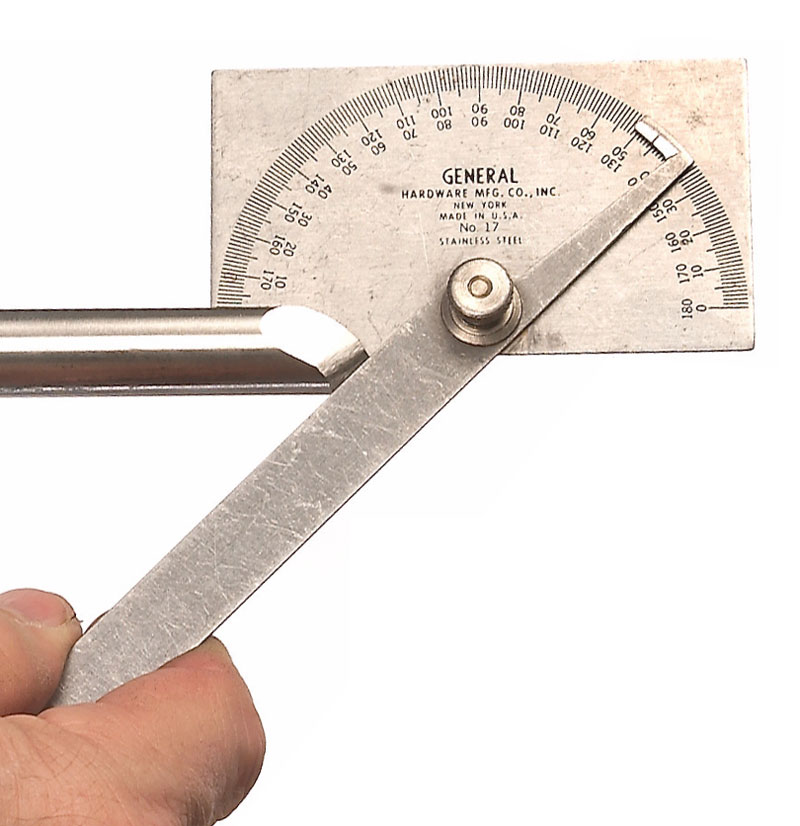
Step 2. Use a protractor to check the angle of your profile (see Sources, below). There is no perfect angle for all situations. To start, 45 to 60 degrees is fine. With experience, you’ll see how different angles affect a tool’s performance.
2. Fingernail Profile
Grinding the fingernail profile requires more dexterity than making the traditional profile, but it’s not difficult. In fact, the operation is very similar to a few cuts in bowl turning itself.
To begin, set the tool rest about 120 degrees to the wheel (Step 1). The front edge of the tool rest must be very close—1/8 in. or less—to the wheel, so you can’t pinch your fingers in the gap. Rest the gouge on top of two fingers and push it slowly toward the wheel. Contact the middle section of the bevel first. Then raise the gouge’s handle until the full bevel touches the wheel. Begin a slow upward twist, continuing until the tool is heeled over on its side (Steps 2 and 3). Repeat this process on one side of the gouge until sparks come over the edge and travel down inside the flute—that’s the sign the edge is done. Do the same procedure on the other side of the tool and then work on the middle of the gouge to make a uniform, continuous bevel.
The fingernail profile is the best shape for a beginning bowl turner. It’s more versatile than the traditional profile. It works well whether the bowl is mounted toward the headstock or tailstock and is useful for detailing work on a rim or foot. The sides can be used for shear cutting and shear scraping finishing cuts.

Top view. The end of a fingernail profile should be oval, but not too pointy.

Side view. The line from the point to the top should be straight or slightly convex, never concave.

Step 1. Sharpen the fingernail profile in a fluid motion, one side of the bevel at a time. Begin at the center. You’ll rotate the tool and push it up the grinding wheel, all in one shot, using your fingers for support.
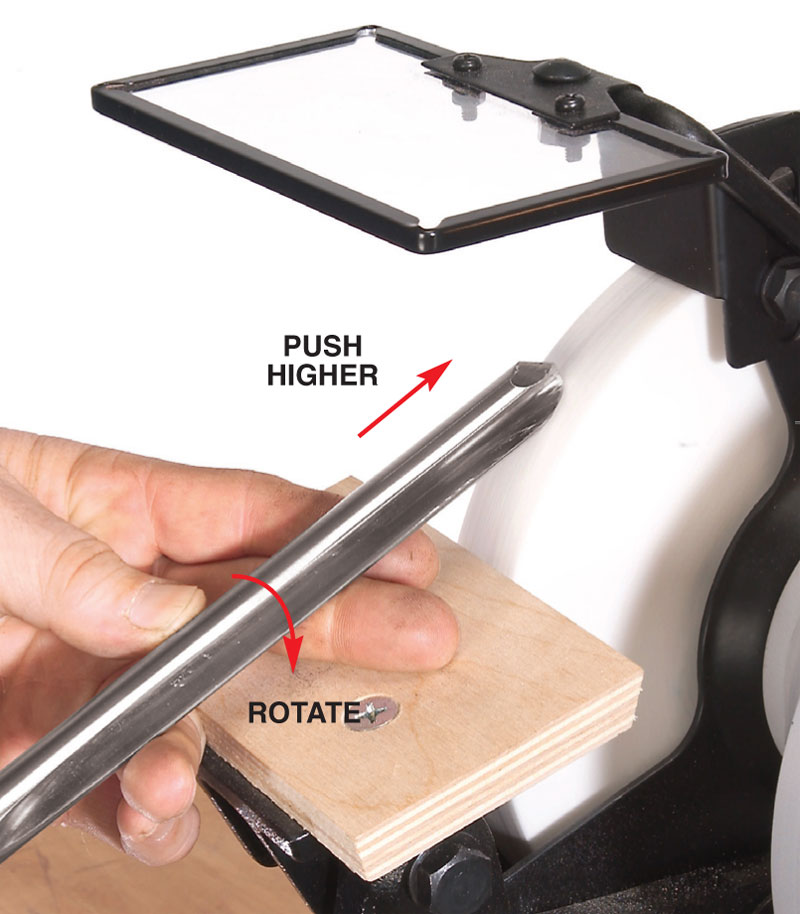
Step 2. Twist the gouge and push it higher on the grinding wheel.
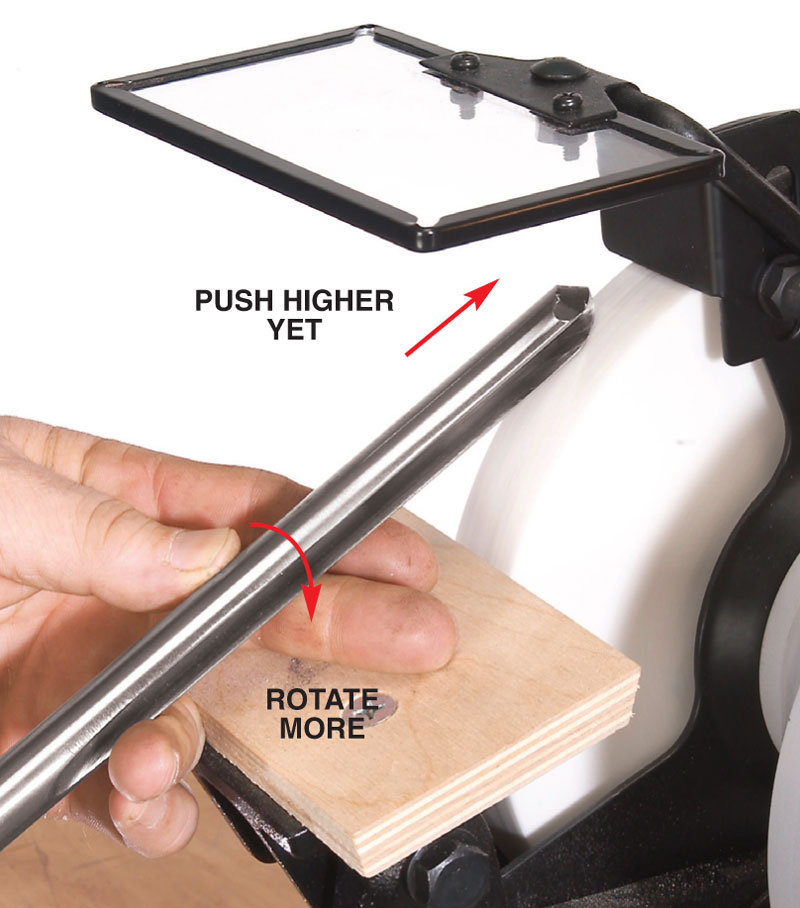
Step 3. Stop twisting and pushing when the tool is fully on its side, at a 90-degree rotation. Make light passes in this manner, on each side, until sparks just begin to come over the cutting edge.
3. Swept-Back Profile
The swept-back profile is the most difficult profile to create, but it doesn’t take a lot of practice to master. If you have trouble, remember that you can’t ruin a turning tool by grinding; you only shorten it.
To begin, set the tool rest in the same manner as for a fingernail profile. The procedure is very similar to making a fingernail profile, but here you work on the long sides of the tool first (Step 1). When both sides are done, grind the front (Step 2). Then blend the front into the sides (Step 3). Aim for a uniform bevel, but the transition doesn’t have to be completely smooth. The front and sides are used in two different turning operations, so the area in between isn’t critical.
The swept-back profile is also called an Irish, Celtic or Ellsworth grind. It’s the most versatile profile. Your bowl gouge can be used as a roughing, scraping and fine finishing tool. It’s easy to level any surface, inside or out, when using the gouge in a shear cutting or shear scraping action. The swept-back profile is not for beginners, however. It can be too aggressive for inexperienced hands. A gouge with a swept-back profile also requires considerable power from the lathe to remove large amounts of material. Some small lathes don’t have enough horsepower to handle it.
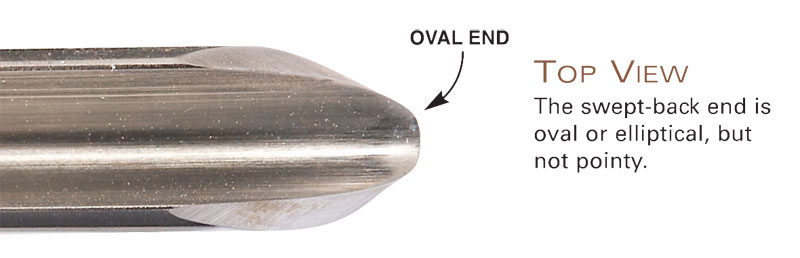
Top view. The swept-back end is oval or elliptical, but not pointy.

Side view. The sides are ground back much farther than a fingernail profile. The line from the point to the top should be straight or slightly convex, never concave.

Step 1. Begin making a swept-back profile by grinding the sides. Hold the gouge on its side and slightly rotate it to create the sweep.

Step 2. Grind the gouge’s front. Begin with the center; then slightly rotate with a small upward push.

Step 3. Blend the front and sides of the gouge by pushing and twisting the gouge up the wheel. This technique is similar to that used to create the fingernail profile.
Final Step: Honing
I hone all my bowl gouges after sharpening and routinely touch them up at the first hint of dullness during turning. Honing isn’t absolutely necessary, but it has many benefits. A honed gouge produces a cleaner cut, makes crisper details and reduces the time I spend sanding. The more often you hone, the less time you’ll spend going back to the grinder for sharpening.
HSS gouges are very tough steel. Most slipstones don’t work well on HSS because they cut too slow, or not at all. I use a special diamond slipstone that cuts much faster and fits the radius of every bowl-turning gouge (see Sources, below).
I hone the bevel first (Step 1). The trick is to hold the stone flat on a bevel. Straight from the grinder, this bevel should be slightly concave. The stone should always contact the ground bevel at two points: the back or heel, and the area below the cutting edge, called the toe. I start honing by only contacting the heel and then angle the stone to touch both surfaces. Honing the flute is much easier (Step 2).
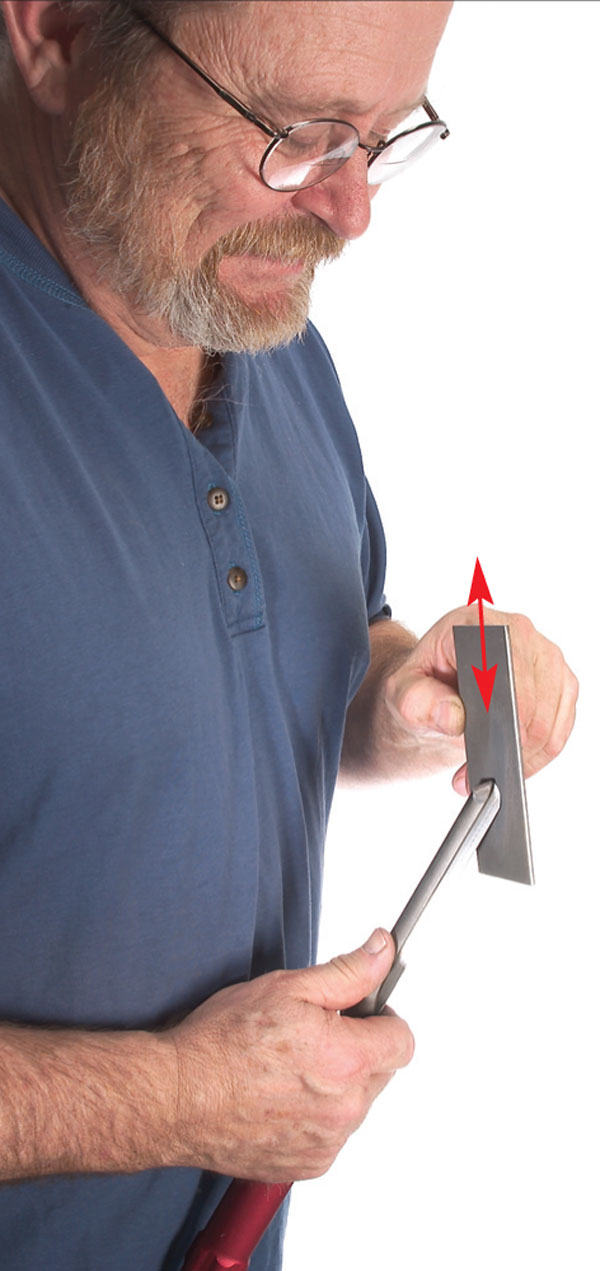
Step 1. Using a diamond slipstone to hone a gouge really improves its performance. Hone the ground bevel first by bracing the gouge and moving the stone up and down.

Step 2. Hone the inside of the gouge using the slipstone’s rounded edges. Brace the gouge against your side, place the stone flat on the gouge’s flute and slide the stone back and forth.
Equipment
Most turners use a bench grinder to reshape and sharpen their tools. Just about any equipment will do, but here’s what I suggest (see Sources, below):
– 8-in. grinder. I prefer a slow-speed model that runs about 1,725 rpm. I haven’t tried them all, but I really like the heavy-duty Delta 23-275, $175. It has lots of power and feels very stable.
– Rock-solid tool rests. This is the greatest weakness of most grinders, but not the Delta. Look for supports that have no flex. They should be easy to angle and move in and out. I added wood platforms to the Delta’s tool rests to make larger support areas.
– Friable grinding wheels. They come in white, pink, blue or orange. I prefer a 60 or 80 grit for sharpening and a 46 or coarser grit for shaping. Look for a J- or K-level hardness for turning tools.
– Diamond wheel dresser. Dressing a wheel is critical for good sharpening. A dresser cleans, flattens and sharpens the wheel by exposing fresh grit. I prefer this T-handle dresser ($35, see photo, right) because it works extremely fast.
– Movable lamp. It should be able to illuminate either side of both wheels.
– A face shield or safety glasses and a dust mask. Be sure to use these because the grinding dust is a health hazard. Dressing a wheel creates lots of dust.

Sources
Note: Product availability and prices are subject to change.
Delta Machinery, deltamachinery.com, 800-223-7278, 8-in. slow-speed bench grinder, #23-725.
MSC, mscdirect.com, 800-645-7270, 8-in. dia., 60-grit wheel, #86758562; Bushing set, #00390955; 8-in.-dia., 46-grit wheel, #05867163; Bushing set #00390989; Steel protractor, #06475172.
Packard Woodworks, packardwoodworks.com, 800-683-8876, Diamond Jim grinding wheel dresser, #141504.
Alan Lacer, Worker of Wood, alanlacer.com, 715-426-9451, Diamond Slipper slipstone.
This story originally appeared in American Woodworker September 2006, issue #123.

Here are some supplies and tools we find essential in our everyday work around the shop. We may receive a commission from sales referred by our links; however, we have carefully selected these products for their usefulness and quality.


