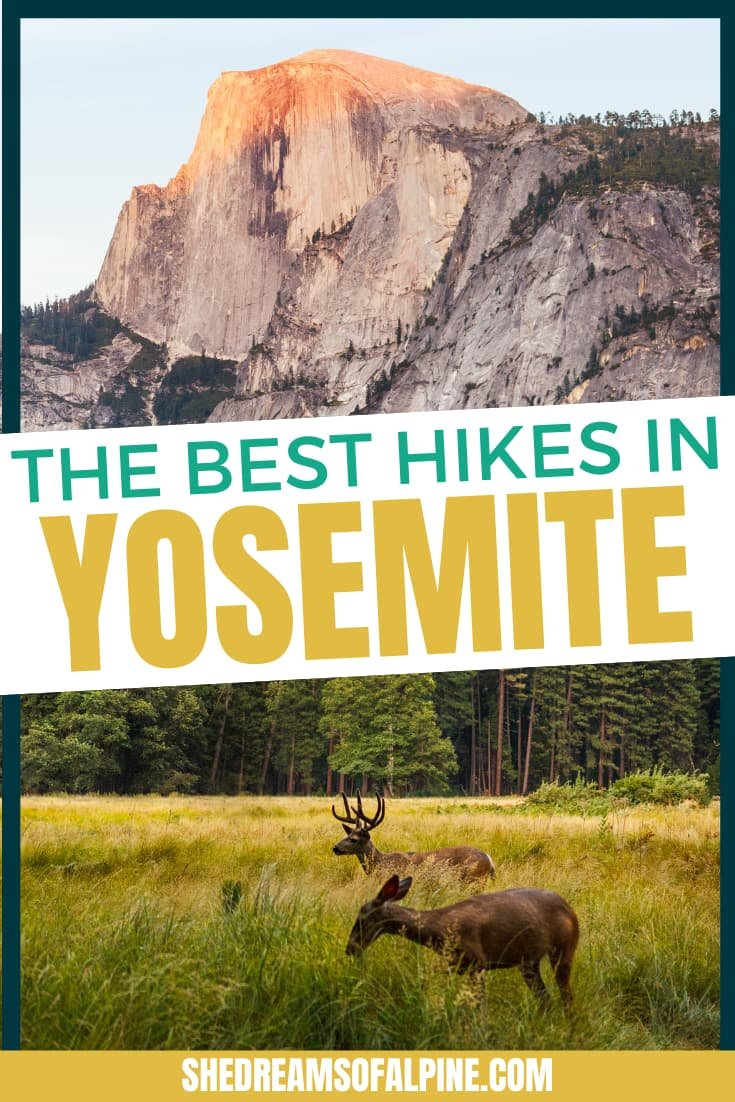
27 Best Hikes in Yosemite National Park (2024) to Put on Your Hiking Bucket List

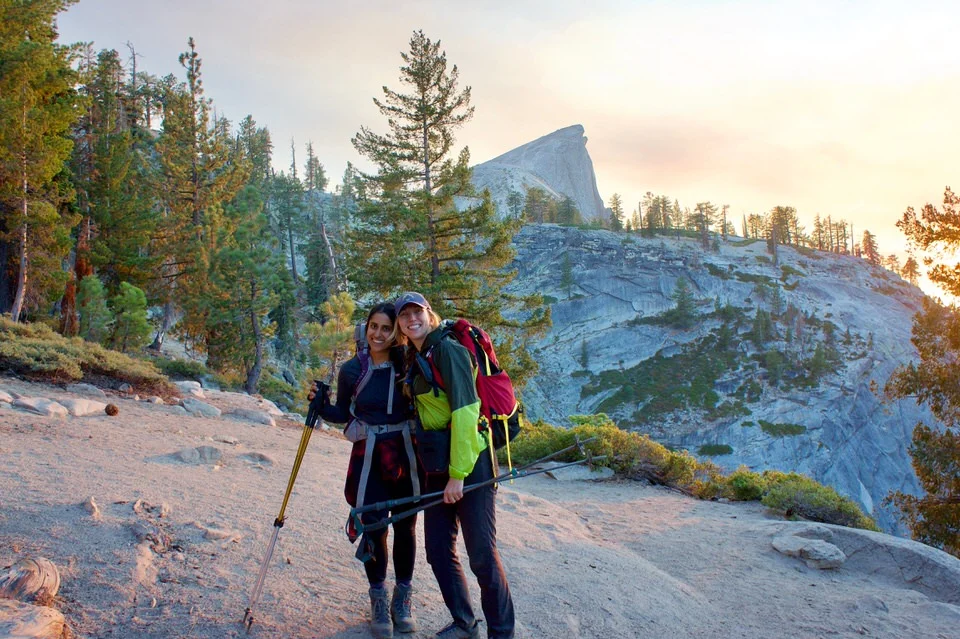
Yosemite National Park is one of the most magical places I’ve ever been, and experiencing the park via one of its many amazing hiking trails is probably the best way to fully grasp its grandeur and beauty. I put together a list of some of the best hikes in Yosemite so that next time you visit, you have a quick and easy guide to reference for exploring the Yosemite trails.
In this post, we will dive into all the best hiking trails in Yosemite – over 25 of them are covered here!
And if you just can’t get enough and are interested in more guides for hiking in California, be sure to check out our resources at the bottom of the post. You’ll find links to even more classic hikes in California including some of my very favorite California backpacking trails and favorite California 14er hikes (14,000 foot peaks), some of which are only a short day drive from Yosemite! Plus, a guide to all of my favorite hikes in Mammoth Lakes for more eastern Sierra epicness!
Also, be sure to check out this guide to important permit & reservation deadlines for popular hiking trails in California.
I’ve split up the list of Yosemite hikes based on difficulty, so if you’re looking for a harder (or easier) day hike you can skip to the section you are searching for. I decided to start with the most difficult hikes first since some of my absolute favorite hikes in Yosemite are the most difficult ones.
So if you are looking for the easy hikes in Yosemite, skip to the bottom – and believe me, there are a ton of awesome easy day hikes in Yosemite as well.
About This Best Hikes in Yosemite Post
Since everyone has a different gauge of “difficult” and “easy” hiking, here is how I’ve defined the list below:
1. Best Difficult Hikes in Yosemite - If a trail is over 7 miles long OR over 2,500 feet of total elevation gain, I rated the hike as “difficult.”
2. Best Moderate Hikes in Yosemite - If a trail is within the 4-7 mile range OR between the 1,000 to 2,500 feet of total elevation gain, I rated the hike as “moderate.”
3. Best Easy Hikes in Yosemite - If a trail was under 4 miles long OR under 1,000 feet of total elevation gain, I rated the hike as “easy.”
4. The Epic Special Trail That Runs Through Yosemite - We’ll finish with one of the most iconic Yosemite National Park trails in the United States that starts right in the heart of Yosemite. You can’t do it in a day, but it’s definitely one to put on that bucket list of yours!
Yosemite Hikes Map
Many of the best trails in Yosemite in the list below are located within Yosemite Valley, but some of the hikes are further away. Parking can prove difficult in Yosemite, so sometimes it is best to take a shuttle from the valley to your hiking trailhead. Make sure to check the details of getting to the trailhead and make a plan for each of the hikes you choose.
Note: Reservations are required to enter Yosemite during peak summer season from July 1 - August 16, and on weekends and holidays from April 13 - June 30 and August 17 - October 27. Find out more info about Yosemite reservations here.
Here is a Yosemite trail map showing the location of the best hikes in Yosemite that we discuss in detail in this post. Click the map below to be taken to an interactive Google map to explore the locations further (or click here).

Here’s a quick list of all the hikes we cover inside of this post. So, if there’s a specific hike you’re looking for, just jump to the number:
The Half Dome Hike (14 miles round trip, 5,300 ft. gain, difficult)
Clouds Rest (14 miles round trip, 2,800 ft gain, difficult)
Upper Yosemite Falls Trail (7.6 miles round trip, 2,600 ft. gain, difficult)
Glen Aulin Trail to Tuolumne Falls & White Cascade (13 miles round trip, 600 ft. gain, difficult)
Four Mile Trail to Glacier Point (9.6 miles round trip, 3,200 ft. gain, difficult)
North Dome Hike (8.8 miles round trip, 1,800 ft. gain, difficult)
The Diving Board (12.5 miles round trip, 4,074 ft. gain, difficult)
The Pohono Trail (12 miles round trip, 3,700 ft. gain, difficult)
Panorama Trail (8.5 miles one way, 3,200 ft. gain, difficult)
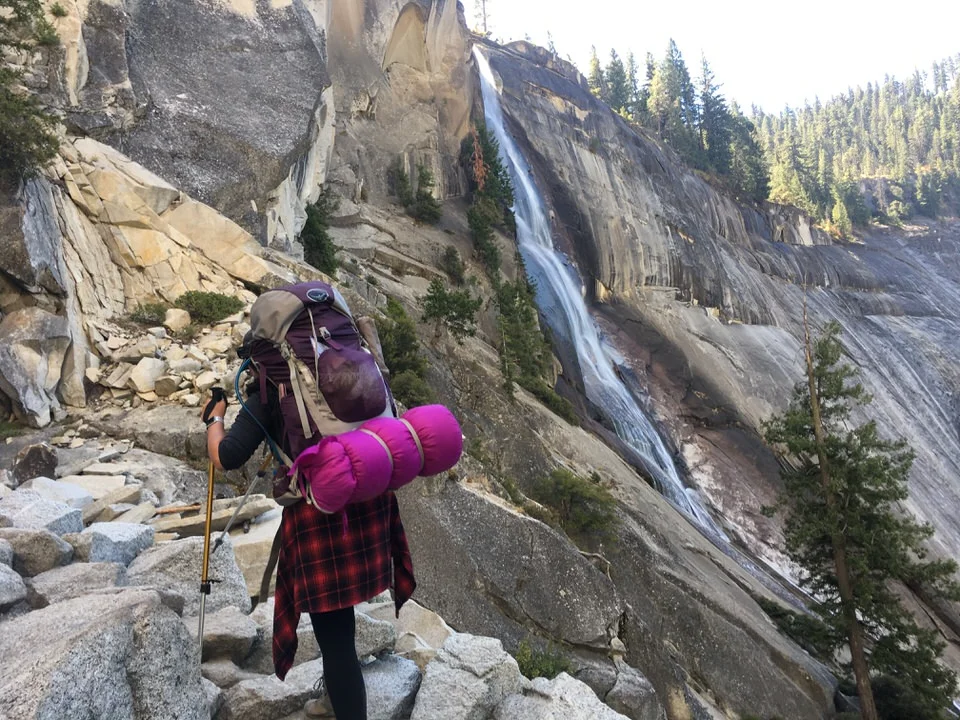
Mist Trail to Vernal & Nevada Falls (7 miles round trip, 1,900 ft. gain, moderate)
Mariposa Grove Trail (7 miles round trip, 1,200 ft. gain, moderate)
Mono Pass Trail (7.4 miles round trip, 900 ft. gain, moderate)
Elizabeth Lake Trail (4.9 miles round trip, 900 ft. gain, moderate)
Cathedral Lakes Trail (8 miles round trip, 1,200 ft. gain, moderate)
Gaylor Lakes & Granite Lakes Trail (4.5 miles round trip, 1,250 ft. gain, moderate)
Columbia Rock Hike (3 miles round trip, 1,050 ft. gain, moderate)
Lower Yosemite Falls (0.5 miles round trip, minimal gain, easy)
Bridalveil Falls Hike (1.2 miles round trip, 200 ft. gain, easy)
Lembert Dome Trail (2.8 miles round trip, 846 ft. gain, easy-ish)
Tenaya Lake (2.5 miles round trip, minimal gain, easy)
Glacier Point Short Hike (1 mile round trip, minimal gain, easy)
Mirror Lake Hike (2.4 miles round trip, 100 ft gain, easy)
Wawona Meadow Loop (5 miles round trip, minimal gain, easy)
Soda Springs & Parsons Lodge (1.5 miles round trip, minimal gain, easy)
Sentinel Dome Trail (2.2 miles round trip, 400 ft. gain, easy)
Taft Point (2.2 miles round trip, 200 ft. gain, easy)
John Muir Trail (211 miles long, 46,000 ft gain, thru-hike)
Without further ado, here are 27 of the best hikes in Yosemite to inspire your next visit to Yosemite National Park!
Best Difficult Hikes in Yosemite
Some of the best Yosemite trails are also the park’s most difficult hikes, which is why I started this list with the difficult ones. Don’t be discouraged if you don’t think you’re up for one of the difficult hikes though, as there are still plenty of moderate and easy hikes in the Valley that offer great Yosemite views.
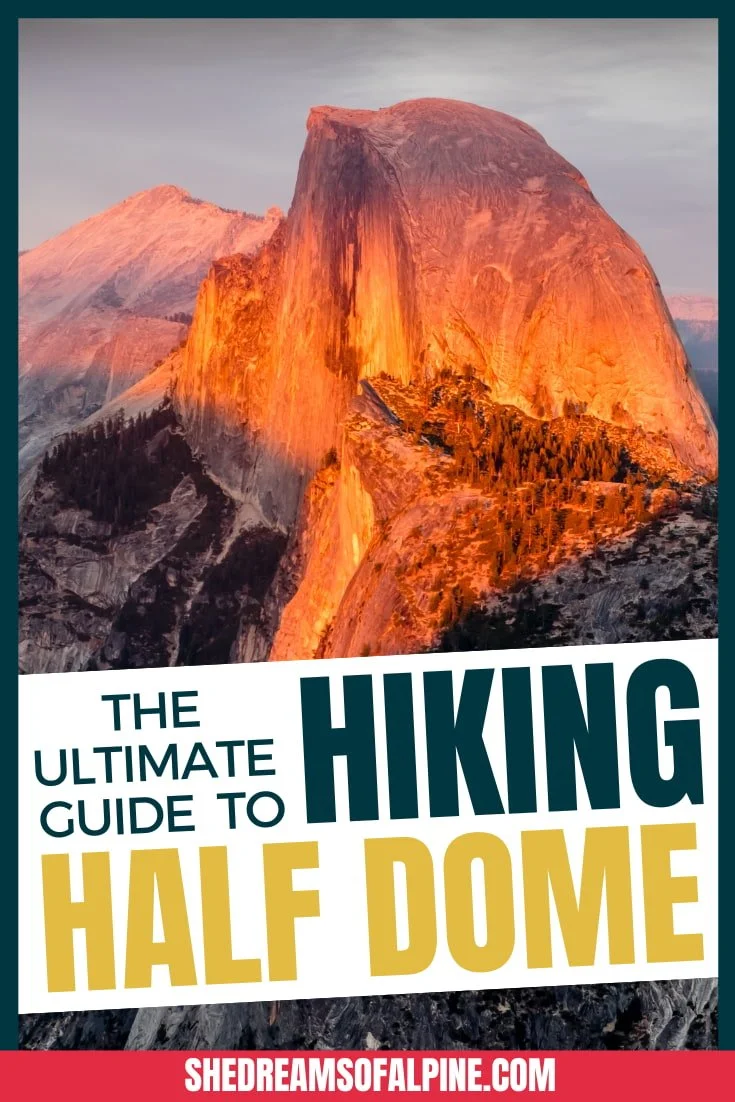
1. Half Dome Hike
Half Dome Hike Quick Facts:
Type of Trail: Out and Back
Total Mileage: ~ 14 miles via the Mist Trail, ~16.5 miles round trip via the John Muir Trail, or you can choose to go up the Mist Trail (7.25 miles) and down the John Muir Trail (8.25 miles) for a round trip of around 15.5 miles. (It’s easier on your knees to go down the John Muir Trail, because the Mist Trail is stair steps the practically the whole way.)
Total Elevation Gain: ~5,300 feet of elevation gain (though, when I took my GPS, It said more like 5,600 feet of gain)
Difficulty: Very strenuous day hike
Crowd Rank: Extremely crowded
Scenery Rank: Top-notch, epic view of the Yosemite Valley
Best Place to Park to Access Trailhead: The closest parking area to this trailhead is actually called “The Trailhead” and is near Curry Village. This parking lot fills up very quickly since practically all the Half Dome hikers try to park here and many of them start VERY early in the morning (which you should do too if you plan to do this hike in one day). However, you can also park just about anywhere in the eastern part of the Valley and take one of Yosemite’s free shuttles to the trailhead. You can also find additional parking in Curry Village.
SPECIAL NOTE! You must have a Half Dome hiking permit to hike up to the top of Half Dome! If you don’t have a permit to hike Half Dome, you can hike to the sub-dome, but then you need to turn around… and yes, there are rangers out there who will check if you have a permit or not. Respect the rules. If you can’t get a permit, there are a bunch of other great hikes in Yosemite, or just hike to the sub-dome!
>> Read our full Half Dome Hike guide for all the nitty-gritty details on the Half Dome Hike.

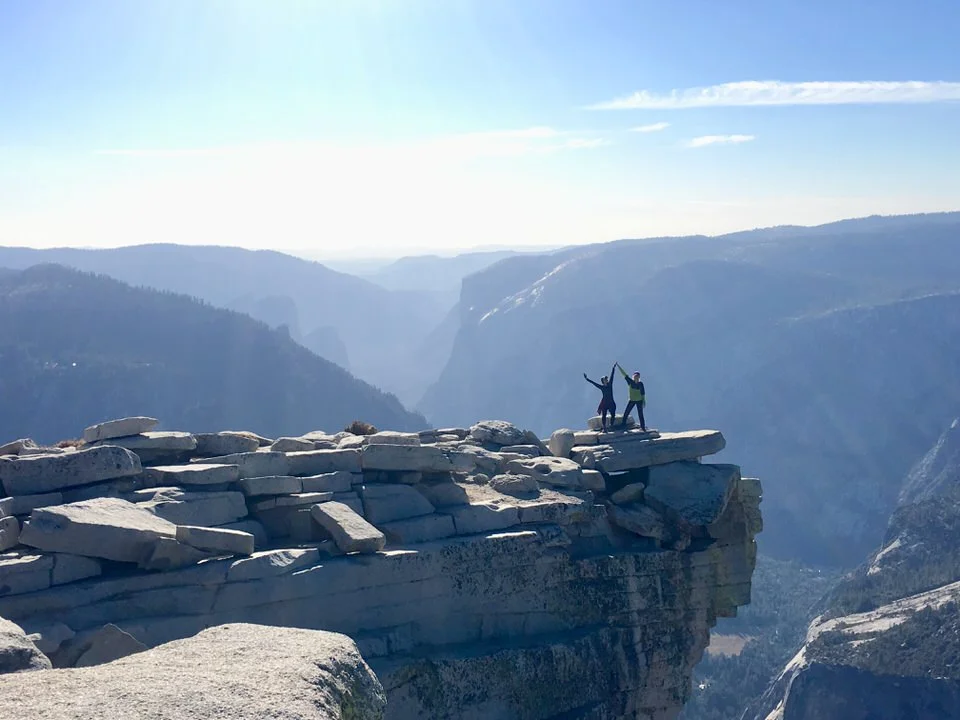
Hiking Half Dome is one of the most unique hiking experiences you can get in the United States, and an epic day hiking challenge if you choose to hike this in a day. With over 16 miles round trip and over 5000 feet of elevation gain, you are in for a very long day.
Most hikers, especially those who are not used to long mileage hikes with lots of elevation gain will do well to start their hike very early in the morning. Plan to spend the whole day doing this hike unless you are in good shape.
My advice is to start by hiking up the Mist Trail. Its a brutal uphill stair-stepping workout, but its quicker and more efficient.
Make sure to bring plenty of water, particularly if you are hiking this in the summer. You will get very thirsty. There are several opportunities to fill up with water along your hike, but one of the best spots to plan on filling up is at the Little Yosemite Valley campground. Be sure to bring a water filter, so you can filter clean drinking water here. I’d fill up on water before continuing up to sub-dome and Half Dome.
There’s no rest or ease to this hike as you make your way up the sub-dome. If you don’t have a hiking permit for Half Dome, you cannot go beyond the sub-dome. But if you do have a permit, you will continue to the base of Half Dome cables.
At first you might hesitate, because the hike up the cables is nearly vertical, and your only protection is your grip on the cables and your footing against the planked “stairway” to the top. DO NOT attempt the cables without proper gloves and shoes with good grip. DO NOT attempt the cables if you are very terrified of heights.

I also advise against using a “harness” system to go up the cables. In my opinion, harnesses are just a false sense of protection here, because you would need a very specific set up in order for this to actually be “safe,” and most people are not going to have that set up.
Having to fuss with carabiners and your harness system is going to do you more harm than good in getting up the cables, especially with all the other people around. So just take your time, focus on going plank to plank, and hang on with a strong grip.
There WILL be a lot of people on this hike, and really the only good way to avoid crowds would be to get there around sunset, but then you need to be prepared to do the hike down in the dark. If you aren’t comfortable with that, be prepared to share this trail with crowds.
The views are worth it though, and I think it is a super exciting hike overall. Just be smart, bring plenty of water, a water filter, plenty of food, gloves, shoes with good grip, and also bring a jacket and a headlamp in case you find yourself hiking down in the dark.
Do not underestimate this hike! It’s hard, and it is potentially dangerous if you don’t take the right precautions. Please don’t rely on your phone flashlight to get you down in the dark.
What makes this Yosemite hike special? It’s probably the most classic, iconic hike of them all! The Half Dome hike truly is one of the best hikes in Yosemite Valley. In fact, there aren’t many hikes out there that are quite like Half Dome. It’s unique, challenging and fun in so many different ways.
Pro Tip: Consider taking the Mist Trail up to the top of Half Dome and then coming down the John Muir Trail. Even though the John Muir Trail will add on about an extra mile, it is much easier on your knees to go down this trail than the stair-stepping Mist Trail.
>> Resource for more about this trail: The Ultimate Half Dome Hike Trail Guide
2. Clouds Rest

Clouds Rest Hike Quick Facts:
Type of Trail: Out and Back
Total Mileage: There are multiple trailheads, but assuming you start at Sunrise Lakes Trailhead, it is around 12 miles round trip.
Total Elevation Gain: ~3000 feet total gain
Difficulty: Difficult
Crowd Rank: Busy, but not as crowded as the Half Dome hike
Scenery Rank: Amazing! Epic views of Half Dome
Best Place to Park to Access Trailhead: Sunrise Lakes Trailhead
Clouds Rest trail description contribution from blogger Kaelee of Seattle Bred:
If you failed to get permits to hike to the top of Half Dome, but are still hoping for a difficult hike with sweeping views of the valley, then you must check out Clouds Rest! On a clear day, this hike will reward you with one of the most epic views of Half Dome.
It’s also shorter than Half Dome, has less elevation gain, and is slightly less terrifying of a hike for those who have a fear of heights! After finishing this hike, you may wonder why anyone even bothers with the notoriously difficult lottery system for Half Dome permits.

There are multiple trailheads to hike to Clouds Rest, the most popular being the Sunrise Lakes trailhead on Tioga Road. If you start at Sunrise Lakes, it’s a little under 14 miles with around 2800 ft of elevation gain. Make sure to bring plenty of water as this hike is extremely exposed and hot in summer months.
If you live closer to sea level, keep the high elevation of the Sierras in mind. You will end up at around 10,000 ft which is where some people can begin to experience altitude sickness.
The final push to Clouds Rest is on an exposed ridge, so if you have an extreme fear of heights you may want to consider another trail.
What makes this Yosemite hike special? It’s less crowded than some other popular hikes, but still a challenging and awesome Yosemite day hike with some of the most epic views of Half Dome in Yosemite.
>> Resource for more about this trail: Clouds Rest Hike Trail Guide
GRAB MY [FREE] OUTDOOR BACKPACKER STARTER KIT:
I created the Ultimate Outdoor Backpacker Starter Kit for you (and it's FREE)! This starter kit is filled with 14 pages of my best hiking and backpacking tips to help you learn what it takes to become a safe, confident, and self-sufficient outdoor backpacker!
3. Upper Yosemite Falls Trail
Upper Yosemite Falls Hike Quick Facts:
Type of Trail: Out and Back
Total Mileage: ~7.6 miles roundtrip
Total Elevation Gain: 2,600 feet to the top of Yosemite Falls, you can continue further to Yosemite Point which will make your total elevation gain around 3,000 feet.
Difficulty: Difficult
Crowd Rank: Since this hike starts in the Valley, it will still likely be decently crowded, but because it is a difficult hike, you will encounter fewer people than on the easier hikes.
Scenery Rank: Fantastic - views of Half Dome and Yosemite Falls in the same shot!
Best Place to Park to Access Trailhead: Your hike will start at Lower Yosemite Falls trailhead, and the best place to park is the day-use parking lot south of Yosemite Village. You can grab a shuttle to the trailhead as well.
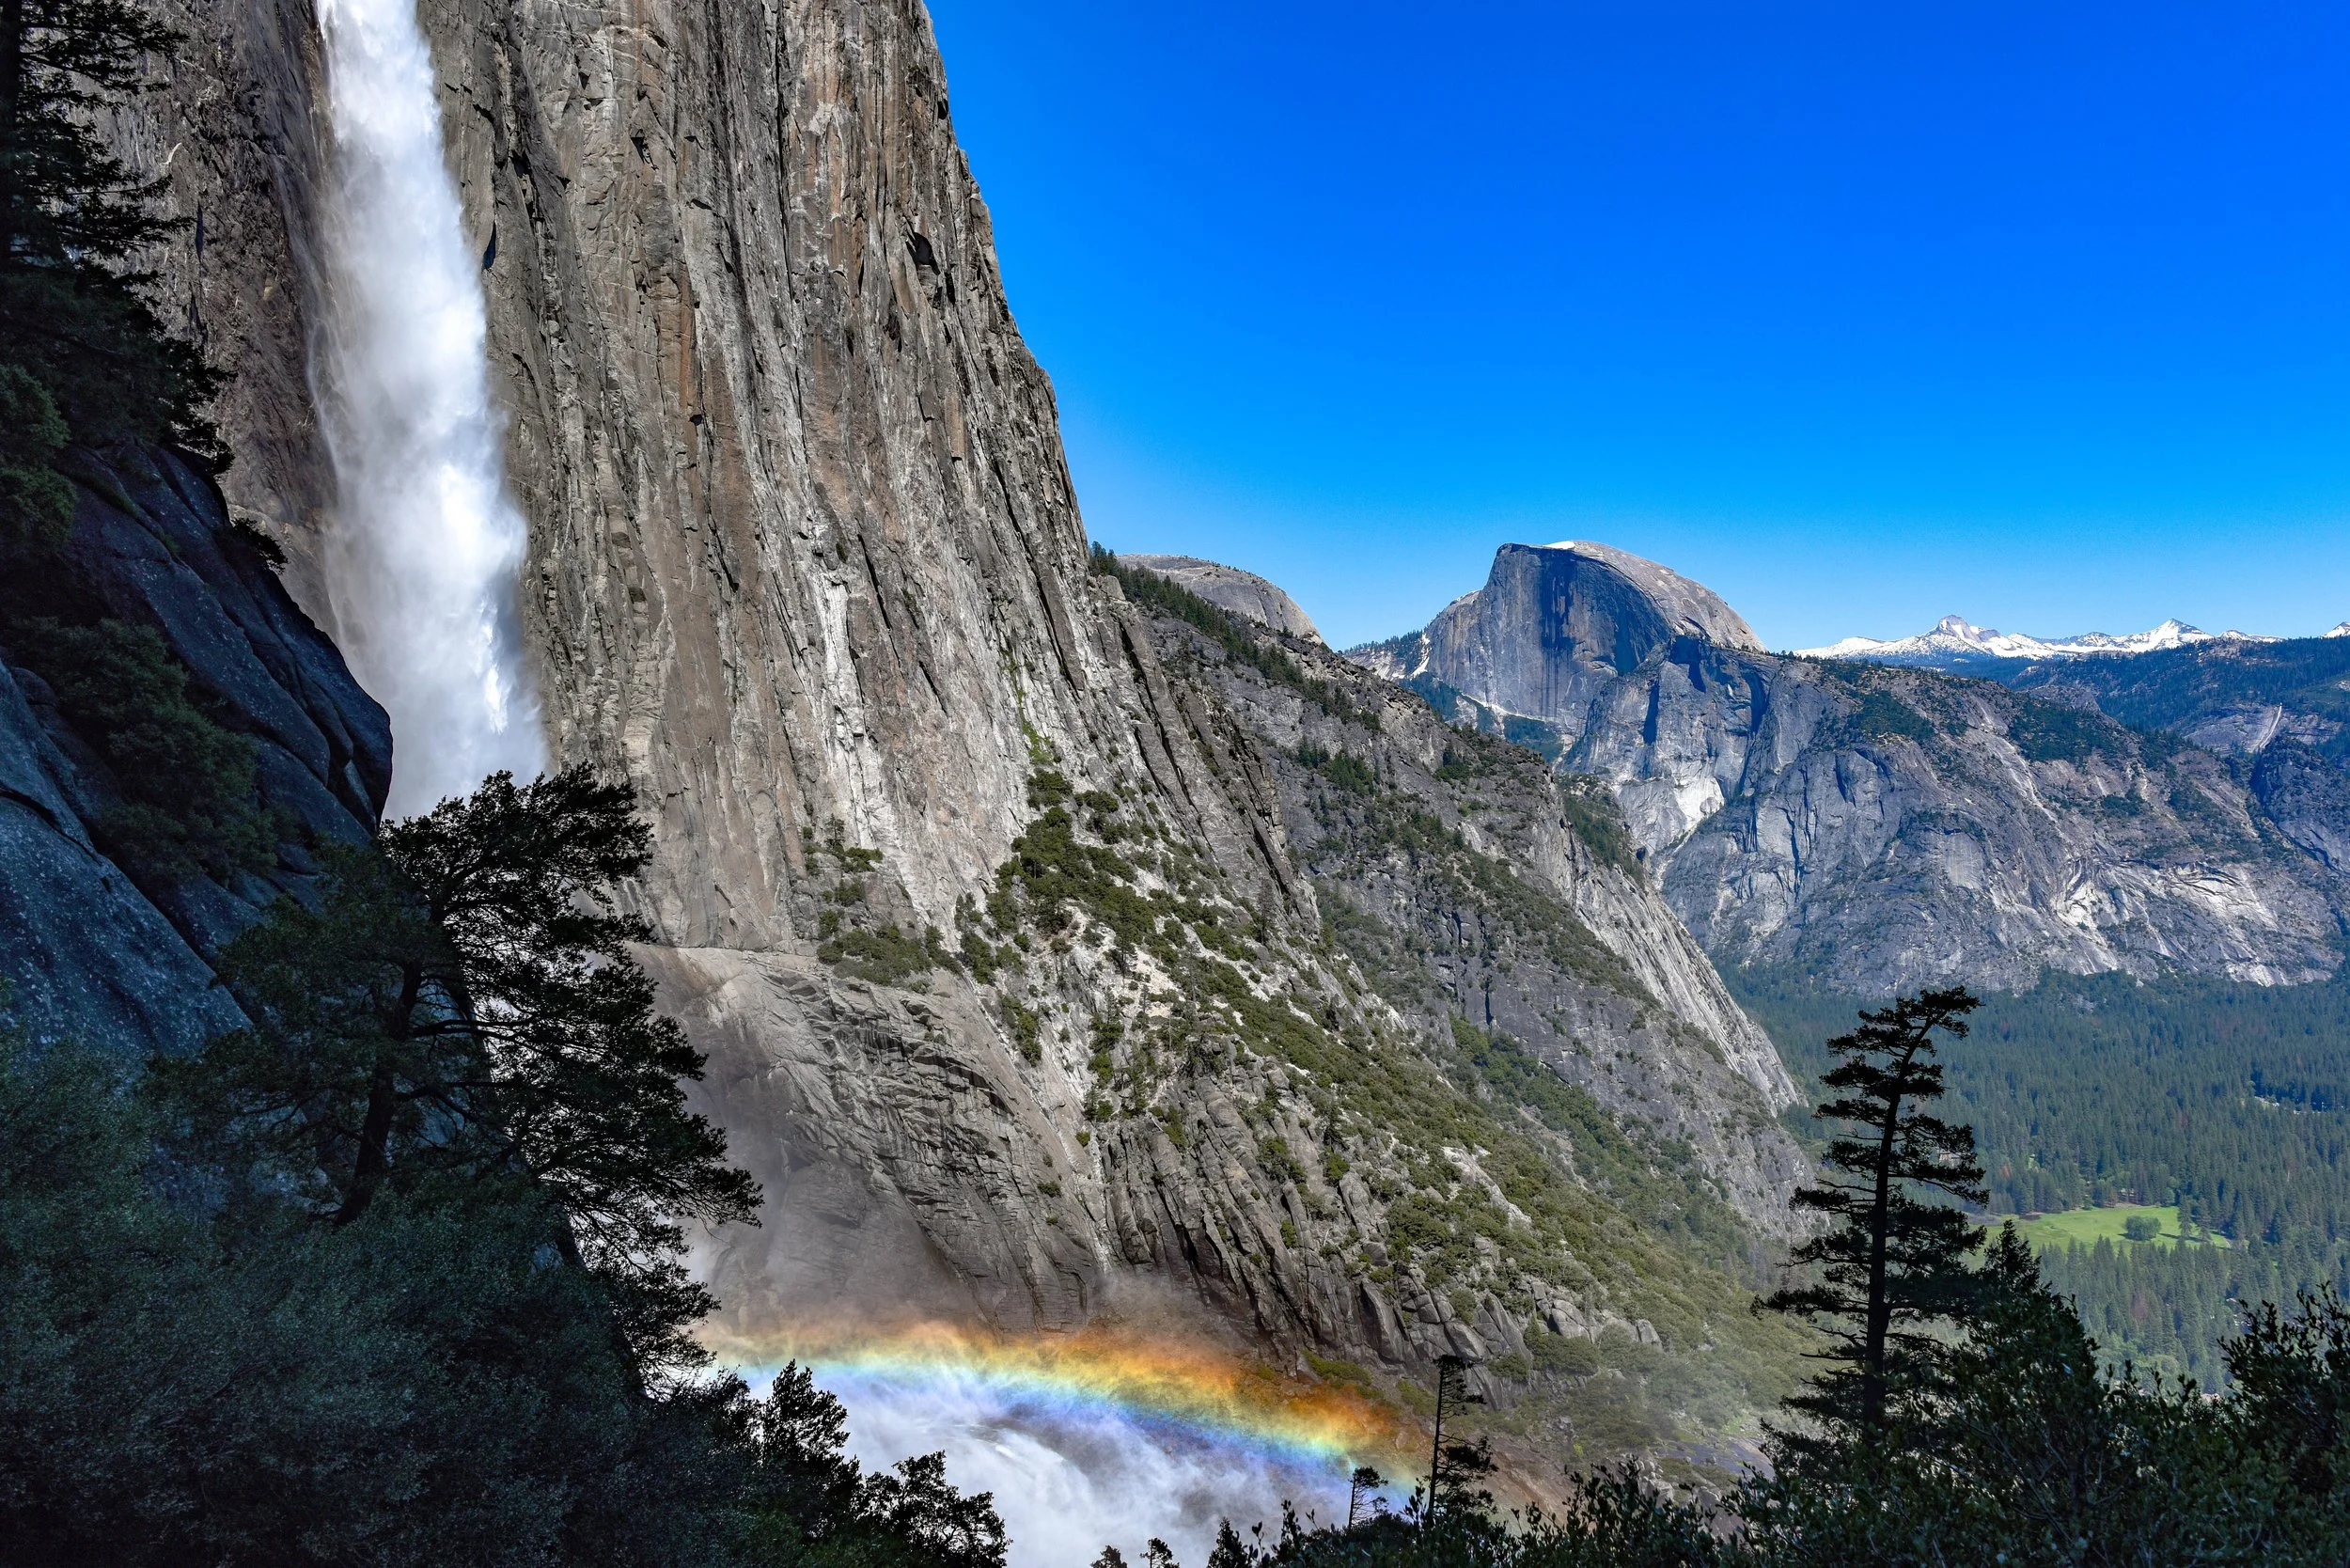
The Yosemite Falls hike is an epic-stair-master workout, but affords you some amazing views of the classic Yosemite Valley landmarks and scenery. Enjoy the experiencyof walking through the waterfall spray of Yosemite Falls and the chance to photograph both Half Dome and Yosemite Falls in the same shot.
The best time to do this hike is in the summer months when the falls are in full roar from winter run-off. In the fall, this is still a great hike, but the waterfall wont be as grand.
What makes this Yosemite hike special? Epic waterfall sprays, a great workout, and amazing Yosemite Valley views.
4. Glen Aulin trail to Tuolumne Falls & White Cascade
Glen Aulin Trail Hike Quick Facts:
Type of Trail: Out and Back
Total Mileage: 13 miles roundtrip
Total Elevation Gain: ~600 feet of total gain
Difficulty: Difficult
Crowd Rank: Pretty crowded and busy
Scenery Rank: Very pretty!
Best Place to Park to Access Trailhead: Park at the Dog Lake/Lembert Dome trailhead parking lot
While the Glen Aulin Trail hike doesn’t have a ton of total elevation gain, it is still a difficult hike due to its longer length and time commitment. The hike starts off in the dreamy Tuolumne Meadows and then meanders along the windy Tuolumne River until it ultimately ends at Glen Aulin.
If you continue on below Glen Aulin, you’ll wind up at three beautiful ranging waterfalls in the Grand Canyon of the Tuolumne.
What makes this Yosemite hike special? It’s long but relatively flat and meanders along beautiful streams and meadows in Tuolumne.
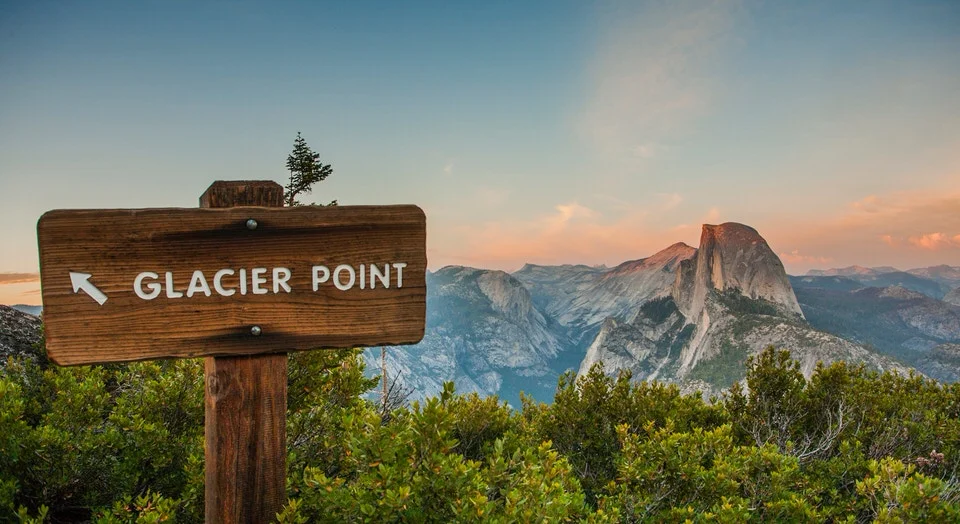
5. Four Mile Trail to Glacier Point

Four Mile Trail Hike Quick Facts:
Type of Trail: Point to Point OR Out and Back
Total Mileage: ~4.8 miles (ONE WAY), so about 9.6 miles round trip
Total Elevation Gain: ~3,200 feet total gain
Difficulty: Difficult
Crowd Rank: There will likely be a lot of hikers on this trail since it connects from the Valley floor to Glacier Point (a very popular viewpoint that is also accessible via an easier hike).
Scenery Rank: Top-notch Half Dome Views
Best Place to Park to Access Trailhead: If you are doing this as an out and back hike, you can just park in Yosemite Valley. The trail starts just off on the right of Southside Drive. Some people opt to hike up this trail and take a bus back to the Valley from Glacier Point.
The Four Mile Trail description contribution from blogger Paulina of Little Grunts:
Glacier Point is the spot to be for unobstructed views of the iconic Half Dome and its sheer, steep face. The Four Mile Trail takes you from the valley floor to Glacier Point, gaining 3,200 feet of total elevation gain.
Despite its name, this trail is actually not 4 miles long, and is actually 4.8 miles to the top. In the summer, you can retrace your steps or hop on a shuttle back to Yosemite Valley.
The Four Mile Trail is best hiked when Glacier Point Road is closed, but before winter hits Yosemite Valley. You’ll have this crowded spot all to yourself then. Check before you go because this trail does get closed around December due to treacherous conditions.
What makes this Yosemite hike special? It’s a great way to challenge yourself, get a good workout and end with some of the best views of Half Dome in Yosemite Valley.
6. North Dome Hike

North Dome Hike Quick Facts:
Type of Trail: Out and Back
Total Mileage: ~8.8 miles roundtrip
Total Elevation Gain: ~1,800 feet of total gain
Difficulty: Difficult
Crowd Rank: Less crowded
Scenery Rank: Awesome views of the face of Half Dome
Best Place to Park to Access Trailhead: Park at the Porcupine Creek lot on Tioga Road
Avoid the biggest crowds in Yosemite but still get amazing views of Half Dome on the North Dome hike. This hike not super strenuous and offers fantastic, straight-on views of the face of Half Dome, as well as a cool perspective of the popular Clouds Rest hike.
While there are a few different trails up North Dome, the easiest option starts at Porcupine Creek off Tioga Road. Because Tioga Road closes in the winter, you’ll want to do this hike in spring, summer, or fall.
What makes this Yosemite hike special? The North Dome offers you a unique angle of Half Dome’s massive granite face.
7. The Diving Board
Diving Board Hike Quick Facts:
Type of Trail: Out and Back
Total Mileage: 12.5 miles
Total Elevation Gain: 4,074 feet
Difficulty: Very strenuous, with a lot of elevation gain, some rock scrambling, as well as difficult trail-finding which might require bushwhacking
Crowd Rank: Extremely light crowds for most of the trail
Scenery Rank: Epic view of Half Dome
Best Place to Park to Access Trailhead: Happy Isles Trailhead Parking Lot, which is just behind Curry Village (about half a mile from the actual trailhead). You can take a free shuttle right to the trailhead.
The Diving Board is a rock ledge with a steep drop-off that sits just below Half Dome and provides expansive views of the Valley without the typical Valley crowds.
The trail to the Dining Board begins with the well-traveled Mist Trail, but at the top of Vernal Fall, you will leave the crowds behind and follow a strenuous uphill trail toward Little Yosemite. There are also a couple of different shortcuts, all of which require good route-finding ability, and no matter which way you go, this hike is extremely demanding and will require rock scrambling. But the phenomenal close-up perspective of Half Dome makes it all worth it!
What makes this Yosemite hike special? Amazing & unique views of Half Dome that not a lot of people get to see. In fact, this was actually the site where famed outdoor photographer Ansel Adams took one of his signature photos, “Monolith, the Face of Half Dome.”
8. The Pohono Trail

The Pohono Trail Hike Quick Facts:
Type of Trail: Point to Point
Total Mileage: 13 miles one way
Total Elevation Gain: ~3700 total feet of elevation gain if you include Sentinel Dome
Difficulty: Very difficult
Crowd Rank: Parts of this trail can be very crowded
Scenery Rank: A highlight of Yosemite’s best landmarks and scenery
Best Place to Park to Access Trailhead: There are parking lots at both Glacier Point and Tunnel View that should be easy enough to grab a spot at with some patience.
You can choose to hike this trail from Glacier Point to Tunnel View (most popular) or from Tunnel View to Glacier Point. Both directions are difficult to hike and require uphill cardio. Tunnel View to Glacier Point, however, is more difficult than Glacier Point to Tunnel View.
You can only do this trail as long as Glacier Point Road is open, typically from May to November.
Highlights on this trail include: Glacier Point, Taft Point, Crocker Point, Stanford Point, Dewey Point, and Inspiration Point. You’ll also get to pass along Sentinel Dome and end (or begin) at the popular tourist stop, Tunnel View (seen in the photo above).
Most people don’t attempt to do this trail as a round trip hike, but I suppose you could if you were up for the 26 mile challenge.
If you opt to do this one way, you will have to figure out your transportation scenario. This is probably the most complicated part of this hike, so do some research and planning in advance of your trip to make sure you have it all detailed out.
There are some great details in this post on your transportation options for this hike
What makes this Yosemite hike special? A long epic hike with a great tour of Yosemite Valley’s most famous landmarks.
9. Panorama Trail

Panorama Trail Hike Quick Facts:
Type of Trail: Point to Point OR Out and Back
Total Mileage: ~ 8.5 miles one way, or 17 miles roundtrip
Total Elevation Gain: ~3,200 feet total gain
Difficulty: Difficult
Crowd Rank: Medium to high
Scenery Rank: Fantastic views of Yosemite’s classic landmarks
Best Place to Park to Access Trailhead: If you decide to go from Glacier Point down to the Valley, then park in the Valley and take the Glacier Point bus from Yosemite Lodge to the Glacier Point Trailhead.
Most people start the Panorama Trail hike going one way from Glacier Point down to Yosemite Valley. The Panorama Trail starts and ends at two very popular trails in Yosemite, Glacier Point and the Mist Trail.
So not only will you get to hike through these Yosemite hiking trail classics, you’ll also pass by lesser-known landmarks such as Illilouette Falls and Panorama Point.
Be sure to make the side trail stop up to Panorama Point to catch amazing views of Glacier Point, North Dome, and Half Dome. However, you’ll have to be on the lookout for this side trail because it is unmarked, but it is definitely worth the short detour!
What makes this Yosemite hike special? More amazing views of Yosemite’s epic landmarks, and the extra special lesser-known viewpoint of Panorama Point!
GRAB MY ESSENTIAL HIKING GEAR PACKING LIST
Best Moderate Hikes in Yosemite
Yosemite National Park also features a bunch of awesome moderate hikes including these listed below.
10. Mist Trail to Vernal Falls and Nevada Falls
Mist Trail to Vernal Falls and Nevada Falls Hike Quick Facts:
Type of Trail: Out and Back
Total Mileage: ~1 mile to Vernal Falls Footbridge, or 3.5 miles to the top of Nevada Falls. If you hike all the way to Nevada Falls, your total round trip mileage will be about 7 total miles.
Total Elevation Gain: 300 feet gain to Vernal Falls Footbridge, and 1,900 total feet gain to the top of Nevada Falls from the trailhead
Difficulty: Moderate
Crowd Rank: This trail is VERY popular, expect to share it with a lot of park visitors
Scenery Rank: This hike is very scenic! This Yosemite hike includes two iconic Yosemite Valley waterfalls.
Best Place to Park to Access Trailhead: The closest parking area to this trailhead is actually called “The Trailhead” and is near Curry Village. This parking lot fills up very quickly since a lot of Half Dome hikers park here as well. If you’re really hoping to park at this trailhead then make sure to get there VERY early. However, you can also park just about anywhere in the eastern part of the valley and take one of Yosemite’s free shuttles to the trailhead. You can also find additional parking in Curry Village.
To Vernal Falls Footbridge:
Vernal Falls footbridge trail description contribution from blogger Mary Beth of MB Sees:
One of my family’s favorite Yosemite hikes is the trail to Vernal Fall Footbridge. It’s just under 2 miles round trip, but part of the larger High Sierra Loop Trial – so if we get a wild hair and decide to go farther, we can!
While this section of trail is both paved and (relatively) short, there’s a pretty healthy elevation change that not everyone is willing to tackle – so it allows you to get away from the larger crowds of tourists.
You gain 300 feet in the quick mile up to the bridge, so it definitely gets your heart rate up. Hike with your baby on your back, like we did, and it’s a real workout!

But the reward at the end is worth it – a peek-a-boo view of Vernal Fall on one side of the bridge, and a view of the valley below from the other.
If you choose to climb to the top of Vernal Falls instead of just stopping at the footbridge, you’ll end up gaining about 1,000 feet of total elevation, but well worth the effort!
To Nevada Falls:
Many people turn around at Vernal Falls, but if you choose to challenge yourself a bit and continue onward to the top of Nevada Falls, you’re in for a continued, great stair-stepping workout and even more amazing views!
This trail is no joke of a workout, but it doesn’t fail to disappoint. Just keep your eye on the prize and make your way slowly but surely to the top. It’s one of the valley’s most rewarding and beautiful hikes.
What makes this Yosemite hike special? The Mist Trail is one of the most well known hikes in the Valley, and is the trail many hikers choose to take when going to the top of Half Dome.
It’s a classic, iconic Yosemite Valley hike.
Pro Tip: Visit when the waterfalls are in their full glory, around April to June when snow is melting and flowing into the Valley.
11. Mariposa Grove Trail
Mariposa Grove Trail Hike Quick Facts:
Type of Trail: Loop
Total Mileage: 7 miles
Total Elevation Gain: 1,200 feet
Difficulty: Moderate
Crowd Rank: Expect a lot of fellow hikers the first few miles, but then the crowds thin out
Scenery Rank: Impressive and imposing giant sequoia trees make for a different view than typical Yosemite trails, and Wawona Point offers a panoramic overlook
Best Place to Park to Access Trailhead: Mariposa Grove Welcome Area has 300 parking spots and provides a free shuttle (operating March-November) to Mariposa Grove itself.
The entire Mariposa Grove trail loop is a moderate hike that also takes you to Wawona Point, which offers a beautiful view of Wawona Valley. If you just want to see some of the sequoias, you can do the smaller Grizzly Giant Loop, which is only 2 miles.
What makes this Yosemite hike special? Mariposa Grove is the biggest grove of sequoias in Yosemite, and this trail lets you marvel at many of these giants, including the 3,000 year-old Grizzly Giant.

12. Mono Pass Trail
Mono Pass Trail Hike Quick Facts:
Type of Trail: Out and Back
Total Mileage: 7.4 miles roundtrip
Total Elevation Gain: ~900 feet of total gain
Difficulty: Moderate
Crowd Rank: Low compared to what you’ll find in Yosemite Valley
Scenery Rank: Beautiful in its own right and a different scene then most of the hikes you will do in Yosemite Valley
Best Place to Park to Access Trailhead: There is parking for about 20 cars or so at Mono Pass Trailhead.
The Mono Pass Trail is a relatively low-key trail crowd-wise when compared to the hikes in the heart of Yosemite Valley, and this trail offers unique views and landmarks outside the classic famous Yosemite Valley scenery.
Starting at the Mono Pass Trailhead, you’ll climb your way up between beautiful meadows and streams toward Mono Pass.
If you continue past Mono Pass a short ways, you’ll also sneak a peak at the Eastern Sierras and Mono Lake.
What makes this Yosemite hike special? Sneak away from the chaos of the valley to hike this beautiful trail bordering the Sierra Nevadas.
13. Elizabeth Lake Trail
Elizabeth Lake Trail Hike Quick Facts:
Type of Trail: Out & Back
Total Mileage: 4.9 miles
Total Elevation Gain: 900 feet
Difficulty: Moderate
Crowd Rank: Fairly secluded for its popular location off of Tioga Road
Scenery Rank: Beautiful view from the top of Elizabeth Lake and Unicorn Peak
Best Place to Park to Access Trailhead: The trailhead is at the far end of Tuolumne Meadows Campground, and you can follow signs to park directly there.
The start of the hike to Elizabeth Lake is steep enough to keep away some of the crowds in Tuolumne, as it gains a lot of its elevation in the first mile. But if you make it through that uphill slog, you’ll find yourself crossing a lovely meadow on the way to the lake.
Once at the lake, you’ll find the best view by scrambling up under Unicorn Peak to an overlook where you can see the lake with a backdrop of Johnson Peak. You can also wander around the lake or soak in the sun on some rock slabs before heading back.
What makes this Yosemite hike special? A gorgeous lake with a panoramic view if you scramble up the overlook under Unicorn Peak.
14. Cathedral Lakes Trail

Cathedral Lakes Trail Hike Quick Facts:
Type of Trail: Out and Back
Total Mileage: 8 miles round trip if you go to both Upper and Lower Cathedral Lakes
Total Elevation Gain: ~1,200 feet of total elevation gain
Difficulty: Moderate
Crowd Rank: Fairly busy, as this area is popular for hikers and climbers alike
Scenery Rank: Stunning!
Best Place to Park to Access Trailhead: You can park at the Cathedral Lakes Trailhead parking lot or on the shoulder of the road near the trailhead. The parking lot fills up quickly as this is a very popular area for both climbers and hikers.
The Cathedral Lakes Trail is by far one of the top hikes in Yosemite, and is one of my absolute favorite areas.
I’ve gotten to hike around this area via many different routes, but if you take the moderate Cathedral Lakes Trail, you’ll swing by both Upper and Lower Cathedral Lakes (as the name suggests) and will sneak stunning views of Cathedral Peak.
What makes this Yosemite hike special? Relatively moderate hike into two stunning lakes with views of one of Tuolumne’s most iconic peaks, Cathedral Peak.
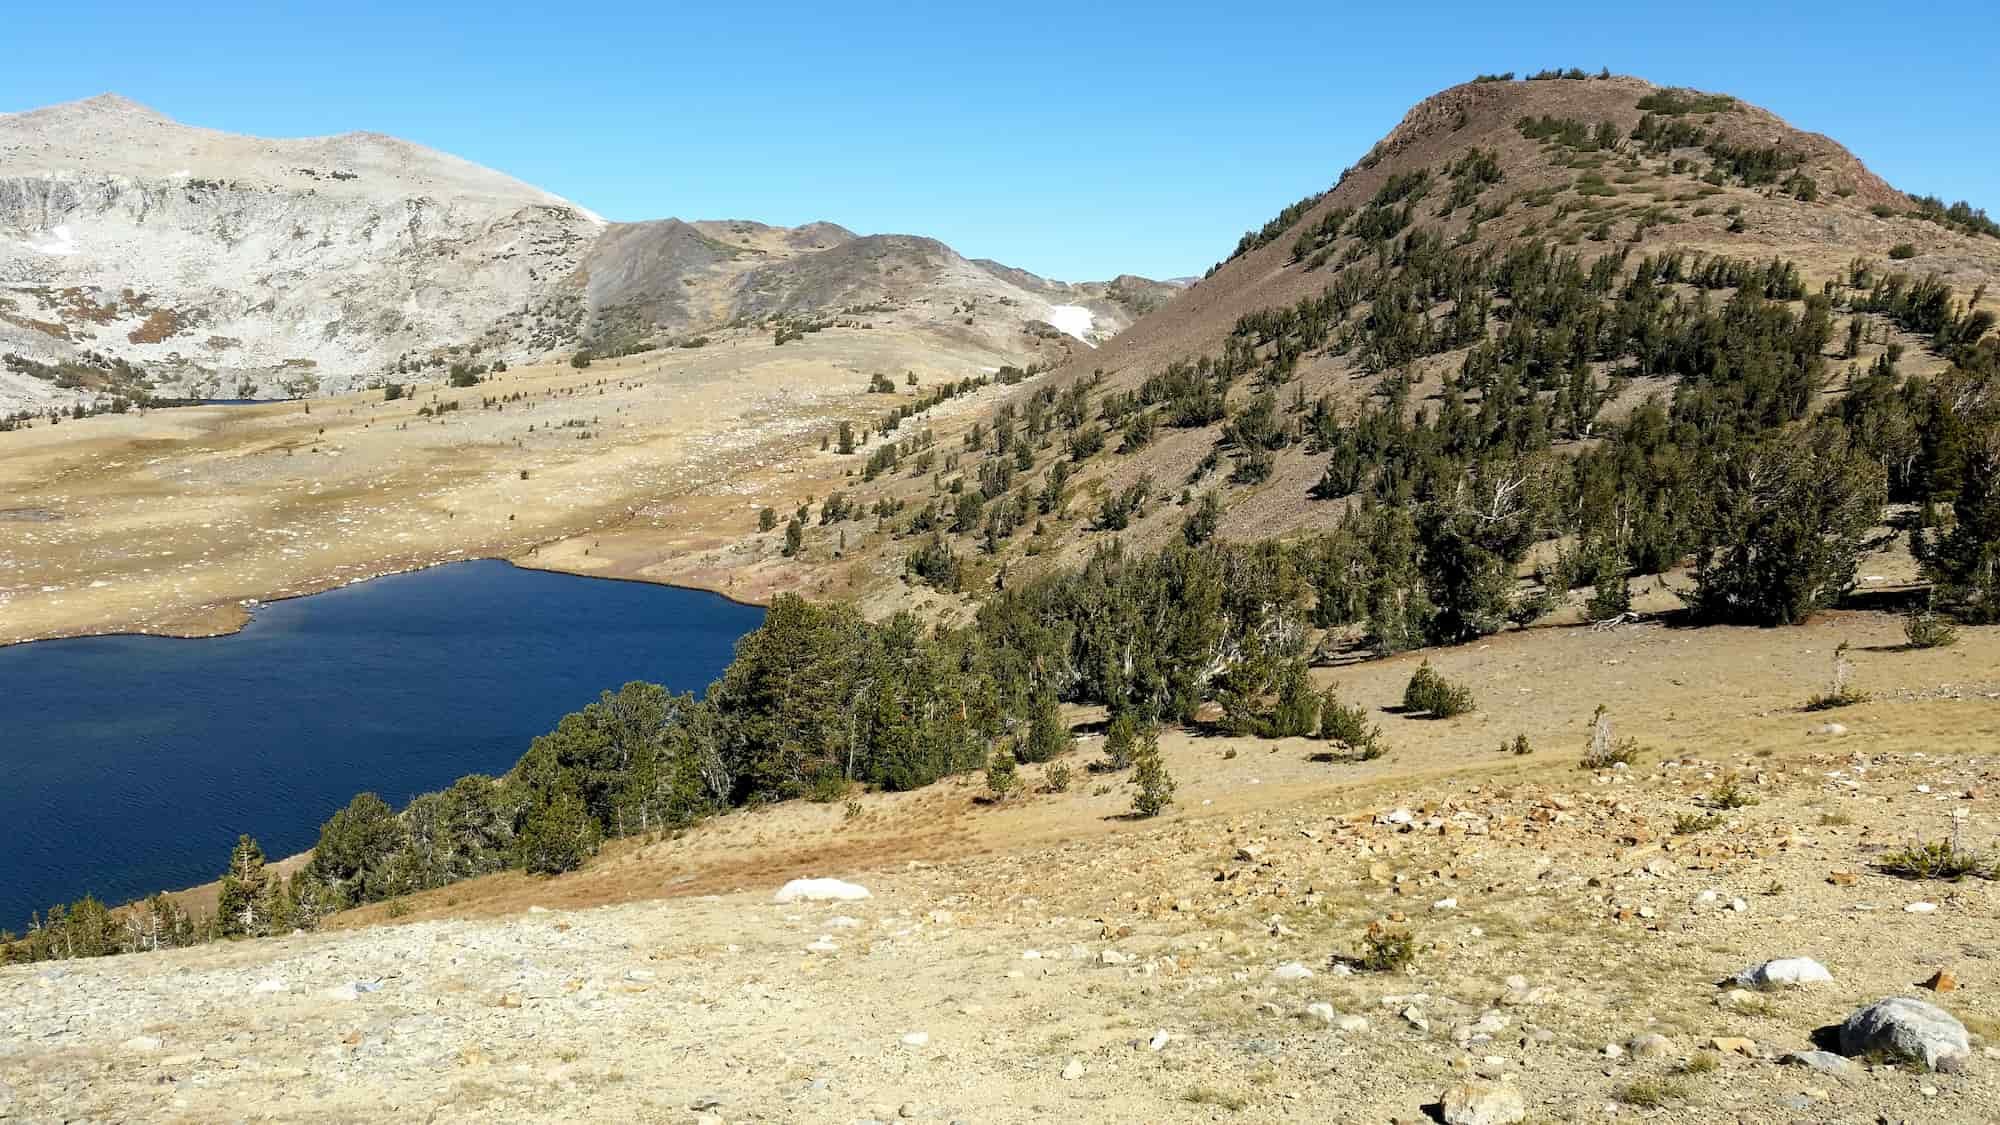
15. GAYLOR LAKES & GRANITE LAKES TRAIL
Gaylor Lakes & Granite Lakes Hike Quick Facts:
Type of Trail: Out and Back
Total Mileage: 4.5 miles round trip if you go all the way to Granite Lakes (3 miles round trip just to Gaylor Lakes)
Total Elevation Gain: ~1,250 feet of total elevation gain
Difficulty: Moderate
Crowd Rank: Much less crowded than anything in the Valley
Scenery Rank: Awesome views of meadows & mountains
Best Place to Park to Access Trailhead: This hike starts just inside the eastern entrance to Yosemite, and there’s a small trailhead lot off Tioga Road.
The hike to Gaylor and Granite Lakes has a little bit of everything and is a great way to get away from the crowds in the Valley and explore the east side of Yosemite National Park.
If you don’t have a lot of time, you can turn around after reaching Gaylor Lakes, but it’s really worth continuing on to Granite Lakes for some truly stunning views. You can also check out the abandoned Great Sierra Mine on the way.
What makes this Yosemite hike special? Fantastic views the whole way of wide open meadows and mountain peaks, on top of the gorgeous alpine lakes!
16. COLUMBIA ROCK HIKE
Columbia Rock Hike Quick Facts:
Type of Trail: Out and Back
Total Mileage: 3 miles round trip
Total Elevation Gain: ~1,050 feet of total elevation gain
Difficulty: Moderate
Crowd Rank: Super busy, since it starts in the Valley
Scenery Rank: Epic views of the Valley & Half Dome
Best Place to Park to Access Trailhead: You start this hike at Lower Yosemite Falls trailhead, so the best place to park is the day-use parking lot south of Yosemite Village. You can also grab a shuttle to the trailhead as well.
If you’re not quite ready or don’t have time to hike all the way to Upper Yosemite Falls, hiking to Columbia Rock is a great alternative option. While this hike is quite short at only two miles, it’s also super steep, which is how it earns a moderate rating.
Tons of switchbacks take you up to an overlook at Columbia Rock, where you’ll be rewarded for your workout with breathtaking views into the Valley. Enjoy the incredible perspective of Half Dome before you head back down.
What makes this Yosemite hike special? Panoramic views of Yosemite Valley and Half Dome on a relatively short hike.
Best Easy Hikes in Yosemite
Even if you’re not able to get out on the moderate to difficult trails, you can still explore the stunning beauty of Yosemite on these easy hikes with incredible views.
17. Lower Yosemite Falls

Lower Yosemite Falls Hike Quick Facts:
Type of Trail: Variety of Options
Total Mileage: ~0.5 miles
Total Elevation Gain: Minimal
Difficulty: Easy
Crowd Rank: Quite crowded due to proximity to Yosemite Village
Scenery Rank: Beautiful view of Yosemite Falls
Best Place to Park to Access Trailhead: Park at Yosemite Village and walk to the trailhead.
The Lower Yosemite Falls hike is a must-do, chill hike for families and solo adventurers alike.
Even though the hike is super short and easy-going, you’ll still enjoy the stroll around the Valley floor and standing below Yosemite Falls looking up in awe.
I like to grab a coffee from the cafe in Yosemite Village and do this hike for a lovely little walk while I drink my coffee.
This is really the perfect easy day hike in Yosemite Valley, especially if you are pressed for time but still want to soak in the sights of Yosemite Valley.
What makes this Yosemite hike special? If you spend any time at all in Yosemite Village, make sure to stop by to get an epic view up at Yosemite Falls.
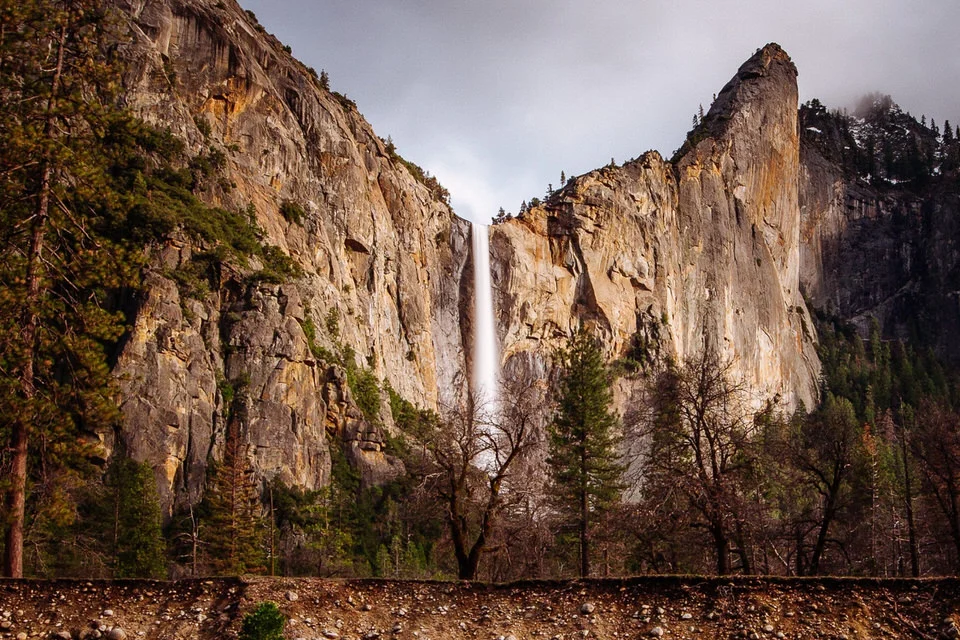
18. Bridalveil Falls
Bridalveil Falls Hike Quick Facts:
Type of Trail: Out and Back
Total Mileage: 1.2 miles roundtrip
Total Elevation Gain: ~200 feet total gain
Difficulty: Easy
Crowd Rank: Very crowded
Scenery Rank: Up-close and personal views of Bridalveil Falls
Best Place to Park to Access Trailhead: Bridalveil Falls Trailhead
This can be a fun hike to do during the peak of waterfall season when the falls are flowing in full rage.
Be prepared to get a little wet from the spray, but that is just part of the fun!
This is a very easy hike, which also makes it a pretty crowded hike. Still a great one to see if you’re looking to take on a short hike in while exploring the Valley.
What makes this Yosemite hike special? Bridalveil Falls epic waterfall spray!
19. Lembert Dome Trail
Lembert Dome Trail Hike Quick Facts:
Type of Trail: Loop
Total Mileage: 2.8 miles
Total Elevation Gain: 846 feet
Difficulty: Easy-ish (it is very steep, but doable)
Crowd Rank: Not too crowded for Yosemite
Scenery Rank: An impressive panoramic view of Tuolumne Meadows and the Cathedral Range
Best Place to Park to Access Trailhead: Park in the lot directly next to the Lembert Dome trailhead.
The Lembert Dome Trail starts in a lodgepole pine forest that leads you to the bottom of the dome. There are a couple of options to get to the summit – either a spur trail that heads up ledges on the northeast side of the dome or a class 3 scramble up the southeast face.
While the scramble up the steep granite slab is much easier than Half Dome, you should make sure to wear shoes with good traction, and be careful as you go. Also, avoid this section of the hike if it’s raining, since the rock will be slippery.
What makes this Yosemite hike special? Hiking up a granite dome for a stunning view from “on top of the world” makes the Lembert Dome hike feel like a mini version of Half Dome.
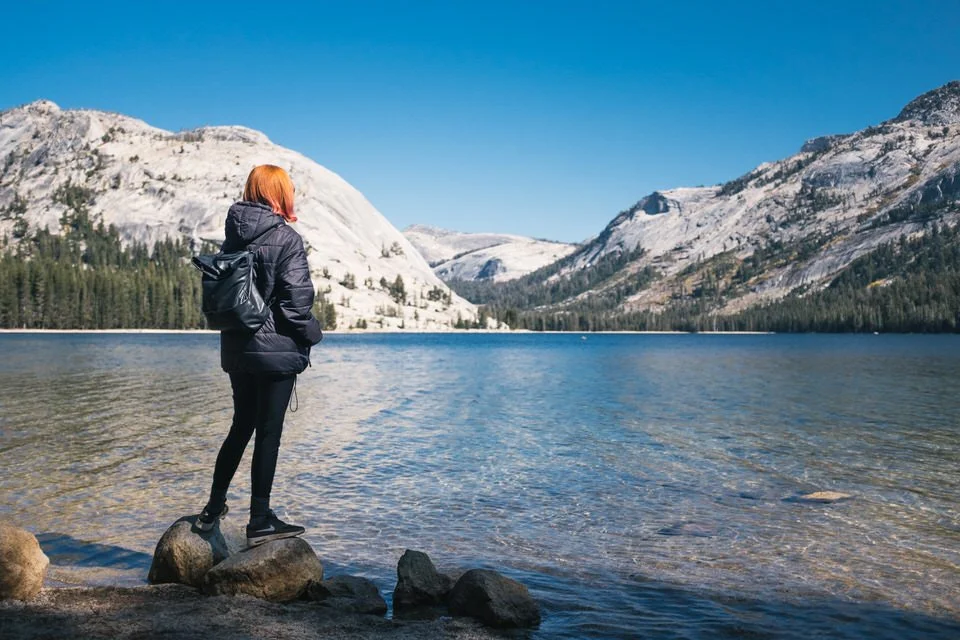
20. Tenaya Lake
Tenaya Lake Hike Quick Facts:
Type of Trail: Loop
Total Mileage: ~2.5 miles round trip
Total Elevation Gain: Minimal
Difficulty: Easy
Crowd Rank: Medium
Scenery Rank: Beautiful lake views the entire hike
Best Place to Park to Access Trailhead: There are parking lots at either end of the lake, or, if those fill up, you can park along the should of Tioga Road.
Tenaya Lake is super accessible and is an awesome place to come and spend the day to explore.
Hike this beautiful loop around the lake or enjoy a lazy day on its sandy shore – or do both! Either way, it’s an excellent place to spend the day.
For those in your group who are feeling more ambitious, the Tenaya Lake area is also the starting trailhead for the epic Clouds Rest hike!
There is even some rock climbing in the surrounding boulders above the lake that make for fun, less crowded bouldering locations.
What makes this Yosemite hike special? Tenaya Lake is beautiful and easily accessible.
21. Glacier Point Short Hike
Glacier Point Short Hike Quick Facts:
Type of Trail: Out and Back
Total Mileage: 1 mile round trip
Total Elevation Gain: Minimal
Difficulty: Easy
Crowd Rank: Very popular
Scenery Rank: One of the best in Yosemite to view Half Dome
Best Place to Park to Access Trailhead: Glacier Point parking lot
If you aren’t up for one of the more difficult hikes that takes you to Glacier Point, then you can drive up to the Glacier Point Trailhead and still enjoy this epic view with a very minimal hike.
This is an excellent spot to drive to at the end of the day and watch the sunset on Half Dome in the distance.
What makes this Yosemite hike special? This view of Half Dome is probably the best in the valley.
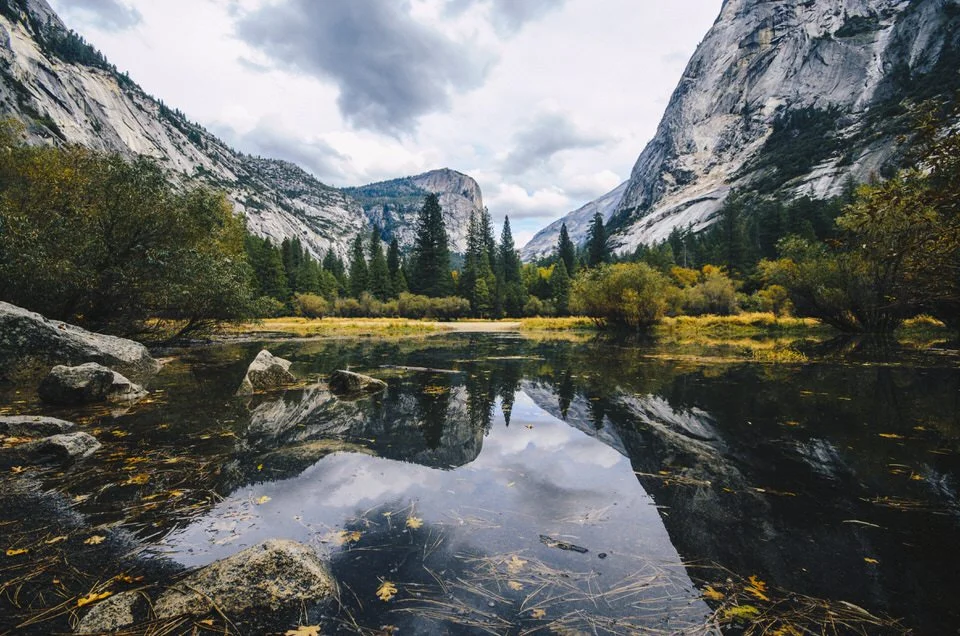
22. Mirror Lake
Mirror Lake Hike Quick Facts
Type of Trail: Out and Back
Total Mileage: 2.4 miles roundtrip
Total Elevation Gain: ~100 feet or less
Difficulty: Easy
Crowd Rank: Popular
Scenery Rank: Beautiful Yosemite Valley reflected back at you
Best Place to Park to Access Trailhead: You can park in the valley and take one of the free shuttle busses or if you start your hike in the valley, park near Curry Village.
The Mirror Lake hike makes for a great easy day hike in the Valley and takes you up close to the base of Half Dome (or about as close as you can get from the Valley floor).
If you look for the right spot, you can even see the top of Half Dome reflected back at you in Mirror Lake. People also enjoy swimming in Mirror Lake in the summer.
You can make this a longer hike by hiking all the way out to Tenaya Canyon (about 4 miles round trip) or by starting your hike in Yosemite Village instead of taking a shuttle to the trailhead (which adds on about another 1.5 miles to the total trip mileage).
What makes this Yosemite hike special? Get an extra special view of Yosemite Valley reflected back at you via Mirror Lake.

23. Wawona Meadow Loop
Wawona Meadow Loop Hike Quick Facts:
Type of Trail: Loop
Total Mileage: ~ 5 mile loop
Total Elevation Gain: Minimal
Difficulty: Easy
Crowd Rank: Low
Scenery Rank: Pretty meadows, but lower on the scenery scale due to the presence of the golf course
Best Place to Park to Access Trailhead: The trailhead is across the road from the Wawona Hotel parking lot, where you can look for parking.
The Wawona Meadow Loop makes it on the top hikes in Yosemite list because not only is it a nice easy day hike, but it is also relatively uncrowded compared to many of Yosemites other hiking trails.
There is however a 9-hole golf course around this hike, which is interesting, but not what you’d expect to find in a National Park.
This trail can make for an extra beautiful hike in the spring when the wildflowers are blooming and also in the fall when the fall leaves are changing colors.
What makes this Yosemite hike special? Low crowds, and a golf course, if you’re into that kind of thing. Pets and bicycles are also allowed on this trail since it is paved.
24. Soda Springs and Parsons Lodge

Soda Springs and Parsons Lodge Quick Facts:
Type of Trail: Loop
Total Mileage: 1.5 miles roundtrip
Total Elevation Gain: Very minimal
Difficulty: Easy
Crowd Rank: On popular weekends, you might find a lot of people here since it is so easy to access, but it isn’t as bad as some other areas in Yosemite.
Scenery Rank: Beautiful views! Less elevation gain though, so most of your views are going to be of the surrounding scenery and Soda Springs.
Best Place to Park to Access Trailhead: Lembert Dome parking area (Shuttle Stop #4)
Trail description contribution from blogger Katherine of Bright Lights of America:
We were lucky enough to book a campsite at Yosemite, even though I had a hip issue that stopped me from being able to hike very far at all.
We were determined to get at least one hike in, and the trail past Soda Springs and Parsons Lodge was perfect. It was a relatively flat, wide path at Tuolumne Meadows, easy to get to using the park shuttle (stop #4), and a short loop that took in a beautiful bridge and river.
On our way out, we saw lots of little critters scampering through the meadows, from chipmunks to ground squirrels to a family of deer.
We stopped at what’s left of the Soda Springs Cabin, built back in 1889. The cabin shelters the most prolific of the springs – carbonated water bubbling from the ground – but there are also a few springs outside its walls as well.
Carry on to Parsons Lodge, which is used for exhibitions during the summer, but was first built as a memorial to a member of the Sierra Club back in 1915. We managed to catch an author’s reading and book signing as we passed through.
The last beautiful stop on this hike is Tuolumne Meadows footbridge, a low wooden bridge where you can sit and watch the water rush by after a soaking rain.
What makes this Yosemite hike special? Although the hike is short and sweet, you’ll get to pass by three unique landmarks: the Soda Springs Cabin, Parsons Lodge, and the Tuolumne Meadows footbridge.
25. Sentinel Dome Trail

Sentinel Dome Trail Hike Quick Facts:
Type of Trail: Out and Back
Total Mileage: 2.2 miles roundtrip
Total Elevation Gain: ~ 400 feet of total gain
Difficulty: Easy
Crowd Rank: Medium
Scenery Rank: Very scenic!
Best Place to Park to Access Trailhead: The parking lot for Sentinel Dome Trail shares the same space with the Taft Point trailhead (another popular hike in the park). The lot is fairly small, so you may need to park your car on the shoulder of Glacier Point Road.
The hardest part about the Sentinel Dome Trail hike is the final bit up Sentinel Dome itself, otherwise, you’ll find this a nice easy Yosemite day hike with epic panoramic views of the valley.
On the summit of Sentinel Dome, you’ll find a dead Jeffery Pine tree which became famous when Ansel Adams took a very well-known picture of it. However, the tree died in a drought in 1977 and is now dead on the summit.
What makes this Yosemite hike special? Epic views in all directions with relatively easy hiking.
26. Taft Point

Taft Point Hike Quick Facts:
Type of Trail: Out and Back
Total Mileage: ~ 2.2 miles roundtrip
Total Elevation Gain: ~ 200 feet of total gain
Difficulty: Easy
Crowd Rank: Medium
Scenery Rank: Epic sweeping views with unique photo ops
Best Place to Park to Access Trailhead: The parking lot for Taft Point shares the same space with the Sentinel Dome trailhead (mentioned above). The lot is fairly small, so you may need to park your car on the shoulder of Glacier Point Road.
This hiking spot is a very popular location for hikers and photographers alike, since it provides amazing views of Yosemite Valley, including the grand El Capitan.
This area gets a bad reputation because people are known to push their luck getting close to the edge for the “perfect photo.”
Use common sense when hiking here, and stay a safe distance away from the edge. There are no guardrails here so you go at your own risk. Regardless of the potential danger, this is a great little easy hike in Yosemite.
What makes this Yosemite hike special? Classic Yosemite photo opportunity with relatively easy hiking.
Yosemite’s Most Epic Trail
27. John Muir Trail

John Muir Trail Hike Quick Facts:
Type of Trail: Thru Hike
Total Mileage: 211 miles
Total Elevation Gain: Around 46,000 total feet of elevation gain!
Difficulty: Difficult, multi-week backpacking trip
Crowd Rank: Very popular, but the trail can feel secluded once you get away from the entry hubs and out further into the backcountry of the Sierras.
Scenery Rank: The most epic scenery you’ll find in all of California!
Trailhead: You can start in Yosemite or Whitney Portal.
Ok, so the John Muir Trail isn’t entirely located in Yosemite, BUT the trail does start (or end depending on which direction you’re hiking) in the heart of Yosemite Valley.
The John Muir Trail is one of the most epic and iconic California hikes, and is one of the most sought after thru-hiking achievements in the United States.
Hikers compete for permits every year to spend 2-6 weeks backpacking this 211 mile long hike – check out our Ultimate Guide to Planning Your John Muir Trail Thru-Hike if you want to attempt this yourself.
Permits are required to hike the John Muir Trail, and you can read all about how to get them in our John Muir Trail Permits guide.
If you live in California or nearby, you can choose to hike the John Muir Trail in segments, which is what I did when I lived there. You can check out a few of my trail guides on sections of the John Muir Trail below:
43 Miles of the John Muir Trail from Onion Valley to Whitney Portal
38 Miles of the John Muir Trail from Lyell Canyon to Devil’s Postpile
Regardless of which way you do the JMT, it’s one to put on the bucket list. If you’d like a little taste of the John Muir Trail you can start your hike up towards Half Dome hiking up the John Muir Trail instead of the Mist Trail.
What makes this Yosemite hike special? It’s California’s most well-known thru-hike and a larger portion of the trail is also part of the larger thru-hike known as the Pacific Crest Trail.

Looking for more California adventures?
If you are looking for additional California hiking adventures, check out our resources below:
A Full List of All the California 14er Hikes
Important Permit & Reservation Deadlines for Popular California Hiking Trails & Campsites
Other Essential Hiking Resources:
Also be sure to check out these essential hiking resources!
If you’re looking for some more “Best Hikes In” Blog Posts, be sure to check out these:
So how many of the hikes above have you done? Are any of these still on your Yosemite National Park hiking bucket list?! Did we miss any of your favorite Yosemite hikes? Let us know in the comments below!
Cheers,
Allison - She Dreams of Alpine


Related Posts:


17 Awesome Palm Springs Hikes in Southern California | Palms Springs is an outdoor oasis where the mountains collide with the desert. From beautiful trails through oases of fan palms to epic mountain summits – and a unique aerial tram ride to a trailhead – the best Palm Springs hikes provide unique adventures in the Coachella Valley. | shedreamsofalpine.com