
Ladyfingers

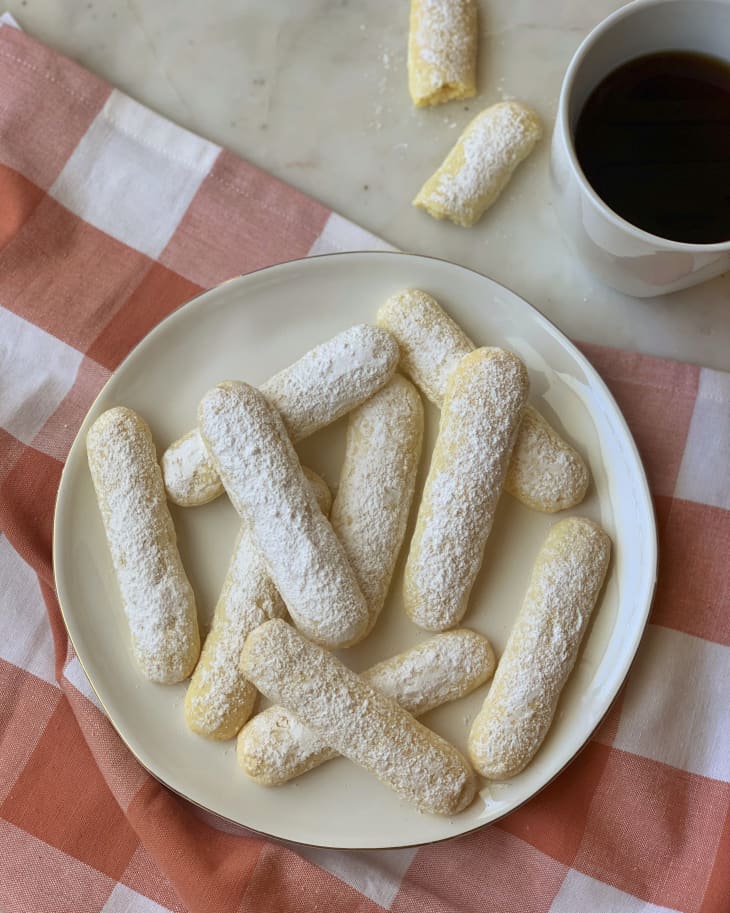
These delicate piped sponge cakes are the perfect accompaniment to a hot cup of coffee.
Makesabout 40 (4-inch) ladyfingers
Prep35 minutes
Cook11 minutes to 15 minutes
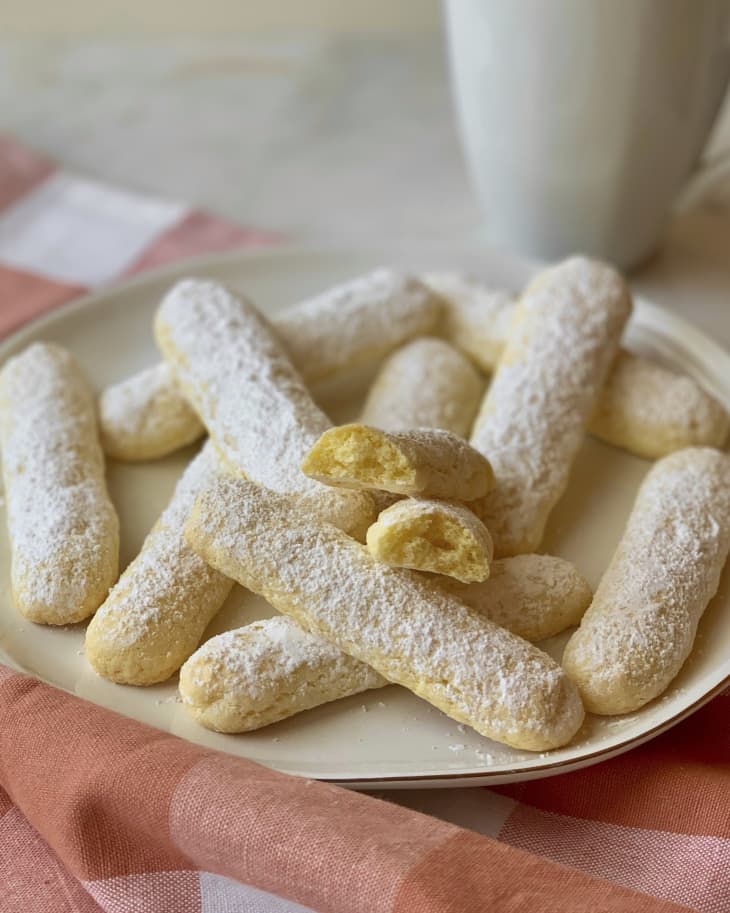
Whether you call them ladyfingers, savoiardi, sponge biscuits, boudoirs, or any of its other many monikers, these delicate piped sponge cakes hold up beautifully in desserts like tiramisu. While it may seem fussy to make ladyfingers, unlike their store-bought counterpart that typically comes firm and dry, freshly baked ladyfingers have a delicately crisp exterior and soft, chewy interior that make them the perfect accompaniment to a hot cup of coffee.
What Are Ladyfingers?
Ladyfingers are piped sponge cakes that can be eaten on their own, but are often used in desserts such as tiramisu or in trifles. They are noted to have gotten the name “ladyfingers” from their long, slender appearance, compared to the likes of, well, a lady’s fingers.
Ladyfingers are made from just a handful of ingredients — eggs, granulated and powdered sugar, vanilla, cream of tartar, flour, cornstarch, and salt. The egg-based sponge cakes don’t have any chemical leaveners, but rather get their lift from whipped egg whites.
How to Make the Best Ladyfingers
The trick to making a good ladyfinger lies in the technique. In short, egg yolks and whites are whipped separately and folded together, dry ingredients are folded in, the mixture is piped onto baking sheets, and baked until golden around the edges. In order to make ladyfingers that don’t fall flat (literally), I have a few tips and tricks to help.
- In this recipe, room-temperature eggs are separated and the yolks and whites are whipped separately. While there are ways to whip the eggs whole, it can be tricky. Whipping the yolks and whites separately is a more reliable, controlled method.
- After whipping the yolks with sugar and vanilla, the whites are whipped in a clean bowl. If you’re using the same bowl, be sure to wash and dry it thoroughly, as the fat from any yolk residue will prevent the whites from whipping up to their maximum potential volume.
- The whites are whipped with cream of tartar on medium-low speed while granulated sugar is streamed in. The cream of tartar and streaming of the sugar helps to stabilize the meringue. Once foamy, the mixer is turned up to medium speed and the whites are whipped to a soft peak. The mixer is then turned up once more to medium-high speed and whipped to stiff, glossy peaks. Whipping the whites in stages is a technique I picked up when interning at Martha Stewart. By gradually increasing the speed, you create tinier bubbles that create a more stable meringue. In this case, you want a stable meringue to provide the height for the ladyfingers.
- Take care to not over-fold the dry ingredients into the egg mixture, as this can deflate the meringue and cause the piped ladyfingers to spread too much.
- Don’t skip the dusting of powdered sugar before baking! As noted by Stella Parks, it helps the ladyfingers rise rather than spread.
How to Store Ladyfingers
Ladyfingers can be stored in an airtight container for up to 10 days.
How to Serve Ladyfingers
- Use them to make tiramisu.
- Layer them in a trifle.
- Dip the ends in melted chocolate.
- Sandwich ladyfingers with ganache, jam, or lemon curd.
- Use them in place of cookies in an icebox cake.
Ladyfingers Recipe
These delicate piped sponge cakes are the perfect accompaniment to a hot cup of coffee.
Prep time 35 minutes
Cook time 11 minutes to 15 minutes
Makes about 40 (4-inch) ladyfingers
Nutritional Info
Ingredients
- 4
large eggs
- 3/4 cup
granulated sugar, divided
- 3/4 teaspoon
vanilla extract
- 1/4 teaspoon
cream of tartar
- 1 cup
all-purpose flour
- 4 teaspoons
cornstarch
- 1/2 teaspoon
kosher salt
Powdered sugar, for dusting
Instructions
Separate 4 large egg yolks, placing the yolks into the bowl of a stand mixer (or large bowl if using an electric mixer) and the whites into a small bowl. Let sit out until room temperature. Meanwhile, arrange 2 racks to divide the oven into thirds and heat the oven to 350°F. Line 2 baking sheets with parchment paper or silicone baking mats. Fit a pastry bag with a 1/2-inch round tip.
Add 1/2 cup of the granulated sugar and 3/4 teaspoon vanilla extract to the egg yolks. Beat with the whisk attachment on medium speed until the egg yolks are lightened in color, about 2 minutes. Increase the speed to medium-high and beat until doubled in volume, very pale yellow, falls off the whisk in thick ribbons, and the whisk leaves visible lines through the egg yolk mixture when the mixer is running, about 2 minutes more.
Transfer the mixture to a bowl. Clean and dry the stand mixer and whisk attachment.
Add the reserved egg whites and 1/4 teaspoon cream of tartar to the stand mixer. Attach the whisk attachment and turn on to on medium-low speed. Slowly add the remaining 1/4 cup granulated sugar and beat until the mixture is foamy and beginning to grow in volume, about 2 minutes.
Increase the speed to medium and beat until soft peaks form, about 2 minutes. Increase the speed to medium-high and beat until glossy and stiff peaks form, about 2 minutes more.
Add half of the egg yolk mixture and fold until just combined. Add the remaining egg yolk mixture and fold until almost fully incorporated, some streaks are okay. Do not overmix.
Sift 1 cup all-purpose flour, 4 teaspoons cornstarch, and 1/2 teaspoon kosher salt into the egg mixture. Fold together until just incorporated with no dry bits remaining, it’s okay if the mixture is not smooth. Do not overmix.
Transfer the mixture to the pastry bag. Pipe 4-inch long ladyfingers onto the baking sheets, spacing them 3/4 to 1-inch apart, 20 per sheet. Dust an even layer of powdered sugar over the ladyfingers.
Bake until puffed and just turning golden around the bottom, 11 to 15 minutes. Bake for a shorter amount of time for soft, chewy ladyfingers and longer for firmer, chewy ladyfingers.
Let the ladyfingers cool completely on the baking sheets. Transfer to an airtight container and store at room temperature until ready to serve. Dust lightly with more powdered sugar before serving as desired. (If using in a dessert such as tiramisu, the ladyfingers can be stored uncovered or loosely covered at room temperature to further dry out until ready to use instead.)
Recipe Notes
Storage: Ladyfingers can be stored in an airtight container for up to 10 days.