Nokia 3360 User's Guide
Nokia 3360 User's Guide
Nokia 3360 User's Guide

Create successful ePaper yourself
Turn your PDF publications into a flip-book with our unique Google optimized e-Paper software.
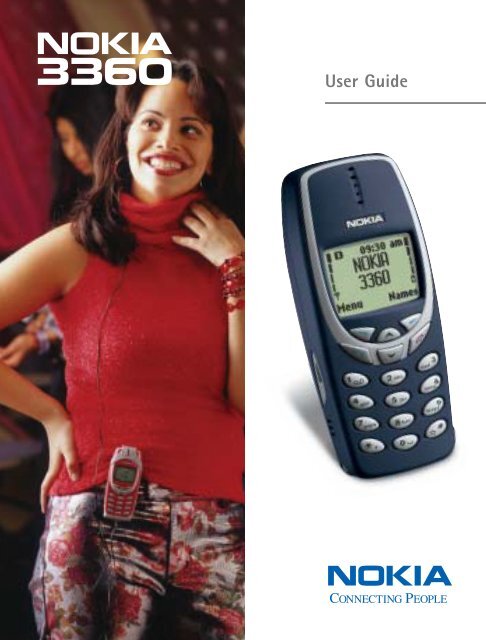
User <strong>Guide</strong>
<strong>Nokia</strong> <strong>3360</strong><br />
User <strong>Guide</strong><br />
Phone notes<br />
Notes Where to get information<br />
My number Wireless service provider<br />
Voice mail number<br />
Wireless service<br />
provider’s customer<br />
care<br />
Model number <strong>3360</strong> Type label. Located under<br />
the battery.<br />
Phone type NPW-1<br />
ESN (Electronic<br />
serial number)
The wireless phone described in this guide is approved for use in TDMA and AMPS<br />
networks.<br />
LEGAL INFORMATION<br />
Part No. 9355118, Issue No. 4<br />
Copyright ©2002 <strong>Nokia</strong>. All rights reserved.<br />
<strong>Nokia</strong>, <strong>Nokia</strong> Connecting People, the <strong>Nokia</strong> Original Accessories logos, <strong>Nokia</strong> <strong>3360</strong>,<br />
Space Impact and Snake II are trademarks or registered trademarks of <strong>Nokia</strong>.<br />
Printed in Canada 9/2002<br />
US Patent No 5818437 and other pending patents.<br />
T9 text input software Copyright ©1999-2002. Tegic Communications, Inc. All<br />
rights reserved.<br />
Includes RSA BSAFE cryptographic or security protocol software from<br />
RSA Security.<br />
The information contained in this user guide was written for the <strong>Nokia</strong> <strong>3360</strong> phone.<br />
<strong>Nokia</strong> operates a policy of continuous development. <strong>Nokia</strong> reserves the right to<br />
make changes and improvements to any of the products described in this<br />
document without prior notice<br />
UNDER NO CIRCUMSTANCES SHALL NOKIA BE RESPONSIBLE FOR ANY LOSS OF<br />
DATA OR INCOME OR ANY SPECIAL, INCIDENTAL, AND CONSEQUENTIAL OR<br />
INDIRECT DAMAGES HOWSOEVER CAUSED.<br />
THE CONTENTS OF THIS DOCUMENT ARE PROVIDED “AS IS.” EXCEPT AS REQUIRED<br />
BY APPLICABLE LAW, NO WARRANTIES OF ANY KIND, EITHER EXPRESS OR<br />
IMPLIED, INCLUDING, BUT NOT LIMITED TO, THE IMPLIED WARRANTIES OF<br />
MERCHANTABILITY AND FITNESS FOR A PARTICULAR PURPOSE, ARE MADE IN<br />
RELATION TO THE ACCURACY AND RELIABILITY OR CONTENTS OF THIS DOCUMENT.<br />
NOKIA RESERVES THE RIGHT TO REVISE THIS DOCUMENT OR WITHDRAW IT AT ANY<br />
TIME WITHOUT PRIOR NOTICE.<br />
EXPORT CONTROLS<br />
This product contains commodities, technology or software exported from the<br />
United States in accordance with the Export Administration regulations. Diversion<br />
contrary to U.S. law is prohibited.<br />
FCC/INDUSTRY CANADA NOTICE<br />
Your phone may cause TV or radio interference (for example, when using a<br />
telephone in close proximity to receiving equipment). The FCC or Industry Canada<br />
can require you to stop using your telephone if such interference cannot be<br />
eliminated. If you require assistance, contact your local service facility. This device<br />
complies with part 15 of the FCC rules. Operation is subject to the condition that<br />
this device does not cause harmful interference.
Contents<br />
1 Safety first . . . . . . . . . . . . . . . . . . . . . . . . . . . . . . . . . . . . .1<br />
2 Welcome . . . . . . . . . . . . . . . . . . . . . . . . . . . . . . . . . . . . . . .3<br />
Get the most out of this guide . . . . . . . . . . . . . . . . . . . . . . . . . . . 3<br />
Understand wireless network services . . . . . . . . . . . . . . . . . . . . . 5<br />
Register your phone . . . . . . . . . . . . . . . . . . . . . . . . . . . . . . . . . . . . 6<br />
E-newsletters . . . . . . . . . . . . . . . . . . . . . . . . . . . . . . . . . . . . . . . . . 6<br />
Learn about accessibility solutions . . . . . . . . . . . . . . . . . . . . . . . . 6<br />
Your phone’s label. . . . . . . . . . . . . . . . . . . . . . . . . . . . . . . . . . . . . . 9<br />
Contact <strong>Nokia</strong> . . . . . . . . . . . . . . . . . . . . . . . . . . . . . . . . . . . . . . . . 10<br />
Contact your service provider . . . . . . . . . . . . . . . . . . . . . . . . . . . 10<br />
3 Set up your phone. . . . . . . . . . . . . . . . . . . . . . . . . . . . . . . 11<br />
Install the battery . . . . . . . . . . . . . . . . . . . . . . . . . . . . . . . . . . . . . 11<br />
Charge the battery . . . . . . . . . . . . . . . . . . . . . . . . . . . . . . . . . . . . 12<br />
Remove the battery . . . . . . . . . . . . . . . . . . . . . . . . . . . . . . . . . . . 12<br />
Important battery information . . . . . . . . . . . . . . . . . . . . . . . . . . 13<br />
Prolong battery life. . . . . . . . . . . . . . . . . . . . . . . . . . . . . . . . . . . . 13<br />
Switch on your phone . . . . . . . . . . . . . . . . . . . . . . . . . . . . . . . . . 14<br />
Set up your headset . . . . . . . . . . . . . . . . . . . . . . . . . . . . . . . . . . . 14<br />
Use the carrying case . . . . . . . . . . . . . . . . . . . . . . . . . . . . . . . . . . 14<br />
Adjust the volume. . . . . . . . . . . . . . . . . . . . . . . . . . . . . . . . . . . . . 15<br />
Adjust screen contrast . . . . . . . . . . . . . . . . . . . . . . . . . . . . . . . . . 15<br />
4 Review the basics . . . . . . . . . . . . . . . . . . . . . . . . . . . . . . .16<br />
Your <strong>Nokia</strong> <strong>3360</strong> phone . . . . . . . . . . . . . . . . . . . . . . . . . . . . . . . . 16<br />
About the antenna . . . . . . . . . . . . . . . . . . . . . . . . . . . . . . . . . . . . 17<br />
Memory use. . . . . . . . . . . . . . . . . . . . . . . . . . . . . . . . . . . . . . . . . . 17<br />
Learn the keys . . . . . . . . . . . . . . . . . . . . . . . . . . . . . . . . . . . . . . . . 18<br />
Make and answer calls. . . . . . . . . . . . . . . . . . . . . . . . . . . . . . . . . 19<br />
[ i ]
Check the Start screen . . . . . . . . . . . . . . . . . . . . . . . . . . . . . . . . . 20<br />
Review phone symbols . . . . . . . . . . . . . . . . . . . . . . . . . . . . . . . . . 21<br />
Use the selection keys . . . . . . . . . . . . . . . . . . . . . . . . . . . . . . . . . 23<br />
Check in-phone help . . . . . . . . . . . . . . . . . . . . . . . . . . . . . . . . . . 23<br />
Browse phone menus . . . . . . . . . . . . . . . . . . . . . . . . . . . . . . . . . . 23<br />
Shortcuts . . . . . . . . . . . . . . . . . . . . . . . . . . . . . . . . . . . . . . . . . . . 25<br />
Phone book menu. . . . . . . . . . . . . . . . . . . . . . . . . . . . . . . . . . . . . 29<br />
5 Add information . . . . . . . . . . . . . . . . . . . . . . . . . . . . . . . . 30<br />
About entering letters and numbers. . . . . . . . . . . . . . . . . . . . . . 30<br />
ABC and 123 methods . . . . . . . . . . . . . . . . . . . . . . . . . . . . . . . . . 31<br />
Write with predictive text . . . . . . . . . . . . . . . . . . . . . . . . . . . . . . 34<br />
6 Store names and numbers. . . . . . . . . . . . . . . . . . . . . . . . . 38<br />
Open the phone book . . . . . . . . . . . . . . . . . . . . . . . . . . . . . . . . . . 38<br />
Save names and numbers . . . . . . . . . . . . . . . . . . . . . . . . . . . . . . 38<br />
Save a text entry with a name . . . . . . . . . . . . . . . . . . . . . . . . . . 39<br />
Recall information . . . . . . . . . . . . . . . . . . . . . . . . . . . . . . . . . . . . 39<br />
Use phone book menus . . . . . . . . . . . . . . . . . . . . . . . . . . . . . . . . 40<br />
Edit a name or number. . . . . . . . . . . . . . . . . . . . . . . . . . . . . . . . . 42<br />
Erase stored names and numbers . . . . . . . . . . . . . . . . . . . . . . . . 42<br />
Erase the entire phone book . . . . . . . . . . . . . . . . . . . . . . . . . . . . 42<br />
Add a second number to a name. . . . . . . . . . . . . . . . . . . . . . . . . 43<br />
Check memory status. . . . . . . . . . . . . . . . . . . . . . . . . . . . . . . . . . 44<br />
7 Check call history . . . . . . . . . . . . . . . . . . . . . . . . . . . . . . . 45<br />
Check missed, received, or dialed calls . . . . . . . . . . . . . . . . . . . . 45<br />
Clear call lists . . . . . . . . . . . . . . . . . . . . . . . . . . . . . . . . . . . . . . . . 46<br />
Check call timers . . . . . . . . . . . . . . . . . . . . . . . . . . . . . . . . . . . . . 47<br />
Turn on a current call timer. . . . . . . . . . . . . . . . . . . . . . . . . . . . . 48<br />
Clear call timers . . . . . . . . . . . . . . . . . . . . . . . . . . . . . . . . . . . . . . 48<br />
8 Use advanced calling features. . . . . . . . . . . . . . . . . . . . . . 49<br />
Set in-call options . . . . . . . . . . . . . . . . . . . . . . . . . . . . . . . . . . . . 49<br />
[ ii ]
Use call waiting . . . . . . . . . . . . . . . . . . . . . . . . . . . . . . . . . . . . . . 50<br />
Use call forwarding. . . . . . . . . . . . . . . . . . . . . . . . . . . . . . . . . . . . 52<br />
Redial automatically. . . . . . . . . . . . . . . . . . . . . . . . . . . . . . . . . . . 53<br />
Use a calling card . . . . . . . . . . . . . . . . . . . . . . . . . . . . . . . . . . . . . 54<br />
Send your own number in caller ID. . . . . . . . . . . . . . . . . . . . . . . 56<br />
Select a phone number . . . . . . . . . . . . . . . . . . . . . . . . . . . . . . . . 57<br />
Set touch tones. . . . . . . . . . . . . . . . . . . . . . . . . . . . . . . . . . . . . . . 57<br />
9 Use voice mail . . . . . . . . . . . . . . . . . . . . . . . . . . . . . . . . . .60<br />
Check for messages . . . . . . . . . . . . . . . . . . . . . . . . . . . . . . . . . . . 60<br />
Set up your voice mailbox . . . . . . . . . . . . . . . . . . . . . . . . . . . . . . 60<br />
Set greetings . . . . . . . . . . . . . . . . . . . . . . . . . . . . . . . . . . . . . . . . . 61<br />
Listen to your voice messages . . . . . . . . . . . . . . . . . . . . . . . . . . . 61<br />
10 Personalize rings and tones . . . . . . . . . . . . . . . . . . . . . . . .62<br />
What is a profile? . . . . . . . . . . . . . . . . . . . . . . . . . . . . . . . . . . . . . 62<br />
Select a different profile . . . . . . . . . . . . . . . . . . . . . . . . . . . . . . . 62<br />
Customize a profile. . . . . . . . . . . . . . . . . . . . . . . . . . . . . . . . . . . . 62<br />
Rename profiles . . . . . . . . . . . . . . . . . . . . . . . . . . . . . . . . . . . . . . 66<br />
11 Personalize phone settings. . . . . . . . . . . . . . . . . . . . . . . . .67<br />
Set the language. . . . . . . . . . . . . . . . . . . . . . . . . . . . . . . . . . . . . . 67<br />
Set and display the clock . . . . . . . . . . . . . . . . . . . . . . . . . . . . . . . 67<br />
Set the clock to be updated by the network . . . . . . . . . . . . . . . 68<br />
Add a welcome note. . . . . . . . . . . . . . . . . . . . . . . . . . . . . . . . . . . 69<br />
Use speed dialing . . . . . . . . . . . . . . . . . . . . . . . . . . . . . . . . . . . . . 69<br />
Set your phone to answer automatically . . . . . . . . . . . . . . . . . . 71<br />
Set the lights (car kit only) . . . . . . . . . . . . . . . . . . . . . . . . . . . . . 71<br />
Restore the factory settings. . . . . . . . . . . . . . . . . . . . . . . . . . . . . 72<br />
12 Manage phone security . . . . . . . . . . . . . . . . . . . . . . . . . . .73<br />
Change your security code. . . . . . . . . . . . . . . . . . . . . . . . . . . . . . 73<br />
Lock the keypad . . . . . . . . . . . . . . . . . . . . . . . . . . . . . . . . . . . . . . 74<br />
Restrict calls . . . . . . . . . . . . . . . . . . . . . . . . . . . . . . . . . . . . . . . . . 75<br />
[ iii ]
13 Manage reminders and notes . . . . . . . . . . . . . . . . . . . . . . 77<br />
Add a reminder . . . . . . . . . . . . . . . . . . . . . . . . . . . . . . . . . . . . . . . 77<br />
Add a note. . . . . . . . . . . . . . . . . . . . . . . . . . . . . . . . . . . . . . . . . . . 78<br />
Send and receive a reminder or note . . . . . . . . . . . . . . . . . . . . . 78<br />
Choose other reminder and note options . . . . . . . . . . . . . . . . . . 79<br />
14 Use prepaid services . . . . . . . . . . . . . . . . . . . . . . . . . . . . . 80<br />
Manage prepaid service . . . . . . . . . . . . . . . . . . . . . . . . . . . . . . . . 80<br />
Save your access numbers . . . . . . . . . . . . . . . . . . . . . . . . . . . . . . 81<br />
Add money to your account . . . . . . . . . . . . . . . . . . . . . . . . . . . . 81<br />
Check your prepaid balance. . . . . . . . . . . . . . . . . . . . . . . . . . . . . 82<br />
15 Set network services features . . . . . . . . . . . . . . . . . . . . . . 83<br />
Set up how your phone selects a network . . . . . . . . . . . . . . . . . 83<br />
Use your phone while traveling. . . . . . . . . . . . . . . . . . . . . . . . . . 84<br />
16 Communicate with text messages. . . . . . . . . . . . . . . . . . . 85<br />
About text messages . . . . . . . . . . . . . . . . . . . . . . . . . . . . . . . . . . 85<br />
Use folders for text messages . . . . . . . . . . . . . . . . . . . . . . . . . . . 86<br />
Write and send a text message . . . . . . . . . . . . . . . . . . . . . . . . . . 86<br />
Resend a message from the outbox . . . . . . . . . . . . . . . . . . . . . . 88<br />
Receive a text message . . . . . . . . . . . . . . . . . . . . . . . . . . . . . . . . 88<br />
Read a text message . . . . . . . . . . . . . . . . . . . . . . . . . . . . . . . . . . 89<br />
Save a message in the archive folder . . . . . . . . . . . . . . . . . . . . . 90<br />
When your phone’s memory is full . . . . . . . . . . . . . . . . . . . . . . . 90<br />
Erase messages . . . . . . . . . . . . . . . . . . . . . . . . . . . . . . . . . . . . . . . 90<br />
Reply to a message. . . . . . . . . . . . . . . . . . . . . . . . . . . . . . . . . . . . 91<br />
Forward a message. . . . . . . . . . . . . . . . . . . . . . . . . . . . . . . . . . . . 92<br />
Send and receive e-mail messages . . . . . . . . . . . . . . . . . . . . . . . 92<br />
Use templates . . . . . . . . . . . . . . . . . . . . . . . . . . . . . . . . . . . . . . . . 93<br />
Chat with other phone users . . . . . . . . . . . . . . . . . . . . . . . . . . . . 94<br />
Use picture messages . . . . . . . . . . . . . . . . . . . . . . . . . . . . . . . . . . 95<br />
[ iv ]
17 Use special features . . . . . . . . . . . . . . . . . . . . . . . . . . . . .98<br />
Send and receive business cards . . . . . . . . . . . . . . . . . . . . . . . . . 98<br />
Download (transfer) ringing tones . . . . . . . . . . . . . . . . . . . . . . . 99<br />
Set the alarm clock. . . . . . . . . . . . . . . . . . . . . . . . . . . . . . . . . . . 100<br />
Use the calculator. . . . . . . . . . . . . . . . . . . . . . . . . . . . . . . . . . . . 102<br />
18 Infrared. . . . . . . . . . . . . . . . . . . . . . . . . . . . . . . . . . . . . .104<br />
Infrared basics. . . . . . . . . . . . . . . . . . . . . . . . . . . . . . . . . . . . . . . 104<br />
Send and receive information . . . . . . . . . . . . . . . . . . . . . . . . . . 105<br />
PC Connectivity. . . . . . . . . . . . . . . . . . . . . . . . . . . . . . . . . . . . . . 107<br />
19 Connect to the Wireless Internet. . . . . . . . . . . . . . . . . . .108<br />
Notes on Wireless Internet access . . . . . . . . . . . . . . . . . . . . . . 108<br />
Set up for browsing . . . . . . . . . . . . . . . . . . . . . . . . . . . . . . . . . . 109<br />
Sign on to the Wireless Internet . . . . . . . . . . . . . . . . . . . . . . . . 109<br />
Use browser options (Services Menu) . . . . . . . . . . . . . . . . . . . . 110<br />
Sign off the Wireless Internet . . . . . . . . . . . . . . . . . . . . . . . . . . 110<br />
Navigate the Wireless Internet . . . . . . . . . . . . . . . . . . . . . . . . . 110<br />
Use bookmarks . . . . . . . . . . . . . . . . . . . . . . . . . . . . . . . . . . . . . . 112<br />
20 Play games . . . . . . . . . . . . . . . . . . . . . . . . . . . . . . . . . . .114<br />
Space impact. . . . . . . . . . . . . . . . . . . . . . . . . . . . . . . . . . . . . . . . 114<br />
Pairs II . . . . . . . . . . . . . . . . . . . . . . . . . . . . . . . . . . . . . . . . . . . . . 114<br />
Snake II . . . . . . . . . . . . . . . . . . . . . . . . . . . . . . . . . . . . . . . . . . . . 115<br />
21 Frequently asked questions (FAQ) . . . . . . . . . . . . . . . . . .116<br />
22 Glossary . . . . . . . . . . . . . . . . . . . . . . . . . . . . . . . . . . . . .119<br />
23 Reference information . . . . . . . . . . . . . . . . . . . . . . . . . .121<br />
Battery statements . . . . . . . . . . . . . . . . . . . . . . . . . . . . . . . . . . . 121<br />
Use proper care and maintenance. . . . . . . . . . . . . . . . . . . . . . .122<br />
Understand important safety information . . . . . . . . . . . . . . . .123<br />
Emergency calls . . . . . . . . . . . . . . . . . . . . . . . . . . . . . . . . . . . . .126<br />
Certification Information (SAR). . . . . . . . . . . . . . . . . . . . . . . . .128<br />
[ v ]
Use accessories safely . . . . . . . . . . . . . . . . . . . . . . . . . . . . . . . . 130<br />
Batteries . . . . . . . . . . . . . . . . . . . . . . . . . . . . . . . . . . . . . . . . . . . 131<br />
Accessories . . . . . . . . . . . . . . . . . . . . . . . . . . . . . . . . . . . . . . . . . 132<br />
Technical information . . . . . . . . . . . . . . . . . . . . . . . . . . . . . . . . 139<br />
Troubleshooting . . . . . . . . . . . . . . . . . . . . . . . . . . . . . . . . . . . . . 140<br />
Warranty information . . . . . . . . . . . . . . . . . . . . . . . . . . . . . . . . 141<br />
Appendix A<br />
Message from the CTIA to all users of mobile phones . . . . . . 147<br />
Appendix B<br />
Message from the FDA to all users of mobile phones. . . . . . . 151<br />
Index . . . . . . . . . . . . . . . . . . . . . . . . . . . . . . . . . . . . . . . . . . . . . . 156<br />
[ vi ]
1 Safety first<br />
[ 1 ]<br />
Safety first<br />
Read these simple guidelines. Breaking the rules may be dangerous or<br />
illegal. Further detailed information is given in this manual.<br />
Do not switch on the phone when wireless phone use is<br />
prohibited or when it may cause interference or danger.<br />
ROAD SAFETY COMES FIRST<br />
Don't use a hand-held phone while driving.<br />
INTERFERENCE<br />
All wireless phones may get interference, which could affect<br />
performance.<br />
SWITCH OFF IN HOSPITALS<br />
Follow any regulations or rules. Switch the phone off near<br />
medical equipment.<br />
SWITCH OFF IN AIRCRAFT<br />
Wireless devices can cause interference in aircraft.<br />
SWITCH OFF WHEN REFUELING<br />
Don't use the phone at a refueling point. Don't use near fuel or<br />
chemicals.<br />
SWITCH OFF NEAR BLASTING<br />
Don't use the phone where blasting is in progress. Observe<br />
restrictions, and follow any regulations or rules.<br />
USE SENSIBLY<br />
Use only in the normal position. Don't touch the antenna<br />
unnecessarily.
QUALIFIED SERVICE<br />
Only qualified personnel may install or repair phone equipment.<br />
ACCESSORIES AND BATTERIES<br />
Use only approved accessories and batteries. Do not connect<br />
incompatible products.<br />
WATER-RESISTANCE<br />
Your wireless phone is not water-resistant. Keep it dry.<br />
CONNECTING TO OTHER DEVICES<br />
When connecting to any other device, read its user guide for<br />
detailed safety instructions. Do not connect incompatible<br />
products.<br />
CALLING<br />
Ensure the phone is switched on and in service. Enter the<br />
phone number, including the area code, then press . To<br />
end a call, press . To answer a call, press .<br />
EMERGENCY CALLS<br />
Ensure the phone is switched on and in service. Press<br />
many times as needed (for example, to exit a call, to exit a<br />
as<br />
menu) to clear the display. Enter the emergency number, then<br />
press<br />
to do so.<br />
. Give your location. Do not end the call until told<br />
[ 2 ]
2 Welcome<br />
Congratulations on your purchase of a <strong>Nokia</strong><br />
<strong>3360</strong> mobile phone, a new tool for the mobile<br />
information society.<br />
<strong>Nokia</strong> recommends that you read this chapter<br />
before you use your new phone. You will find<br />
useful information about:<br />
How to use this guide<br />
How to understand network services<br />
How to contact <strong>Nokia</strong><br />
• GET THE MOST OUT OF THIS GUIDE<br />
The tips that follow can help you use this guide effectively.<br />
Understand the terms<br />
This guide uses certain terms for certain actions.<br />
[ 3 ]<br />
Welcome<br />
Press means to briefly press and then release a key. For example,<br />
press means “Press the zero key.”<br />
Press Menu means to press the key that is below the word Menu on<br />
the phone’s screen.<br />
Press and hold means to press and hold a key for 1 to 3 seconds<br />
(depending on the feature you’re using), then release the key.<br />
You use the selection keys and to choose an option on<br />
a menu.<br />
Highlighted means that an option you see on the screen is enclosed<br />
in a dark bar. Choices you make with the two selection keys act on the<br />
highlighted option.
Notice text conventions<br />
This user guide provides text clues to help make instructions clear and<br />
easy to follow. These clues are called conventions.<br />
Convention What it means<br />
bold The word or phrase appears on the phone’s screen.<br />
bold and blue The word is an address on the World Wide Web.<br />
bold and blue A definition for the word or phrase appears in the terms<br />
list (glossary) near the end of the user guide.<br />
italic Italics indicate emphasis. Pay close attention to any<br />
information in italics.<br />
Follow graphic clues<br />
This guide uses certain icons (small pictures) to alert you to important<br />
information.<br />
Tip: Provides information about a shortcut or an alternate method<br />
of doing something<br />
Note: Explains a feature or points out an important concept<br />
Important: Alerts you to information critical to using a feature<br />
correctly<br />
Caution: Warns you when you may lose information<br />
Warning: Helps you avoid personal injury, damage to the phone,<br />
or property damage<br />
[ 4 ]
[ 5 ]<br />
Welcome<br />
Look for updates<br />
From time to time, <strong>Nokia</strong> may update this user guide to reflect changes<br />
or corrections. The latest version may be available at the <strong>Nokia</strong> site on the<br />
internet at<br />
www.nokia.com/us<br />
An interactive user guide that provides step-by-step instructions for any<br />
of your phone features is available at<br />
www.nokiahowto.com<br />
UNDERSTAND WIRELESS NETWORK SERVICES<br />
A number of features included in this guide are called Network Services.<br />
These are special services you arrange through your wireless service<br />
provider. Before you can take advantage of any of these Network Services,<br />
you must subscribe to them through your service provider and obtain<br />
instructions for their use from your service provider.<br />
Note: Some networks may not support all language-dependent<br />
characters and/or services.<br />
Network services for your <strong>Nokia</strong> phone include:<br />
Voice mail and voice privacy<br />
Call waiting, call forwarding, and caller ID<br />
Text and picture messages<br />
Ability to send your own number<br />
News and information services<br />
Selected Internet access services<br />
Sign up with a service provider<br />
Before you can use any network services, you must sign up with a wireless<br />
service provider. Your service provider will supply descriptions of special<br />
features and instructions for using their services.
REGISTER YOUR PHONE<br />
Make sure to register your phone at www.warranty.nokiausa.com or<br />
1-888-NOKIA-2U (1-888-665-4228) so that we can serve your needs<br />
better if you should need to call the center or have your phone repaired.<br />
E-NEWSLETTERS<br />
When you register your phone, you can sign up for <strong>Nokia</strong>'s e-newsletter<br />
<strong>Nokia</strong> Connections if you would like. You will receive tips and tricks on<br />
using your phone, accessory information, and special offers.<br />
Note differences among service providers<br />
Wireless network providers differ from each other in certain ways. For<br />
example, some networks may not support all language-dependent characters.<br />
When you sign up for service, make sure your provider offers the services<br />
you need.<br />
LEARN ABOUT ACCESSIBILITY SOLUTIONS<br />
<strong>Nokia</strong> is committed to making mobile phones easy to use for all<br />
individuals, including those with disabilities. <strong>Nokia</strong> maintains an internet<br />
site that is dedicated to accessibility solutions. For more information<br />
about phone features, accessories and other <strong>Nokia</strong> products designed<br />
with your needs in mind, visit the web site at<br />
www.nokiaaccessibility.com<br />
Alternate format user guides<br />
This user guide is available in alternate formats, including:<br />
Braille<br />
Large print<br />
Audio cassette<br />
E-text (electronic documents on a 3.5-inch disk, in Microsoft Word or<br />
WordPerfect format)<br />
To request any format, call <strong>Nokia</strong> Customer Care at (888) 665-4228.<br />
Hearing-impaired and other TTY users can contact <strong>Nokia</strong> at (800) 246-6542.<br />
[ 6 ]
[ 7 ]<br />
Welcome<br />
LPS-3 Mobile Inductive Loopset<br />
The LPS-3 loopset is a <strong>Nokia</strong> accessory designed to make the 3300 series<br />
phone more accessible to hearing-aid users. The LPS-3 loopset is also<br />
compatible with the <strong>Nokia</strong> 8200- and 8800-series digital phones.<br />
The <strong>Nokia</strong> loopset gives hearing-impaired wireless customers clear access<br />
to digital telephony for the first time. With the loopset, people who use a<br />
T-coil equipped hearing aid can make and receive calls without noise<br />
interference.<br />
HOW THE LOOPSET WORKS<br />
The LPS-3 loopset uses inductive technology to<br />
transmit sound to a hearing aid equipped with a Tcoil.<br />
With inductive technology, the sound from<br />
the phone is amplified more efficiently and background<br />
noise is eliminated.<br />
The loopset is easy to use. You wear the loopset<br />
around your neck, connect it to your phone, and<br />
speak directly toward the microphone.<br />
To activate the loopset for use, go to the loopset<br />
profile under Menu 4-4-3 (Menu > Settings > Accessory settings ><br />
Loopset). For detailed instructions on using the loopset, refer to the<br />
booklet that comes with the LPS-3.<br />
Note: The loopset can be purchased separately as an accessory.<br />
See “Loopset (LPS-3)” on page 134.<br />
Set up the TTY/TDD profile<br />
You can connect your phone to a TTY/TDD using the <strong>Nokia</strong> TTY/TDD<br />
Adapter (HDA-9). In order for your phone to recognize the TTY/TDD, you’ll<br />
need to set up the TTY/TDD profile, under Accessory settings.<br />
Important: Some manufacturers of TTY/TDD devices suggest that<br />
the phone be least 18 inches from the TTY/TDD device. When<br />
connecting to any other device, read its user guide or contact its<br />
manufacturer for detailed instructions and safety information.
1 Connect the TTY/TDD via cable to the HDA-9 adapter.<br />
2 Plug the HDA-9 adapter into the connector on the bottom of your<br />
phone, as shown in the illustration.<br />
18”<br />
3 Press Menu 4-4-4-1 (Settings > Accessory settings > TTY/TDD ><br />
Use TTY).<br />
4 Scroll to Yes, then press Select.<br />
NOTES ABOUT TTY/TDD CALLS<br />
The <strong>Nokia</strong> TTY/TDD Adapter (HDA-9) is for use with compatible<br />
TTY/TDD devices only. Check with the manufacturer of the TTY/TDD<br />
device to ensure that the connection is compatible.<br />
Check with the manufacturer of the TTY/TDD device for the<br />
connecting cable.<br />
TTY/TDD communications depend on network availability. Check with<br />
your service provider for availability and description of services.<br />
MAKE A TTY/TDD CALL<br />
Tip: Before making a TTY/TDD call with your <strong>Nokia</strong> phone, check the<br />
signal strength. See “In the Start screen” on page 20for details.<br />
1 From the Start screen, enter the number and press .<br />
2 When the receiving party answers, begin typing your conversation on<br />
the TTY/TDD.<br />
[ 8 ]
[ 9 ]<br />
Welcome<br />
RECEIVE A TTY/TDD CALL<br />
Tip: You may find it helpful to use the vibrating alert under the<br />
Profiles menu. See “Set a vibrating alert” on page 64 for details.<br />
1 Make sure the TTY/TDD device is connected to your phone.<br />
2 Press to answer the call, then type your responses on the<br />
TTY/TDD.<br />
END A TTY/TDD CALL<br />
Press .<br />
Accessible features<br />
This phone has many accessible features, including:<br />
Nibs beneath the key for quick reference to the keypad<br />
Tactile feedback when a you press a key<br />
Adjustable display contrast<br />
Ability to send and receive short text messages<br />
Convenience of 1-touch dialing<br />
Vibrating alert for incoming calls and messages<br />
YOUR PHONE’S LABEL<br />
When you call <strong>Nokia</strong> Customer Care Center or your service provider, you<br />
will need to provide specific information about your phone. This<br />
information is recorded on the phone’s type label. The type label is located<br />
under the battery inside the phone’s back cover. It contains the model and<br />
serial numbers as well as other important information about your phone.<br />
Please do not remove or deface the label.<br />
Note: The battery must be removed to view your phone’s type<br />
label. See “Remove the battery” on page 12 for more information.
CONTACT NOKIA<br />
If you have a question and have already checked the Troubleshooting<br />
section (see page 140), we recommend that you have the following<br />
information available before contacting the <strong>Nokia</strong> Customer Care Center<br />
or the service provider:<br />
Your phone’s model number<br />
ESN (Electronic serial number – located on the label under the<br />
battery)<br />
Your billing address ZIP code<br />
The phone or accessory in question<br />
<strong>Nokia</strong> Customer Care Center, USA<br />
<strong>Nokia</strong> Mobile Phones<br />
7725 Woodland Center Blvd.<br />
Suite #150<br />
Tampa, Florida 33614<br />
Tel: 1-888-NOKIA-2U<br />
(1-888-665-4228)<br />
Fax: 1-813-249-9619<br />
For TTY users: 1-800-24-NOKIA<br />
(1-800-246-6542)<br />
CONTACT YOUR SERVICE PROVIDER<br />
You may want to save your service provider’s customer support telephone<br />
number into your phone. This will let you easily contact your provider if<br />
you have questions or issues with your phone service.<br />
[ 10 ]<br />
Customer Interaction Centre,<br />
Canada<br />
<strong>Nokia</strong> Products Ltd.<br />
601 Westney Road South<br />
Ajax, Ontario L1S 4N7<br />
Tel: 1-888-22-NOKIA<br />
(1-888-226-6542)<br />
Fax: 1-905-427-1070<br />
Web site: www.nokia.ca
3 Set up your phone<br />
Before you use your phone, you need to:<br />
Charge the battery.<br />
Connect any accessories you want to use.<br />
Adjust a few phone settings to suit your needs.<br />
[ 11 ]<br />
Set up your phone<br />
If your dealer has already installed the battery, you can skip to “Charge<br />
the battery.”<br />
INSTALL THE BATTERY<br />
1 Push in the release button on the back of the<br />
phone (1), slide the cover toward the top of<br />
the phone (2 and 3), remove the cover.<br />
2 Place the battery in the compartment with<br />
the label side facing up and the golden<br />
contact area aligned with the contact prongs.<br />
3 Slide the battery into place and snap<br />
the top of the battery in so that the<br />
bar comes down snugly next to the<br />
battery.<br />
4 Replace the cover (1) and slide it until<br />
you hear a click (2).<br />
Bar
CHARGE THE BATTERY<br />
Follow these guidelines to charge the battery.<br />
1 Connect the charger to an AC wall outlet.<br />
2 With your phone on or off, connect the<br />
lead from the charger to the bottom of<br />
the phone.<br />
The battery indicator bar appears on the<br />
screen and starts to scroll up and down<br />
after a few seconds.<br />
3 Disconnect the charger from the phone and<br />
AC outlet when the battery is fully charged.<br />
REMOVE THE BATTERY<br />
You will need to remove the existing battery if you want to install a new<br />
battery or if you’ve purchased a spare battery. Make sure the phone has<br />
been turned off for 10 seconds.<br />
1 Remove the back cover of the phone.<br />
2 Look for the battery latch that runs along<br />
the end of the battery nearest the top of<br />
the phone.<br />
3 With your thumbs, push the latch away<br />
from the battery until the latch snaps and<br />
the battery lifts slightly.<br />
4 Take out the battery.<br />
Caution: Use only your hands to remove the battery. Do not use<br />
any objects that may damage the phone or the battery.<br />
[ 12 ]<br />
Battery<br />
indicator
IMPORTANT BATTERY INFORMATION<br />
[ 13 ]<br />
Set up your phone<br />
With your phone turned off, charge your new battery for three hours<br />
before its first use. Use the battery until it is fully discharged. Repeat<br />
this procedure twice for a total of three charging cycles.<br />
Battery operation time may be less than estimated times during the<br />
first charges. This condition is normal.<br />
When the battery is fully discharged, the scrolling bars may not<br />
appear immediately.<br />
After the first charge, you can make and receive calls during the<br />
charging cycle, but the calls interrupt the charging. When the phone<br />
call ends, the charging will resume.<br />
The bars on the screen stop scrolling and remain constant when the<br />
phone is fully charged. If you leave the phone connected to the<br />
charger, the battery receives an additional charge.<br />
Note: The battery will accept a “trickle charge” for an additional<br />
two hours. See “Reference information” on page 121 for more<br />
information on batteries.<br />
Charging time depends on the charger and battery used. See “Batteries”<br />
on page 131 for charging, talk, and standby times.<br />
PROLONG BATTERY LIFE<br />
A NiMH battery may last longer and have better performance if you fully<br />
discharge it from time to time. To discharge your battery leave your phone<br />
switched on until the battery drains completely and the phone turns itself<br />
off. Ignore any messages to recharge your battery and let the battery<br />
completely discharge.<br />
Important: Do not attempt to discharge the battery by any means<br />
other than those just described.
SWITCH ON YOUR PHONE<br />
When the battery is completely charged, you can switch on your phone.<br />
Press and hold the power key .<br />
Warning: Do not switch on the phone when wireless phone<br />
use is prohibited or when it may cause interference or danger.<br />
SET UP YOUR HEADSET<br />
The headset provides convenient<br />
handsfree use of the phone.<br />
Connect the headset<br />
When you use the headset,<br />
1 Plug the headset jack into the<br />
bottom of your phone.<br />
2 Put the round ear plug into one<br />
ear.<br />
Use the headset<br />
With the headset connected, you can make, answer and end calls as usual.<br />
Use the keypad to press (talk) or (end) or to enter numbers<br />
to make a call.<br />
When you use the headset, the microphone for the headset hangs at the<br />
side of your head. Although the microphone may seem far from your mouth,<br />
you can speak at a normal volume.<br />
USE THE CARRYING CASE<br />
The carrying case helps protect the phone when you’re not using it.<br />
<strong>Nokia</strong> recommends that you keep the phone in a case when you’re not<br />
actively using the phone for calls.<br />
[ 14 ]
[ 15 ]<br />
Set up your phone<br />
ADJUST THE VOLUME<br />
Current volume<br />
You can change the volume level on your phone,<br />
making incoming voice sounds louder or softer.<br />
While in a call, Press to increase the<br />
volume, and to decrease it.<br />
A bar chart appears on the phone’s screen, showing the current<br />
volume level.<br />
ADJUST SCREEN CONTRAST<br />
You can change the contrast on your phone’s<br />
screen, making the screen brighter or darker.<br />
1 Press Menu 4-3-5 (Menu > Settings ><br />
Phone settings > Display contrast).<br />
A bar chart appears, showing the current<br />
contrast level.<br />
2 Press to increase the contrast, and to decrease it.<br />
3 Press OK to confirm your changes, or press Back to leave the contrast<br />
at its current level.
4 Review the basics<br />
This section gives you a brief introduction to the phone and shows quick<br />
steps for making, answering, and managing your calls. The rest of this<br />
guide provides complete details on phone use.<br />
YOUR NOKIA <strong>3360</strong> PHONE<br />
Power key<br />
Up scroll key<br />
Left selection key<br />
Talk key<br />
Down scroll key<br />
[ 16 ]<br />
Infrared port<br />
Earpiece<br />
Screen<br />
Right selection key<br />
End key<br />
Keypad<br />
Microphone
ABOUT THE ANTENNA<br />
Your phone has a built-in antenna. As<br />
with any other radio transmitting device,<br />
do not touch the antenna unnecessarily<br />
when the phone is switched on.<br />
[ 17 ]<br />
Back<br />
of phone<br />
Review the basics<br />
Contact with the antenna affects call<br />
quality and may cause the phone to operate at a higher power level than<br />
otherwise needed. Not touching the antenna area during a phone call<br />
optimizes the antenna performance and the talk time of your phone.<br />
Hold the phone to your ear, placing your finger tips on the five raised dots,<br />
which are located below the antenna area on the back of your phone.<br />
Caution: Watch for possible overheating. It is normal for your<br />
phone to become hot during use. If the phone becomes too hot, it<br />
automatically drops the current call and returns to the Start screen.<br />
You won’t be able to make or receive calls until the phone cools.<br />
MEMORY USE<br />
In your <strong>Nokia</strong> <strong>3360</strong> phone, Phone book and Reminders share memory<br />
space. When either of these features are used, there is less memory<br />
available for other features. This is especially true with heavy use of some<br />
features. If your use of one or more features takes all of the shared<br />
memory, your phone may display a message saying Memory Full. To<br />
proceed, you would need to delete some of the information or entries<br />
from these features to make additional memory space available.
LEARN THE KEYS<br />
Here is a summary of how to use the keys.<br />
Key How to use it<br />
-<br />
Power: Press and hold to switch the phone on or off.<br />
Press briefly to access the list of profiles.<br />
Selection: Press to choose the option shown by the<br />
word above the key (for example, Menu).<br />
Talk: Press to make a call to the name or number<br />
shown on the screen or to answer a call. Press<br />
once at the Start screen to view the first in a list of<br />
numbers you’ve most recently dialed.<br />
Press to review the list. Press again to call<br />
a number shown on the list.<br />
End: Press to end a call or to silence the ring from an<br />
incoming call. Also, press to return to the Start screen.<br />
Number: Use keys 2 through 9 to enter numbers and<br />
letters.<br />
Press if you want to insert a blank space while<br />
entering text.<br />
1 Key: Press and hold to call your voice mailbox.<br />
Symbols: Press to enter special characters, such as<br />
punctuation marks and symbols.<br />
Scroll keys: Press to scroll up or down through a menu<br />
list of options.<br />
[ 18 ]
MAKE AND ANSWER CALLS<br />
Use this quick guide to make and answer calls.<br />
Switch the<br />
phone on (or<br />
off)<br />
[ 19 ]<br />
Review the basics<br />
Press and hold the power key .<br />
Warning: Do not switch on the phone<br />
when wireless phone use is prohibited or<br />
when the phone may cause interference<br />
or danger.<br />
Make a call 1 Hold the phone as you would any other telephone,<br />
with the earpiece over your ear and the<br />
microphone near your mouth, or connect and<br />
use the headset.<br />
2 Press number keys to enter a number, including<br />
area code if needed.<br />
3 Press .<br />
Answer a call When your phone rings, press .<br />
End a call Press .<br />
Avoid<br />
unintentional<br />
calls<br />
Turn Keyguard<br />
off<br />
Press Menu then . A feature called Keyguard<br />
is now on. You cannot accidentally make a call.<br />
Press Unlock then .
CHECK THE START SCREEN<br />
When you switch on your phone, a<br />
welcome appears, then you see the<br />
Start screen.<br />
The Start screen appears when the<br />
phone is idling or standing by.<br />
Return to the Start screen<br />
You can easily return to the Start screen from any activity other than an<br />
active call. To do so, press .<br />
The phone clears (erases) text or information you may have been entering,<br />
except for new text messages, and the screen returns to its standby state,<br />
when you press .<br />
IN THE START SCREEN<br />
Start screen Your service provider’s name may appear here.<br />
Shows the signal strength of the wireless network where<br />
you are. The higher the bar, the stronger the signal.<br />
Shows the battery charge level. The higher the bar, the<br />
higher the power level in the battery.<br />
Menu The top level of menu choices on your phone. Press<br />
(left selection key) to enter the menus. Navigate the<br />
menus using the scroll keys.<br />
Names The entry point for the phone book. Press (right<br />
selection key) to enter the Names list (after you’ve added<br />
some entries to the phone book).<br />
Indicates that you are in a digital network.<br />
[ 20 ]<br />
Start screen
Check the menu number and scroll bar<br />
A scroll bar appears on the right side<br />
of the screen when you scroll through<br />
the main menus. The menu number is<br />
located at the top of the scroll bar.<br />
A tab on the bar gives you a visual<br />
representation of your relative position<br />
in the menu structure.<br />
[ 21 ]<br />
Review the basics<br />
REVIEW PHONE SYMBOLS<br />
The following is a collection of the various symbols and signals you may<br />
see on your phone.<br />
Symbol What it means<br />
You have an active call.<br />
The phone is waiting for you to enter numbers or text.<br />
You set your ringing tone to Silent.<br />
You’ve activated Keyguard to help prevent any accidental<br />
keypresses.<br />
You have one or more voice messages waiting.<br />
You have one or more unread text messages waiting.<br />
Digital service is available.<br />
Letters you enter will be uppercase (capital letters).<br />
Letters you enter will be lowercase.<br />
Letters you enter will be in sentence case.<br />
Characters you enter will be numbers.<br />
Scroll<br />
bar with<br />
tab
Symbol What it means<br />
You are using predictive text. Available when entering<br />
reminder notes, or writing text messages.<br />
You are using predictive text. Characters you enter will<br />
be sentence case.<br />
You are using predictive text. Characters you enter will be<br />
lowercase letters. Press to switch to sentence case<br />
letters. Press and hold to switch to numbers, or<br />
press and hold the number you want until it appears.<br />
You can enter only symbols, such as punctuation marks.<br />
Appears when you press and hold the key while<br />
entering or editing text.<br />
The alarm clock is set.<br />
Lets you know that the picture message has been read.<br />
Lets you know that the picture message has not been read.<br />
Lets you know that you have a reminder which has not<br />
expired.<br />
Lets you know that you have a reminder which has expired.<br />
Indicates that you have a note.<br />
[ 22 ]
USE THE SELECTION KEYS<br />
The two selection keys beneath<br />
the screen access the function<br />
shown above them on the screen.<br />
In this example, pressing the<br />
left selection key when the<br />
word Menu appears above it<br />
shows the first of many<br />
Left<br />
selection<br />
key<br />
[ 23 ]<br />
Review the basics<br />
Right<br />
selection<br />
key<br />
menus. You scroll through the menus using the and keys.<br />
If you press the right selection key with Names above it, the<br />
phone book menu opens.<br />
When this guide says, “Press Menu,” it means, “Press the selection key<br />
beneath the word Menu.”<br />
CHECK IN-PHONE HELP<br />
Your phone provides brief descriptions of all menu options in an “in-phone”<br />
help system.<br />
1 Scroll to a menu or submenu option.<br />
2 Wait about 10 seconds.<br />
A short message appears, describing the option and what it does.<br />
3 Use to scroll down through the longer descriptions.<br />
Note: Press Menu 4-3-4 (Menu > Settings > Phone settings ><br />
Help texts) to turn the in-phone help system (help texts) on or off.<br />
BROWSE PHONE MENUS<br />
A menu is a list of choices you can make A menu<br />
to change settings on your phone or use<br />
various phone features. Your phone has<br />
several menus. Each menu can contain<br />
several levels of submenus.<br />
You can use menus and submenus two ways: by scrolling or by using a<br />
shortcut.
Scroll through menus<br />
1 At the Start screen, press Menu, then scroll through the menus using<br />
the and keys.<br />
2 Select Options, Select, or OK by pressing the selection key for the<br />
option you want.<br />
3 Use the scroll and selection keys to navigate the submenus; press<br />
to return to the Start screen.<br />
Use a shortcut<br />
Menus and options are numbered so<br />
that you can quickly find your way<br />
to an option. The numbers appear in<br />
the top right corner of the screen<br />
and show your location in the menu.<br />
1 Press Menu.<br />
2 Within 3 seconds, enter the first number of the menu function you<br />
want to access. Repeat until you have entered all the numbers.<br />
For example, to turn on Automatic redial, press Menu 4-2-1-1(Menu ><br />
Settings > Call settings > Automatic redial > On).<br />
TIPS<br />
You can scroll upward (backward, so to speak) as well as downward<br />
to find some of the most frequently used submenu options.<br />
You can return to the previous menu level by pressing Back.<br />
To exit a menu and return to the Start screen, press . If you<br />
leave a menu by pressing , you cancel any changes you made.<br />
Some menus may not appear. Ask your service provider for details.<br />
[ 24 ]<br />
Menu<br />
numbers
SHORTCUTS<br />
1 MESSAGES<br />
Write message. . . . . . . . . . . . . . . . . . . . . . 01-1<br />
Write e-mail . . . . . . . . . . . . . . . . . . . . . . . 01-2<br />
Chat . . . . . . . . . . . . . . . . . . . . . . . . . . . . . . 01-3<br />
Inbox . . . . . . . . . . . . . . . . . . . . . . . . . . . . . 01-4<br />
Outbox . . . . . . . . . . . . . . . . . . . . . . . . . . . . 01-5<br />
Archive . . . . . . . . . . . . . . . . . . . . . . . . . . . . 01-6<br />
Templates. . . . . . . . . . . . . . . . . . . . . . . . . . 01-7<br />
Erase all . . . . . . . . . . . . . . . . . . . . . . . . . . . 01-8<br />
Voice messages . . . . . . . . . . . . . . . . . . . . . 01-9<br />
Listen to voice messages . . . . . . . . 01-9-1<br />
Voice mailbox number . . . . . . . . . . 01-9-2<br />
2 CALL LOG<br />
Missed calls . . . . . . . . . . . . . . . . . . . . . . . . . 2-1<br />
Received calls . . . . . . . . . . . . . . . . . . . . . . . 2-2<br />
Dialed calls . . . . . . . . . . . . . . . . . . . . . . . . . 2-3<br />
Clear call lists . . . . . . . . . . . . . . . . . . . . . . . 2-4<br />
All . . . . . . . . . . . . . . . . . . . . . . . . . . . 2-4-1<br />
Missed . . . . . . . . . . . . . . . . . . . . . . . . 2-4-2<br />
Received. . . . . . . . . . . . . . . . . . . . . . . 2-4-3<br />
Dialed. . . . . . . . . . . . . . . . . . . . . . . . . 2-4-4<br />
Call timers . . . . . . . . . . . . . . . . . . . . . . . . . . 2-5<br />
Duration of last call . . . . . . . . . . . . . 2-5-1<br />
Duration of dialed calls . . . . . . . . . . 2-5-2<br />
Duration of received calls. . . . . . . . . 2-5-3<br />
Duration of all calls . . . . . . . . . . . . . 2-5-4<br />
Life timer . . . . . . . . . . . . . . . . . . . . . . 2-5-5<br />
Clear timers . . . . . . . . . . . . . . . . . . . . 2-5-6<br />
3 PROFILES<br />
Normal . . . . . . . . . . . . . . . . . . . . . . . . . . . . . 3-1<br />
Select . . . . . . . . . . . . . . . . . . . . . . . . . 3-1-1<br />
[ 25 ]<br />
Review the basics
Customize. . . . . . . . . . . . . . . . . . . . . . 3-1-2<br />
Ringing options . . . . . . . . . . . . 3-1-2-1<br />
Ringing tone. . . . . . . . . . . . . . . 3-1-2-2<br />
Ringing volume . . . . . . . . . . . . 3-1-2-3<br />
Vibrating alert . . . . . . . . . . . . . 3-1-2-4<br />
Message alert tone . . . . . . . . . 3-1-2-5<br />
Keypad tones . . . . . . . . . . . . . . 3-1-2-6<br />
Warning tones . . . . . . . . . . . . . 3-1-2-7<br />
Profile name (not available with<br />
Normal profile)<br />
Silent . . . . . . . . . . . . . . . . . . . . . . . . . . . . . . 3-2<br />
Meeting . . . . . . . . . . . . . . . . . . . . . . . . . . . . 3-3<br />
Outdoor . . . . . . . . . . . . . . . . . . . . . . . . . . . . 3-4<br />
Pager. . . . . . . . . . . . . . . . . . . . . . . . . . . . . . . 3-5<br />
4 SETTINGS<br />
Time settings . . . . . . . . . . . . . . . . . . . . . . . . 4-1<br />
Alarm clock . . . . . . . . . . . . . . . . . . . . 4-1-1<br />
Clock. . . . . . . . . . . . . . . . . . . . . . . . . . 4-1-2<br />
Show/Hide clock. . . . . . . . . . . . 4-1-2-1<br />
Set the time . . . . . . . . . . . . . . . 4-1-2-2<br />
Time format . . . . . . . . . . . . . . . 4-1-2-3<br />
Auto update of date and time . . . . . 4-1-3<br />
On . . . . . . . . . . . . . . . . . . . . . . . 4-1-3-1<br />
Confirm first . . . . . . . . . . . . . . . 4-1-3-2<br />
Off . . . . . . . . . . . . . . . . . . . . . . . 4-1-3-3<br />
Call settings . . . . . . . . . . . . . . . . . . . . . . . . . 4-2<br />
Automatic redial . . . . . . . . . . . . . . . . 4-2-1<br />
On . . . . . . . . . . . . . . . . . . . . . . . 4-2-1-1<br />
Off . . . . . . . . . . . . . . . . . . . . . . . 4-2-1-2<br />
Calling card . . . . . . . . . . . . . . . . . . . . 4-2-2<br />
Current call timer . . . . . . . . . . . . . . . 4-2-3<br />
On . . . . . . . . . . . . . . . . . . . . . . . 4-2-3-1<br />
Off . . . . . . . . . . . . . . . . . . . . . . . 4-2-3-2<br />
Phone settings . . . . . . . . . . . . . . . . . . . . . . . 4-3<br />
Language . . . . . . . . . . . . . . . . . . . . . . 4-3-1<br />
[ 26 ]
Touch tones . . . . . . . . . . . . . . . . . . . . 4-3-2<br />
Manual touch tones . . . . . . . . 4-3-2-1<br />
Touch tone length . . . . . . . . . . 4-3-2-2<br />
Welcome note . . . . . . . . . . . . . . . . . . 4-3-3<br />
Help texts . . . . . . . . . . . . . . . . . . . . . 4-3-4<br />
On . . . . . . . . . . . . . . . . . . . . . . . 4-3-4-1<br />
Off. . . . . . . . . . . . . . . . . . . . . . . 4-3-4-2<br />
Display contrast . . . . . . . . . . . . . . . . 4-3-5<br />
Restore factory settings . . . . . . . . . . 4-3-6<br />
Accessory settings. . . . . . . . . . . . . . . . . . . . 4-4<br />
Headset . . . . . . . . . . . . . . . . . . . . . . . 4-4-1<br />
Profile in use with accessory . 4-4-1-1<br />
Automatic answer . . . . . . . . . . 4-4-1-2<br />
Handsfree . . . . . . . . . . . . . . . . . . . . . 4-4-2<br />
Profile in use with accessory . 4-4-2-1<br />
Automatic answer . . . . . . . . . . 4-4-2-2<br />
Lights . . . . . . . . . . . . . . . . . . . . 4-4-2-3<br />
Loopset. . . . . . . . . . . . . . . . . . . . . . . . 4-4-3<br />
Use Loopset . . . . . . . . . . . . . . . 4-4-3-1<br />
Profile in use with accessory . 4-4-3-2<br />
Automatic answer . . . . . . . . . . 4-4-3-3<br />
TTY/TDD . . . . . . . . . . . . . . . . . . . . . . . 4-4-4<br />
Security settings . . . . . . . . . . . . . . . . . . . . . 4-5<br />
Call restrictions . . . . . . . . . . . . . . . . . 4-5-1<br />
Restrict outgoing calls . . . . . . 4-5-1-1<br />
Restrict incoming calls . . . . . . 4-5-1-2<br />
Access codes . . . . . . . . . . . . . . . . . . . 4-5-2<br />
Change security code . . . . . . . 4-5-2-1<br />
1 Network services . . . . . . . . . . . . . . . . . . . 4-6<br />
Voice privacy . . . . . . . . . . . . . . . . . . . 4-6-1<br />
On . . . . . . . . . . . . . . . . . . . . . . . 4-6-1-1<br />
Off. . . . . . . . . . . . . . . . . . . . . . . 4-6-1-2<br />
Network feature setting . . . . . . . . . . 4-6-2<br />
Call forwarding . . . . . . . . . . . . . . . . . 4-6-3<br />
Call waiting . . . . . . . . . . . . . . . . . . . . 4-6-4<br />
Send own caller ID . . . . . . . . . . . . . . 4-6-5<br />
Own number selection . . . . . . . . . . . . . . . . 4-7<br />
[ 27 ]<br />
Review the basics<br />
1 For information on activating these network services, see “Use<br />
advanced calling features” on page 49.
5 SYSTEM<br />
Automatic. . . . . . . . . . . . . . . . . . . . . . . . . . . 5-1<br />
Manual . . . . . . . . . . . . . . . . . . . . . . . . . . . . . 5-2<br />
New search. . . . . . . . . . . . . . . . . . . . . . . . . . 5-3<br />
6 GAMES<br />
7 CALCULATOR<br />
8 REMINDERS<br />
9 INFRARED<br />
10 SERVICES<br />
11 PREPAID<br />
Check account balance . . . . . . . . . . . . . . . 11-1<br />
Add money to account . . . . . . . . . . . . . . . 11-2<br />
Save access phone numbers . . . . . . . . . . . 11-3<br />
Note: The Prepaid menu is visible only when Prepaid service is<br />
available in your network and/or activated on your account. Please<br />
contact your service provider for more information on Prepaid<br />
services.<br />
[ 28 ]
PHONE BOOK MENU<br />
For access to the phone book and its menus:<br />
Switch back to the Start screen.<br />
Press Names.<br />
These options are available:<br />
FIND<br />
ADD ENTRY<br />
EDIT NAME<br />
ADD NUMBER<br />
ERASE<br />
One by one<br />
Erase all<br />
OPTIONS<br />
Phone book view<br />
Name list<br />
Name only<br />
Name+number<br />
Memory status<br />
1-TOUCH DIALING<br />
[ 29 ]<br />
Review the basics
5 Add information<br />
This section gives detailed instructions for entering<br />
names, numbers, messages, and other information<br />
into your phone.<br />
“Store names and numbers” starting on page 38<br />
tells you how to use and manage names and<br />
numbers.<br />
“Communicate with text messages” starting on page 85 tells you how<br />
to send, receive, and manage mobile messages.<br />
ABOUT ENTERING LETTERS AND NUMBERS<br />
The kind of information you’re entering (names, numbers, or text)<br />
determines which of the three ways that you use to enter information into<br />
your <strong>Nokia</strong> <strong>3360</strong> phone:<br />
Method The phone shows Use for<br />
ABC for all uppercase letters, Writing names or text.<br />
for all lowercase letters, is the default (preset)<br />
or<br />
method.<br />
for sentence case You can also enter<br />
numbers in this mode<br />
when prompted to enter a<br />
name.<br />
123 for numbers. Entering numbers.<br />
Predictive<br />
text<br />
for text in messages. Writing messages and notes.<br />
[ 30 ]
[ 31 ]<br />
Add information<br />
ABC AND 123 METHODS<br />
You can enter any combination of numbers and letters into phone book<br />
entries, Web addresses, and more using the ABC and 123 methods.<br />
The phone shows the current method<br />
with an icon, or small picture, in the<br />
upper left corner of the screen.<br />
Enter letters<br />
When you are in a name box in the<br />
phone book, the phone shows the<br />
icon. You use the phone’s<br />
keypad to enter letters.<br />
1 Find the key with the letter you want to enter.<br />
2 Press the key repeatedly until the letter appears on the screen.<br />
For example, press three times to enter the letter C.<br />
3 Wait for the blinking cursor to reappear before you enter another<br />
letter, unless the letter is on a different key.<br />
Example: To enter the name Albert:<br />
Press A<br />
Press l<br />
Press b<br />
Press e<br />
Press r<br />
Press t<br />
Current<br />
entry<br />
method<br />
Note: The default case in Abc mode is sentence case. Only the<br />
first letter of each word is capitalized.
Enter numbers<br />
When you are in a number box in the phone book, the phone shows the<br />
icon. To enter numbers, simply press the numbers you want.<br />
When in mode, you can enter numbers by pressing the key multiple<br />
times until the number shows up, or you can press and hold the key. The<br />
method used to enter numbers depends on the type of information you<br />
are entering.<br />
Enter punctuation and other characters<br />
Depending on the language selected for your phone, the following<br />
characters may be available:<br />
Key Characters Key Characters<br />
. , ‘ ? ! @ ~ / “ - 1 P Q R S 7<br />
A B C 2 T U V 8<br />
D E F 3 W X Y Z 9<br />
G H I 4 Space, 0<br />
J K L 5 Press for symbols.<br />
M N O 6 Changes letter case.<br />
Note: Some networks may not support all language-dependent<br />
characters.<br />
ENTER SPACES AND PUNCTUATION<br />
Press to enter a space between words.<br />
Press briefly while in to enter a period.<br />
Press to show special characters. A screen appears with the<br />
available special characters.<br />
Use the scroll keys to select the character you want, then press Insert.<br />
[ 32 ]
ERASE MISTAKES<br />
If you make a mistake:<br />
Press to erase one character to the left.<br />
Press Clear as needed to erase more than one character.<br />
[ 33 ]<br />
Add information<br />
CHANGE LETTER CASE<br />
To switch between uppercase and lowercase letters, press .<br />
The icon switches to , showing you are using lowercase<br />
letters.<br />
To enter a number while in letter mode, press and hold a key until the<br />
key’s number appears on the screen.<br />
Use special characters in names and phone numbers<br />
Your phone has specials characters, symbols and punctuation that are<br />
available when writing text.<br />
Note: The list of special characters may change depending on<br />
your service provider.<br />
IN ABC<br />
1 Press .<br />
A screen appears with the available symbols.<br />
2 Use and to move to the character<br />
you want, then press Insert.<br />
Note: For faster scrolling when viewing special characters, you<br />
can use the 2 (up), 8 (down), 4 (left) and 6 (right) keys.<br />
IN 123<br />
The key inserts the following characters when you are prompted to<br />
enter a phone number. Press until the character you want appears:
* This character sends command strings to the<br />
network. Contact your service provider for<br />
details.<br />
+ This character is used to link a 1-touch dialing<br />
location to the number currently being entered.<br />
p This character creates a pause that occurs when<br />
the phone dials a number. Numbers entered to the right of this special<br />
character are automatically sent as touch tones after a 2.5-second pause.<br />
w This character causes the phone to wait for you to press Send.<br />
WRITE WITH PREDICTIVE TEXT<br />
When you’re writing text messages on your<br />
phone, you can use the predictive text method<br />
of entering information. With predictive text,<br />
you press each number key once for each letter.<br />
The phone will try to identify what you are<br />
writing based on the words already stored in<br />
your phone’s memory.<br />
The word shown on the screen changes after each keystroke (as shown in<br />
the example that follows). Since it’s easy to get confused, you should try to<br />
disregard the word you’re writing until you have entered all the characters.<br />
Example: To write <strong>Nokia</strong> with predictive text turned on:<br />
What you press What you see<br />
Press O<br />
Press On<br />
Press Onl<br />
Press Onli<br />
Press <strong>Nokia</strong><br />
[ 34 ]
Keys and tools for predictive text<br />
Key Purpose<br />
Keys with<br />
letters<br />
[ 35 ]<br />
Add information<br />
Use for word entry. Press each key only once for each<br />
letter.<br />
Press to view the next matching word if the underlined<br />
word is not the word you intended. To change the<br />
underlined word, press repeatedly until the word<br />
you want appears. You may also, press and hold this key<br />
for a list of symbols.<br />
Spell If predictive text doesn’t recognize a word, you see<br />
Spell above the left selection key. Press Spell, enter the<br />
word you want to enter, and press Save.<br />
Press once to accept a word and add a space.<br />
Press and hold to enter a number. You see the icon<br />
on the screen. Press and hold again to write text<br />
letters.<br />
Clear Press once to delete the character to the left of the cursor.<br />
Press to add a punctuation mark.<br />
Press once quickly to switch the letter case.<br />
indicates uppercase. indicates lowercase.<br />
160 The maximum number of characters available. The<br />
character counter appears in the top right corner of the<br />
screen and counts down for each character you add.
Turn on predictive text input<br />
1 Press Menu, then press Select.<br />
2 When Write message appears, press Select.<br />
3 Press Options, scroll to Predictive text and press Select.<br />
4 Scroll to the language you want (for example, English).<br />
5 Press Select.<br />
T9 prediction on appears. (T9 is the technical name for predictive text<br />
input.) This means you can use the predictive text method to enter<br />
messages. In the text message window where you write, the predictive<br />
text icon appears. Predictive text can be turned on and off by<br />
pressing twice.<br />
Turn off predictive text input<br />
1 Repeat steps 1 through 5 in the section immediately above.<br />
2 Scroll to T9 prediction off and press Select.<br />
Tips for predictive text<br />
INSERT A SYMBOL<br />
1 Press and hold.<br />
The symbol screen appears, showing the list<br />
of special characters. For more information<br />
on special characters see “Enter spaces and<br />
punctuation” on page 32.<br />
2 Scroll to the symbol you want and press Insert.<br />
CHECK A WORD<br />
When you’ve finished writing, make sure the underlined word is the word<br />
you intended to write.<br />
[ 36 ]
If the word is correct:<br />
Insert a punctuation mark, if needed.<br />
Press to confirm the change and enter a space.<br />
Start writing the next word.<br />
If the word is not correct:<br />
[ 37 ]<br />
Add information<br />
Press repeatedly until the word you want appears, and<br />
then press to confirm it.<br />
OR<br />
Press Options, scroll to Matches, then press Select. Scroll to the<br />
correct word and press Use.<br />
Start writing the next word.<br />
When you enter a period to end a sentence, the phone switches to<br />
sentence case so that the first letter in the next word will be uppercase.<br />
ADD A WORD TO THE PREDICTIVE TEXT DICTIONARY<br />
If the word Options changes to Spell, the word you intended to write is<br />
not in predictive text. You can add the word to predictive text.<br />
1 Press Spell and enter the word(s) using standard text entry.<br />
2 Press Save to save the word(s).<br />
INSERT NUMBERS<br />
1 To add a number to the message, press and hold until<br />
appears on the screen.<br />
2 Enter the numbers you want, then press and hold to return to<br />
the method.<br />
WRITE COMPOUND WORDS<br />
1 Write the first part of the word and press to accept that part.<br />
2 Write the last part of the compound word and press to enter<br />
the word.
6 Store names and numbers<br />
Your phone includes a phone book that<br />
can store up to 200 entries (names and<br />
associated phone numbers). In addition,<br />
the phone book can store up to two<br />
numbers per name and a text entry,<br />
such as a postal address or an e-mail<br />
address.<br />
Phone book<br />
An entry in the phone book can consist of a number only or a name<br />
and a number.<br />
You cannot enter the same name twice. If you try to save a name that<br />
is already in the phone book, the phone asks if you want to add the<br />
number to an existing name.<br />
Note: This feature shares memory space with other features. See<br />
“Memory use” on page 17 for more information.<br />
OPEN THE PHONE BOOK<br />
There is more than one way to view the names in your phone book:<br />
Press Names, select Find, enter the name, then press Find.<br />
Press Names, select Find, press List, then scroll through the names.<br />
At the Start screen, use and to scroll through the names.<br />
SAVE NAMES AND NUMBERS<br />
You have more than one option for saving names and numbers.<br />
Quickly save a number and name<br />
This method is called quick save.<br />
1 Enter the phone number using the keypad.<br />
2 Press Options, then select Save.<br />
[ 38 ]
3 Enter a name and press OK.<br />
4 Press Done to return to the Start screen.<br />
Save an entry using the names menu<br />
1 Press Names to enter the phone book.<br />
2 Scroll to Add entry and press Select.<br />
3 Enter a name and press OK.<br />
4 Enter a number and press OK.<br />
5 Press Done to return to the Start screen.<br />
[ 39 ]<br />
Store names and numbers<br />
SAVE A TEXT ENTRY WITH A<br />
NAME<br />
Once you have added a contact to your phone<br />
book, you can add an e-mail address, a mailing<br />
address, or a note to that contact.<br />
Note: Text entries can only be added to existing contacts.<br />
For instance, you cannot enter an e-mail address until you<br />
have selected a name to add the address to.<br />
1 Find the name to which you want to add text.<br />
2 Press Details, then press Options.<br />
3 Scroll to Add text, then press Select.<br />
4 Scroll to the text type you would like to add (E-mail, Street addr., or<br />
Note), then press Select.<br />
5 Enter the text, and press OK.<br />
6 Press to return to the Start screen.<br />
RECALL INFORMATION<br />
You can recall numbers from the phone book several different ways.
Recall numbers from the phone book<br />
1 At the Start screen, press Names.<br />
2 Select Find and enter the name you need.<br />
3 Press Find, then press .<br />
You may have to scroll to the appropriate entry in a list if you have<br />
stored names that are similar to each other.<br />
Recall information with shortcuts<br />
You may want to use some of these shortcuts, or alternate methods for<br />
recalling a number.<br />
Press Names, enter the first letter of the name, scroll to the name, and<br />
press .<br />
At the Start screen, press the scroll keys to enter your list of names,<br />
scroll to the name you want, and press .<br />
Press to access a list of your last ten dialed calls, scroll to the<br />
one you want to dial, and press again.<br />
USE PHONE BOOK MENUS<br />
The phone book has several menus from which you can choose. These menus<br />
appear when you press Names. Use the scroll keys to move to the menu<br />
you want to use.<br />
Find Allows you to search for a specific entry.<br />
Add entry Allows you to add a new contact to your phone<br />
book.<br />
Edit name Allows you to edit an existing contact.<br />
Add number Allows you to add a number to an existing name<br />
in the phone book.<br />
[ 40 ]
Change phone book views<br />
You can view your phone book in three different ways:<br />
[ 41 ]<br />
Store names and numbers<br />
Erase Allows you to erase names and numbers one by<br />
one or all at once.<br />
Options Takes you to a new menu list which includes the<br />
phone book’s memory status and scrolling view.<br />
1-touch dialing Allows you to assign up to eight keys for speed<br />
dialing.<br />
Name list Shows all the names that are stored in your phone<br />
book. Three names appear on the screen at a time.<br />
Name only Displays individual names only. You can view the<br />
corresponding phone number by pressing Details<br />
and then scrolling up or down.<br />
Name+number Shows individual names and numbers. Only one<br />
name and its corresponding number appears on<br />
the screen at a time.<br />
In all views, you can use the scroll keys to move up and down through the<br />
list of names.<br />
To change the way you view names and numbers in your phone book:<br />
1 Press Names.<br />
2 Scroll to Options and press Select.<br />
3 At Phone book view, press Select.<br />
4 Scroll to the view you want and press Select.
EDIT A NAME OR NUMBER<br />
You can edit a name, a number, or both.<br />
1 Recall the name or number you wish to edit.<br />
2 Press Details, then press Options.<br />
3 Scroll to Edit number or Edit name and press Select.<br />
4 Edit the name or number and press OK.<br />
ERASE STORED NAMES AND NUMBERS<br />
Erasing stored names and numbers removes them from your phone.<br />
Once you erase an item, you can restore it only by re-entering it.<br />
1 Recall the phone book entry you want to erase.<br />
2 Press Details, then press Options.<br />
3 Scroll to Erase, and press Select.<br />
The message Erase all details? appears.<br />
4 Press OK.<br />
OR<br />
1 Press Names, scroll to Erase, and press Select.<br />
2 Scroll to One by one and press Select.<br />
You see your list of names.<br />
3 Scroll to the entry you want to delete and press Erase.<br />
4 When the message Erase all details? appears, press OK.<br />
ERASE THE ENTIRE PHONE BOOK<br />
These steps erase all contacts in your phone book.<br />
1 Press Names, scroll to Erase, and press Select.<br />
2 Scroll to Erase all and press Select.<br />
3 When you see the message Are you sure?, press OK.<br />
4 Enter your security code and press OK.<br />
[ 42 ]
ADD A SECOND NUMBER TO A NAME<br />
You can add a second number from the phone<br />
book, the Start screen, name recall or number<br />
type. Once you choose to add a number to an<br />
existing name, you can select one of the<br />
following number type locations in which to<br />
store the second number: General, Mobile,<br />
Home, Work, or Fax.<br />
From the phone book<br />
1 Press Names, scroll to Add number, and press Select.<br />
[ 43 ]<br />
Store names and numbers<br />
2 Scroll to the name where you will add the number and press Add no.<br />
3 Scroll to the type of number you are adding (General, Mobile, Home,<br />
Work or Fax), and press Select.<br />
4 Enter the number and press OK.<br />
From the Start screen<br />
1 Enter the phone number using the keypad.<br />
2 Press Options.<br />
3 Scroll to Add to name and press Select.<br />
4 Scroll to the name to which you want to add the number and press<br />
Add no.<br />
5 Scroll to the desired number type and press Select.<br />
By recalling the name<br />
1 Recall the name to which you would like to add a second number.<br />
2 Press Details, then press Options.<br />
3 Scroll to Add number, then press Select.<br />
4 Scroll to the desired number type and press Select.<br />
5 Enter the number and press OK.
Change the number type<br />
Once you have saved a name with two numbers, you can change the number<br />
type for either of the phone numbers. (For example, you can change the<br />
type if you saved a number as General and you want to change it to Home.)<br />
1 Recall the name from the phone book.<br />
2 Press Details, then scroll to the number you want to change.<br />
3 Press Options, scroll to Change type, and press Select.<br />
4 Scroll to the number type you would like and press Select.<br />
Specify a primary number<br />
If any names in your phone book have multiple numbers, it’s a good idea<br />
to specify the number that you dial most often for that name as the<br />
primary number. By assigning the most-used number as primary, you<br />
are telling the phone to dial that number when you select the name for<br />
dialing—a great time saver when you dial names with two numbers.<br />
1 Recall the name for which you want to select a primary number.<br />
2 Press Details, then scroll to the number you want to set as the primary<br />
number.<br />
3 Press Options, scroll to As primary no., and press Select.<br />
CHECK MEMORY STATUS<br />
You can check what percentage of your phone book’s memory is free and<br />
what percentage has been used.<br />
1 Press Names and scroll to Options.<br />
2 Press Select.<br />
3 Scroll to Memory status and press Select.<br />
[ 44 ]
7 Check call history<br />
Your phone provides a call log that registers<br />
information about calls you make and receive.<br />
The call log keeps track of:<br />
Missed calls<br />
Numbers you’ve dialed<br />
Numbers from which you’ve received calls<br />
Amount of time you’ve spent on calls<br />
[ 45 ]<br />
Check call history<br />
CHECK MISSED, RECEIVED, OR DIALED CALLS<br />
1 Press Menu 2 (Menu > Call log) to go to the call log, then press Select.<br />
2 Use and to move to Missed calls, Received calls, or<br />
Dialed calls.<br />
3 Press Select at the submenu you want.<br />
For missed, received, and dialed calls, a phone number (or the name<br />
associated with a number in the phone book) appears.<br />
4 Use and to scroll to the number or name you want, then<br />
press Options.<br />
For missed, received, and dialed names or numbers, you have the choices<br />
shown in the list shown below.<br />
5 Scroll to the option you want, then press Select.<br />
Call time<br />
Send message<br />
Shows the time and date when the call was connected.<br />
(You must first set the phone’s clock)<br />
Allows you to write and send a text message to numbers<br />
listed in the call log<br />
View number Allows you to view the number.<br />
Edit number Allows you to edit the number shown on the screen
Save Saves the number in your phone book<br />
Add to name<br />
Adds the number to a name you’ve already entered in<br />
your phone book<br />
Erase Removes the number from the call log<br />
Call Activates a call to the number<br />
Tip: To dial any number that appears on your phone’s screen,<br />
press .<br />
MISSED CALLS<br />
Your phone stores the last ten numbers for calls you missed. When you miss<br />
a call(s), the message Missed calls appears on the screen with the number<br />
of calls missed.<br />
You are notified of missed calls only if your phone was turned on in the<br />
original service area of your service provider.<br />
Note: If you chose the Forward if not answered option in Call<br />
Forwarding, your phone treats these forwarded calls as missed calls.<br />
DIALED CALLS, RECEIVED CALLS<br />
Your phone stores the last ten numbers for calls you’ve dialed or received.<br />
CLEAR CALL LISTS<br />
Your phone uses call lists to track numbers for incoming, outgoing, and<br />
missed calls. You can erase some or all of the numbers that appear in the<br />
call log.<br />
Caution: You cannot undo this operation.<br />
1 Press Menu 2-4 (Menu > Call log > Clear call lists).<br />
2 Use or to scroll through the options list.<br />
The list includes: All, Missed, Received, and Dialed.<br />
3 Stop at the appropriate option and press Select.<br />
[ 46 ]
[ 47 ]<br />
Check call history<br />
The All option clears every number in every list, whereas the other<br />
options clear only the numbers associated with that option. For example,<br />
the Dialed option clears only the numbers associated with calls you<br />
previously dialed.<br />
CHECK CALL TIMERS<br />
Your phone uses call timers to track the amount of time you spend on<br />
each call. You can review phone use by checking the phone’s call timers.<br />
1 Press Menu 2-5 (Menu > Call log > Call timers).<br />
2 Use or to scroll through the following options:<br />
Duration of<br />
last call<br />
Duration of<br />
dialed calls<br />
Duration of<br />
received<br />
calls<br />
Duration of<br />
all calls<br />
Life timer<br />
Clear<br />
timers<br />
Shows the time used for the last call made<br />
Shows the time used for all outgoing calls since you reset<br />
the timers<br />
Shows the time used for all received calls since you reset<br />
the timers<br />
Shows the time used for all calls that have been made<br />
and received since you reset the timers.<br />
Shows the time used for all calls for the life of your phone.<br />
This option cannot be reset.<br />
Clears (erases) all call timers for the currently selected<br />
phone number. Your phone includes separate timers for<br />
each number used, with the exception of the life timer.<br />
Caution: If you select the Clear timers option, the action cannot<br />
be undone. If you use the call timers to log the amount of time<br />
spent on calls, you may want to record the information in the call<br />
timers before you clear them.
Note: The actual invoice for calls and services from your service<br />
provider may vary, depending upon network features, rounding-off<br />
for billing, taxes, and so forth.<br />
TURN ON A CURRENT CALL TIMER<br />
You can set your phone to show the running elapsed time while a call<br />
is active.<br />
1 Press Menu 4-2-3 (Menu > Settings > Call settings > Current<br />
call timer).<br />
2 Scroll to On and press Select.<br />
From this point on, the timer is active during each call you make or<br />
receive. The time appears on the phone’s screen.<br />
3 After a call has ended, press any key on your phone to clear the<br />
current call time from the screen.<br />
CLEAR CALL TIMERS<br />
1 Press Menu 2-5-6 (Menu > Call log > Call timers > Clear timers).<br />
The Security code box appears.<br />
2 Enter your security code and press OK.<br />
[ 48 ]
Use advanced calling features<br />
8 Use advanced calling features<br />
This chapter describes advanced calling features such as conference calling,<br />
call waiting, and credit cards for calls. Not all features described here are<br />
available in all wireless network systems.<br />
SET IN-CALL OPTIONS<br />
Your phone allows you to use a number of features during a call. These<br />
features are known as in-call options.<br />
Note: Many in-call options are network services features. To use<br />
these options, you must contact your service provider.<br />
You cannot use all these options at all times. This section tells you when<br />
you can use a certain option.<br />
1 To access an option during a call, press Options.<br />
2 Choose from the following options.<br />
Touch tones Allows you to manually enter a touch tone string<br />
(series of tones) or search for a string in your phone<br />
New call Allows you to create a new call while in a call<br />
End all calls Ends all active calls<br />
Names Allows you to use the phone book. Once you open<br />
the phone book, pressing will not close the<br />
phone book, but it will end the current call<br />
Menu Takes you to the main menus<br />
Mute/<br />
unmute<br />
Mutes the phone’s microphone. If your phone’s<br />
microphone has already been muted, Unmute appears<br />
instead of Mute. Press Select to choose either of<br />
these options.<br />
These options can affect the microphones of any<br />
accessories connected to the phone.<br />
[ 49 ]
USE CALL WAITING<br />
If you have call waiting, your phone beeps during a call to let you know<br />
that someone else is calling you. Depending on your caller ID setup, the<br />
phone might also show the number of the incoming call.<br />
Call waiting is not available in all wireless systems. Before you can use call<br />
waiting, you must contact your service provider to make sure this feature<br />
is available and turned on for your phone. Then you may need to activate<br />
the call waiting feature.<br />
Store the call waiting feature code<br />
1 Press Menu 4-6-2 (Menu > Settings > Network services > Network<br />
feature setting).<br />
2 Enter the feature code your service provider gave you and press OK.<br />
3 Scroll to Call waiting and press Select.<br />
4 Make sure that Activate is highlighted and press Select.<br />
Activate call waiting<br />
1 Press Menu 4-6-4-1 (Menu > Settings > Network services > Call<br />
waiting > Activate).<br />
2 Press Select.<br />
Manage calls<br />
Call waiting works with both local and long distance calls.<br />
To answer an incoming call, press .<br />
To switch from one call to another, press .<br />
To end both calls, press .<br />
[ 50 ]
[ 51 ]<br />
Use advanced calling features<br />
Make a conference call<br />
While in a call, you can call another number and “conference in” (add) a<br />
third party to the call.<br />
The conference call feature varies based on wireless systems. Contact your<br />
service provider for details.<br />
1 While in a call, you can either dial the number you want to conference<br />
in and press .<br />
OR<br />
Press Options, scroll to New call, press Select, enter the phone number,<br />
and press Call.<br />
If you don’t remember the number of the party you want to include<br />
in the conference and you know that this number is in your phone<br />
book, you can recall the number.<br />
2 When the third party answers, press to connect all three parties.<br />
3 To place one of the parties on hold, press again.<br />
If you press a third time, the party you placed on hold rejoins<br />
the call, and the second party is placed on hold. Once you place one<br />
of the parties on hold, you are unable to rejoin all three parties.<br />
4 To drop all parties, press .<br />
Look up a number during a conference call<br />
If you don’t remember a number that you need to call while in another<br />
call and you know that this number is in your phone book, you can recall<br />
the number without having to end the current call.<br />
1 During the call, press Options.<br />
2 Scroll to Names and press Select.<br />
3 Press Select at Find.<br />
4 Enter a name and press Find, or scroll through the phone book.<br />
5 Press Details.
USE CALL FORWARDING<br />
When you use call forwarding, your network redirects incoming calls to<br />
another phone number.<br />
The call forwarding feature is not available in all wireless systems. Contact<br />
your service provider for details and availability.<br />
Important:Call forwarding is a network-dependent feature and<br />
may not work the same in all networks. Contact your service<br />
provider for availability and for your network’s feature codes.<br />
Learn about call forwarding feature codes<br />
Your network requires separate codes for activating and cancelling the<br />
various types of call forwarding. Your carrier should provide you with the<br />
necessary feature codes for these network services.<br />
Once you store these feature codes in your phone, they are sent automatically<br />
to the network when you select one of the call forwarding options from<br />
your phone’s menu.<br />
Your phone can store the following types of feature codes:<br />
Feature code type Description<br />
Forward all calls Forwards all incoming calls.<br />
Forward if busy Forwards calls only when you’re on your phone.<br />
Forward if not<br />
answered<br />
Forward if out<br />
of reach<br />
Cancel all call<br />
forwarding<br />
Forwards calls if you don’t answer.<br />
Forwards calls if you are out of reach of your<br />
wireless network or if your phone is turned off.<br />
Cancels all forwarding options that are<br />
currently active.<br />
[ 52 ]
Store the call forwarding feature code<br />
[ 53 ]<br />
Use advanced calling features<br />
1 Press Menu 4-6-2 (Menu > Settings > Network services > Network<br />
feature setting). The Feature code box appears.<br />
2 Enter the feature code your service provider gave you, then press OK.<br />
3 Use or to scroll to Call forwarding and press Select.<br />
4 Scroll to the type of forwarding that matches the feature code you<br />
entered, then press Select.<br />
5 Make sure that Activate is highlighted and press Select.<br />
Activate/cancel call forwarding<br />
1 Press Menu 4-6-3 (Menu > Settings > Network services ><br />
Call forwarding).<br />
2 Scroll to the desired call forwarding option, then press Select.<br />
3 Highlight Activate and press Select.<br />
4 In the Number box, either enter the number to which you want your<br />
calls forwarded (or press Find to recall a number from the phone book).<br />
5 Press OK.<br />
Your phone calls the network to activate (or cancel) the feature you’ve<br />
requested. The network sends a confirmation note when the feature has<br />
been activated (or cancelled) successfully.<br />
REDIAL AUTOMATICALLY<br />
There are times when you may not be able to place a call (example: due<br />
to the high volume of traffic on the wireless network). When the wireless<br />
system is busy or unavailable, Automatic redial instructs your phone to<br />
retry the call.<br />
ACTIVATE AUTOMATIC REDIAL<br />
1 Press Menu 4-2-1 (Menu > Settings > Call settings > Automatic<br />
redial).<br />
2 Scroll to On and press Select.
If the system is busy, your phone makes 3 additional call attempts. If you<br />
want to stop the automatic redial process prior to the last attempt,<br />
press .<br />
Important: This feature does not automatically redial a number<br />
when the number you are calling is busy.<br />
USE A CALLING CARD<br />
You can use a calling card when you dial long distance calls. First you must<br />
store your calling card information in the phone. Your phone can store<br />
information for a maximum of four calling cards.<br />
Save calling card information (step 1)<br />
1 Press Menu 4-2-2 (Menu > Settings > Call settings > Calling card).<br />
2 Enter your security code and press OK.<br />
3 Scroll to card A, B, C or D and press Options.<br />
4 Scroll to Edit and press OK. At Dialing sequence, press Select.<br />
5 Use or to scroll through the list of dialing sequences, as<br />
described in the following list.<br />
Dialing sequence Use for cards that require you to<br />
Access number<br />
+ phone number<br />
+ card number<br />
Access number<br />
+ card number<br />
+ phone number<br />
Prefix<br />
+ phone number<br />
+ card number<br />
6 Press Select.<br />
Dial 1-800 access number, then phone number,<br />
then card number (+ PIN if required).<br />
Dial 1-800 access number, then card number<br />
(+ PIN if required), then phone number.<br />
Dial the prefix (any numbers that must precede<br />
the phone number) and phone number you want<br />
to dial, then card number (+ PIN, if required).<br />
[ 54 ]
[ 55 ]<br />
Use advanced calling features<br />
Save calling card information (step 2)<br />
The order of the following steps may vary, depending on which dialing<br />
sequence your card uses.<br />
1 When prompted for the calling card’s access number, enter the number<br />
and press OK. This number is usually the 1-800 number that is listed on<br />
the calling card.<br />
2 When prompted to enter a calling card number and PIN number, enter<br />
the number, and press OK. Press OK again when the Save changes?<br />
message appears.<br />
3 Use or to scroll to Card name, press Select, and enter the<br />
card name using your phone’s keypad.<br />
4 Press OK.<br />
Choose a calling card to use<br />
If you have more than one calling card, you’ll need to choose one before<br />
making a call.<br />
1 Press Menu 4-2-2 (Menu > Settings > Call settings > Calling card).<br />
2 Enter your security code and press OK.<br />
3 Scroll to the desired card and press Options.<br />
4 Scroll to Select and press OK.<br />
Make a calling card call<br />
1 Enter the phone number, including any prefix (such as 0 or 1) that<br />
may be needed.<br />
2 Press and hold until your phone displays the message Card call<br />
3<br />
and then Wait for tone, then press OK.<br />
When you hear the tone from your calling card service, press OK.<br />
4 After the tone, your phone displays the message Wait for tone, press<br />
OK again. Press OK.<br />
Note: This procedure might not apply to all the calling card<br />
options that are programmed into your phone. Check your calling<br />
card for more information, or contact your long distance company.
SEND YOUR OWN NUMBER IN CALLER ID<br />
You can determine, for each call you make, whether your telephone number<br />
appears on another phone’s caller ID.<br />
In most service areas, when you call others, your name is presented to their<br />
caller ID (if they subscribe). With Send own caller ID, you can block or<br />
send the display of your number when you make a call.<br />
Note: Send own caller ID might not be available in your wireless<br />
system. Contact your service provider for details and availability.<br />
Also note that this feature is effective only when you call a number<br />
that is equipped with caller ID.<br />
Before you can use Send own caller ID, you must first store its feature code.<br />
Otherwise, this feature might not appear on your phone’s menu.<br />
Store the feature code<br />
1 Press Menu 4-6-2 (Menu > Settings > Network services > Network<br />
feature setting).<br />
The Feature code box appears.<br />
2 Enter the feature code your service provider gave you and press OK.<br />
3 Use or to scroll to Send own caller ID and press Select.<br />
4 Highlight Yes and press Select.<br />
Set the send own number feature<br />
1 Press Menu 4-6-2-3 (Menu > Settings > Network services ><br />
Network feature setting > Send own caller ID).<br />
2 Scroll to Yes (to show your number) or No (not to show it).<br />
3 Press Select.<br />
4 Enter the number you wish to call (or press Find to retrieve the number<br />
from the phone book), and press OK.<br />
[ 56 ]
[ 57 ]<br />
Use advanced calling features<br />
SELECT A PHONE NUMBER<br />
When you first activate your phone, your service provider programs the<br />
phone number and system information into your phone’s memory. The<br />
number assigned to your phone provides service for only one service area.<br />
Your phone can be activated in up to three different service areas, however.<br />
For example, your phone could be activated in Dallas, Toronto, and New<br />
York. Each service area would assign a different phone number or account<br />
to your phone.<br />
You must select a phone number for your home system, and if you travel<br />
outside your home system, you can choose another number. Only one phone<br />
number can be active at a time.<br />
Note: It might not be necessary to have up to three numbers for<br />
your phone if your service provider has service or roaming agreements<br />
for each area in which you wish to use your phone. Contact your<br />
service provider for details.<br />
Select the phone number<br />
1 Press Menu 4-7 (Menu > Settings > Own number selection).<br />
2 Scroll to the phone number you want to use and press Select.<br />
The first phone number on this list is the currently selected number.<br />
You need at least one active number to make calls.<br />
SET TOUCH TONES<br />
Touch tones are sounds that are produced when you press the keys on your<br />
phone’s keypad. Sometimes, touch tones are called DTMF tones.<br />
You can use touch tones for many automated over-the-phone services<br />
such as checking bank balances and airline schedules and using your voice<br />
mailbox. Those features depend on operator’s availability. Touch tones can<br />
be sent only when a call is active.
Set manual touch tones<br />
1 Press Menu 4-3-2-1 (Menu > Settings > Phone settings > Touch<br />
tones > Manual touch tones).<br />
2 Select one of the following options, then press Select:<br />
Continuous Tone sounds for as long as you press and hold a key<br />
Fixed Sets the tone length to 0.1 second, regardless of how<br />
long you press a key<br />
Off Turns off the tones. No tones are sent when you press<br />
a key<br />
Set touch tone length<br />
You can also set the length of each touch tone.<br />
1 Press Menu 4-3-2-2 (Menu > Settings > Phone settings > Touch<br />
tones > Touch tone length).<br />
2 Use or to scroll to Short or Long. Short sets the tone<br />
length to 0.1 second. Long sets the tone length to 0.5 second.<br />
3 Press Select.<br />
Store touch tone sequences (strings)<br />
You can store touch tone strings the same way that you store names and<br />
numbers in your phone book. You can store an entire sequence of digits<br />
and send it as touch tones for frequently used strings of numbers.<br />
STORE TOUCH TONE STRINGS WITH PHONE NUMBERS<br />
1 Enter the phone number that you want associated with a touch tone.<br />
2 Press w or p where needed.<br />
w (wait): When you dial this phone number, your phone first dials the<br />
number, then waits (because of the w character) for you to press<br />
Send. When you press Send, the phone sends your touch tone.<br />
p (pause): If you include a p character instead of a w, your phone<br />
pauses for 2.5 seconds and then automatically sends the touch tone.<br />
[ 58 ]
3 Enter the touch tone string.<br />
4 Store the number as you normally would.<br />
[ 59 ]<br />
Use advanced calling features<br />
SEND A TOUCH TONE STRING<br />
1 Press Menu 4-3-2-1 (Menu > Settings > Phone settings > Touch<br />
tones > Manual touch tones).<br />
2 Make sure that the setting is not set to Off.<br />
If it is, use or to scroll to one of the other options and<br />
press Select.<br />
3 Then, during your call, press Options, scroll to Touch tones and<br />
press Select.<br />
4 Enter the touch tone string or recall the string from the phone book,<br />
and press Tones.<br />
Warning: If you send touch tones while in the analog mode, be<br />
careful not to send confidential information.
9 Use voice mail<br />
Voice mail provides a way for callers who miss<br />
you to leave a message that you can retrieve later.<br />
To use voice mail, you must sign up for the feature<br />
with your wireless service provider.<br />
CHECK FOR MESSAGES<br />
Your phone beeps when you receive a voice message. Also, the message<br />
New voice message appears on your phone’s screen, along with the<br />
icon.<br />
If you receive more than one voice mail message, your phone may show the<br />
number of messages that you have received. Wireless network provider<br />
determines the final format.<br />
Note: To use voice mail, you need to learn the voice mail system’s<br />
various greetings, passwords, and prompts. Your service provider<br />
can provide instructions.<br />
SET UP YOUR VOICE MAILBOX<br />
As part of your network’s voice mail feature, your service provider gives<br />
you a voice mailbox phone number. Save this number in your phone to<br />
make getting your voice messages quick and convenient.<br />
1 Press Menu 01-9-2 (Menu > Messages > Voice messages > Voice<br />
mailbox number).<br />
2 Enter your voice mailbox phone number.<br />
3 Press OK.<br />
Your voice mailbox number can be up to 32 digits long and is used until<br />
you change it. Therefore, if your phone number changes, the voice mail<br />
number will probably change also. For further information, contact your<br />
service provider.<br />
[ 60 ]
[ 61 ]<br />
Use voice mail<br />
SET GREETINGS<br />
Voice greetings may vary in different wireless systems. If you need<br />
information about how to record your greeting, contact your service<br />
provider.<br />
LISTEN TO YOUR VOICE MESSAGES<br />
The way you listen to your voice messages depends on your service provider.<br />
Call your service provider if you have any questions.<br />
1 When your phone alerts you to new voice messages, press Listen and<br />
follow the instructions given on the phone.<br />
2 If you’d rather listen to your messages later, press Exit.<br />
3 To listen to your voice messages:<br />
Press and hold .<br />
OR<br />
Press Menu 01-9-1 (Menu > Messages > Voice messages > Listen<br />
to voice messages).<br />
Follow the prompts to review your messages.
10 Personalize rings and tones<br />
WHAT IS A PROFILE?<br />
A profile is a group of settings you can use to<br />
customize the way your phone works. You can<br />
set your own preferences for these items:<br />
Ringing options Vibrating alert<br />
Ringing volume Keypad tones<br />
Ringing tone Profile name<br />
Warning tones<br />
Message alert tone<br />
Your phone comes with five profiles:<br />
Normal (default setting) Outdoor<br />
Silent Pager<br />
Meeting<br />
SELECT A DIFFERENT PROFILE<br />
1 Quickly press the Power key.<br />
2 Use and to move to the profile you want to use.<br />
Profile names are highlighted as you scroll through them.<br />
3 Press Select to select a profile.<br />
Note: You can also change your profile under the Profiles menu.<br />
To access this menu, press Menu 3 (Menu > Profiles).<br />
CUSTOMIZE A PROFILE<br />
1 Press Menu 3 (Menu > Profiles).<br />
2 Scroll to the desired profile in the list and press Select.<br />
3 Select Customize to view the options for the selected profile.<br />
Note: When you change a setting in the current profile, it affects<br />
only that profile. Your phone’s normal settings do not change.<br />
[ 62 ]
[ 63 ]<br />
Personalize rings and tones<br />
Set ringing options<br />
You can choose the type of ring your phone uses to notify you of an incoming<br />
call. This setting does not affect any incoming text message alert tones.<br />
1 Press Menu 3 (Menu > Profiles).<br />
Your phone lists each profile.<br />
2 Use or to scroll to the desired profile in the list for which<br />
you want to set the ringing options, and press Select.<br />
3 Scroll to Customize and press Select.<br />
4 Scroll to Ringing options and press Select.<br />
5 Scroll to one of the ringing options, as described below, and press<br />
Select.<br />
Ring The phone rings normally.<br />
Ascending<br />
Ringing volume increases (gets louder) if the phone<br />
is not answered.<br />
Ring once The phone rings once to indicate an incoming call.<br />
Beep once The phone beeps once to indicate an incoming call.<br />
Silent The phone makes no sound.<br />
Set the ringing tone<br />
The ringing tone is the sound your phone makes when you receive a call.<br />
You can set the ringing tone to a specific sound or tune to personalize how<br />
the phone rings.<br />
Note: If you have already chosen a ringing option of either Silent<br />
or Beep once, the ringing tones are already turned off. See “Set ringing<br />
options” on page 63 for details.<br />
1 Press Menu 3 (Menu > Profiles). Your phone lists each profile.<br />
2 Use or to scroll to the profile for which you want to set<br />
the ringing tone.
3 Press Select.<br />
4 Scroll to Customize and press Select.<br />
5 Scroll to Ringing tone and press Select.<br />
6 Scroll through the options, and when you hear the tone you want to<br />
use, press Select.<br />
Set the ringing volume<br />
You can set the default ringing volume for incoming voice calls and message<br />
alert tones.<br />
1 Press Menu 3 (Menu > Profiles).<br />
2 Use or to scroll to the profile you will set, and press Select.<br />
3 Highlight Customize and press Select.<br />
4 Scroll to Ringing volume and press Select.<br />
5 Scroll through the options. When you hear the right volume level,<br />
press Select.<br />
Note: As you scroll through the ringing options, you can listen to a<br />
sample of each.<br />
Set a vibrating alert<br />
You can have your phone vibrate to indicate an incoming call.<br />
1 Press Menu 3 (Menu > Profiles).<br />
2 Use or to scroll to the profile for which you want to change<br />
the vibrating alert, and press Select.<br />
3 Select Customize and press Select.<br />
4 Scroll to Vibrating alert and press Select.<br />
5 Use or to scroll to On or Off and press Select.<br />
The phone does not vibrate when it is connected to or placed in any<br />
charging device.<br />
[ 64 ]
[ 65 ]<br />
Personalize rings and tones<br />
Set the message alert tone<br />
You can set your phone to use a certain tone to indicate an incoming text<br />
message.<br />
1 Press Menu 3 (Menu > Profiles).<br />
2 Use or to scroll to the profile for which you want to set<br />
the message alert tone, and press Select.<br />
3 Select Customize and press Select.<br />
4 Scroll to Message alert tone, then press Select.<br />
5 Use or to scroll through your choices.<br />
The phone plays samples of each choice as you scroll to it.<br />
6 When you find the tone you want, press Select.<br />
Set keypad tones<br />
Keypad tones set the volume of the tone you hear when you press your<br />
phone’s keys.<br />
1 Press Menu 3 (Menu > Profiles).<br />
2 Use or to scroll to the profile for which you want to set<br />
the keypad tones, and press Select.<br />
3 Select Customize and press Select.<br />
4 Scroll to Keypad tones and press Select.<br />
5 Use or to scroll to one of the levels and press Select. If you<br />
choose Off, no keypad tones are heard.<br />
Set warning tones<br />
You can set warning tones in your phone. Warning tones include the sounds<br />
your phone makes during error conditions, during confirmations, when a<br />
battery is low, and when you need to recharge the battery.<br />
1 Press Menu 3 (Menu > Profiles).<br />
2 Use or to scroll to the profile for which you want to set<br />
the warning tones, and press Select.
3 Select Customize and press Select.<br />
4 Scroll to Warning tones, then press Select.<br />
5 Scroll to On and press Select.<br />
If you do not want to use warning tones, you can turn them off by<br />
scrolling to Off and pressing Select.<br />
RENAME PROFILES<br />
You can rename any of the profiles except Normal. You may want to use<br />
your own name for one of the profiles. When you do, your name appears on<br />
the Start screen.<br />
1 Press Menu 3 (Menu > Profiles).<br />
2 Use or to scroll to the desired profile and press Select.<br />
3 Select Customize, scroll to Profile name and press Select.<br />
4 Enter the new name and press OK.<br />
Note: You cannot rename the Normal profile.<br />
[ 66 ]
Personalize phone settings<br />
11 Personalize phone settings<br />
You can change certain settings so that your phone suits your own needs<br />
and lifestyle. Changes you can make include changing the language on<br />
the screen, showing or hiding the clock, and setting up 1-touch dialing.<br />
SET THE LANGUAGE<br />
You can set your phone to use a certain language.<br />
Your possible choices are English, French, Spanish, Portuguese, Russian,<br />
Hebrew, Ukrainian, and Chinese. Languages vary in different regions.<br />
All these languages may not be available in your phone.<br />
1 Press Menu 4-3-1 (Menu > Settings > Phone settings > Language).<br />
2 Use or to scroll to the language you want to use and<br />
press Select.<br />
SET AND DISPLAY THE CLOCK<br />
Your phone has an internal clock that you can<br />
set to appear on the phone’s screen. The clock is<br />
connected to an alarm clock. See “Set the alarm<br />
clock” on page 100 for details.<br />
Set the clock<br />
1 Press Menu 4-1-2 (Menu > Settings ><br />
Time settings > Clock).<br />
2 Use or to scroll to Set the time and press Select.<br />
3 Enter the time using a 00:00 format and press OK. For example, to set<br />
your clock to 9:30, enter 09:30. If you set the time format for 24-hour<br />
time, enter the number the same way: 09:30 or 21:30.<br />
If you set time format to am/pm, use<br />
am or pm and press Select.<br />
or to scroll to<br />
If you set the time format to 24-hour, the time is set as soon as<br />
you press OK after adjusting the time.<br />
[ 67 ]<br />
Clock
Show the clock on the Start screen<br />
1 Press Menu 4-1-2 (Menu > Settings > Time settings > Clock).<br />
2 To show the clock, scroll to Show clock and press Select.<br />
Select Hide clock if the clock is showing and you don’t want to see it.<br />
Select the time format<br />
You can change the way your clock shows the time, whether in am/pm<br />
(12-hour) or 24-hour format.<br />
1 Press Menu 4-1-2 (Menu > Settings > Time settings > Clock).<br />
2 Use or to scroll to Time format and press Select.<br />
3 Use or to scroll to either am/pm or 24-hour and press Select.<br />
SET THE CLOCK TO BE UPDATED BY THE NETWORK<br />
You can set your phone’s clock to be updated by the network, if available.<br />
Turn on the network date and time update<br />
1 Press Menu 4-1-3 (Menu > Settings > Time settings > Auto update<br />
of date and time), then press Select.<br />
2 Scroll to On or Confirm first, then press Select.<br />
If you choose Confirm first, you will receive the message Update date<br />
and time of the phone? before the phone’s clock is updated. Select<br />
OK to accept the update or Back to reject it.<br />
Turn off the network date and time update<br />
1 Press Menu 4-1-3 (Menu > Settings > Time settings > Auto update<br />
of date and time), then press Select.<br />
2 Scroll to Off, then press Select.<br />
[ 68 ]
ADD A WELCOME NOTE<br />
You can set your phone to show a brief welcome<br />
note each time you switch on your phone. The note<br />
can include your name, a reminder, or more.<br />
1 Press Menu 4-3-3 (Menu > Settings ><br />
Phone settings > Welcome note).<br />
2 Enter the text of the welcome note.<br />
[ 69 ]<br />
Personalize phone settings<br />
As you enter characters, they appear to the left of the cursor. Press<br />
Clear to delete characters to the left of the cursor. Press or<br />
to move the cursor right or left.<br />
3 Press Options.<br />
4 Scroll to Save and press Select.<br />
If you ever want to erase the welcome note, select Erase instead.<br />
USE SPEED DIALING<br />
You must store names and numbers in your phone book before you can use<br />
speed dialing (1-touch dialing).<br />
To set up speed dialing, you assign a name from the phone book to a 1-touch<br />
dial location, using your phone’s keys through . When you press<br />
and hold the key, the phone automatically dials the associated number.<br />
: This key is used exclusively to dial your voice mailbox.<br />
: You can use this key to dial a customer care operator. See<br />
“Contact your service provider” on page 10 for details. You can overwrite<br />
this feature and assign a 1-touch dial location to the key.<br />
Set up a speed-dial key<br />
1 Press Names and scroll to 1-touch dialing.<br />
2 Press Select.<br />
3 Use or to scroll to the first number that includes the message<br />
(empty) and press Assign.
4 Use or to scroll to the name and number to which you<br />
want to assign this key and press Select.<br />
Repeat these steps for as many keys as you want to set up.<br />
5 To call a number using speed dialing, press and hold the appropriate<br />
key for a few seconds.<br />
Note: To quickly assign a number to an empty 1-touch dialing<br />
key, press and hold the key. A series of prompts will appear.<br />
Change speed dialing numbers<br />
After you have assigned a speed dialing number to a key, you can change<br />
key and number associations at any time.<br />
1 Press Names, scroll to 1-touch dialing, and press Select.<br />
2 Scroll to the key you want to change and press Options.<br />
3 Scroll to Change and press Select.<br />
4 Enter the new number or recall a number from the phone book.<br />
5 When you’ve entered the number, press OK.<br />
OR<br />
If you’ve found a number in the phone book, press Select.<br />
If the name you selected has more than one number, scroll to the<br />
number you want and press Select.<br />
Erase speed dialing numbers<br />
You can erase speed dialing key assignments at any time.<br />
1 Press Names.<br />
2 Use or to scroll to 1-touch dialing and press Select.<br />
3 Scroll to the key you want to erase and press Options.<br />
4 Scroll to Erase and press Select.<br />
5 Press OK.<br />
[ 70 ]
[ 71 ]<br />
Personalize phone settings<br />
SET YOUR PHONE TO ANSWER AUTOMATICALLY<br />
You can set your phone to answer incoming voice calls after one ring. This<br />
setting works when your phone is connected to a headset or to an<br />
approved handsfree car kit.<br />
1 Press Menu 4-4-1-2 (Menu > Settings > Accessory settings ><br />
Headset > Automatic answer).<br />
2 Press Select.<br />
3 Use or to scroll to either On or Off and press Select.<br />
Note: Handsfree, Headset and Loopset do not appear unless your<br />
phone has already been connected to the accessory.<br />
SET THE LIGHTS (CAR KIT ONLY)<br />
While your phone is connected to a car kit, you can set the phone’s lights<br />
two ways. You can either have the lights on only when you use the phone<br />
or have them on the whole time the phone is in car kit mode.<br />
Note: This setting works only when your phone is connected to a<br />
car kit.<br />
1 Press Menu 4-4-2-3 (Menu > Settings > Accessory settings ><br />
Handsfree > Lights).<br />
Note: Handsfree does not appear in the list unless the phone has<br />
been connected to a car kit.<br />
2 Scroll through your choices in the list below, and press Select.<br />
Automatic<br />
On<br />
Instructs the phone to turn off the lights within 15 seconds<br />
if no keys are pressed.<br />
Instructs the phone to leave the lights on the entire time<br />
that your phone is connected to the car kit.
RESTORE THE FACTORY SETTINGS<br />
You can change the default (factory) settings for your phone. Later, you<br />
can return them to the original settings when needed.<br />
Note: The phone does not reset the memory, timers, language<br />
selection, and security code. However, any profiles you have modified<br />
are reset when you restore your settings.<br />
1 Press Menu 4-3-6 (Menu > Settings > Phone settings > Restore<br />
factory settings).<br />
2 Enter your security code and press OK.<br />
[ 72 ]
Manage phone security<br />
12 Manage phone security<br />
Your phone has a versatile security system that is intended to prevent<br />
unauthorized use of the phone.<br />
You cannot activate or use certain phone features without having first<br />
successfully entered your phone’s security code.<br />
The default (preset) security code is 12345.<br />
<strong>Nokia</strong> highly recommends that you immediately change this code. Then,<br />
write down and store the new code in a safe place, away from your phone.<br />
TIPS<br />
When you enter the security code, a * appears on the screen each<br />
time you press a key. The * prevents others from seeing your code.<br />
If you enter the wrong security code five times in a row, your phone<br />
won’t accept any entries for the next five minutes. However, if<br />
you realize that you’ve entered the code incorrectly before pressing<br />
OK, use Clear to erase the code, digit by digit.<br />
CHANGE YOUR SECURITY CODE<br />
It’s a good idea to change your security code so that others who know the<br />
default code cannot enter the correct code.<br />
1 Press Menu 4-5-2-1 (Menu > Settings > Security settings > Access<br />
codes > Change security code). The Security code box appears.<br />
2 Enter the default security code and press OK.<br />
3 At the message Enter new security code, enter your new security code<br />
and press OK.<br />
4 At the message Verify new security code, enter your new security code<br />
again and press OK. The message Security code changed appears.<br />
If you have changed your security code and don’t remember the new<br />
code, contact your service provider. Once you have changed your security<br />
code, the default setting is no longer valid.<br />
[ 73 ]
LOCK THE KEYPAD<br />
When you lock the keypad, you prevent accidental keypresses — for example,<br />
when your phone is in a pocket or purse. This feature is called Keyguard.<br />
Note: Keyguard is automatically turned off when the phone is<br />
connected to a car kit.<br />
Activate Keyguard<br />
At the Start screen:<br />
Press Menu then press .<br />
When Keyguard is on, calls may be possible to the emergency number<br />
programmed into your phone. For example, you could dial 911 and<br />
press . The number is displayed only after you have keyed in its<br />
last digit.<br />
Deactivate Keyguard<br />
Press Unlock then press .<br />
Answer a call while Keyguard is active<br />
During an incoming call, the keypad automatically unlocks.<br />
Press or to answer the call.<br />
After you end the call, Keyguard automatically becomes active again.<br />
If you need the phone’s lights while Keyguard is on, press the Power<br />
key to quickly switch the lights on for 15 seconds.<br />
[ 74 ]
[ 75 ]<br />
Manage phone security<br />
RESTRICT CALLS<br />
You can restrict incoming and outgoing calls. To restrict calls, you create<br />
a list of numbers and apply the appropriate restriction.<br />
Before you define restrictions for outgoing calls, two restriction options<br />
are available: Select and Add restriction. The maximum number of call<br />
restrictions you can define is ten.<br />
Note: When calls are restricted, calls may be possible to certain<br />
emergency numbers in some networks (for example, 911 or other<br />
official emergency number).<br />
Add a number to the call restriction list<br />
You can create a list of restrictions for both outgoing and incoming calls.<br />
1 Press Menu 4-5-1 (Menu > Settings > Security settings > Call<br />
restrictions).<br />
2 Press Select, enter your security code, and press OK.<br />
3 Scroll to Restrict outgoing calls or Restrict incoming calls, then<br />
press Select.<br />
4 Scroll to Add restriction, then press Select.<br />
5 Enter the number you want to restrict, or recall the number from the<br />
phone book, then press OK.<br />
6 Enter a name for the restriction, then press OK. If you press OK<br />
without entering a name, the number will be used.<br />
After you have used the Add restriction option to add at least one<br />
restriction, the following options become available:<br />
Select Allows you to select call restrictions from the<br />
outgoing or incoming calls list<br />
Add restriction Allows you to add a call restriction<br />
Edit Allows you to edit an existing call restriction<br />
Erase Erases an existing call restriction
Restrict outgoing calls<br />
1 Press Menu 4-5-1 (Menu > Settings > Security settings > Call<br />
restrictions).<br />
2 Press Select, enter your security code, and press OK.<br />
3 Scroll to Restrict outgoing calls and press Select.<br />
4 Scroll to Select to choose from your list of call restrictions.<br />
If you have not added any restrictions, your only option will be All calls.<br />
5 Scroll to the restriction you want to activate and press Mark.<br />
6 Press Done. The message Save changes? appears. Press Yes.<br />
When attempting to call a number you have restricted, the message<br />
Call not allowed appears, and the call is cancelled.<br />
Restrict incoming calls<br />
1 Press Menu 4-5-1 (Menu > Settings > Security settings > Call<br />
restrictions).<br />
2 Press Select, enter your security code, and press OK.<br />
3 Scroll to Restrict incoming calls, then press Select.<br />
4 Scroll to Select and press Select to choose from your list of call<br />
restrictions.<br />
If you have not added any restrictions, your only option will be All calls.<br />
5 Scroll to the restriction you want to activate and press Mark.<br />
6 Press Done. The message Save changes? appears. Press Yes.<br />
Turn off call restrictions<br />
Turn off restrictions by following the same steps you used to restrict incoming<br />
or outgoing calls. When you get to step 5,<br />
Scroll to the restriction you want to deactivate and press Unmark.<br />
Press Done. You’re asked if you want to save changes. Press Yes and<br />
the restriction is turned off.<br />
[ 76 ]
Manage reminders and notes<br />
13 Manage reminders and notes<br />
Reminders and notes help you keep track of important events or tasks. A<br />
reminder can have a date, time, and alarm attached to it. If you have not<br />
set your clock, you will be prompted to do so when you enter your first<br />
reminder. Predictive text is available with this feature. See “Write with<br />
predictive text” on page 34 for more information.<br />
Note: This feature shares memory space with other features. See<br />
“Memory use” on page 17 for more information.<br />
ADD A REMINDER<br />
1 Press Menu 8 (Menu > Reminders), then press Options.<br />
2 Scroll to Add reminder and press Select.<br />
3 Enter the subject for the reminder and press Options. The following<br />
options are available:<br />
Save: Saves the reminder.<br />
New line: Moves the cursor to the next line.<br />
Predictive text: Allows you to turn predictive text on or off. If<br />
predictive text is activated, the predictive text options will be<br />
available.<br />
4 Highlight Save and press Select.<br />
5 Enter the date and press OK, then enter the time and press OK.<br />
If you have programmed your phone’s clock for am/pm format, you<br />
will then have to select am or pm.<br />
6 Next, you have the option to set an alarm for your reminder.<br />
If you don’t want an alarm, highlight Alarm off and press Select.<br />
If you want an alarm, highlight Alarm on and press Select.<br />
You can set the alarm to go off 5, 10, 15 or 30 minutes before the<br />
time you set for the reminder.<br />
[ 77 ]
You can choose At event time to set the alarm to go off at the<br />
same time as the reminder.<br />
You can choose Other to define your own time for the alarm.<br />
Scroll to the option you want and press Select.<br />
ADD A NOTE<br />
1 Press Menu 8 (Menu > Reminders). Press Options, scroll to Add note,<br />
then press Select.<br />
2 Enter the note, then press Options.<br />
Save: Saves the note.<br />
New line: Moves the cursor to the next line.<br />
Predictive text: Allows you to turn predictive text on or off. If<br />
predictive text is activated, the predictive text options will be<br />
available.<br />
3 Scroll to Save, then press Select.<br />
SEND AND RECEIVE A REMINDER OR NOTE<br />
You can send and receive reminders and notes in the same way you send<br />
and receive business cards, by text messaging (SMS) or by Infrared. For more<br />
information about these methods of sending and receiving information, see<br />
“Infrared” on page 104 and “Communicate with text messages” on page 85.<br />
Send a reminder or note<br />
1 Press Menu, scroll to Reminders, and press Select.<br />
2 Scroll through your list of reminders and notes, highlight the one you<br />
want to send, and press Options.<br />
3 Scroll to Send, then press Select.<br />
You will have the options Send via IR, Send as note, or Send as text.<br />
4 Select the method you would like to use, then follow the phone’s<br />
prompts to send the reminder or note.<br />
[ 78 ]
[ 79 ]<br />
Manage reminders and notes<br />
Receive a reminder or note<br />
1 The message Reminder received appears when someone sends you a<br />
reminder or note.<br />
2 Press Show to view the note.<br />
OR<br />
Press Exit to delete the note. The message Discard note? appears.<br />
Press OK.<br />
3 Press Options to view the available reminder or note options.<br />
4 Press Select when you have highlighted the option you want.<br />
See the next section for a list of available options and their descriptions.<br />
CHOOSE OTHER REMINDER AND NOTE OPTIONS<br />
When you view a reminder or note, or when you view the list of reminders<br />
and notes, you may have some of the following options.<br />
View Allows you to view the note or reminder.<br />
Add reminder Allows you to add a reminder.<br />
Add note Allows you to add a note.<br />
Erase Erases the reminder or note.<br />
Erase opt’s Allows you to choose from two options for erasing<br />
multiple reminders and notes.<br />
All expired: Erases all reminders that expired.<br />
All at once: Erases all reminders and notes.<br />
Edit Allows you to edit the reminder or note.<br />
Send Allows you to send the reminder or note.<br />
Date and time Allows you to set the current date and time. The time<br />
setting will change the current time set for the clock.
14 Use prepaid services<br />
With prepaid service, you buy wireless network<br />
services in advance. Your phone works the same<br />
way it did before, with some additional features.<br />
Prepaid service may not be available from your<br />
wireless service provider. Contact the service<br />
provider for details.<br />
Note: When no more charging units or currency units are left,<br />
calls may only be possible to the emergency number programmed<br />
into your phone (for example, 911 or other official emergency<br />
number).<br />
MANAGE PREPAID SERVICE<br />
After you sign up with your service provider for prepaid service, you need<br />
to activate the Prepaid menu. This menu appears on your screen only if<br />
you’ve activated the service.<br />
ACTIVATE PREPAID<br />
To activate prepaid services, enter the following sequence:<br />
[ 80 ]<br />
(*#7766#)<br />
The message Prepaid menu enabled appears on the screen.<br />
DEACTIVATE PREPAID<br />
To deactivate prepaid services, enter the following sequence:<br />
(*#77633#)<br />
The message Prepaid menu disabled appears on the screen.
[ 81 ]<br />
Use prepaid services<br />
USE THE MENU<br />
To use the Prepaid menu, press Menu and then press to go<br />
immediately to the Prepaid menu.<br />
Press or to scroll through prepaid options.<br />
SAVE YOUR ACCESS NUMBERS<br />
You can check your prepaid balance and add money when the balance is<br />
low. To do that, you first need to save the correct access numbers in your<br />
phone. Contact your service provider for the access numbers.<br />
1 Press Menu 11-3 (Menu > Prepaid > Save access phone numbers).<br />
2 At Save access phone numbers, press Select.<br />
3 Scroll to Replenish phone number, press Select, enter the access<br />
number from your service provider, and press OK.<br />
4 Scroll to Balance phone number, enter the balance number from your<br />
service provider, and press OK.<br />
The message Saved appears to confirm each entry.<br />
ADD MONEY TO YOUR ACCOUNT<br />
To add money, you must first have saved the correct access number in<br />
your phone. (See the previous section for instructions.)<br />
1 Press Menu 11-2 (Menu > Prepaid > Add money to account).<br />
2 At Card number, enter your prepaid card number and press OK.<br />
3 When you see the message Listen for prompt then press OK, press<br />
OK.<br />
When the transaction is complete, a voice message gives you the new<br />
balance.<br />
4 When you see the message Wait for prompt, then press End, press<br />
End call.
CHECK YOUR PREPAID BALANCE<br />
Contact your service provider for the toll-free access number used to check<br />
the balance remaining in your prepaid account.<br />
Check the prepaid balance<br />
1 Press Menu 11-1 (Menu > Prepaid > Check account balance).<br />
2 At Check account balance, press Select.<br />
The phone calls your service provider. The screen shows Calling and<br />
then Checking balance. A voice message gives you the current balance.<br />
3 Press to terminate the call.<br />
[ 82 ]
Set network services features<br />
15 Set network services features<br />
You can subscribe to various network services. Availability depends on<br />
your service provider. Your phone supports the network services listed<br />
here. These services are not available from all providers or in all areas.<br />
Voice privacy<br />
Call waiting<br />
Call forwarding<br />
Sending own number<br />
Feature code: When you subscribe to any of these services, your service<br />
provider gives you a feature code that activates each service. Deactivation<br />
codes are used to deactivate each service. After you store the appropriate<br />
code, your phone sends the code to the network to verify that you’re using<br />
the correct feature code.<br />
Menus for network features: Menus for the services described here appear<br />
on your phone only after you’ve stored the appropriate feature code. You can<br />
use these menus to activate and deactivate the network services.<br />
Voice privacy: The voice privacy feature does not require you to store a<br />
feature code before using it.<br />
More than one number? If your phone has more than one phone number<br />
assigned to it, stored feature codes apply only to the primary phone number.<br />
SET UP HOW YOUR PHONE SELECTS A NETWORK<br />
You can choose how your phone selects a network to use. Your phone may<br />
not show the options described here. For information, contact your service<br />
provider.<br />
Search for a network<br />
Press Menu 5 (Menu > System).<br />
You have the following three options.<br />
[ 83 ]
Automatic Your phone automatically searches for available networks<br />
and chooses the appropriate one. Every time you turn<br />
on your phone, it resets to Automatic.<br />
Manual The phone searches for networks and then shows a list<br />
of the ones that are available. If an available network is<br />
found, the word Available: appears on the screen followed<br />
by the name of the network. To choose the network<br />
listed, press OK.<br />
New search Your phone begins a new search for both private and<br />
residential systems. When it finds the best system<br />
available, the phone shows the system name.<br />
If the phone doesn’t find another system, the question<br />
Perform an extended search? will appear. Press OK if<br />
you wish to continue searching.<br />
Note: If you have two phone numbers, you can use the Manual<br />
and New search options only with your primary phone number.<br />
USE YOUR PHONE WHILE TRAVELING<br />
When your phone is outside its home area, the phone is said to be roaming.<br />
Calls made or received while you are roaming may cost more than calls<br />
made in your home area.<br />
When your phone begins roaming, the phone beeps once and may show<br />
the word ROAM on the phone’s screen, depending on how roaming<br />
works with your phone.<br />
When your phone is not roaming, it either shows the word HOME or<br />
the name of your service provider.<br />
When you’re roaming in some systems outside your home area, the<br />
system in which you’re traveling (the host system) may not recognize<br />
your phone. You may not be able to place a call.<br />
Contact your service provider for more specific information on how roaming<br />
works with your phone and for information about coverage limitations.<br />
[ 84 ]
Communicate with text messages<br />
16 Communicate with text<br />
messages<br />
You can use your phone to send and receive short<br />
text messages if your service provider offers the<br />
message feature and if you subscribe to the service.<br />
You can also send messages as e-mail.<br />
ABOUT TEXT MESSAGES<br />
Message recipients: The phone to which you send a text message must<br />
support text messages. It may not be possible to send an SMS text message<br />
to someone’s phone who has an account with a different service provider.<br />
However you may be able to send a text message as e-mail to someone<br />
who has an account with a different service provider. For more information<br />
on e-mail SMS messaging, please see “Send and receive e-mail messages”<br />
on page 92.<br />
Message length: The maximum length of a received text message is 160<br />
characters.<br />
Network variations: The maximum length of a text message depends on<br />
the capabilities of the network from which the message originated. Also,<br />
text message format may occasionally be different, as messages can originate<br />
in networks other than your own.<br />
Note: You can send mobile messages if you have subscribed to the<br />
mobile messaging service offered by your service provider and the<br />
network in which you are using your phone supports mobile<br />
messaging.<br />
Contact your service provider for more information about text message<br />
services.<br />
[ 85 ]
USE FOLDERS FOR TEXT MESSAGES<br />
Your phone has four folders for managing text messages.<br />
Inbox The inbox stores messages you receive.<br />
Outbox The outbox stores messages you have written, sent, edited<br />
and forwarded.<br />
Archive The archive folder stores messages you want to save.<br />
Templates The templates folder stores message templates you create.<br />
A template is like a form letter—a message you can use<br />
many times.<br />
Text message capacity<br />
Your phone can store up to 30 text messages. This is a combined total of<br />
messages stored in your inbox, outbox, and archive folders. In addition,<br />
your phone stores up to 10 custom templates in the Templates folder.<br />
WRITE AND SEND A TEXT MESSAGE<br />
When writing text messages, use the predictive text method for fast text<br />
entry. For details, see “Write with predictive text” on page 34.<br />
1 Press Menu, select Messages, then select Write message.<br />
The message screen appears.<br />
2 Enter a message of up to 160 characters.<br />
A counter in the upper right corner of the<br />
screen shows the number of characters<br />
remaining.<br />
3 When you’ve finished writing, press Options,<br />
scroll to Send, then press Select.<br />
4 Enter or recall the recipient’s phone number, then press OK.<br />
Sending message appears. When the message is successfully sent,<br />
Message sent appears.<br />
[ 86 ]<br />
Counter
[ 87 ]<br />
Communicate with text messages<br />
Note: When sending messages via the SMS network service, your<br />
phone may display the words “Message sent”. This is an indication<br />
that the message has been sent by your phone to the message<br />
center number programmed into your phone. This is not an<br />
indication that the message has been received at the intended<br />
destination. For more details about SMS services, check with your<br />
service provider.<br />
Options when writing a text message<br />
The order and availability of options varies depending on the messaging<br />
function and the network service features enabled on your phone.<br />
Send Sends the message.<br />
Settings Allows you to choose options for the message:<br />
Callback no., Reply req., Read receipt, and Urgent.<br />
Save Saves the message.<br />
Clear text Clears the message screen.<br />
Exit editor Takes you back to the Write message screen.<br />
Insert name Allows you to insert a name from the phone book.<br />
Insert number Allows you to insert a number from the phone book.<br />
Use template Allows you to insert a template.<br />
Attach picture Allows you to attach a picture to your message.<br />
Insert word<br />
OR<br />
Edit word<br />
Using predictive text (T9), you can manually spell a<br />
word and insert it into your message. This option is<br />
not available unless predictive text is activated.<br />
Insert symbol Takes you to the list of special characters. Available<br />
when predictive text (T9) is activated.<br />
Predictive text Activates or deactivates predictive text.<br />
Matches Other word choices while using predictive text.
RESEND A MESSAGE FROM THE OUTBOX<br />
A message in the outbox shows one of two icons:<br />
The icon shows that you have sent the message to the text<br />
message center.<br />
The icon shows that you have tried to send the message, but the<br />
sending attempt was unsuccessful.<br />
1 Scroll to the message, then press Select.<br />
2 Press Options.<br />
3 Scroll to Send, and press Select.<br />
4 Enter the number to which you want to send the message. You will have<br />
the option of finding one of your stored numbers. Once the number has<br />
been entered, press OK.<br />
RECEIVE A TEXT MESSAGE<br />
When you receive a text message, the phone plays a message alert tone<br />
and the text message icon appears, along with one of the following<br />
messages:<br />
Message received: Means that you have an unread message or page.<br />
If you have more than one message or page, the appropriate number<br />
is listed before this message.<br />
When you receive the above message along with another message call,<br />
followed by a name or number, the message is a page. Only the names<br />
of people who are stored in your phone book appear.<br />
New emergency message: Means that an emergency message or page<br />
was sent by someone via the service provider. Emergency messages are<br />
sent only in situations where life or property are in immediate danger.<br />
Emergency messages are listed first and override all other messages.<br />
Urgent: Means the message has a high priority. These messages are<br />
indicated by an exclamation point (!).<br />
[ 88 ]
READ A TEXT MESSAGE<br />
1 Press Show.<br />
[ 89 ]<br />
Communicate with text messages<br />
2 Press Options for a list of choices you have while reading the message<br />
(see the list at the end of this section).<br />
3 Press Select when the option you want is highlighted.<br />
In your inbox, text messages are shown in the order in which they were<br />
received, unless one is an emergency message. An emergency message<br />
overrides any other message and appears first.<br />
OPTIONS FOR A MESSAGE<br />
When you press Options while reading a message, you have the following<br />
choices.<br />
Erase Erases the current message.<br />
Reply Provides a screen where you can write a reply.<br />
Chat Allows you to start a chat session.<br />
Use number Calls the person who sent you the text message, if<br />
their phone number is included in the message. You<br />
can also press while the message is open to<br />
dial the number.<br />
If more than one number is on the screen, the numbers<br />
appear in a list. Scroll to the phone number you want<br />
to call and press .<br />
Forward Forwards the message to another person. That person<br />
must have the appropriate message service.<br />
Edit Allows you to edit the message.<br />
Save Saves the message in the archive folder.<br />
Rename Allows you to rename the message.
SAVE A MESSAGE IN THE ARCHIVE FOLDER<br />
When you send or receive a text message, you can save it in the archive<br />
folder. Messages can be saved from the inbox and the outbox.<br />
Save a message<br />
1 Highlight the message you wish to save and press Select.<br />
2 Press Options.<br />
3 Scroll to Save, then press Select.<br />
The message Saved to archive appears.<br />
WHEN YOUR PHONE’S MEMORY IS FULL<br />
When your phone’s message memory is full, one or more messages of the<br />
lowest priority are automatically deleted. Messages are not deleted from<br />
your phone’s archive and templates folders.<br />
If after deleting messages the memory is still full, your phone shows<br />
the message No space: message waiting. The icon blinks.<br />
Clear the notification by pressing OK.<br />
ERASE MESSAGES<br />
You can erase a message individually or erase the contents of an entire<br />
folder at once. You also have the option of erasing all read messages from<br />
all folders at the same time.<br />
Erase a message<br />
1 While reading a message, press Options.<br />
2 Scroll to Erase, then press Select.<br />
Your phone asks you to confirm that you want to erase the message.<br />
3 Press OK.<br />
[ 90 ]
Erase messages from folders<br />
[ 91 ]<br />
Communicate with text messages<br />
1 Press Menu 01-8 (Menu > Messages > Erase all). You will have the<br />
following options: All read, Inbox, Outbox, and Archive.<br />
2 Scroll to the folder that you want to empty all messages from and<br />
press Select.<br />
All messages in that folder will be deleted. If you choose All read, every<br />
message you have read will be deleted simultaneously from the inbox,<br />
outbox and archive folders.<br />
3 Enter your security code and press OK.<br />
REPLY TO A MESSAGE<br />
1 While reading a message, press Options.<br />
2 Scroll to Reply, press Select, and choose one of the following reply<br />
options:<br />
As message<br />
As e-mail<br />
Once you select the type of reply, choose one of these options:<br />
Blank screen<br />
Original text (Not available when replying to e-mail.)<br />
Template<br />
Yes<br />
No<br />
Ok<br />
3 Edit your reply, then press Options.<br />
4 Scroll to Send, then press Select.<br />
The phone shows the return number.<br />
5 Edit the number if needed, then press OK.
FORWARD A MESSAGE<br />
1 While reading a message in the inbox, press Options.<br />
2 Scroll to Forward, press Select, and choose whether your message should<br />
be sent as a text message or as e-mail.<br />
3 Press Options, or edit the message and press Options.<br />
4 Scroll to Send, then press Select.<br />
5 Enter or recall the recipient’s phone number, then press OK.<br />
SEND AND RECEIVE E-MAIL MESSAGES<br />
You can use your phone to send and receive e-mail messages. This service<br />
depends on operator’s availability.<br />
Send an e-mail message<br />
1 Press Menu 01-2 (Menu > Messages > Write e-mail).<br />
2 Press Select.<br />
The e-mail address box opens.<br />
3 Enter the e-mail address, then press OK.<br />
If you press Find, enter the first few letters of the name you want and<br />
press Select when you find the name. The address appears in the<br />
recipient address box.<br />
4 Enter a subject and press OK.<br />
5 When the message screen appears, enter your message.<br />
The maximum number of characters for message length varies; check<br />
with your service provider for details.<br />
You can turn on predictive text input if you wish. For information, see<br />
“Write with predictive text” on page 34.<br />
6 When you’ve finished the message, press Options, select Send e-mail,<br />
and press Select.<br />
A status message tells you the mail is being sent.<br />
Note: If your phone asks for an e-mail gateway number, contact<br />
your service provider.<br />
[ 92 ]
Reply to or forward an e-mail message<br />
[ 93 ]<br />
Communicate with text messages<br />
1 If the message is not on the screen, press Menu 01-4 (Menu ><br />
Message > Inbox).<br />
2 Select the message you received and press Select.<br />
3 Press Options, scroll to Forward or Reply, and press Select.<br />
4 Scroll to As e-mail and press Select.<br />
5 Select the format.<br />
6 Follow steps 3 through 6 in “Send an e-mail message.”<br />
Note: If your phone asks for an e-mail gateway number, contact<br />
your service provider.<br />
Receive an e-mail message<br />
To receive e-mail messages, you need the special e-mail address provided<br />
by your wireless service provider. You can give this address to people who<br />
need to reach you by e-mail. They can then send e-mail messages to you<br />
from their computers or other e-mail devices.<br />
Messages sent to you by e-mail arrive as regular text messages. You<br />
can use all the options described earlier to save, reply to, or forward<br />
a message.<br />
See your service provider to get the e-mail address for your phone and<br />
for more information on using e-mail on the service.<br />
USE TEMPLATES<br />
You can view, edit and erase the preset messages, or templates, that are<br />
available for writing a message. Templates can be used when you write,<br />
reply to, or edit a message.<br />
Work with templates<br />
1 Press Menu 01-7 (Menu > Messages > Templates) and press Select.<br />
2 Scroll to the template you want and press Select.
3 Press Options to view the menu list:<br />
Send Sends the template as a text message.<br />
Edit Allows you to edit the template before sending.<br />
Rename Allows you to rename the template.<br />
Use number Allows you to use a number.<br />
4 Select the option you want and follow the phone’s prompts to<br />
complete your task.<br />
Insert a template when writing a new message<br />
1 Press Menu 01-1 (Menu > Messages > Write message).<br />
2 Press Options, scroll to Use template, and press Select.<br />
3 Scroll to the template you want and press Select.<br />
4 Continue as you would when sending a new text message.<br />
Note: You can also insert a template when replying to or editing a<br />
message.<br />
CHAT WITH OTHER PHONE USERS<br />
You can have a direct conversation with another person using the chat<br />
feature. Chat has distinct advantages over text messaging, such as faster<br />
send and reply, as well as direct, uninterrupted communication with your<br />
chat partner. To use chat you must subscribe to text messaging, which is<br />
network dependent. Contact your service provider for more information.<br />
Start a chat session<br />
1 Press Menu 01-3 (Menu > Messages > Chat), then press Select.<br />
2 Enter the other party’s phone number or recall it from the phone book<br />
and press OK.<br />
3 At My chat name: enter a name for the chat session and press OK.<br />
[ 94 ]
[ 95 ]<br />
Communicate with text messages<br />
4 Write your chat message, press Options, then press Send.<br />
5 Press OK to clear the screen and reply to the message.<br />
6 To view the previous message or edit your chat name, press Options<br />
and select Chat history or Chat name.<br />
Note: You can start a chat session when replying to a regular text<br />
message as well. When reading the message, select Options, then<br />
select Chat.<br />
USE PICTURE MESSAGES<br />
You can attach a picture to a text message or you can use templates to<br />
send pictures to your friends and family. You can also save new pictures<br />
in the Templates folder. Picture messages have options that are similar to<br />
text messages.<br />
Note: This function can be used only if it is supported by your<br />
network operator or service provider. Only phones that offer picture<br />
message features can receive and display picture messages.<br />
Notes about picture messages<br />
Your phone offers five built-in picture message templates under<br />
Messages > Templates, and space for up to five other picture messages.<br />
Picture messages can be sent from phone to phone, or they can be<br />
downloaded, depending on the wireless services offered by your<br />
provider.<br />
Only phones that offer picture messaging can receive and display the<br />
images.<br />
Each picture message is made up of a text message. Therefore, sending<br />
one picture message may be equivalent to sending up to six text<br />
messages. The size of the picture message depends on the size of the<br />
image you are sending.<br />
Send picture messages<br />
1 Press Menu, then Select.<br />
2 Scroll to Templates, then press Select.
3 Scroll to the picture you want to send, and press Select.<br />
4 Press Options, scroll to Send, then press Select.<br />
5 Recall or enter the phone number of the recipient.<br />
6 Press OK.<br />
Attach a picture to a text message<br />
For a list of options while composing a text message, see “Options when<br />
writing a text message” on page 87.<br />
1 Press Menu 01-1 (Menu > Messages > Write message).<br />
2 Enter your message, then press Options.<br />
3 Scroll to Attach picture, then press Select.<br />
4 Scroll to the picture you want to send, then press View.<br />
5 Press Use to attach the picture to your text message.<br />
6 Press Options, then select Send.<br />
7 Enter the phone number or recall a number from your phone book,<br />
then press OK.<br />
Preview, change, or erase a picture message<br />
1 After a picture has been attached to your text message, press Options<br />
at the message edit screen.<br />
2 Scroll to one of the following options and press Select.<br />
a) Preview - Previews the attached message before sending.<br />
Press Back to exit.<br />
b) Change picture - Takes you back to the picture list. Scroll to<br />
highlight a new picture. Press View then press Use to link the<br />
new picture to your message.<br />
c) Delete picture - Deletes the attached picture from your text<br />
message.<br />
[ 96 ]
Receive picture messages<br />
[ 97 ]<br />
Communicate with text messages<br />
1 When your phone displays Message received, press Show and the<br />
message appears.<br />
2 If the picture has a text message with it, scroll up or down to see the<br />
entire message.<br />
SAVE THE PICTURE<br />
1 While viewing a picture message, press Options.<br />
2 Scroll to Save picture, then press Select.<br />
3 Enter a title for the picture, then press OK.
17 Use special features<br />
This section describes several special features, including transmission of<br />
business cards, downloading ringing tones from the Internet, and setting<br />
the alarm clock.<br />
SEND AND RECEIVE BUSINESS CARDS<br />
Your phone can send or receive electronic business cards. A business card<br />
consists of a name, phone number, and text entry. You can save received<br />
business cards in your phone book.<br />
Send a business card<br />
1 Find the name in your phone book and press Details.<br />
2 Press Options, scroll to Send bus. card, then press Select.<br />
3 Scroll to SMS and press Select. (SMS stands for short message<br />
service.)<br />
4 Choose Primary no. or All details, then press Select. This step appears<br />
only if you have two numbers saved with the name or if you have a<br />
text entry.<br />
5 Enter or recall the phone number to which you want to send the<br />
business card, and press OK.<br />
Note: You can also send and receive business cards using infrared<br />
(IR). See “Send and receive information” on page 105.<br />
View a received business card<br />
When you receive a business card, the phone shows the message Business<br />
card received.<br />
Note: If you press Exit at any time before you save the business<br />
card, the message Discard business card? appears. You have the<br />
option of OK or Back.<br />
[ 98 ]
[ 99 ]<br />
Use special features<br />
1 When your phone shows Business card received, press Show.<br />
2 Scroll through the available information.<br />
Save a viewed business card<br />
1 While viewing the business card, press Options.<br />
2 Scroll to Save, then press Select.<br />
Delete a viewed business card<br />
While viewing the business card, press Options.<br />
Scroll to Discard, then press Select.<br />
DOWNLOAD (TRANSFER) RINGING TONES<br />
You can download (transfer) up to ten ringing tones to replace the personal<br />
entries in your list of tones. Ringing tones can be ringing sounds or short<br />
tunes. For details about this network service, contact your wireless service<br />
provider, who can also point you to Web sites that offer these tones.<br />
Note: If you press Exit at any time before you save the ringing<br />
tone, the message Discard received ringing tone? appears. You<br />
have the option of OK or Back.<br />
Receive a ringing tone<br />
If you have this service and your phone receives a downloaded ringing tone,<br />
your phone shows the message Ringing tone received.<br />
1 Press Options.<br />
You have the options of Playback, Save tone, and Discard.<br />
2 Scroll to Playback and press Select.<br />
The phone plays the ringing tone until you press Quit.<br />
Save a received ringing tone<br />
1 If you want to save a ringing tone after you’ve listened to it, press Quit.<br />
2 Scroll to Save tone, then press Select.
3 Choose the ringing tone you want to replace—either an empty personal<br />
placeholder, if any are remaining, or a tone you’ve downloaded<br />
previously.<br />
4 Press Select.<br />
The phone saves the new tone in the list of ringing tones. For instructions<br />
on changing the ringing tone on your phone, see “Set a vibrating alert”<br />
on page 64.<br />
Discard received ringing tones<br />
You can discard a ringing tone if you don’t want to save it.<br />
Press Exit.<br />
OR<br />
Press Options, scroll to Discard, then press Select.<br />
SET THE ALARM CLOCK<br />
The alarm clock is based on the time settings in your phone’s clock. You can<br />
set the alarm clock to ring at any time, even if your phone is turned off.<br />
If the alarm time is reached while the phone is switched off, the phone<br />
switches itself on and starts sounding the alarm tone. If you press Stop,<br />
the phone asks whether you want to activate the phone for calls. Press No<br />
to switch off the phone or Yes to make and receive calls.<br />
Note: Do not press Yes when wireless phone use is prohibited or<br />
when it may cause interference or danger.<br />
The alarm clock’s volume is determined by the phone’s current volume and<br />
tone settings.<br />
Set the time<br />
To set the time, see “Set the clock” on page 67.<br />
[ 100 ]
Set the alarm clock<br />
[ 101 ]<br />
Use special features<br />
1 Press Menu 4-1-1 (Menu > Settings > Time settings > Alarm clock).<br />
The Set alarm time message appears.<br />
2 Enter the time for the alarm and press OK.<br />
Use the hh:mm format (03:40, for example). The alarm clock replaces<br />
any existing numbers with the new time.<br />
3 Select either am or pm.<br />
The am and pm options appear only if you’ve chosen the am/pm format<br />
for the clock.<br />
4 Press Select.<br />
The Alarm on message appears, and the alarm clock icon appears<br />
on the Start screen.<br />
Note: The alarm clock works even when the phone is off.<br />
Turn off the alarm clock when it rings<br />
When the alarm clock rings:<br />
Press Stop to turn it off.<br />
Press Snooze to set the alarm to go off again in 10 minutes. The message<br />
Snoozing appears on the screen. If you wish to cancel the snooze,<br />
press Stop.<br />
If you let the alarm ring for 1 minute or more without pressing a key, it<br />
stops ringing, waits 10 minutes, then rings again. This continues until you<br />
press Stop.<br />
Turn off the alarm clock altogether<br />
If you want to turn the alarm clock completely off:<br />
1 Press Menu 4-1 (Menu > Settings > Time settings).<br />
Alarm clock appears on the screen with the current alarm time.<br />
2 Press Select, scroll to Off, then press Select.
USE THE CALCULATOR<br />
Your phone’s calculator adds, subtracts, multiplies, divides, and converts<br />
currencies.<br />
Note: Your phone must be switched on to use this function. Do<br />
not switch the phone on when wireless phone use is prohibited or<br />
when it may cause interference or danger.<br />
This calculator has a limited accuracy and rounding errors may<br />
occur, especially in long division.<br />
1 Press Menu 7 (Menu > Calculator).<br />
2 Enter the first number in the calculation.<br />
3 Based on the type of calculation that you need to perform, use one of<br />
the following actions:<br />
If you want to... ...Do this<br />
Enter a decimal point Press .<br />
Add Press for + symbol.<br />
Subtract Press twice for - symbol.<br />
Multiply Press three times for * symbol.<br />
Divide Press four times for / symbol.<br />
You can also press Options and then use or to scroll to:<br />
Add, Subtract, Multiply, Divide, Square, Square root, Change sign,<br />
To home, To foreign, or Exchange rate.<br />
4 Enter the second number in the calculation.<br />
You can repeat steps 3 and 4 as many times as necessary. Press Clear<br />
to erase any mistakes.<br />
5 Press Options, use or to scroll to Equals, and press Select.<br />
[ 102 ]
[ 103 ]<br />
Use special features<br />
Convert currency<br />
You can use the calculator to first set the exchange rate and then to<br />
calculate the exchange value.<br />
SET THE EXCHANGE RATE<br />
1 Press Menu 7 (Menu > Calculator), then press Options.<br />
2 Use or to scroll to Exchange rate and press Select.<br />
3 Select the exchange rate: Foreign units converted to home units or<br />
Home units converted to foreign units.<br />
4 Press Select.<br />
The exchange rate box opens with the number 1.<br />
5 Enter the appropriate number and press OK.<br />
To enter a decimal point, press .<br />
CALCULATE CURRENCY USING THE EXCHANGE RATE<br />
1 Press Menu 7 (Menu > Calculator).<br />
2 Enter the number of units for the exchange rate.<br />
3 Press Options and scroll to To home or To foreign.<br />
To home converts foreign units of currency to home units using<br />
the exchange rate you entered.<br />
To foreign converts home units of currency to foreign units using<br />
the exchange rate you entered.<br />
4 Press Select.
18 Infrared<br />
Your phone can send and receive certain types<br />
of data by way of the phone’s infrared (IR) Infrared port<br />
port. This is a wireless transfer, so you don’t<br />
need a cable or additional software.<br />
To connect using IR, the device with which you<br />
want to connect must comply with Infrared<br />
Data Association (IrDA) requirements.<br />
Transmission and reception must be to or from<br />
a compatible phone or device (for example,<br />
another phone, computer, or handheld device).<br />
Do not point the IR (infrared) beam at anyone's eye or allow it to interfere<br />
with other IR devices. This device is a Class 1 Laser product.<br />
Note: The preferable distance between two devices in an infrared<br />
connection is from 3 inches to 3 feet. There must be no obstructions<br />
between the devices when both IR ports are pointed at each other.<br />
Note: Your phone must be switched on to use this function. Do<br />
not switch the phone on when wireless phone use is prohibited or<br />
when it may cause interference or danger.<br />
INFRARED BASICS<br />
You can use IR to send and receive phone book entries (business cards)<br />
and reminder notes.<br />
1 Make sure that the IR ports of the two devices are pointed at each other.<br />
2 Press Menu 9 (Menu > Infrared), then press Select. You see the<br />
message IR reception activated, and the IR icon appears.<br />
3 Have the user of the sending device select the desired IR function to<br />
start data transfer.<br />
If data transfer does not start within 2 minutes after the activation of<br />
the IR port, the connection is cancelled. You must start it again.<br />
[ 104 ]
Check the status of an IR connection<br />
The status of an IR connection is shown by the infrared icon .<br />
[ 105 ]<br />
Infrared<br />
When appears steady, there is an IR connection between your<br />
phone and the other device.<br />
When doesn’t appear, no IR connection exists.<br />
When blinks, your phone is trying to connect to the other device<br />
or the connection has been lost.<br />
SEND AND RECEIVE INFORMATION<br />
You can transmit information in your phone by infrared (IR) using the<br />
industry-standard v.card format. You can send and receive business cards<br />
(v.card 2.1 format) to another compatible phone, to a PC that has an IR<br />
port and is running the appropriate software, or to other compatible IRequipped<br />
handheld devices.<br />
Send a business card to another device<br />
First, make sure that the other phone or device is set to receive data via<br />
its IR port. Refer to the user guide for the receiving device for more information<br />
on setting up IR communications and receiving data over IR.<br />
1 Recall the phone book entry you would like to send by IR.<br />
2 Press twice (Details > Options).<br />
3 Scroll to Send bus. card and press Select.<br />
4 Point the two IR ports at each other.<br />
5 Scroll to Via infrared, then press Select.<br />
Sending<br />
indicator<br />
The message Sending business card<br />
appears on the screen.<br />
Note: If you have more than one number or text information to<br />
send, choose Primary no. or All details, then press Select.
Receive a business card from another device<br />
You can receive business cards from another compatible device. The user<br />
of the other phone or device sends you a card as described in the previous<br />
section.<br />
1 Point the two IR ports at each other.<br />
2 Press Menu 9 (Menu > Infrared).<br />
3 When you see the message Business card received, press Show.<br />
4 Press Options to select Save or Discard, and press Select.<br />
If you press Save, the confirmation message Business card saved<br />
appears.<br />
If you press Discard, the question Discard business card? appears.<br />
Press OK to discard the information.<br />
Reminders<br />
You can send and receive reminder notes (v.cal 2.1 format) between<br />
compatible phones and other compatible IR-equipped handheld devices.<br />
Note: Make sure that the other phone or device is set to receive<br />
data by way of its IR port. Refer to the user guide for the other<br />
device for more information on enabling IR communications and<br />
receiving data over IR.<br />
SEND A REMINDER NOTE TO ANOTHER DEVICE<br />
1 Scroll to the reminder you wish to send and press .<br />
2 Scroll to Send, then press .<br />
3 Point the infrared ports of each device at each other.<br />
4 Scroll to Via IR and press to start data transfer.<br />
[ 106 ]
[ 107 ]<br />
Infrared<br />
PC CONNECTIVITY<br />
You can make a serial connection between your <strong>Nokia</strong> phone and your<br />
compatible Infrared-equipped laptop or IR-equipped desktop PC. Once<br />
you establish this connection, you can access your phone’s information<br />
from your PC, or use your phone as a wireless modem.<br />
<strong>Nokia</strong> PC Suite<br />
Once your phone is connected to your PC via Infrared, you can use the<br />
various components of <strong>Nokia</strong> PC Suite to:<br />
make a backup copy of the data in your phone (Content Copier)<br />
edit phone book names and numbers, profiles, and settings via your<br />
PC's keyboard.<br />
create new ringing tones and transfer them to your phone (PC Composer)<br />
synchronize your phone book and reminders with PIM applications such<br />
as Microsoft Outlook, Outlook Express, and Lotus Organizer (PC Sync)<br />
Instructions for PC Suite installation and setup, as well as the PC Suite user<br />
guide are available as part of the software download. Please refer to the<br />
documentation provided with PC Suite for more information.<br />
Modem setup<br />
You can use your <strong>Nokia</strong> phone as a wireless modem with your laptop<br />
computer, giving you access to the Internet (for e-mail and Web browsing)<br />
or corporate networks wherever you are.<br />
For more information on modem setup, please refer to the PC Connectivity<br />
<strong>Guide</strong>. This document can be downloaded from the <strong>Nokia</strong> website.<br />
Download software<br />
PC Suite and modem setup are provided to you free of charge, and are<br />
available for download from:<br />
http://www.nokia.com/us
19 Connect to the Wireless Internet<br />
Your phone has a built-in browser you can use to<br />
connect to selected services on the Internet. You<br />
can view weather reports, check news or flight<br />
times, view financial information, and much more.<br />
You can also save the address of any Wireless<br />
Internet site as a bookmark, much the same way<br />
you bookmark a Web page on your personal computer.<br />
Note: Your phone must be switched on to use this function. Do<br />
not switch the phone on when wireless phone use is prohibited or<br />
when it may cause interference or danger.<br />
Note: All features may not be available on all carrier networks.<br />
Please check with your service provider for availability. If your phone<br />
does not display “Services” on its menu, your network provider does<br />
not support these features at this time.<br />
NOTES ON WIRELESS INTERNET ACCESS<br />
This section gives a brief overview of wireless Internet access and provides<br />
some notes that may be useful in understanding wireless access.<br />
Technology background<br />
A technology called Wireless Application Protocol (WAP) is to mobile devices<br />
what the World Wide Web (WWW) is to desktop computers. The mobile<br />
community began developing WAP several years ago to provide access to<br />
the Internet for mobile users.<br />
Today, most WAP sites consist of text and hyperlinks, and some sites can<br />
accept text input. Some pages even contain low-resolution graphics. Your<br />
service provider and others are free to design WAP sites as they choose,<br />
so the sites are as variable as Web pages on the Internet.<br />
[ 108 ]
[ 109 ]<br />
Connect to the Wireless Internet<br />
The service provider’s role<br />
Because wireless Internet content is designed to be viewed from your phone,<br />
your wireless service provider now becomes your “wireless Internet service<br />
provider“ as well.<br />
It’s likely that your service provider has created a home page and set up<br />
your browser to go to this page when you connect to the Internet. Once<br />
at your service provider’s home page, you’ll find links to a number of other<br />
sites that offer wireless access.<br />
SET UP FOR BROWSING<br />
You should not need to do anything to set up your phone for browsing.<br />
Your service provider usually modifies the appropriate settings when you<br />
subscribe to the feature. Contact your service provider if you have<br />
problems using the browser.<br />
SIGN ON TO THE WIRELESS INTERNET<br />
You use the Services menu to connect to the Internet.<br />
1 At the Start screen, press Menu 10 (Menu > Services).<br />
2 At the Services menu, press Select, then select Home.<br />
Your phone connects to the Internet and to your service provider’s<br />
home page. The first time you connect, you will be asked to enter<br />
the date and time if you have not already set them.<br />
The message Connecting to service appears on the screen until<br />
the connection is complete.<br />
If you see the message Check homepage address, the phone may<br />
not be set up for browsing. Contact your service provider to make<br />
sure that your phone is configured properly.
USE BROWSER OPTIONS (SERVICES MENU)<br />
The Services menu gives you the options shown in the following list.<br />
Some service providers may have customized the options on the Services<br />
menu. Contact your service provider for more information if any of the<br />
options shown here are not available.<br />
Home<br />
Settings<br />
Clear cache<br />
Starts the browser and takes you to your service<br />
provider’s home page.<br />
Provides options for changing connection settings,<br />
appearance settings, and security certificate.<br />
Empties the browser’s temporary memory and frees<br />
up space. It’s advisable to empty your cache at the<br />
end of each session.<br />
SIGN OFF THE WIRELESS INTERNET<br />
Press at any time (or press Quit). At the question Quit browsing?<br />
select Yes.<br />
Note: The information or services you have accessed are stored in<br />
the cache of your phone. A cache is a buffer memory, which is used<br />
to store data temporarily. If you have tried to access or have<br />
accessed confidential information requiring passwords (for<br />
example, your bank account), empty the cache of your phone after<br />
each use.<br />
To empty the cache, press Menu 10-3 (Menu > Services > Clear<br />
cache).<br />
NAVIGATE THE WIRELESS INTERNET<br />
The pictures on this page show most of the elements you may find on a<br />
wireless Internet site. These are examples only.<br />
[ 110 ]
Header line: The current Internet site.<br />
Active hyperlink: Highlighted option ready to<br />
be chosen.<br />
Inactive hyperlink: Scroll to select a link and<br />
press OK to switch to other pages on the current<br />
site or to other sites.<br />
Use or to scroll through the list of<br />
links. You can use as “open link”.<br />
Selection list: Brackets [ ] mean you can press<br />
the link to show additional choices or links.<br />
Options/Back: Press Options to go to the site’s<br />
menu and/or the browser menu. Press Back to<br />
return to the previous page.<br />
Data entry field: Brackets [ ] around three dots<br />
appear when you need to enter information.<br />
For example, you might enter a city name, an<br />
airline name or flight number, or a stock symbol.<br />
[ 111 ]<br />
Connect to the Wireless Internet<br />
Edit a data entry field<br />
When you need to enter information, follow these steps.<br />
1 Scroll to highlight the data entry field, press Options, then select Edit.<br />
2 Use the phone’s keypad to enter the text in the data entry field (for<br />
example, Miami), and press OK.<br />
The text you entered now appears between the brackets in the field.<br />
3 Scroll to the link you want (for example, Get forecast?) and press<br />
Options and select Open link.
Choose browser options (while connected)<br />
While you’re connected to the Internet, the phone’s browser provides the<br />
options described in the following list.<br />
Tip: Developers of wireless Internet sites may add options to the<br />
browser menu that are specific to their Web sites. These options<br />
are often links to other areas within the site. As in any other menu,<br />
scroll to the link you want and press Select.<br />
Home Takes you back to the service provider’s home page.<br />
Bookmarks Shows a list of all saved bookmarks.<br />
Edit or Select<br />
Allows you to edit the currently selected browser<br />
element (for example, a checklist or text entry field),<br />
or selects the active (highlighted) hyperlink.<br />
Go to address Accepts an address you enter.<br />
Use Number<br />
Captures a phone number shown on the screen to<br />
add to the phone book or place a call.<br />
Clear cache Empties the browser’s temporary memory.<br />
Exit<br />
Exits the current session and returns to the Start<br />
screen.<br />
USE BOOKMARKS<br />
You can save addresses for your favorite sites as bookmarks. A bookmark<br />
helps you find a site again.<br />
If a wireless Internet site has a title, it will appear in the bookmark list<br />
(for example, Yahoo! News, ebay on WAP, Mapquest).<br />
If the site has no title, the site’s address will appear in the list of<br />
bookmarks (for example, http://www.yahoo.com/news.wml).<br />
[ 112 ]
[ 113 ]<br />
Connect to the Wireless Internet<br />
SAVE AN ADDRESS AS A BOOKMARK<br />
1 Navigate to the site you want to bookmark and press Options.<br />
2 Scroll to Add Bookmark and press Select.<br />
ENTER A BOOKMARK MANUALLY<br />
1 While browsing, press Options.<br />
2 Scroll to Bookmarks and press Select.<br />
3 Press Options, highlight New bookmark and press Select.<br />
4 Enter the site’s address (example: my.yahoo.com) and press OK.<br />
You don’t need to enter http://. It is added automatically.<br />
5 Enter a name for the new bookmark and press OK.<br />
RETURN TO A BOOKMARKED SITE<br />
1 While browsing, press Options.<br />
2 Scroll to Bookmarks and press Select.<br />
3 Scroll to the bookmark you want and press Options.<br />
4 Scroll to Go to and press Select.<br />
If your connection ends while browsing, your phone will reconnect to the<br />
Internet when you select your bookmark.
20 Play games<br />
Not only can you use your phone for communication but also for some<br />
serious fun. Your phone offers three games from which to choose.<br />
Note: Your phone must be switched on to use this function. Do<br />
not switch the phone on when wireless phone use is prohibited or<br />
when it may cause interference or danger.<br />
Start a new game<br />
1 Press Menu 6-1 (Menu > Games > Select game).<br />
2 Scroll to the desired game, and press Select.<br />
Use the option Instructions to learn how to play the game. With the option<br />
Level you can choose the difficulty level of the game.<br />
Please visit <strong>Nokia</strong> games services on the Internet for more hints and tips:<br />
http://www.nokia.com/us<br />
GAME SETTINGS<br />
You can change the settings of the game’s sounds, lights and shakes. To<br />
access the settings menu press Menu > Games > Settings.<br />
SPACE IMPACT<br />
Use your weapons to survive alien attacks. When you defeat all the enemies,<br />
you progress to the next level. Use the and keys to move up<br />
and down, then and keys to move left and right. Key or<br />
fires the main weapons, and key or fires bonus weapons.<br />
PAIRS II<br />
Uncover pictures to find pairs, but use as few tries as possible. In Time<br />
trial, you must find all the pairs before the bomb explodes. Move the<br />
cursor with keys , , , and . Press to reveal the<br />
pictures. To advance to the next level, you must match all the pairs before<br />
the dynamite fuse runs out.<br />
[ 114 ]
[ 115 ]<br />
Play games<br />
SNAKE II<br />
Feed the snake with as many goodies as possible and watch it grow. Use<br />
keys , , , and to turn the snake toward the food. The<br />
longer the snake’s tail grows, the higher your score. You can choose to<br />
have a clear field, or select from five different mazes. If the snake runs<br />
into its own tail or the surrounding wall, the game is over.<br />
Note: You can use your phone’s IR port to play Snake II against<br />
someone else. Before starting the game, point the IR ports of each<br />
phone at the other and then (each player) choose the two-player<br />
option.
21 Frequently asked questions<br />
(FAQ)<br />
This section lists and answers the questions phone users most frequently ask.<br />
Some of the answers tell you to use menu shortcuts. For a complete listing<br />
of these shortcuts, refer to “Shortcuts” on page 25.<br />
Q. What is my security code?<br />
A. The default security code is 12345. However, <strong>Nokia</strong> recommends that<br />
you change this code immediately. Certain features can be used only<br />
after the correct security code has been successfully entered.<br />
Q. How do I lock the keypad?<br />
A. You can lock the keypad by pressing Menu > . The term Keyguard<br />
is also used in connection with this feature.<br />
Q. How do I unlock the keypad?<br />
A. Press Unlock and then press . The term Keyguard is also used in<br />
connection with this feature.<br />
Q. How do I make the ringing louder?<br />
A. Press Menu 3-1-2-3 (Menu > Profiles > Normal > Customize ><br />
Ringing volume), then choose a volume level.<br />
Q. How do I change the ringing tone?<br />
A. Press Menu 3 (Menu > Profiles) and scroll through the list of profiles<br />
until you find the one for which you want to set the ringing tone.<br />
Then press Select.<br />
Highlight Customize and press Select.<br />
Scroll to Ringing tone, then press Select.<br />
Scroll through the options. After you hear the tone you want to<br />
use, press Select.<br />
[ 116 ]
Q. How do I store my voice mailbox number?<br />
[ 117 ]<br />
Frequently asked questions (FAQ)<br />
A. Press Menu 01-9-2 (Menu > Messages > Voice messages > Voice<br />
mailbox number), enter your voice mailbox phone number, and press OK.<br />
The screen tells you that the number is saved.<br />
This voice mailbox number is valid unless your phone number changes.<br />
If your phone number changes, you will have to save a new voice<br />
mailbox number.<br />
Q. How do I call my voice mailbox number (retrieve voice messages)?<br />
A. When your phone alerts you to new voice messages, press Listen and<br />
follow the instructions on the phone. If you’d rather listen to your<br />
messages later, press Exit.<br />
To listen to your voice messages at a later time, perform one of the<br />
following actions:<br />
Press and hold .<br />
Press Menu 01-9-1 (Menu > Messages > Voice messages ><br />
Listen to voice messages). Follow the voice prompts to review your<br />
messages.<br />
Q. How do I find my phone’s model number?<br />
A. Turn your phone off, then remove the battery from the phone. The<br />
model number is printed on the label under the battery.<br />
Q. How do I redial the last-dialed number?<br />
A. Press twice, quickly.<br />
Q. How do I assign a key to 1-touch dialing?<br />
A. Press Names and scroll to 1-touch dialing.<br />
Press Select. Use or to scroll to the first number that<br />
includes the message (empty) and press Assign.<br />
Enter or recall the name/number you want to assign this key and<br />
press Select. Repeat these steps as many times as necessary.
Q. How do I find out the amount of space I have used in my phone’s<br />
memory?<br />
A. Press Names and scroll to Options.<br />
Press Select.<br />
Scroll to Memory status and press Select again. Your memory status<br />
appears.<br />
Q. How do I find my phone’s electronic serial number (ESN)?<br />
A. Turn your phone off, remove the phone’s back cover. See “Install the<br />
battery” for more information. The ESN number is printed on the label<br />
under the battery.<br />
Q. How can I change the contrast of my phone’s display?<br />
A. Menu 4-3-5. See “Adjust screen contrast” on page 15.<br />
Q. How do I clear my call timers?<br />
A. WARNING: The clearing of call timers cannot be undone.<br />
Press Menu 2-5-6 (Menu > Call log > Call timers > Clear timers).<br />
When the security code box appears, enter your security code and<br />
press OK.<br />
[ 118 ]
22 Glossary<br />
[ 119 ]<br />
Glossary<br />
Business card A business card is the same as an entry in the phone<br />
book. It may contain a name, phone number, and text<br />
entry. It can also be sent to other devices.<br />
Call forwarding A network services feature you use to forward incoming<br />
calls to another number.<br />
Call lists A list used to track numbers for incoming, outgoing,<br />
or missed calls.<br />
Call log A log that registers information about calls you make<br />
and receive.<br />
Call timers Timers used to track the amount of time you spend<br />
on calls.<br />
Call waiting A network services feature that enables your phone<br />
to beep while you are in the middle of a call. The beep<br />
lets you know that someone else is calling you.<br />
Electronic serial<br />
number<br />
The identification number that is assigned to the phone.<br />
In-call options Features available for use while you are in a call.<br />
Keyguard Locks the keypad to prevent accidental keypresses.<br />
Keypad tones The tone you hear when you press a key.<br />
Menu A list of choices you can make to change settings on<br />
your phone or use various phone features.<br />
Number type<br />
locations<br />
A location for a specific type of number, such as a<br />
Home or Work number.
Predictive text A method of entering information in your phone that<br />
uses a dictionary to predict, or guess, what you are<br />
writing.<br />
Primary number The number your phone dials when you select a name<br />
from the phone book that has more than one number<br />
assigned to it.<br />
Profile A group of settings you can use to customize the way<br />
your phone works.<br />
Quick save A fast method for saving a number.<br />
Ringing tone The sound your phone makes when you receive a call.<br />
Ringing tones can be ringing sounds or short tunes.<br />
Scroll bar A bar that appears on the right side of the screen when<br />
you scroll through the main menus.<br />
SMS The quick way to say short message service.<br />
Start screen The idle screen that appears when you turn on your<br />
phone.<br />
T9 The technical name for predictive text.<br />
Template A template is like a form letter-something you can use<br />
many times.<br />
Voice mail A network services feature that enables people who<br />
call and miss you to leave a voice message on your<br />
phone.<br />
Warning tones Sounds your phone makes when error conditions and<br />
confirmations occur, when the battery is low, and<br />
when you need to recharge the battery.<br />
[ 120 ]
Reference information<br />
23 Reference information<br />
BATTERY STATEMENTS<br />
Charging and Discharging<br />
Your phone is powered by a rechargeable battery.<br />
Note that a new battery's full performance may be achieved only after<br />
two or three complete charge and discharge cycles!<br />
The battery can be charged and discharged hundreds of times but it will<br />
eventually wear out. When the operating time (talk time and standby<br />
time) is noticeably shorter than normal, it is time to buy a new battery.<br />
Use only batteries approved by the phone manufacturer and recharge<br />
your battery only with the chargers approved by the manufacturer.<br />
Unplug the charger when not in use. Do not leave the battery connected<br />
to a charger for longer than a week, since overcharging may shorten its<br />
lifetime. If left unused, a fully charged battery will discharge itself over<br />
time.<br />
Temperature extremes can affect the ability of your battery to charge;<br />
allow it to cool down or warm up first.<br />
For good operation times with NiMh batteries, discharge the battery from<br />
time to time by leaving your phone switched on until it turns itself off (or<br />
by using the battery discharge facility of any approved accessory available<br />
for your phone). Do not attempt to discharge the battery by any other<br />
means.<br />
Use the battery only for its intended purpose.<br />
Never use any charger or battery which is damaged or worn out.<br />
Do not short-circuit the battery. Accidental short-circuiting can occur<br />
when a metallic object (coin, clip, or pen) causes direct connection of the<br />
+ and - terminals of the battery (metal strips on the battery), for example,<br />
when you carry a spare battery in your pocket or purse. Short-circuiting<br />
the terminals may damage the battery or the connecting object.<br />
[ 121 ]
Leaving the battery in hot or cold places, such as in a closed car in summer<br />
or winter conditions, will reduce the capacity and lifetime of the battery.<br />
Always try to keep the battery between 59°F and 77°F (15°C and 25°C). A<br />
phone with a hot or cold battery may temporarily not work, even when<br />
the battery is fully charged. Batteries' performance is particularly limited<br />
in temperatures well below freezing.<br />
Do not dispose of batteries in a fire!<br />
Dispose of batteries according to applicable local regulations (for<br />
example, recycling). Do not dispose of as household waste.<br />
USE PROPER CARE AND MAINTENANCE<br />
Your phone is a product of superior design and craftsmanship and should<br />
be treated with care. The suggestions below will help you to fulfill any<br />
warranty obligations and to enjoy this product for many years:<br />
Keep the phone and all its parts and accessories out of the reach of<br />
small children.<br />
Keep the phone dry. Precipitation, humidity and all types of liquids or<br />
moisture can contain minerals that will corrode electronic circuits.<br />
Do not use or store the phone in dusty, dirty areas. Its moving parts<br />
can be damaged.<br />
Do not store the phone in hot areas. High temperatures can shorten<br />
the life of electronic devices, damage batteries, and warp or melt<br />
certain plastics.<br />
Do not store the phone in cold areas. When it warms up (to its normal<br />
temperature), moisture can form inside which may damage electronic<br />
circuit boards.<br />
Do not attempt to open the phone. Nonexpert handling may damage<br />
it.<br />
Do not drop, knock, or shake the phone. Rough handling can break<br />
internal circuit boards.<br />
[ 122 ]
[ 123 ]<br />
Reference information<br />
Do not use harsh chemicals, cleaning solvents, or strong detergents<br />
to clean the phone.<br />
Do not paint the phone. Paint can clog the moving parts and prevent<br />
proper operation.<br />
Use only the supplied or an approved replacement antenna.<br />
Unauthorized antennas, modifications, or attachments could damage<br />
the phone and may violate regulations governing radio devices.<br />
All of the above suggestions apply equally to your phone, battery, charger<br />
or any accessory. If any of them are not working properly, take them to<br />
your nearest qualified service facility. The personnel there will assist you,<br />
and if necessary, arrange for service.<br />
UNDERSTAND IMPORTANT SAFETY INFORMATION<br />
Traffic Safety<br />
Do not use a handheld telephone while driving a vehicle. Always secure<br />
the phone in its holder; do not place the phone on the passenger seat or<br />
where it can break loose in a collision or sudden stop.<br />
Remember road safety always comes first!<br />
Operating environment<br />
Remember to follow any special regulations in force in any area and<br />
always switch off your phone whenever it is forbidden to use it, or when<br />
it may cause interference or danger.<br />
Use the phone only in its normal operating positions.<br />
Electronic devices<br />
Most modern electronic equipment is shielded from radio frequency (RF)<br />
signals. However, certain electronic equipment may not be shielded<br />
against the RF signals from your wireless phone.
PACEMAKERS<br />
Pacemaker manufacturers recommend that a minimum separation of 6<br />
inches (20 cm) be maintained between a handheld wireless phone and a<br />
pacemaker to avoid potential interference with the pacemaker. These<br />
recommendations are consistent with the independent research by and<br />
recommendations of Wireless Technology Research. Persons with<br />
pacemakers:<br />
Should always keep the phone more than 6 inches (20 cm) from their<br />
pacemaker when the phone is switched on<br />
Should not carry the phone in a breast pocket<br />
Should use the ear opposite the pacemaker to minimize the potential<br />
for interference.<br />
If you have any reason to suspect that interference is taking place,<br />
switch off your phone immediately.<br />
HEARING AIDS<br />
Some digital wireless phones may interfere with some hearing aids. In the<br />
event of such interference, you may want to consult your service provider.<br />
Other medical devices<br />
Operation of any radio transmitting equipment, including cellular phones,<br />
may interfere with the functionality of inadequately protected medical<br />
devices. Consult a physician or the manufacturer of the medical device to<br />
determine if they are adequately shielded from external RF energy or if<br />
you have any questions. Switch off your phone in health care facilities<br />
when any regulations posted in these areas instruct you to do so.<br />
Hospitals or health care facilities may be using equipment that could be<br />
sensitive to external RF energy.<br />
Vehicles<br />
RF signals may affect improperly installed or inadequately shielded<br />
electronic systems in motor vehicles (for example, electronic fuel<br />
injection systems, electronic antiskid/antilock braking systems, electronic<br />
[ 124 ]
[ 125 ]<br />
Reference information<br />
speed control systems, air bag systems). Check with the manufacturer or<br />
its representative regarding your vehicle. You should also consult the<br />
manufacturer of any equipment that has been added to your vehicle.<br />
Posted facilities<br />
Switch your phone off in any facility where posted notices so require.<br />
Potentially explosive atmospheres<br />
Switch off your phone when in any area with a potentially explosive<br />
atmosphere and obey all signs and instructions. Sparks in such areas could<br />
cause an explosion or fire resulting in bodily injury or even death.<br />
Users are advised to switch off the phone when at a refueling point<br />
(service station). Users are reminded of the need to observe restrictions on<br />
the use of radio equipment in fuel depots (fuel storage and distribution<br />
areas), chemical plants, or where blasting operations are in progress.<br />
Areas with a potentially explosive atmosphere are often but not always<br />
clearly marked. They include below deck on boats; chemical transfer or<br />
storage facilities; vehicles using liquefied petroleum gas (such as propane<br />
or butane); areas where the air contains chemicals or particles, such as<br />
grain, dust, or metal powders; and any other area where you would<br />
normally be advised to turn off your vehicle engine.<br />
Vehicles<br />
Only qualified personnel should service the phone or install the phone in<br />
a vehicle. Faulty installation or service may be dangerous and may<br />
invalidate any warranty which may apply to the unit.<br />
Check regularly that all wireless phone equipment in your vehicle is<br />
mounted and operating properly.<br />
Do not store or carry flammable liquids, gases, or explosive materials in<br />
the same compartment as the phone, its parts, or accessories.
For vehicles equipped with an air bag, remember that an air bag inflates<br />
with great force. Do not place objects, including both installed or portable<br />
wireless equipment in the area over the air bag or in the air bag<br />
deployment area. If in-vehicle wireless equipment is improperly installed<br />
and the air bag inflates, serious injury could result.<br />
FCC regulations prohibit using your phone while in the air. Switch off your<br />
phone before boarding an aircraft. The use of wireless telephones in an<br />
aircraft may be dangerous to the operation of the aircraft, disrupt the<br />
wireless telephone network, and may be illegal.<br />
Failure to observe these instructions may lead to suspension or denial of<br />
telephone services to the offender, legal action, or both.<br />
EMERGENCY CALLS<br />
Important: This phone, like any wireless phone, operates using<br />
radio signals, wireless, and landline networks as well as userprogrammed<br />
functions. Because of this, connections in all<br />
conditions cannot be guaranteed. Therefore you should never rely<br />
solely upon any wireless phone for essential communications (for<br />
example, medical emergencies).<br />
Emergency calls may not be possible on all wireless phone networks or<br />
when certain network services and/or phone features are in use. Check<br />
with local service providers.<br />
To make an emergency call:<br />
1 If the phone is not on, switch it on. Check for adequate signal<br />
strength.<br />
2 Press as many times as needed (for example, to exit a call, to<br />
exit a menu, etc.) to clear the display and ready the phone for calls.<br />
3 Key in the emergency number for your present location (for example,<br />
911 or other official emergency number). Emergency numbers vary by<br />
location.<br />
4 Press the key.<br />
[ 126 ]
[ 127 ]<br />
Reference information<br />
If certain features are in use, you may first need to turn those features off<br />
before you can make an emergency call. Consult this user guide and your<br />
local cellular service provider.<br />
When making an emergency call, remember to give all the necessary<br />
information as accurately as possible. Remember that your wireless phone<br />
may be the only means of communication at the scene of an accident -<br />
do not end the call until given permission to do so.
CERTIFICATION INFORMATION (SAR)<br />
THIS MODEL PHONE MEETS THE GOVERNMENT'S REQUIREMENTS FOR<br />
EXPOSURE TO RADIO WAVES.<br />
Your wireless phone is a radio transmitter and receiver. It is designed and<br />
manufactured not to exceed the emission limits for exposure to radio<br />
frequency (RF) energy set by the Federal Communications Commission of<br />
the U.S. Government. These limits are part of comprehensive guidelines<br />
and establish permitted levels of RF energy for the general population. The<br />
guidelines are based on standards that were developed by independent<br />
scientific organizations through periodic and thorough evaluation of<br />
scientific studies. The standards include a substantial safety margin<br />
designed to assure the safety of all persons, regardless of age and health.<br />
The exposure standard for wireless mobile phones employs a unit of<br />
measurement known as the Specific Absorption Rate, or SAR. The SAR<br />
limit set by the FCC is 1.6W/kg.* Tests for SAR are conducted using<br />
standard operating positions accepted by the FCC with the phone<br />
transmitting at its highest certified power level in all tested frequency<br />
bands. Although the SAR is determined at the highest certified power<br />
level, the actual SAR level of the phone while operating can be well below<br />
the maximum value. This is because the phone is designed to operate at<br />
multiple power levels so as to use only the power required to reach the<br />
network. In general, the closer you are to a wireless base station antenna,<br />
the lower the power output.<br />
Before a phone model is available for sale to the public, it must be tested<br />
and certified to the FCC that it does not exceed the limit established by<br />
the government-adopted requirement for safe exposure. The tests are<br />
performed in positions and locations (for example, at the ear and worn on<br />
the body) as required by the FCC for each model. The highest SAR value<br />
for this model phone as reported to the FCC when tested for use at the<br />
ear is 1.11 W/kg, and when worn on the body, as described in this user<br />
guide, is 1.24 W/kg. (Body-worn measurements differ among phone<br />
models, depending upon available accessories and FCC requirements).<br />
[ 128 ]
[ 129 ]<br />
Reference information<br />
While there may be differences between the SAR levels of various phones<br />
and at various positions, they all meet the government requirement.<br />
The FCC has granted an Equipment Authorization for this model phone<br />
with all reported SAR levels evaluated as in compliance with the FCC RF<br />
exposure guidelines. SAR information on this model phone is on file with<br />
the FCC and can be found under the Display Grant section of<br />
http://www.fcc.gov/oet/fccid after searching on FCC ID LJPNPW-1NB.<br />
For body worn operation, this phone has been tested and meets the FCC<br />
RF exposure guidelines when used with the <strong>Nokia</strong> accessories supplied or<br />
designated for this product. Use of other accessories may not ensure<br />
compliance with FCC RF exposure guidelines.<br />
*In the United States and Canada, the SAR limit for mobile phones used<br />
by the public is 1.6 watts/kilogram (W/kg) averaged over one gram of<br />
tissue. The standard incorporates a substantial margin of safety to give<br />
additional protection for the public and to account for any variations in<br />
measurements. SAR values may vary depending on national reporting<br />
requirements and the network band. For SAR information in other regions<br />
please look under product information at www.nokia.com/us.
USE ACCESSORIES SAFELY<br />
This section provides information about the phone’s batteries, chargers,<br />
and accessories. Be aware that the information in this section is subject<br />
to change as the batteries, chargers, and accessories change.<br />
Check the model number of any charger before use with this phone. This<br />
device is intended for use when supplied with power from an ACP-7U,<br />
ACP-8U, or LCH-9 charger.<br />
Warning: Use only <strong>Nokia</strong> original accessories, or batteries,<br />
chargers, and accessories approved by <strong>Nokia</strong>, for use with this<br />
<strong>Nokia</strong> phone model. The use of any other types may invalidate any<br />
approval or warranty applying to the phone, and may be dangerous.<br />
For availability of approved accessories, please check with your dealer.<br />
When you are not using a charger, disconnect it from the power source.<br />
When the battery is running out of power and your phone only has a few<br />
minutes of talk time remaining, a warning tone sounds and the Battery low<br />
message appears briefly. When no more talk time is left, a warning tone<br />
is sounded and the phone switches itself off.<br />
A few practical rules for accessory operation:<br />
Keep all accessories out of the reach of small children.<br />
When you disconnect the power cord of any accessory, grasp and pull<br />
the plug, not the cord.<br />
Check regularly that any vehicle-installed accessories are mounted<br />
and are operating properly.<br />
Installation of any complex car accessories must be made by qualified<br />
personnel only.<br />
Use only batteries, chargers, and accessories that have been approved<br />
by the phone manufacturer. The use of any other types could<br />
invalidate any approval or warranty applying to the phone and could<br />
be dangerous.<br />
[ 130 ]
[ 131 ]<br />
Reference information<br />
BATTERIES<br />
This section provides information about the phone’s battery. Be aware<br />
that the information in this section is subject to change.<br />
Note: Dispose of used batteries in accordance with any local<br />
regulations.<br />
The tables shown in this section provide information about battery options<br />
that are available for your phone, charging times with the Rapid Travel<br />
Charger (ACP-8U), the Standard Travel Charger (ACP-7U), talk times, and<br />
standby times. Consult your service provider for more information.<br />
Charging times<br />
The charging times listed below are approximate.<br />
Battery Option ACP-7U Charger ACP-8U Charger<br />
BMC-3 900 mAh NiMH Up to 4 h Up to 2 h<br />
Standby and talk times<br />
Battery talk and standby times are estimates only and depend on signal<br />
strength, network conditions, features used, battery age and condition<br />
(including the effect of charging habits), temperatures to which the<br />
battery is exposed, use in digital mode, and many other factors. Please<br />
note that the amount of time a phone is used for calls will affect its<br />
standby time. Likewise, the amount of time that the phone is turned on<br />
and in standby mode will affect its talk time.<br />
Battery<br />
option<br />
NiMH Battery<br />
BMC-3 900 mAh<br />
Talk time Standby time<br />
Digital Analog Digital Analog<br />
Up to 5 h Up to 2.5 h Up to 15 d Up to 1.9 d
ACCESSORIES<br />
If you want to enhance your phone’s functionality,<br />
a range of accessories is available for you. You can<br />
select any of these items to help accommodate<br />
your specific communication needs. For availability<br />
of these and other accessories, contact your service<br />
provider.<br />
Warning: Use only <strong>Nokia</strong> original accessories, or batteries, chargers<br />
and accessories approved by <strong>Nokia</strong>, for use with this <strong>Nokia</strong> phone<br />
model. The use of any other types may invalidate any approval or<br />
warranty applying to the phone, and may be dangerous.<br />
900 mAh NiMH Battery (BMC-3)<br />
Provides up to 2 - 5 hours of digital talk time and<br />
up to 6.5 - 15 days of digital standby time.<br />
Provides up to 1 - 2.5 hours of analog talk time and<br />
up to 1 - 2 days of analog standby time.<br />
Also available:<br />
850 mAh Extended Li-Ion Battery (BLC-2)<br />
Rapid Travel Charger (ACP-8U)<br />
The Rapid Travel Charger is a lightweight (100 g) and<br />
durable AC charger. Calls can be made during charging,<br />
even with a fully discharged battery.<br />
To use the Rapid Travel Charger (ACP-8), plug it into a<br />
standard 120 V or 220 V AC wall outlet, and connect the<br />
lead from the charger to the base of your phone.<br />
Approximate charging times for discharged batteries are<br />
shown in “Charging times” on page 131.<br />
Also available:<br />
Standard Travel Charger (ACP-7U)<br />
Rapid Travel Charger (ACP-12U)<br />
[ 132 ]
[ 133 ]<br />
Reference information<br />
Rapid Cigarette Lighter Charger (LCH-9)<br />
You can charge your phone’s battery from your<br />
vehicle battery by using the Rapid Cigarette<br />
Lighter Charger (LCH-9).<br />
The input voltage range is from 11 to 32V DC,<br />
negative grounding. Avoid prolonged charging<br />
with the Rapid Cigarette Lighter Charger (LCH-<br />
9) when the car engine is not running; this could cause your car battery<br />
to drain. Note also, that in some cars, the cigarette lighter plug is not<br />
provided with electricity if the ignition is not switched on.<br />
Spare Battery Charger (DDC-1)<br />
Lightweight and stylish, this charger<br />
provides a convenient way to charge<br />
your spare battery.<br />
Compatible with:<br />
Standard Travel Charger (ACP-7U)<br />
Rapid Travel Charger (ACP-8U)<br />
Desktop Charging Stand (DCV-10)<br />
Used together with the Standard Travel Charger<br />
(ACP-7U) or the Rapid Travel Charger (ACP-8U), the<br />
Desktop Charging Stand is an economical choice<br />
when you need your phone close at hand, always<br />
ready for calls.<br />
This charging stand allows you to charge your phone’s battery in an upright,<br />
obtainable position on your desk.<br />
Charging is indicated by the scrolling battery bars that are located on<br />
the right side of your phone’s Start screen.<br />
When the scrolling stops, the battery is approximately 80% charged.<br />
The battery is fully charged a couple of hours after this time.
Headset (HDE-2)<br />
The headset provides handsfree operation. It<br />
connects directly to the phone requiring no<br />
additional adapter.<br />
Also available:<br />
Boom Headset (HDB-5)<br />
Headset Kit (HDC-5)<br />
Loopset (LPS-3)<br />
With the <strong>Nokia</strong> loopset, people who use a T-coil<br />
equipped hearing aid have the freedom to talk on a<br />
digital mobile phone. The loopset goes around your<br />
neck - so it can be worn comfortably and discreetly.<br />
Leather carry case (CSL-20)<br />
Luxurious, hard-leather case that helps<br />
protect your phone. The clip attaches to<br />
your belt for convenience. (shown at<br />
right)<br />
Also Available:<br />
Leather carry case (CSL-24)<br />
Carry Sleeve (CBM-12)<br />
[ 134 ]
TTY/TDD Adapter (HDA-9)<br />
The TTY/TDD Adapter is a <strong>Nokia</strong><br />
accessory that allows you to connect<br />
your mobile phone to a<br />
Telecommunications Device for the<br />
Deaf (TTY/TDD) to make a call in digital<br />
mode.<br />
WHAT YOU’LL NEED<br />
In addition to the <strong>Nokia</strong> phone, you’ll<br />
need the following for TTY/TDD<br />
communication.<br />
[ 135 ]<br />
Reference information<br />
A TTY/TDD device that is “cellular ready” or “cellular compatible”<br />
A cable for connecting the TTY/TDD to your phone, usually supplied by<br />
the manufacturer of the TTY/TDD device<br />
The TTY/TDD Adapter (HDA-9), which can be purchased separately as an<br />
accessory at www.nokia.com/us.<br />
Mobile Holder (MBC-6)<br />
Small and easy to use, the Mobile Holder<br />
provides an ideal place to hold the phone in a<br />
vehicle. The Mobile Holder is easy to attach to<br />
the dashboard via a mounting plate or swivel.<br />
The Mobile Holder is compatible with the Rapid<br />
Cigarette Lighter Charger (LCH-9) and the<br />
Express Car Kit (PPH-1).<br />
TTY/TDD<br />
Adapter
Express Car Kit (CARK-125)<br />
This car kit provides charging and<br />
handsfree functionality, with excellent<br />
audio quality. The car kit is easy to use and<br />
is compatible with 12 V systems.<br />
The Express Car Kit Includes a holder,<br />
plug-in handsfree, external microphone<br />
(HFM-8).<br />
Express Car Kit (PPH-1)<br />
The Express Car Kit provides charging and handsfree<br />
functionality. Compatible with 12 V systems, the<br />
Express Car Kit plugs into the cigarette lighter socket<br />
for charging. A green light indicates readiness for<br />
charging. The Express Car Kit has a built in speaker<br />
and uses the phone’s microphone. The Express Car Kit<br />
also has a connector for an optional external<br />
microphone (HFM-8). The microphone should be<br />
installed 20” apart from the external speaker.<br />
The Express Car Kit requires no screws for installation<br />
and thus can be moved easily from car to car.<br />
[ 136 ]
[ 137 ]<br />
Reference information<br />
<strong>Nokia</strong> Xpress-on color covers<br />
Your phone’s Xpress-on cover is available in several fashion colors. Extra<br />
covers may be purchased from your authorized <strong>Nokia</strong> dealer.<br />
Note: Before changing the cover, always<br />
switch off the power and disconnect the<br />
phone from the charger or any other<br />
device. Always store the phone with covers<br />
attached.<br />
REMOVE THE BACK COVER<br />
1 Switch off the power and disconnect the<br />
phone from the charger or any other device.<br />
2 Push in the release button on the back of the phone (1), slide the<br />
cover toward the top of the phone (2 and 3), and remove it.<br />
REMOVE THE FRONT COVER<br />
1 Use the finger rests on each side of the<br />
phone and hold the phone face down.<br />
2 While holding the phone, place your<br />
finger on the grove between the phone<br />
and the cover.<br />
3 Gently pry the front cover away from the<br />
phone and lift the phone out of the<br />
cover.<br />
REMOVE THE KEYPAD<br />
1 Lift the keypad from the inside of the front cover.<br />
2 Place the keypad into the new front cover.<br />
3<br />
2<br />
1
REPLACE THE FRONT COVER<br />
1 Slide the top of the phone into the top of the front cover. Be careful to<br />
align the power key/IR port with its place in the top of the front cover.<br />
2 Gently push the bottom of the phone into the bottom of the front<br />
cover until it snaps into place.<br />
REPLACE THE BACK COVER<br />
1 Insert the two catches of the back cover in the corresponding slots in<br />
the phone.<br />
2 Slide the cover towards the bottom of the phone<br />
until it locks into place.<br />
[ 138 ]
TECHNICAL INFORMATION<br />
Feature Specification<br />
[ 139 ]<br />
Reference information<br />
Weight 5.3 oz with BMC-3 900 mAh NiMH<br />
battery<br />
Size 105 cc<br />
Frequency Range Lowband<br />
824.04 - 848.97 MHz (TX)<br />
869.04 - 893.97 MHz (RX)<br />
Highband<br />
1850.04 - 1909.92 MHz (TX)<br />
1930.08 - 1989.96 MHz (RX)<br />
Transmitter Output<br />
Power<br />
Up to 600mW<br />
Battery Voltage 3 V nominal<br />
Operating Temperature -4°F to + 104°F<br />
(-20°C to + 40°C)<br />
Number of Channels 832 lowband<br />
1997 highband<br />
Phone numbers Up to 3<br />
Memory Locations Up to 200
TROUBLESHOOTING<br />
Problem Possible cause Possible solution<br />
My phone isn’t<br />
charging.<br />
My phone isn’t<br />
making/receiving<br />
calls.<br />
I can’t listen to my<br />
voice messages.<br />
The charger and the<br />
phone are not properly<br />
connected.<br />
The charger is not<br />
properly plugged in.<br />
The battery is not<br />
charged.<br />
The signal strength is<br />
poor.<br />
You don’t have voice<br />
mail service.<br />
You have not set up<br />
your voice mailbox<br />
with your service<br />
provider.<br />
You have not saved<br />
your voice mail<br />
number in your phone.<br />
You have forgotten<br />
your password or are<br />
entering it incorrectly.<br />
The voice mail number<br />
you have saved is<br />
incorrect.<br />
[ 140 ]<br />
Securely connect the<br />
charger to the phone.<br />
Ensure that the charger<br />
is plugged in correctly.<br />
Charge the battery.<br />
If you are indoors, move<br />
toward a window.<br />
Call your wireless<br />
service provider.<br />
Call your wireless<br />
service provider.<br />
Refer to “Set up your<br />
voice mailbox” on<br />
page 60.<br />
Call your wireless<br />
service provider.<br />
Call your wireless<br />
service provider.
<strong>Nokia</strong> ONE-YEAR LIMITED WARRANTY<br />
[ 141 ]<br />
Reference information<br />
<strong>Nokia</strong> Inc. (“<strong>Nokia</strong>”) warrants that this cellular phone (“Product”) is free<br />
from defects in material and workmanship that result in Product failure<br />
during normal usage, according to the following terms and conditions:<br />
1 The limited warranty for the Product extends for ONE (1) year beginning<br />
on the date of the purchase of the Product. This one year period is<br />
extended by each whole day that the Product is out of your possession<br />
for repair under this warranty.<br />
2 The limited warranty extends only to the original purchaser (“Consumer”)<br />
of the Product and is not assignable or transferable to any subsequent<br />
purchaser/end-user.<br />
3 The limited warranty extends only to Consumers who purchase the<br />
Product in the United States of America.<br />
4 During the limited warranty period, <strong>Nokia</strong> will repair, or replace, at<br />
<strong>Nokia</strong>’s sole option, any defective parts, or any parts that will not<br />
properly operate for their intended use with new or refurbished<br />
replacement items if such repair or replacement is needed because<br />
of product malfunction or failure during normal usage. No charge<br />
will be made to the Consumer for any such parts. <strong>Nokia</strong> will also<br />
pay for the labor charges incurred by <strong>Nokia</strong> in repairing or replacing<br />
the defective parts. The limited warranty does not cover defects in<br />
appearance, cosmetic, decorative or structural items, including<br />
framing, and any non-operative parts. <strong>Nokia</strong>’s limit of liability under<br />
the limited warranty shall be the actual cash value of the Product at<br />
the time the Consumer returns the Product for repair, determined by<br />
the price paid by the Consumer for the Product less a reasonable<br />
amount for usage. <strong>Nokia</strong> shall not be liable for any other losses or<br />
damages. These remedies are the Consumer’s exclusive remedies for<br />
breach of warranty.
5 Upon request from <strong>Nokia</strong>, the Consumer must prove the date of the<br />
original purchase of the Product by a dated bill of sale or dated<br />
itemized receipt.<br />
6 The Consumer shall bear the cost of shipping the Product to <strong>Nokia</strong> in<br />
Melbourne, Florida. <strong>Nokia</strong> shall bear the cost of shipping the Product<br />
back to the Consumer after the completion of service under this<br />
limited warranty.<br />
7 The Consumer shall have no coverage or benefits under this limited<br />
warranty if any of the following conditions are applicable:<br />
a) The Product has been subjected to abnormal use, abnormal<br />
conditions, improper storage, exposure to moisture or dampness,<br />
unauthorized modifications, unauthorized connections,<br />
unauthorized repair, misuse, neglect, abuse, accident, alteration,<br />
improper installation, or other acts which are not the fault of<br />
<strong>Nokia</strong>, including damage caused by shipping.<br />
b) The Product has been damaged from external causes such as<br />
collision with an object, or from fire, flooding, sand, dirt,<br />
windstorm, lightning, earthquake or damage from exposure to<br />
weather conditions, an Act of God, or battery leakage, theft,<br />
blown fuse, or improper use of any electrical source, damage<br />
caused by computer or internet viruses, bugs, worms, Trojan<br />
Horses, cancelbots or damage caused by the connection to other<br />
products not recommended for interconnection by <strong>Nokia</strong>.<br />
c) <strong>Nokia</strong> was not advised in writing by the Consumer of the alleged<br />
defect or malfunction of the Product within fourteen (14) days<br />
after the expiration of the applicable limited warranty period.<br />
d) The Product serial number plate or the accessory data code has<br />
been removed, defaced or altered.<br />
e) The defect or damage was caused by the defective function of the<br />
cellular system or by inadequate signal reception by the external<br />
antenna, or viruses or other software problems introduced into<br />
the Product.<br />
[ 142 ]
[ 143 ]<br />
Reference information<br />
8 <strong>Nokia</strong> does not warrant uninterrupted or error-free operation of the<br />
Product. If a problem develops during the limited warranty period, the<br />
Consumer shall take the following step-by-step procedure:<br />
a) The Consumer shall return the Product to the place of purchase<br />
for repair or replacement processing.<br />
b) If “a” is not convenient because of distance (more than 50 miles)<br />
or for other good cause, the Consumer shall ship the Product<br />
prepaid and insured to:<br />
<strong>Nokia</strong> Inc., Attn: Repair Department<br />
795 West Nasa Blvd.<br />
Melbourne, FL 32901<br />
c) The Consumer shall include a return address, daytime phone<br />
number and/or fax number, complete description of the problem,<br />
proof of purchase and service agreement (if applicable). Expenses<br />
related to removing the Product from an installation are not<br />
covered under this limited warranty.<br />
d) The Consumer will be billed for any parts or labor charges not<br />
covered by this limited warranty. The Consumer will be responsible<br />
for any expenses related to reinstallation of the Product.<br />
e) <strong>Nokia</strong> will repair the Product under the limited warranty within<br />
30 days after receipt of the Product. If <strong>Nokia</strong> cannot perform<br />
repairs covered under this limited warranty within 30 days, or<br />
after a reasonable number of attempts to repair the same defect,<br />
<strong>Nokia</strong> at its option, will provide a replacement Product or refund<br />
the purchase price of the Product less a reasonable amount for<br />
usage. In some states the Consumer may have the right to a<br />
loaner if the repair of the Product takes more than ten (10) days.<br />
Please contact the Customer Service Center at <strong>Nokia</strong> at the<br />
telephone number listed at the end of this warranty if you need<br />
a loaner and the repair of the Product has taken or is estimated<br />
to take more than ten (10) days.
f) If the Product is returned during the limited warranty period, but<br />
the problem with the Product is not covered under the terms and<br />
conditions of this limited warranty, the Consumer will be notified<br />
and given an estimate of the charges the Consumer must pay to<br />
have the Product repaired, with all shipping charges billed to the<br />
Consumer. If the estimate is refused, the Product will be returned<br />
freight collect. If the Product is returned after the expiration of<br />
the limited warranty period, <strong>Nokia</strong>’s normal service policies shall<br />
apply and the Consumer will be responsible for all shipping charges.<br />
9 You (the Consumer) understand that the product may consist of<br />
refurbished equipment that contains used components, some of<br />
which have been reprocessed. The used components comply with<br />
Product performance and reliability specifications.<br />
10 ANY IMPLIED WARRANTY OF MERCHANTABILITY, OR FITNESS FOR A<br />
PARTICULAR PURPOSE OR USE, SHALL BE LIMITED TO THE DURATION<br />
OF THE FOREGOING LIMITED WRITTEN WARRANTY. OTHERWISE, THE<br />
FOREGOING LIMITED WARRANTY IS THE CONSUMER’S SOLE AND<br />
EXCLUSIVE REMEDY AND IS IN LIEU OF ALL OTHER WARRANTIES,<br />
EXPRESS OR IMPLIED. NOKIA SHALL NOT BE LIABLE FOR SPECIAL,<br />
INCIDENTAL, PUNITIVE OR CONSEQUENTIAL DAMAGES, INCLUDING<br />
BUT NOT LIMITED TO LOSS OF ANTICIPATED BENEFITS OR PROFITS,<br />
LOSS OF SAVINGS OR REVENUE, LOSS OF DATA, PUNITIVE DAMAGES,<br />
LOSS OF USE OF THE PRODUCT OR ANY ASSOCIATED EQUIPMENT,<br />
COST OF CAPITAL, COST OF ANY SUBSTITUTE EQUIPMENT OR<br />
FACILITIES, DOWNTIME, THE CLAIMS OF ANY THIRD PARTIES,<br />
INCLUDING CUSTOMERS, AND INJURY TO PROPERTY, RESULTING<br />
FROM THE PURCHASE OR USE OF THE PRODUCT OR ARISING FROM<br />
BREACH OF THE WARRANTY, BREACH OF CONTRACT, NEGLIGENCE,<br />
STRICT TORT, OR ANY OTHER LEGAL OR EQUITABLE THEORY, EVEN IF<br />
NOKIA KNEW OF THE LIKELIHOOD OF SUCH DAMAGES. NOKIA SHALL<br />
NOT BE LIABLE FOR DELAY IN RENDERING SERVICE UNDER THE<br />
LIMITED WARRANTY, OR LOSS OF USE DURING THE PERIOD THAT THE<br />
PRODUCT IS BEING REPAIRED.<br />
[ 144 ]
[ 145 ]<br />
Reference information<br />
11 Some states do not allow limitation of how long an implied warranty<br />
lasts, so the one year warranty limitation may not apply to you (the<br />
Consumer). Some states do not allow the exclusion or limitation of<br />
incidental and consequential damages, so certain of the above<br />
limitations or exclusions may not apply to you (the Consumer). This<br />
limited warranty gives the Consumer specific legal rights and the<br />
Consumer may also have other rights which vary from state to state.<br />
12 <strong>Nokia</strong> neither assumes nor authorizes any authorized service center<br />
or any other person or entity to assume for it any other obligation or<br />
liability beyond that which is expressly provided for in this limited<br />
warranty including the provider or seller of any extended warranty or<br />
service agreement.<br />
13 This is the entire warranty between <strong>Nokia</strong> and the Consumer, and<br />
supersedes all prior and contemporaneous agreements or understandings,<br />
oral or written, relating to the Product, and no representation,<br />
promise or condition not contained herein shall modify these terms.<br />
14 This limited warranty allocates the risk of failure of the Product<br />
between the Consumer and <strong>Nokia</strong>. The allocation is recognized by<br />
the Consumer and is reflected in the purchase price.<br />
15 Any action or lawsuit for breach of warranty must be commenced<br />
within eighteen (18) months following purchase of the Product.<br />
16 Questions concerning this limited warranty may be directed to:<br />
<strong>Nokia</strong> Inc.<br />
Attn: Customer Service<br />
7725 Woodland Center Blvd., Ste. 150<br />
Tampa, FL 33614<br />
Telephone: 1-888-NOKIA-2U (1-888-665-4228)<br />
Facsimile: (813) 287-6612<br />
TTY/TDD Users Only: 1-800-24-NOKIA (1-800-246-6542)<br />
17 The limited warranty period for <strong>Nokia</strong> supplied attachments and<br />
accessories is specifically defined within their own warranty cards<br />
and packaging.<br />
<strong>Nokia</strong> is a registered trademark of <strong>Nokia</strong> Corporation
[ 146 ]
[ 147 ]<br />
Appendix A Message from the CTIA<br />
Appendix A<br />
Message from the CTIA<br />
(Cellular Telecommunications<br />
& Internet Association)<br />
to all users of mobile phones.<br />
© 2001 Cellular Telecommunications & Internet Association. All Rights<br />
Reserved.1250 Connecticut Avenue, NW Suite 800, Washington, DC 20036.<br />
Phone: (202) 785-0081
Safety is the most important call you will ever make.<br />
A <strong>Guide</strong> to Safe and Responsible Wireless Phone Use<br />
Tens of millions of people in the U.S. today take advantage of the unique combination of<br />
convenience, safety and value delivered by the wireless telephone. Quite simply, the wireless<br />
phone gives people the powerful ability to communicate by voice--almost anywhere, anytime-with<br />
the boss, with a client, with the kids, with emergency personnel or even with the police.<br />
Each year, Americans make billions of calls from their wireless phones, and the numbers are<br />
rapidly growing.<br />
But an important responsibility accompanies those benefits, one that every wireless phone user<br />
must uphold. When driving a car, driving is your first responsibility. A wireless phone can be<br />
an invaluable tool, but good judgment must be exercised at all times while driving a motor<br />
vehicle--whether on the phone or not.<br />
The basic lessons are ones we all learned as teenagers. Driving requires alertness, caution and<br />
courtesy. It requires a heavy dose of basic common sense---keep your head up, keep your eyes<br />
on the road, check your mirrors frequently and watch out for other drivers. It requires obeying<br />
all traffic signs and signals and staying within the speed limit. It means using seatbelts and<br />
requiring other passengers to do the same.<br />
But with wireless phone use, driving safely means a little more. This brochure is a call to<br />
wireless phone users everywhere to make safety their first priority when behind the wheel of a<br />
car. Wireless telecommunications is keeping us in touch, simplifying our lives, protecting us in<br />
emergencies and providing opportunities to help others in need.<br />
When it comes to the use of wireless phones, safety is your most important call.<br />
Wireless Phone "Safety Tips"<br />
Below are safety tips to follow while driving and using a wireless phone which should be easy<br />
to remember.<br />
1 Get to know your wireless phone and its features such as speed dial and redial. Carefully<br />
read your instruction manual and learn to take advantage of valuable features most phones<br />
offer, including automatic redial and memory. Also, work to memorize the phone keypad<br />
so you can use the speed dial function without taking your attention off the road.<br />
2 When available, use a hands free device. A number of hands free wireless phone accessories<br />
are readily available today. Whether you choose an installed mounted device for your<br />
wireless phone or a speaker phone accessory, take advantage of these devices if available to<br />
you.<br />
3 Position your wireless phone within easy reach. Make sure you place your wireless phone<br />
within easy reach and where you can grab it without removing your eyes from the road. If<br />
you get an incoming call at an inconvenient time, if possible, let your voice mail answer it<br />
for you.<br />
4 Suspend conversations during hazardous driving conditions or situations. Let the person<br />
you are speaking with know you are driving; if necessary, suspend the call in heavy traffic<br />
or hazardous weather conditions. Rain, sleet, snow and ice can be hazardous, but so is<br />
heavy traffic. As a driver, your first responsibility is to pay attention to the road.<br />
5 Do not take notes or look up phone numbers while driving. If you are reading an address<br />
book or business card, or writing a "to do" list while driving a car, you are not watching<br />
where you are going. It’s common sense. Don’t get caught in a dangerous situation because<br />
you are reading or writing and not paying attention to the road or nearby vehicles.<br />
6 Dial sensibly and assess the traffic; if possible, place calls when you are not moving or<br />
before pulling into traffic. Try to plan your calls before you begin your trip or attempt to<br />
coincide your calls with times you may be stopped at a stop sign, red light or otherwise<br />
[ 148 ]
[ 149 ]<br />
Appendix A Message from the CTIA<br />
stationary. But if you need to dial while driving, follow this simple tip--dial only a few<br />
numbers, check the road and your mirrors, then continue.<br />
7 Do not engage in stressful or emotional conversations that may be distracting. Stressful or<br />
emotional conversations and driving do not mix--they are distracting and even dangerous<br />
when you are behind the wheel of a car. Make people you are talking with aware you are<br />
driving and if necessary, suspend conversations which have the potential to divert your<br />
attention from the road.<br />
8 Use your wireless phone to call for help. Your wireless phone is one of the greatest tools you<br />
can own to protect yourself and your family in dangerous situations--with your phone at<br />
your side, help is only three numbers away. Dial 9-1-1 or other local emergency number in<br />
the case of fire, traffic accident, road hazard or medical emergency. Remember, it is a free<br />
call on your wireless phone!<br />
9 Use your wireless phone to help others in emergencies. Your wireless phone provides you a<br />
perfect opportunity to be a "Good Samaritan" in your community. If you see an auto<br />
accident, crime in progress or other serious emergency where lives are in danger, call 9-1-1<br />
or other local emergency number, as you would want others to do for you.<br />
10 Call roadside assistance or a special wireless non-emergency assistance number when<br />
necessary. Certain situations you encounter while driving may require attention, but are not<br />
urgent enough to merit a call for emergency services. But you still can use your wireless<br />
phone to lend a hand. If you see a broken-down vehicle posing no serious hazard, a broken<br />
traffic signal, a minor traffic accident where no one appears injured or a vehicle you know<br />
to be stolen, call roadside assistance or other special non-emergency wireless number.<br />
Careless, distracted individuals and people driving irresponsibly represent a hazard to everyone<br />
on the road. Since 1984, the Cellular Telecommunications Industry Association and the<br />
wireless industry have conducted educational outreach to inform wireless phone users of their<br />
responsibilities as safe drivers and good citizens. As we approach a new century, more and more<br />
of us will take advantage of the benefits of wireless telephones. And, as we take to the roads,<br />
we all have a responsibility to drive safely.<br />
The wireless industry reminds you to use your phone safely when driving.<br />
For more information, please call 1-888-901-SAFE.<br />
For updates: http://www.wow-com.com/consumer/issues/driving/articles.cfm?ID=85<br />
© 2001 Cellular Telecommunications & Internet Association. All Rights Reserved.1250<br />
Connecticut Avenue, NW Suite 800, Washington, DC 20036. Phone: (202) 785-0081
[ 150 ]
[ 151 ]<br />
Appendix B Message from the FDA<br />
Appendix B<br />
Message from the FDA<br />
(U.S. Food and Drug<br />
Administration)<br />
to all users of mobile phones.<br />
July 18, 2001 ......... For updates: http://www.fda.gov/cdrh/phones
Consumer Update on Wireless Phones<br />
U.S. Food and Drug Administration<br />
1. Do wireless phones pose a health hazard?<br />
The available scientific evidence does not show that any health problems are associated with<br />
using wireless phones. There is no proof, however, that wireless phones are absolutely safe.<br />
Wireless phones emit low levels of radiofrequency energy (RF) in the microwave range while<br />
being used. They also emit very low levels of RF when in the stand-by mode. Whereas high levels<br />
of RF can produce health effects (by heating tissue), exposure to low level RF that does not<br />
produce heating effects causes no known adverse health effects. Many studies of low level RF<br />
exposures have not found any biological effects. Some studies have suggested that some<br />
biological effects may occur, but such findings have not been confirmed by additional research.<br />
In some cases, other researchers have had difficulty in reproducing those studies, or in<br />
determining the reasons for inconsistent results.<br />
2. What is FDA's role concerning the safety of wireless phones?<br />
Under the law, FDA does not review the safety of radiation-emitting consumer products such as<br />
wireless phones before they can be sold, as it does with new drugs or medical devices. However,<br />
the agency has authority to take action if wireless phones are shown to emit radiofrequency<br />
energy (RF) at a level that is hazardous to the user. In such a case, FDA could require the<br />
manufacturers of wireless phones to notify users of the health hazard and to repair, replace or<br />
recall the phones so that the hazard no longer exists.<br />
Although the existing scientific data do not justify FDA regulatory actions, FDA has urged the<br />
wireless phone industry to take a number of steps, including the following:<br />
• Support needed research into possible biological effects of RF of the type emitted by<br />
wireless phones;<br />
• Design wireless phones in a way that minimizes any RF exposure to the user that is not<br />
necessary for device function; and<br />
• Cooperate in providing users of wireless phones with the best possible information on<br />
possible effects of wireless phone use on human health.<br />
FDA belongs to an interagency working group of the federal agencies that have responsibility<br />
for different aspects of RF safety to ensure coordinated efforts at the federal level. The following<br />
agencies belong to this working group:<br />
• National Institute for Occupational Safety and Health<br />
• Environmental Protection Agency<br />
• Federal Communications Commission<br />
• Occupational Safety and Health Administration<br />
• National Telecommunications and Information Administration<br />
The National Institutes of Health participates in some interagency working group activities, as<br />
well.<br />
FDA shares regulatory responsibilities for wireless phones with the Federal Communications<br />
Commission (FCC). All phones that are sold in the United States must comply with FCC safety<br />
guidelines that limit RF exposure. FCC relies on FDA and other health agencies for safety<br />
questions about wireless phones. FCC also regulates the base stations that the wireless phone<br />
networks rely upon. While these base stations operate at higher power than do the wireless<br />
phones themselves, the RF exposures that people get from these base stations are typically<br />
thousands of times lower than those they can get from wireless phones. Base stations are thus<br />
not the subject of the safety questions discussed in this document.<br />
[ 152 ]
[ 153 ]<br />
Appendix B Message from the FDA<br />
3. What kinds of phones are the subject of this update?<br />
The term wireless phone refers here to hand-held wireless phones with built-in antennas, often<br />
called cell mobile or PCS phones. These types of wireless phones can expose the user to<br />
measurable radiofrequency energy (RF) because of the short distance between the phone and<br />
the user’s head. These RF exposures are limited by Federal Communications Commission safety<br />
guidelines that were developed with the advice of FDA and other federal health and safety<br />
agencies. When the phone is located at greater distances from the user, the exposure to RF is<br />
drastically lower because a person's RF exposure decreases rapidly with increasing distance<br />
from the source. The so-called cordless phones; which have a base unit connected to the<br />
telephone wiring in a house, typically operate at far lower power levels, and thus produce RF<br />
exposures far below the FCC safety limits.<br />
4. What are the results of the research done already?<br />
The research done thus far has produced conflicting results, and many studies have suffered<br />
from flaws in their research methods. Animal experiments investigating the effects of<br />
radiofrequency energy (RF) exposures characteristic of wireless phones have yielded conflicting<br />
results that often cannot be repeated in other laboratories. A few animal studies, however, have<br />
suggested that low levels of RF could accelerate the development of cancer in laboratory<br />
animals. However, many of the studies that showed increased tumor development used animals<br />
that had been genetically engineered or treated with cancer-causing chemicals so as to be predisposed<br />
to develop cancer in the absence of RF exposure. Other studies exposed the animals to<br />
RF for up to 22 hours per day. These conditions are not similar to the conditions under which<br />
people use wireless phones, so we don’t know with certainty what the results of such studies<br />
mean for human health.<br />
Three large epidemiology studies have been published since December 2000. Between them, the<br />
studies investigated any possible association between the use of wireless phones and primary<br />
brain cancer, glioma, meningioma, or acoustic neuroma, tumors of the brain or salivary gland,<br />
leukemia, or other cancers. None of the studies demonstrated the existence of any harmful<br />
health effects from wireless phone RF exposures. However, none of the studies can answer<br />
questions about long-term exposures, since the average period of phone use in these studies was<br />
around three years.<br />
5.What research is needed to decide whether RF exposure from wireless<br />
phones poses a health risk?<br />
A combination of laboratory studies and epidemiological studies of people actually using<br />
wireless phones would provide some of the data that are needed. Lifetime animal exposure<br />
studies could be completed in a few years. However, very large numbers of animals would be<br />
needed to provide reliable proof of a cancer promoting effect if one exists. Epidemiological<br />
studies can provide data that is directly applicable to human populations, but 10 or more years<br />
follow-up may be needed to provide answers about some health effects, such as cancer. This is<br />
because the interval between the time of exposure to a cancer-causing agent and the time tumors<br />
develop - if they do - may be many, many years. The interpretation of epidemiological studies is<br />
hampered by difficulties in measuring actual RF exposure during day-to-day use of wireless<br />
phones. Many factors affect this measurement, such as the angle at which the phone is held, or<br />
which model of phone is used.<br />
6. What is FDA doing to find out more about the possible health effects<br />
of wireless phone RF?<br />
FDA is working with the U.S. National Toxicology Program and with groups of investigators<br />
around the world to ensure that high priority animal studies are conducted to address important<br />
questions about the effects of exposure to radiofrequency energy (RF).
FDA has been a leading participant in the World Health Organization International<br />
Electromagnetic Fields (EMF) Project since its inception in 1996. An influential result of this<br />
work has been the development of a detailed agenda of research needs that has driven the<br />
establishment of new research programs around the world. The Project has also helped develop<br />
a series of public information documents on EMF issues.<br />
FDA and the Cellular Telecommunications & Internet Association (CTIA) have a formal<br />
Cooperative Research and Development Agreement (CRADA) to do research on wireless phone<br />
safety. FDA provides the scientific oversight, obtaining input from experts in government,<br />
industry, and academic organizations. CTIA-funded research is conducted through contracts to<br />
independent investigators. The initial research will include both laboratory studies and studies<br />
of wireless phone users. The CRADA will also include a broad assessment of additional research<br />
needs in the context of the latest research developments around the world.<br />
7. How can I find out how much radiofrequency energy exposure I can<br />
get by using my wireless phone?<br />
All phones sold in the United States must comply with Federal Communications Commission<br />
(FCC) guidelines that limit radiofrequency energy (RF) exposures. FCC established these<br />
guidelines in consultation with FDA and the other federal health and safety agencies. The FCC<br />
limit for RF exposure from wireless telephones is set at a Specific Absorption Rate (SAR) of 1.6<br />
watts per kilogram (1.6 W/kg). The FCC limit is consistent with the safety standards developed<br />
by the Institute of Electrical and Electronic Engineering (IEEE) and the National Council on<br />
Radiation Protection and Measurement. The exposure limit takes into consideration the body’s<br />
ability to remove heat from the tissues that absorb energy from the wireless phone and is set well<br />
below levels known to have effects.<br />
Manufacturers of wireless phones must report the RF exposure level for each model of phone to<br />
the FCC. The FCC website (http://www.fcc.gov/oet/rfsafety) gives directions for locating the<br />
FCC identification number on your phone so you can find your phone’s RF exposure level in the<br />
online listing.<br />
8. What has FDA done to measure the radiofrequency energy coming<br />
from wireless phones?<br />
The Institute of Electrical and Electronic Engineers (IEEE) is developing a technical standard for<br />
measuring the radiofrequency energy (RF) exposure from wireless phones and other wireless<br />
handsets with the participation and leadership of FDA scientists and engineers. The standard,<br />
Recommended Practice for Determining the Spatial-Peak Specific Absorption Rate (SAR) in the<br />
Human Body Due to Wireless Communications Devices: Experimental Techniques, sets forth<br />
the first consistent test methodology for measuring the rate at which RF is deposited in the<br />
heads of wireless phone users. The test method uses a tissue-simulating model of the human<br />
head. Standardized SAR test methodology is expected to greatly improve the consistency of<br />
measurements made at different laboratories on the same phone. SAR is the measurement of the<br />
amount of energy absorbed in tissue, either by the whole body or a small part of the body. It is<br />
measured in watts/kg (or milliwatts/g) of matter. This measurement is used to determine<br />
whether a wireless phone complies with safety guidelines.<br />
9. What steps can I take to reduce my exposure to radiofrequency<br />
energy from my wireless phone?<br />
If there is a risk from these products--and at this point we do not know that there is--it is<br />
probably very small. But if you are concerned about avoiding even potential risks, you can take<br />
a few simple steps to minimize your exposure to radiofrequency energy (RF). Since time is a key<br />
factor in how much exposure a person receives, reducing the amount of time spent using a<br />
wireless phone will reduce RF exposure.<br />
[ 154 ]
[ 155 ]<br />
Appendix B Message from the FDA<br />
If you must conduct extended conversations by wireless phone every day, you could place more<br />
distance between your body and the source of the RF, since the exposure level drops off<br />
dramatically with distance. For example, you could use a headset and carry the wireless phone<br />
away from your body or use a wireless phone connected to a remote antenna.<br />
Again, the scientific data do not demonstrate that wireless phones are harmful. But if you are<br />
concerned about the RF exposure from these products, you can use measures like those<br />
described above to reduce your RF exposure from wireless phone use.<br />
10. What about children using wireless phones?<br />
The scientific evidence does not show a danger to users of wireless phones, including children<br />
and teenagers. If you want to take steps to lower exposure to radiofrequency energy (RF), the<br />
measures described above would apply to children and teenagers using wireless phones.<br />
Reducing the time of wireless phone use and increasing the distance between the user and the<br />
RF source will reduce RF exposure.Some groups sponsored by other national governments have<br />
advised that children be discouraged from using wireless phones at all. For example, the<br />
government in the United Kingdom distributed leaflets containing such a recommendation in<br />
December 2000. They noted that no evidence exists that using a wireless phone causes brain<br />
tumors or other ill effects. Their recommendation to limit wireless phone use by children was<br />
strictly precautionary; it was not based on scientific evidence that any health hazard exists.<br />
11. What about wireless phone interference with medical equipment?<br />
Radiofrequency energy (RF) from wireless phones can interact with some electronic devices. For<br />
this reason, FDA helped develop a detailed test method to measure electromagnetic interference<br />
(EMI) of implanted cardiac pacemakers and defibrillators from wireless telephones. This test<br />
method is now part of a standard sponsored by the Association for the Advancement of Medical<br />
instrumentation (AAMI). The final draft, a joint effort by FDA, medical device manufacturers,<br />
and many other groups, was completed in late 2000. This standard will allow manufacturers to<br />
ensure that cardiac pacemakers and defibrillators are safe from wireless phone EMI. FDA has<br />
tested hearing aids for interference from handheld wireless phones and helped develop a<br />
voluntary standard sponsored by the Institute of Electrical and Electronic Engineers (IEEE).<br />
This standard specifies test methods and performance requirements for hearing aids and<br />
wireless phones so that no interference occurs when a person uses a compatible phone and a<br />
accompanied hearing aid at the same time. This standard was approved by the IEEE in 2000.<br />
FDA continues to monitor the use of wireless phones for possible interactions with other<br />
medical devices. Should harmful interference be found to occur, FDA will conduct testing to<br />
assess the interference and work to resolve the problem.<br />
12. Where can I find additional information?<br />
For additional information, please refer to the following resources:<br />
• FDA web page on wireless phones<br />
http://www.fda.gov/cdrh/phones/index.html<br />
• Federal Communications Commission (FCC) RF Safety Program<br />
http://www.fcc.gov/oet/rfsafety<br />
• International Commission on Non-Ionizing Radiation Protection<br />
http://www.icnirp.de<br />
• World Health Organization (WHO) International EMF Project<br />
http://www.who.int/emf<br />
• National Radiological Protection Board (UK)<br />
http://www.nrpb.org.uk/<br />
July 18, 2001For updates: http://www.fda.gov/cdrh/phones
Index<br />
A<br />
ABC and 123 modes 31<br />
accessibility<br />
alternate formats 6<br />
features 9<br />
mobile inductive loopset 7<br />
solutions 6<br />
TTY contact 6<br />
accessories 132<br />
car kit (PPH-1) 136<br />
carry case (CSM-6) 134<br />
mobile holder (MBC-6) 135<br />
safety information 130<br />
spare battery charger 133<br />
TTY adapter 135<br />
activate<br />
alarm clock 100<br />
call forwarding 53<br />
keyguard 74<br />
advanced calling features 49<br />
alarm clock 100<br />
turning off 101<br />
alternate formats<br />
audio cassette 6<br />
e-text 6<br />
large print 6<br />
requesting 6<br />
antenna<br />
contact with 17<br />
location 17<br />
automatic answer 71<br />
automatic redial 53<br />
[ 156 ]<br />
B<br />
basic operation 16<br />
battery<br />
charging 12<br />
important information 13<br />
indicator 12<br />
information 131<br />
installing 11<br />
prolonging life 13<br />
reference information 121, 130<br />
removal 12<br />
bookmarks<br />
entering manually 113<br />
returning to 113<br />
saving 113<br />
using 112<br />
braille user guides 6<br />
browser<br />
options 110<br />
set up 109<br />
business cards<br />
receiving 106<br />
sending 105<br />
C<br />
calculator 102<br />
call forwarding 52<br />
call history 45<br />
call lists, clearing 46<br />
call timers<br />
clearing 48<br />
turning on 48<br />
call waiting 50<br />
caller ID 56<br />
feature code 56
calling card<br />
choosing 55<br />
make a call 55<br />
saving information 54<br />
use 54<br />
calling features, advanced 49<br />
calls<br />
make and answer 19<br />
restricting 75<br />
car kit 136<br />
care and maintenance 122<br />
carry case 134<br />
carrying case 14<br />
characters, entering 32<br />
charge the battery 12<br />
charger<br />
ACP-7U 132<br />
for travel 132<br />
information 130<br />
charging times 131<br />
chat 94<br />
clock<br />
network update 68<br />
set the format 68<br />
show 68<br />
color covers 137<br />
conference calls 51<br />
Connecting to a PC 107<br />
contacting <strong>Nokia</strong> 10<br />
contacting your service provider 10<br />
Content Copier (PC Suite) 107<br />
contrast, adjusting 15<br />
convert currency 103<br />
currency<br />
calculating 103<br />
customer care 10<br />
[ 157 ]<br />
D<br />
data entry, internet 111<br />
Data Synchronization (PC Sync) 107<br />
deactivate<br />
keyguard 74<br />
desktop charging stand 133<br />
dialed calls, checking 45<br />
dictionary, add words 37<br />
digital data 107<br />
digital talk times 131<br />
download ringing tones 99<br />
download software 107<br />
E<br />
edit a name or number 42<br />
e-mail messages 92<br />
emergency calls 126<br />
enter<br />
characters 32<br />
letters and numbers 30<br />
numbers 32<br />
punctuation 32<br />
spaces 32<br />
enter letters 31<br />
enter names and numbers 30<br />
entering letters and numbers 31<br />
erase<br />
mistakes 33<br />
names and numbers 42<br />
text messages 90<br />
erase names or numbers 42<br />
F<br />
factory settings, restoring 72<br />
FAQ 116<br />
1-touch dial 117
call timers 118<br />
contrast 118<br />
ESN 118<br />
model number 117<br />
phone memory 118<br />
redial 117<br />
ringing tone 116<br />
ringing volume 116<br />
security code 116<br />
serial number 118<br />
voice mailbox 117<br />
folder<br />
erase messages from 91<br />
folders<br />
archive 86, 90<br />
for text messages 86<br />
inbox 86<br />
message capacity 86<br />
outbox 86<br />
templates 86<br />
use of 86<br />
full memory 90<br />
G<br />
games<br />
Pairs II 114<br />
playing 114<br />
Snake II 115<br />
Space impact 114<br />
starting 114<br />
glossary 119<br />
H<br />
headset 134<br />
connect 14<br />
setup 14<br />
use 14<br />
[ 158 ]<br />
hearing impaired solutions 7<br />
help 23<br />
home network 84<br />
I<br />
icons 4<br />
information<br />
adding 30<br />
recalling 39<br />
Infrared 104<br />
Infrared connections 104<br />
internet access 108<br />
internet, connecting to 108, 109<br />
IR 104<br />
activating 104<br />
connecting to a PC 107<br />
receiving a business card 106<br />
sending a business card 105<br />
sending a reminder note 106<br />
status 105<br />
K<br />
keyguard<br />
activate 74<br />
answer call while active 74<br />
deactivate 74<br />
keypad lock 74<br />
keypad lock, how to 116<br />
keypad tones, setting 65<br />
keys and features 16<br />
keys, learning 18<br />
keys, selection 23<br />
L<br />
label 9, 10<br />
language setting 67<br />
LCH-9 rapid charger 133
letter case, changing 33<br />
letters, entering 31<br />
lights, car kit 71<br />
lock the keypad 74<br />
loopset 7<br />
how it works 7<br />
LPS-3 7<br />
M<br />
make and answer calls 19<br />
maximum characters in text messages<br />
35<br />
memory is full 90<br />
memory status, checking 44<br />
menu number and scroll bar 21<br />
menu tips 24<br />
menus, phone 23<br />
message alert tone, setting 65<br />
messages<br />
checking 60<br />
text 85<br />
messages, checking 60<br />
missed calls, checking 45<br />
mistakes, erasing 33<br />
mobile holder 135<br />
modem setup 107<br />
N<br />
name or number edit 42<br />
names and numbers<br />
saving 38<br />
saving quickly 38<br />
storing 38<br />
names and numbers, storing 38<br />
names or numbers, erasing 42<br />
names, add second number to 43<br />
network search 83<br />
[ 159 ]<br />
network service features 83<br />
network update of the clock 68<br />
<strong>Nokia</strong> PC Suite 107<br />
notes<br />
adding 78<br />
sending and receiving 78<br />
notes and reminders 77<br />
number selection 57<br />
number type, changing 44<br />
number types 43<br />
numbers, add to message 37<br />
numbers, entering 32<br />
O<br />
options, while in a call 49<br />
P<br />
PC Composer (PC Suite) 107<br />
PC Connectivity 107<br />
PC Suite<br />
Content Copier 107<br />
Instructions 107<br />
PC Composer 107<br />
PC Sync 107<br />
PC Suite (application) 107<br />
PC Sync (PC Suite) 107<br />
personalize phone settings 67<br />
phone basics 16<br />
Phone book<br />
storing names and numbers 38<br />
phone book<br />
entering 39<br />
erasing 42<br />
menus 40<br />
opening 38<br />
save an entry 39<br />
save text entry 39
use number 112<br />
views 41<br />
phone book menu 29<br />
phone book menu options 29<br />
phone book, erasing 42<br />
phone help 23<br />
phone memory, when full 90<br />
phone menus 23<br />
phone security, managing 73<br />
phone symbols 21<br />
picture messages<br />
sending with text 96<br />
viewing 96<br />
play games 114<br />
power on your phone 14<br />
predictive text 34<br />
tips for 36<br />
turning off 36<br />
turning on 36<br />
prepaid access numbers, saving 81<br />
prepaid account, adding money to 81<br />
prepaid balance, checking 82<br />
prepaid services 80<br />
primary number, specifying 44<br />
profile<br />
customizing 62<br />
defined 62<br />
renaming 66<br />
selecting 62<br />
punctuation, entering 32<br />
Q<br />
questions, frequently asked 116<br />
quick save, name and number 38<br />
[ 160 ]<br />
R<br />
rapid charger 133<br />
recall information 39<br />
received calls, checking 45<br />
redial 53<br />
reference information 121<br />
reminder, adding 77<br />
reminders 106<br />
reminders and notes 77<br />
reminders, sending and receiving 78<br />
remove the battery 12<br />
reply to a text message 91<br />
restrict calls 75<br />
review the basics 16<br />
ring options, setting 63<br />
ring volume 64<br />
ring volume, setting 64<br />
ringing tone, setting 63<br />
ringing tones<br />
discarding 100<br />
downloading 99<br />
receiving 99<br />
saving 99<br />
rings and tones 62<br />
roaming 84<br />
S<br />
safety information 123<br />
search for network 83<br />
security code<br />
changing 73<br />
default 73<br />
security code, changing 73<br />
selection keys 23<br />
send and receive<br />
business cards 98
data 104<br />
reminders and notes 78<br />
send own number 56<br />
sending<br />
e-mail 92<br />
service features, network 83<br />
service provider<br />
differences 6<br />
signing up 5<br />
service provider, contacting 10<br />
services menu 110<br />
set the ring volume and tone 64<br />
set up<br />
your headset 14<br />
your phone 11<br />
settings, personalizing 67<br />
shortcuts 24<br />
shortcuts, list of 25<br />
software download 107<br />
spaces, entering 32<br />
special characters 33<br />
special features 98<br />
specify a primary number 44<br />
speed dial 69<br />
standby and talk times 131<br />
standby times<br />
analog 131<br />
digital 131<br />
start screen<br />
about 20<br />
indicators 20<br />
menu number 21<br />
returning to 20<br />
strings, touch tone 58<br />
switch between calls 50<br />
switch on your phone 14<br />
[ 161 ]<br />
symbols displayed on your phone 21<br />
system selection 83<br />
T<br />
talk times<br />
analog 131<br />
digital 131<br />
technical information 139<br />
templates, using 93<br />
terms 3<br />
text conventions 4<br />
text entry, saving 39<br />
text message capacity 86<br />
text messages<br />
about 85<br />
as e-mail 92<br />
communicating with 85<br />
erasing 90<br />
forwarding 92<br />
length 85<br />
maximum characters 35<br />
options 87<br />
recipients 85<br />
replying 91<br />
resending 88<br />
writing and sending 86<br />
time, setting 100<br />
touch tones<br />
length 58<br />
manual 58<br />
sending 59<br />
setting 57<br />
storing 58<br />
storing with numbers 58<br />
troubleshooting 140<br />
TTY 7<br />
end a call 9
make a call 8<br />
receive a call 9<br />
TTY contact 6<br />
turn on your phone 14<br />
U<br />
underlined words 36<br />
understanding wireless network<br />
services 5<br />
updates to this guide 5<br />
use the headset 14<br />
V<br />
vibrating alert, setting 64<br />
voice mail greetings 61<br />
voice mail, setting up 60<br />
voice mail, using 60<br />
voice messages, listening to 61<br />
volume, adjusting 15<br />
W<br />
WAP 108<br />
warning and game tones, setting 65<br />
warranty 141<br />
web address for updates 114<br />
welcome note, adding 69<br />
wireless modem setup 107<br />
wireless network services 5<br />
X<br />
Xpress-on color covers 137<br />
[ 162 ]
NOTES<br />
[ 163 ]
NOTES<br />
[ 164 ]
NOTES<br />
[ 165 ]
NOTES<br />
[ 166 ]
NOTES<br />
[ 167 ]
Para obtener un manual del usuario en español favor de<br />
llamar o enviar un fax al teléfono 1-888-NOKIA-2U,<br />
fax 813-249-9619.<br />
[ 168 ]
Thank you for purchasing your<br />
new <strong>Nokia</strong> <strong>3360</strong> phone.<br />
We’re here for you!<br />
www.nokiahowto.com<br />
Learn how to use your new <strong>Nokia</strong> phone.<br />
www.nokia.com/us<br />
Get answers to your questions.<br />
Register for your phone’s warranty<br />
so we can better serve your needs!<br />
NOKIA INC.<br />
7725 Woodland Center Boulevard, Suite 150, Tampa, FL 33614<br />
Phone: 1-888-NOKIA-2U (1-888-665-4228) Fax: 1-813-249-9619<br />
Text Telephone/Telecommunication Device for the Deaf (TTY/TDD) Users:<br />
1-800-24-NOKIA (1-800-246-6542)<br />
9355118<br />
Printed in Canada N8286