
You also want an ePaper? Increase the reach of your titles
YUMPU automatically turns print PDFs into web optimized ePapers that Google loves.
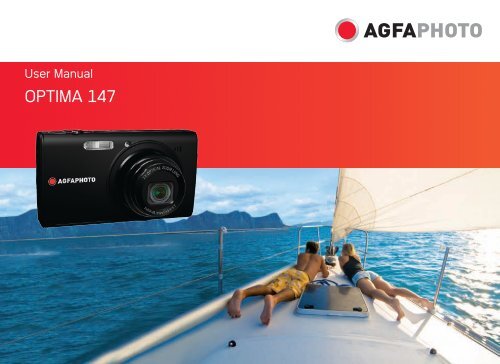
<strong>User</strong> <strong>Manual</strong><br />
<strong>OPTIMA</strong> <strong>147</strong>
WARNING<br />
Do not expose the camera battery pack or other<br />
accessories to rain or humidity to prevent fire hazard or<br />
electric shock.<br />
For customers in the U.S.A.<br />
Tested To Comply With FCC Standards<br />
FOR HOME OR OFFICE USE<br />
FCC Statement<br />
This device complies with part 15 of the FCC Rules.<br />
Operation is subject to the following two conditions:<br />
(1) This device may not cause harmful interference, and (2)<br />
this device must accept any interference received, including<br />
interference that may cause undesired operation.<br />
For customers in Europe<br />
"CE" mark indicates that this product complies<br />
with the European requirements for safety,<br />
health, environment and customer protection. "CE" marked<br />
cameras are intended for sales in Europe.<br />
This symbol [crossed-out wheeled bin WEEE<br />
Annex IV] indicates separate collection of waste<br />
electrical and electronic equipment in the European<br />
countries. Please do not throw the equipment into<br />
the domestic refuse. Please use the return and collection<br />
systems available in your country for the disposal of this<br />
product.<br />
Declaration of Conformity<br />
Model Name: <strong>OPTIMA</strong> <strong>147</strong><br />
Trade Name: <strong>AgfaPhoto</strong><br />
Responsible Party: RedDot Imaging<br />
Address: RedDot Imaging, 2275 NW 84thAve, Doral, FL<br />
33122.<br />
Customer Care Hotline:<br />
Service & Repair Hotline (USA):<br />
1-855-243-2937 (from a landline only)<br />
Service & Repair (UK):<br />
+44 1908 488676<br />
Online Service / International contact:<br />
customersupport@reddotimaging.com<br />
For repair and service in all other countries, please<br />
refer to the warranty pamphlet for additional<br />
information.<br />
i
ii<br />
SAFETY PRECAUTIONS<br />
Camera notes:<br />
Do not store or use the camera in the following types of<br />
locations:<br />
• In the rain, very humid and dusty places.<br />
• In a place where the camera can be exposed directly to<br />
the sunlight or subject to high temperature, e.g. Inside a<br />
closed car in summer.<br />
• In a place where the camera is subject to a high<br />
magnetic field, e.g. near motors, transformers or<br />
magnets.<br />
Do not place the camera on a wet surface or places where<br />
dripping water or sand may come in contact with the<br />
camera, which may cause irrepairable faults.<br />
If the camera will not be used for a long period of time, we<br />
suggest you remove the battery and the memory card from<br />
the camera and keep them in dry environment.<br />
If you carry the camera suddenly from a cold location to a<br />
warm place, moisture may condense inside the camera. We<br />
suggest you wait for a while before turing on the camera.<br />
No compensation for loss of recordings. Loss of recordings<br />
cannot be compensated for if a malfunction of your camera<br />
or recording media, etc, makes the playback of recordings<br />
not possible.<br />
Battery notes:<br />
Incorrect use of the batteries may cause them to leak,<br />
become hot, ignite or burst. Always observe the precautions<br />
given below.<br />
• Do not expose the batteries to water, and take particular<br />
care to keep the terminals dry.<br />
• Do not heat the batteries or throw them into a fire.<br />
• Do not attempt to deform, disassemble or modify the<br />
batteries.<br />
Keep the batteries out of reach of babies and small<br />
children.<br />
In cold locations, battery performance deteriorates and the<br />
time for which they can be used shortens markedly.<br />
Memory card notes:<br />
When using a new memory card, or a memory card has<br />
been initialized by a PC, be sure to format the card with<br />
your digital camera before using it.<br />
To edit image data, copy the image data to the PC’s hard<br />
disk first.<br />
Do not change or delete the folder names or file names<br />
in the memory card from your PC, as this may make it<br />
impossible to recognize or misinterpret the original folder<br />
or file in your camera.<br />
The photos taken by this camera are stored in the autogenerated<br />
folder in SD card. Please do not store photos<br />
that are not taken by this model of camera, as this may<br />
make it impossible to recognize the picture when the<br />
camera is in playback mode. Please do not expose the<br />
camera to harsh environments such as moisture or extreme<br />
temperatures, which may shorten the life of your camera or<br />
damage the batteries.
BEFORE YOU START<br />
Preface<br />
Thank you for purchasing this <strong>AgfaPhoto</strong> digital camera.<br />
Please read this manual carefully and keep it in a safe<br />
place for future reference.<br />
Copyright<br />
© Copyright 2011 RedDot Imaging All rights reserved.<br />
No part of this publication may be reproduced, transmitted,<br />
transcribed, stored in a retrieval system, or translated into<br />
any language or computer language, in any form, by any<br />
means, without the prior written permission of RedDot<br />
Imaging<br />
Trademarks<br />
All trademarks mentioned in this manual are used for<br />
identification purposes only and are properties of their<br />
respective owners.<br />
Safety information<br />
Please read the following important information carefully<br />
before using the product.<br />
• Do not take apart or attempt to service the camera<br />
yourself.<br />
• Do not drop or knock the camera. Improper handling<br />
may damage the product.<br />
• Turn off the camera before inserting or removing the<br />
battery and memory card.<br />
• Use only the type of battery that come with the camera.<br />
Using other types of batteries may damage the camera<br />
and invalidate the warranty.<br />
• Do not touch the camera lens.<br />
• Please not expose the camera to harsh environments<br />
such as moisture, or extreme temperatures, which may<br />
shorten the life of your camera or damage the batteries.<br />
• Do not use or store the camera in dusty, dirty, or sandy<br />
areas, as its components may be damaged.<br />
1
2<br />
<strong>AgfaPhoto</strong> <strong>OPTIMA</strong> <strong>147</strong><br />
• Do not expose the lens to direct sunlight for extended<br />
periods.<br />
• Download all pictures and remove the batteries from<br />
the camera if you are going to store the camera for long<br />
periods of time.<br />
• Do not use abrasive cleansers, alcohol-based, or solvent-based<br />
cleaners to clean the camera. To clean, wipe<br />
the camera with a slightly damp soft cloth.<br />
About this manual<br />
This manual provides you with instructions on how to use<br />
your <strong>AgfaPhoto</strong> digital camera. Every effort has been made<br />
to ensure that the contents of this manual are accurate,<br />
however RedDot Imaging reserves the right to make<br />
changes without notice.<br />
Symbols used in this manual<br />
Throughout this manual, the following symbols are used to<br />
help you locate information quickly and easily:<br />
Indicates the useful information to know.<br />
Indicates precautions to be taken while operating the<br />
camera.
CONTENTS<br />
WARNING ..................................................................i<br />
SAFETY PRECAUTIONS ....................................ii<br />
BEFORE YOU START ........................................1<br />
Preface ................................................................................................... 1<br />
Copyright ..................................................................................... 1<br />
Trademarks ............................................................................... 1<br />
Safety information ........................................................................... 1<br />
About this manual ............................................................................ 2<br />
Symbols used in this manual ............................................ 2<br />
CONTENTS ..............................................................3<br />
GETTING READY ...................................................7<br />
Unpacking ............................................................................................. 7<br />
Camera Views ...................................................................................... 8<br />
Charging the Battery .................................................................... 10<br />
Insert the Battery and SD/SDHC<br />
Card (Not included) ........................................................................ 11<br />
Turning On and Off ........................................................................ 13<br />
Mode Button Operation .............................................................. 14<br />
Setting Date/Time and Language......................................... 15<br />
<strong>AgfaPhoto</strong> <strong>OPTIMA</strong> <strong>147</strong><br />
Setting the Language ........................................................ 15<br />
Setting the Date and Time .............................................. 16<br />
About the LCD Screen ................................................................. 17<br />
BASIC OPERATION .......................................... 18<br />
Shooting in Auto Mode ............................................................... 18<br />
Using the Zoom Function .......................................................... 18<br />
Flash ...................................................................................................... 19<br />
Self-timer ............................................................................................ 19<br />
Macro Mode ....................................................................................... 20<br />
i button function ............................................................................. 20<br />
Face Detection ....................................................................... 21<br />
Smile Detection ...................................................................... 21<br />
Blink Detection ................................................................................ 22<br />
Advanced Functions Menu........................................................ 23<br />
WB (White Balance) ............................................................. 24<br />
ISO................................................................................................. 24<br />
Quality ......................................................................................... 25<br />
Size ............................................................................................... 25<br />
Color ............................................................................................. 26<br />
3
4<br />
<strong>AgfaPhoto</strong> <strong>AgfaPhoto</strong> <strong>OPTIMA</strong> <strong>OPTIMA</strong> <strong>147</strong> <strong>147</strong><br />
Exposure Compensation ................................................... 26<br />
USING THE MODES ......................................... 30<br />
LCD Screen Display ...................................................................... 27<br />
Still Picture Mode Display ............................................... 27<br />
Video Shooting Mode Display ...................................... 29<br />
Playback Mode Display .................................................... 30<br />
ASCN mode ...................................................................................... 31<br />
Landscape ............................................................................... 31<br />
Portrait ...................................................................................... 31<br />
Night Portrait ......................................................................... 32<br />
Backlit Portrait ...................................................................... 32<br />
Night Landscape ................................................................. 32<br />
Macro ......................................................................................... 32<br />
Auto ............................................................................................ 32<br />
Panorama mode .............................................................................. 32<br />
Scene mode ..................................................................................... 33<br />
Sport ........................................................................................... 34<br />
Indoor ......................................................................................... 34<br />
Snow .......................................................................................... 34<br />
Fireworks ................................................................................. 34<br />
Museum .................................................................................... 34<br />
Night Landscape ................................................................. 34<br />
Children ..................................................................................... 34<br />
Leaf ............................................................................................. 35<br />
Sunset ....................................................................................... 35<br />
Glass ........................................................................................... 35<br />
Landscape ............................................................................... 35<br />
Night Portrait ......................................................................... 35<br />
Beach .......................................................................................... 35<br />
Text .............................................................................................. 35<br />
Gathering ................................................................................... 35<br />
ID .................................................................................................... 35<br />
Fish eye ...................................................................................... 35<br />
Travel shooting ...................................................................... 35<br />
Photo frame ............................................................................. 35<br />
Sketch ......................................................................................... 35<br />
Stabilization mode ........................................................................ 36
PLAYBACK ........................................................... 37<br />
Viewing Photos and Videos .................................................... 37<br />
Thumbnail View .............................................................................. 38<br />
i button playback function ........................................................ 39<br />
Using Zoom on Playback (for still pictures only) ......... 41<br />
Using the Delete Button ........................................................... 42<br />
USING THE MENUS ......................................... 43<br />
Still Picture Menu .......................................................................... 43<br />
AF Mode (Auto-Focus mode) ........................................ 44<br />
AF-assist Beam .................................................................... 44<br />
Continuous AF .. .................................................................... 45<br />
Expo Metering (Exposure Metering) .. ........................ 45<br />
Continuous Shot .................................................................. 46<br />
Date Imprint ............................................................................ 46<br />
Quick Review ......................................................................... 47<br />
Digital Zoom ........................................................................... 47<br />
Slow Shutter .......................................................................... 48<br />
Movie Menu ...................................................................................... 48<br />
Continuous AF .. .................................................................... 49<br />
<strong>AgfaPhoto</strong> <strong>AgfaPhoto</strong> <strong>OPTIMA</strong> <strong>OPTIMA</strong> <strong>147</strong> <strong>147</strong><br />
Expo Metering (Exposure Metering) .. ........................ 50<br />
DIS ................................................................................................. 50<br />
Playback Menu ............................................................................... 51<br />
Protect ....................................................................................... 51<br />
Delete ........................................................................................ 52<br />
DPOF (Digital Print Order Format) .............................. 53<br />
Trim ............................................................................................. 54<br />
HDR-High Dynamic Range ............................................... 54<br />
Resize ........................................................................................ 55<br />
Rotate ........................................................................................ 55<br />
Red-eye Reduction .............................................................. 56<br />
Display Setup .................................................................................. 56<br />
Slideshow ................................................................................ 57<br />
Wallpaper Settings ............................................................. 57<br />
Setup Menu ...................................................................................... 60<br />
Beep ........................................................................................... 61<br />
LCD Brightness ..................................................................... 61<br />
Power Saver ........................................................................... 62<br />
Zone ........................................................................................... 62<br />
5
6<br />
<strong>AgfaPhoto</strong> <strong>OPTIMA</strong> <strong>147</strong><br />
Date/Time ................................................................................ 63<br />
Language ................................................................................. 63<br />
File and Software .......................................................................... 63<br />
File Numbering ...................................................................... 64<br />
Copy to Card (Copy internal memory to<br />
memory card) ......................................................................... 64<br />
Reset Settings ...................................................................... 65<br />
FW Version (Firmware version) .................................... 65<br />
Transmission ....................................................... 66<br />
Connecting to a PC ...................................................................... 66<br />
Setting the USB Mode ...................................................... 66<br />
Transferring Files to your PC ........................................ 66<br />
Connecting to a PictBridge Compatible Printer ............ 68<br />
Setting the USB Mode ...................................................... 68<br />
Connecting the Camera and Printer ......................... 69<br />
Using the PictBridge Menu ...................................................... 70<br />
Print with Date ...................................................................... 70<br />
Print without Date .............................................................. 71<br />
Print Index ............................................................................... 72<br />
Print DPOF ............................................................................... 73<br />
Exit .............................................................................................. 73<br />
<strong>AP</strong>PENDICES ....................................................... 74<br />
Specifications .................................................................................. 74<br />
Error Messages .............................................................................. 78<br />
Troubleshooting ............................................................................. 80<br />
Customer Care ................................................................................. 82
GETTING READY<br />
Unpacking<br />
<strong>AgfaPhoto</strong> <strong>OPTIMA</strong> <strong>147</strong><br />
Your package should contain the camera model you purchased along with the following items. If anything is missing or appears<br />
to be damaged, please contact your vendor.<br />
Warranty Card<br />
USB Extension Cable<br />
CD-ROM<br />
Rechargeable lithium-ion<br />
battery<br />
Wrist Strap<br />
AC adapter<br />
7
8<br />
<strong>AgfaPhoto</strong> <strong>AgfaPhoto</strong> <strong>OPTIMA</strong> <strong>OPTIMA</strong> <strong>147</strong> <strong>147</strong><br />
Camera Views<br />
Front View Back View<br />
1 2 3 4 6<br />
7<br />
5<br />
Right View<br />
16<br />
15<br />
12<br />
13<br />
14<br />
11<br />
8<br />
9<br />
10
Top View<br />
Left View<br />
17<br />
18<br />
19<br />
Bottom View<br />
<strong>AgfaPhoto</strong> <strong>AgfaPhoto</strong> <strong>OPTIMA</strong> <strong>OPTIMA</strong> <strong>147</strong> <strong>147</strong><br />
20 21 22 23 24 25 26<br />
1 Flash Lamp 14<br />
Delete Button/Self-timer Button/Down<br />
Button<br />
2 AF Assist/Timer Indicator 15 Macro/Left Button<br />
3 Lens 16 Function/OK Button<br />
4 Speaker 17 Wrist Strap Mount<br />
5 Microphone 18 USB interface switch<br />
6 LCD Screen 19 USB interface<br />
7 i Function Button 20 Power Button<br />
8 Mode Button 21 Movie Button<br />
9 Status Indicator 22 Shutter Button<br />
10 Playback Button 23 Zoom Wheel<br />
11 Menu Button 24 Tripod Socket<br />
12 Disp/Up Button 25 Card Slot/Battery Compartment<br />
13 Flash Mode/Right Button 26 Memory card/Battery slot switch<br />
9
10<br />
<strong>AgfaPhoto</strong> <strong>AgfaPhoto</strong> <strong>OPTIMA</strong> <strong>OPTIMA</strong> <strong>147</strong> <strong>147</strong><br />
Charging the Battery<br />
1. Put the battery into the camera.<br />
2. Use USB cable to connect the camera with power<br />
adapter.<br />
3. Insert power adapter to power socket.<br />
When charging, if the camera indicator is red the<br />
camera is still charging. When the camera completes<br />
charging, the light will turn green. To optimize battery<br />
life, please charge the battery for at least 4 hours<br />
before using it for the first time.<br />
The charger is for indoor use only.
Insert the Battery and SD/SDHC Card (Not included)<br />
1. Open the battery compartment.<br />
<strong>AgfaPhoto</strong> <strong>AgfaPhoto</strong> <strong>OPTIMA</strong> <strong>OPTIMA</strong> <strong>147</strong> <strong>147</strong><br />
2. Insert the battery into the battery slot in the correct<br />
position as shown in the following diagram.<br />
11
12<br />
<strong>AgfaPhoto</strong> <strong>AgfaPhoto</strong> <strong>OPTIMA</strong> <strong>OPTIMA</strong> <strong>147</strong> <strong>147</strong><br />
3. Insert an SD/SDHC card (not included) into the memory<br />
card slot as shown.<br />
Write-protection<br />
buckle<br />
4. Close the battery compartment.
Optional SD/SDHC cards are not included. The use<br />
of 64 MB to 32 GB memory cards from recognized<br />
manufacturers such as SanDisk, Panasonic and<br />
Toshiba is recommended for reliable data storage.<br />
To remove the SD/SDHC card, open the battery<br />
compartment and gently push the card to release it.<br />
Pull the card out carefully.<br />
When selecting Full size (1280X720) to record video,<br />
please use High Speed Card (above Class 4).<br />
When taking video, if “Memory card accessing is<br />
slow” on the LCD screen, please select High Speed<br />
Card or format this card, then take video<br />
Turning On and Off<br />
<strong>AgfaPhoto</strong> <strong>AgfaPhoto</strong> <strong>OPTIMA</strong> <strong>OPTIMA</strong> <strong>147</strong> <strong>147</strong><br />
Press the Power button to turn the camera on. To turn off<br />
the camera, press the Power button again.<br />
Power Button<br />
When the camera is turned on, it will be at the same<br />
shooting mode based on the last use. You can turn the<br />
Mode Dial on the top to select. When using the camera for<br />
the first-time, the language setting page will appear.<br />
13
14<br />
<strong>AgfaPhoto</strong> <strong>AgfaPhoto</strong> <strong>OPTIMA</strong> <strong>OPTIMA</strong> <strong>147</strong> <strong>147</strong><br />
Mode Button Operation<br />
The <strong>AgfaPhoto</strong> camera features a convenient mode button that allows for easy mode selection. All available modes are listed<br />
as follows:<br />
Mode Name Icon Description<br />
Auto mode AUTO Switch to take still pictures in automatic mode.<br />
<strong>Manual</strong> mode Many of the camera settings can be configured manually in this mode.<br />
Panorama mode In this mode, up to 3 frames can be stitched together to create panoramic photo.<br />
Stabilization mode<br />
Switch to take still pictures by reducing the blurs caused by hand shake, under low<br />
luminance, or slow shutter speed.<br />
Scene mode Choose from 20 different scene types and effects for your photos.<br />
Movie mode Switch to record videos.<br />
ASCN mode Switch to have the camera automatically select the best scene type for still pictures.<br />
Portrait Switch to take portrait pictures under normal condition.
Setting Date/Time and Language<br />
The Date/Time and Language setup will automatically<br />
appear when the camera is turned on the first time.<br />
To set the display language, date, and time, go to the<br />
following setup options in the General Setup menu.<br />
• Language<br />
• Date / Time<br />
To access the Setup menu, do the following:<br />
1. Press Power to turn the camera on.<br />
2. Press the button, navigate through the camera<br />
menus by using the Left/Right button to select the<br />
General Setup menu.<br />
Setting the Language<br />
1. Select language with the Down button, press or<br />
right button to enter setting.<br />
2. Use the Up/Down/Left/Right buttons to select the<br />
desired language.<br />
3. Press the button to confirm the setting.<br />
<strong>AgfaPhoto</strong> <strong>AgfaPhoto</strong> <strong>OPTIMA</strong> <strong>OPTIMA</strong> <strong>147</strong> <strong>147</strong><br />
15
16<br />
<strong>AgfaPhoto</strong> <strong>AgfaPhoto</strong> <strong>OPTIMA</strong> <strong>OPTIMA</strong> <strong>147</strong> <strong>147</strong><br />
Setting the Date and Time<br />
1. Select Date/Time with the Up/Down button, then press<br />
or right button to enter setting.<br />
2. Use the Left/Right button to select date or time field,<br />
then press Up/Down buttons to adjust values.<br />
3. Press the button to confirm the setting.
About the LCD Screen<br />
When you turn the camera on, various icons are shown on<br />
the LCD screen to indicate the current camera settings and<br />
status. To learn more about the displayed icons, see “LCD<br />
Screen display” on page 27.<br />
LCD Screen notes:<br />
Extremely high-precision technology had been used to<br />
manufacture the LCD screen so that most of the pixels are<br />
operational for use. However, there may be some minute<br />
points (black, white, red, blue or green) that constantly<br />
appear on the LCD screen. These points are normal in the<br />
manufacturing process and the recording is not affected<br />
in any way.<br />
Avoid exposing the LCD screen to water; please<br />
remove any moisture on the LCD screen with dry and<br />
soft cleaning cloth.<br />
<strong>AgfaPhoto</strong> <strong>AgfaPhoto</strong> <strong>OPTIMA</strong> <strong>OPTIMA</strong> <strong>147</strong> <strong>147</strong><br />
If the LCD monitor is damaged, take particular care<br />
with the liquid crystal in the monitor. If any of the<br />
following situations arise, take the recommended<br />
immediate action indicated below:<br />
• If liquid crystal comes in contact with your skin, wipe<br />
the area with a cloth and then wash thoroughly with<br />
soap and running water.<br />
• If liquid crystal flows into the eyes inadvertently,<br />
please rinse with water immediately and seek medical<br />
assistance.<br />
• If liquid crystal is swallowed, flush your mouth<br />
thoroughly with water. Drink large quantities of water<br />
and induce vomiting. Then seek medical assistance<br />
immediately.<br />
17
18<br />
BASIC OPERATION<br />
Shooting in Auto Mode AUTO<br />
Auto mode is the easiest mode to take photos. While<br />
operating in this mode, the camera automatically optimizes<br />
your photos for best results.<br />
To start shooting, do the following:<br />
1. Press Power to turn the camera on.<br />
2. Press the Mode button to select Automatic mode<br />
( ).<br />
AUTO<br />
3. Compose your picture on the LCD screen and press the<br />
Shutter button halfway to focus on the subject.<br />
4. The LCD screen will show green focus frame after the<br />
subject is in focus.<br />
5. Press Shutter fully to capture the image.<br />
Using the Zoom Function<br />
There are two built-in zoom functions: optical zoom and<br />
digital zoom. When taking photos, you can zoom in or out<br />
on an object using the zoom wheel.<br />
Zoom Wheel<br />
Zoom indicator (See<br />
“Digital Zoom“ on<br />
page 47)<br />
Optical zoom is initially used until it reaches the maximal<br />
threshold. Thereafter, it will switch over from optical to<br />
digital zoom. After adjusting, the zoom axis display will be<br />
hidden, only will be displayed to indicate the current<br />
zoom status.
Flash<br />
Press Right/Flash button to enter the flash interface, then<br />
press Left/Right button to switch among six different flash<br />
modes:<br />
• Flash: Forced off<br />
Flash is turned off.<br />
• Flash: Forced flash<br />
Make forced flash at the moment of shooting.<br />
• Flash: Slow Synchro<br />
This allows you to take pictures of people at night<br />
that clearly show both your subjects and the night<br />
time backdrop.<br />
• Flash:Red-Eye+Slow Synchro<br />
Using this mode for slow synchro shots with redeye<br />
reduction.<br />
• Flash: Red-eye reduction<br />
The camera exposes a brief flash before the<br />
picture is taken to reduce red-eye effects.<br />
• Flash: Auto<br />
Camera flash goes on automatically based on<br />
existing light conditions.<br />
Self-timer<br />
<strong>AgfaPhoto</strong> <strong>AgfaPhoto</strong> <strong>OPTIMA</strong> <strong>OPTIMA</strong> <strong>147</strong> <strong>147</strong><br />
To enable self-timer function, press Down/Self-timer button<br />
to enter the self-timer selection interface, press Left/Right<br />
button to switch among three self-timer modes:<br />
• Self-timer : Off<br />
Disable the self-timer.<br />
• Self-timer : 2 Sec<br />
A single picture is taken 2 seconds after the<br />
Shutter button is pressed.<br />
• Self-timer : 10 Sec<br />
A single picture is taken 10 seconds after the<br />
Shutter button is pressed.<br />
19
20<br />
<strong>AgfaPhoto</strong> <strong>AgfaPhoto</strong> <strong>OPTIMA</strong> <strong>OPTIMA</strong> <strong>147</strong> <strong>147</strong><br />
Macro Mode i button function<br />
Press the Left/Macro button to enter the close-up photo<br />
selection interface, press the Left/Right button to switch<br />
between two close-up shooting modes:<br />
• Macro : On<br />
Select this to focus on subjects 5cm from the<br />
lens.<br />
• Macro : Off<br />
Select this option to disable Macro.<br />
In Shooting mode, pressing key can select the<br />
functions of face detection and smile shooting.<br />
1. Press key to enter function menu.<br />
2. Press Left/Right button to select the function that you<br />
need to set.<br />
3. Press button to enable this function and quit the<br />
menu.
For face and smile detection, only one option can be<br />
activated at a time.<br />
Face Detection<br />
This function automatically detects facial features and<br />
directs the camera to focus on them.<br />
In face detection mode, when you slightly hold the shutter<br />
button halfway, the camera will automatically detect faces<br />
and display a rectangular focus frame around them. The<br />
focus frame will turn green to indicate that the face or<br />
faces are in focus. Press the shutter button the rest of the<br />
way to take the picture.<br />
<strong>AgfaPhoto</strong> <strong>AgfaPhoto</strong> <strong>OPTIMA</strong> <strong>OPTIMA</strong> <strong>147</strong> <strong>147</strong><br />
Smile Detection<br />
When this feature is activated, the camera will automatically<br />
detect smiling faces and capture them.<br />
After enabling the Smile Detection mode press the shutter<br />
button all the way down and the following icons will appear:<br />
The camera will automatically take a photo each time a<br />
smile is detected until the Smile Detection mode is disabled.<br />
To disable Smile Detection, press the button.<br />
21
22<br />
<strong>AgfaPhoto</strong> <strong>AgfaPhoto</strong> <strong>OPTIMA</strong> <strong>OPTIMA</strong> <strong>147</strong> <strong>147</strong><br />
Blink Detection<br />
The blink detection feature is on by default. After taking<br />
each photo, if a face is detected with their eyes closed, the<br />
blink detected icon ( ) will display on the screen.
Advanced Functions Menu<br />
The Advanced Functions menu of the camera includes<br />
image size, image quality, white balance, image color, ISO<br />
and EV value. These customized settings will allow you to<br />
capture pictures and videos with optimal results.<br />
Set the advanced functions with the following steps:<br />
1. Pull up the Advanced Function Menus by pressing<br />
button.<br />
2. Press the Down button to enter the advanced functions<br />
selection screen, press Left/Right button to select the<br />
function that you want to set.<br />
3. Press the Up button to enter the advanced functions<br />
setting interface.<br />
<strong>AgfaPhoto</strong> <strong>AgfaPhoto</strong> <strong>OPTIMA</strong> <strong>OPTIMA</strong> <strong>147</strong> <strong>147</strong><br />
4. Use the Left/Right buttons to change the settings and<br />
then press to confirm the new settings and close<br />
this Advanced Function Menu.<br />
23
24<br />
<strong>AgfaPhoto</strong> <strong>AgfaPhoto</strong> <strong>OPTIMA</strong> <strong>OPTIMA</strong> <strong>147</strong> <strong>147</strong><br />
WB (White Balance)<br />
The White Balance allows you to adjust the color<br />
temperature under different light source to ensure correct<br />
color reproduction. (The WB setting is only available when<br />
the camera is in the <strong>Manual</strong> mode).<br />
The options of White Balance include:<br />
• WB : Auto<br />
• WB : Daylight<br />
• WB : Cloudy<br />
• WB : Fluorescent<br />
• WB : Fluorescent CWF<br />
• WB : Incandescent<br />
• WB : <strong>Manual</strong> (Press the shutter button to set<br />
WB)<br />
ISO<br />
The ISO function allows you to set the sensitivity of the<br />
camera sensor based on the brightness of the scene. To<br />
improve the performance in darker environments, a higher<br />
ISO value is required. On the other hand, a lower ISO value<br />
is needed when in bright conditions. (The ISO setting is<br />
only available when the camera is in the <strong>Manual</strong><br />
mode).<br />
Pictures at higher ISO will naturally have more noise than<br />
those at lower ISO.<br />
The options of ISO include automatic, 64, 100, 200, 400,<br />
800 and 1600.
Quality<br />
The quality setting adjusts the compression ratio of the<br />
images. Higher quality settings give better photos, but will<br />
take up more memory space.<br />
The picture quality of image has three options:<br />
• Quality : Best<br />
• Quality : Fine<br />
• Quality : Normal<br />
<strong>AgfaPhoto</strong> <strong>AgfaPhoto</strong> <strong>OPTIMA</strong> <strong>OPTIMA</strong> <strong>147</strong> <strong>147</strong><br />
Size<br />
The size setting refers to the image resolution in pixels. A<br />
higher image resolution allows you to print that image in<br />
larger sizes without degrading the image quality.<br />
The larger the number of pixels, the better the image<br />
quality. However, it will take up more space. The<br />
opposite will be true also.<br />
25
26<br />
<strong>AgfaPhoto</strong> <strong>OPTIMA</strong> <strong>147</strong><br />
Color<br />
The color setting allows you to add artistic effects directly<br />
when taking pictures. You can try different color tones to<br />
alter the mood of your pictures. (The Color setting is only<br />
available when the camera is in the <strong>Manual</strong> mode).<br />
The color options include:<br />
• Color : Auto<br />
• Color : Vivid<br />
• Color : Black & White<br />
• Color : Sepia<br />
Exposure Compensation<br />
The exposure compensation allows you to adjust the light<br />
exposure value to optimize photo.<br />
The adjustable range of exposure value is from EV -2.0 to<br />
EV+2.0.
USING THE MODES<br />
LCD Screen Display<br />
Still Picture Mode Display<br />
Mode: AUTO M<br />
16<br />
15<br />
14<br />
1 2 3 4 5 6 7 8<br />
AUTO<br />
AUTO<br />
17<br />
18 19 20 21<br />
13<br />
12<br />
9<br />
10<br />
11<br />
<strong>AgfaPhoto</strong> <strong>OPTIMA</strong> <strong>147</strong><br />
1 Shooting Mode Icons<br />
Auto mode <strong>Manual</strong> mode<br />
ASCN mode Scene mode<br />
Stabilization mode Portrait<br />
Panorama mode<br />
2 AF Mode<br />
Single-AF<br />
Multi-AF<br />
3 Expo Metering<br />
Spot<br />
Center<br />
AiAE<br />
4 Image Size<br />
5 Image Quality<br />
27
28<br />
<strong>AgfaPhoto</strong> <strong>AgfaPhoto</strong> <strong>OPTIMA</strong> <strong>OPTIMA</strong> <strong>147</strong> <strong>147</strong><br />
6 Remaining number of pictures<br />
7 Memory card/built-in memory<br />
8 Battery Status<br />
9 WT Ratio (Displayed only when zoom is activated)<br />
10 Zoom<br />
11 Exposure<br />
12 ISO Value (Adjustable only in <strong>Manual</strong> Mode)<br />
13 Histogram<br />
14 Focus Frame<br />
15 Continuous Shot<br />
16 Face Detection<br />
17 Picture Color (Adjustable only in <strong>Manual</strong> Mode)<br />
18 White Balance (Adjustable only in <strong>Manual</strong> Mode)<br />
19 Macro Mode<br />
20 Self-timer<br />
Self-time : 2-sec<br />
Self-time : 10-sec<br />
21 Flash Mode<br />
Flash : Forced off<br />
Flash : Forced flash<br />
Flash : Slow Synchro<br />
Flash : Red-Eye + Slow Synchro<br />
Flash : Red-eye reduction<br />
Flash : Auto
Video Shooting Mode Display<br />
Mode :<br />
13<br />
1 Video Mode icon<br />
2 Continuous AF<br />
3 Metering<br />
Spot<br />
1 2 3 4 5 6 7 8 9<br />
Center<br />
AiAE<br />
4 Video Quality<br />
5 Macro Mode<br />
10<br />
11<br />
12<br />
6 Self-timer<br />
Self-time : 10-sec<br />
<strong>AgfaPhoto</strong> <strong>AgfaPhoto</strong> <strong>OPTIMA</strong> <strong>OPTIMA</strong> <strong>147</strong> <strong>147</strong><br />
7 Remaining Time for Video Recording<br />
8 Memory Card/Built-in Memory<br />
9 Battery Status<br />
10 WT Ratio (Displayed only when zoom is activated)<br />
11 Zoom<br />
12 Exposure<br />
13 Recording Status Icon<br />
Recording standby<br />
Recording<br />
For optimal video shooting, it is recommended that<br />
an SD card be used. Recording videos with the<br />
internal memory jitter and noise may appear on the<br />
image.<br />
HD recording time limited to below 29min.<br />
During video recording the 7x optical zoom and 6x<br />
digital zoom are available.<br />
29
30<br />
<strong>AgfaPhoto</strong> <strong>AgfaPhoto</strong> <strong>OPTIMA</strong> <strong>OPTIMA</strong> <strong>147</strong> <strong>147</strong><br />
Playback mode display<br />
Mode:<br />
13<br />
12<br />
1 2 3 4 5 6<br />
11<br />
10<br />
7<br />
8<br />
9<br />
1 Play Mode icon<br />
2 Picture File<br />
3 File protection<br />
4 Picture Number<br />
5 Memory Card/Built-in Memory<br />
6 Battery Status<br />
7 Image Zoom<br />
8 Zoom Magnification Area Indicator<br />
9 Total Image Area<br />
10 Memory Space (this picture/Total number of pictures)<br />
11 Recording Date and Time<br />
12 OK:PLAY<br />
13 DPOF file
ASCN mode<br />
In the "ASCN" mode, different recording conditions are<br />
detected automatically and the most suitable settings<br />
will be selected. With "ASCN" you can always take good<br />
pictures easily.<br />
To use "ASCN":<br />
1. Press mode selection button to select ASCN mode,<br />
press button to enter ASCN mode, LCD screen will<br />
display the detection scene icon shown as following<br />
figure:<br />
<strong>AgfaPhoto</strong> <strong>AgfaPhoto</strong> <strong>OPTIMA</strong> <strong>OPTIMA</strong> <strong>147</strong> <strong>147</strong><br />
2. Hold the camera steadily and aim at the subject. The<br />
optimum scene mode will be identified automatically.<br />
3. Press the Shutter button halfway down to focus.<br />
4. Press the Shutter button all the way down to take the<br />
picture.<br />
Icon Mode name Icon Mode name<br />
Landscape Mode<br />
Night Landscape<br />
Mode<br />
Portrait Mode Macro Mode<br />
Night Portrait Auto Mode<br />
Backlit Portrait<br />
Landscape Mode<br />
For landscapes, ASCN will automatically adjust the<br />
exposure to match the background.<br />
Portrait Mode<br />
For portraits, ASCN will automatically adjust the exposure<br />
and skin tones to give clear pictures.<br />
31
32<br />
<strong>AgfaPhoto</strong> <strong>AgfaPhoto</strong> <strong>OPTIMA</strong> <strong>OPTIMA</strong> <strong>147</strong> <strong>147</strong><br />
Night Portrait<br />
When you shoot portraits at night, or in low light conditions,<br />
ASCN will automatically adjust the exposure for people and<br />
night scenes.<br />
Backlit Portrait<br />
When the sun or any other light source is behind you,<br />
ASCN will automatically adjust the foreground exposure to<br />
produce good pictures.<br />
Night Landscape Mode<br />
For night scenes, ASCN will automatically increase the ISO<br />
value to compensate for low light.<br />
Macro Mode<br />
To capture object detail for close-ups, ASCN will<br />
automatically adjust the focus.<br />
Auto Mode<br />
The camera will automatically adjusts the exposure and<br />
focus to ensure good pictures.<br />
Panorama mode<br />
Panorama Mode allows you to create a panoramic picture.<br />
The camera will automatically compose a panoramic picture<br />
using the individual shots that you take.<br />
Follow these steps to create a panoramic picture:<br />
1. Press Mode button, use Left/Right button to select<br />
Panorama mode, then press button to enter<br />
Panorama mode for shooting.<br />
2. Use Left/Right button to select the direction for<br />
starting to shoot, press button to enter Shooting<br />
mode; if no selection is made after 2 seconds, the<br />
camera will default to left to right.<br />
3. After the first shot is taken, two target icons will<br />
appear on the left and right side of the LCD screen.<br />
Pan the camera and the circle icon on the screen will<br />
move towards the square frame icon. When the circle<br />
icon and square frame connects, it will turn green<br />
and the camera will take the picture automatically.<br />
Repeat the same step for the third picture to finish the<br />
stitching.
The camera will then stitch the pictures into a panorama<br />
automatically. Press the playback button to enter Playback<br />
mode and review the panorama result.<br />
After selecting Panorama mode, Flash, Self-timer,<br />
Macro mode and Exposure Compensation can’t be<br />
adjusted.<br />
While in panoramic mode, press the Delete button to<br />
cancel shooting.<br />
Panorama Mode can stitch 2 or 3 maximum pictures.<br />
Scene mode<br />
<strong>AgfaPhoto</strong> <strong>AgfaPhoto</strong> <strong>OPTIMA</strong> <strong>OPTIMA</strong> <strong>147</strong> <strong>147</strong><br />
In <strong>Manual</strong> Scene mode, you can select from a total of 20<br />
scene types to match your needs. The camera will adjust<br />
the optimal settings for that scene type.<br />
Press Mode button, use Left/Right button to enter Scene<br />
Selection mode menu, press button to enter Scene<br />
Selection mode, the following figure will display on LCD<br />
screen:<br />
33
34<br />
<strong>AgfaPhoto</strong> <strong>AgfaPhoto</strong> <strong>OPTIMA</strong> <strong>OPTIMA</strong> <strong>147</strong> <strong>147</strong><br />
Select a scene using the Up/Down/Left/Right button and<br />
press the button.<br />
Icon Mode Name Icon Mode Name<br />
Sport Indoor<br />
Snow Fireworks<br />
Museum Night Landscape<br />
Children Leaf/Foilage<br />
Sunset Glass<br />
Landscape Night Portrait<br />
Beach Text<br />
Gathering ID<br />
Fish eye Travel shooting<br />
Photo frame Sketch<br />
Sport<br />
For shooting fast-moving objects. Bring lively pictures to<br />
life.<br />
Indoor<br />
For shooting people indoors. Clearly show background and<br />
atmosphere.<br />
Snow<br />
Suitable for snowy landscape. Camera automatically adjusts<br />
and corrects exposure value (EV).<br />
Fireworks<br />
For shooting at night and fireworks. Shutterspeed is slower<br />
than normal. (Use of tripod is recommended)<br />
Museum<br />
For shooting in museums or places where flash is not<br />
allowed.<br />
Night landscape<br />
For shooting night scenes. Use of tripod is recommended.<br />
Children<br />
Suitable for photographing children and pets. The flash<br />
shuts off automatically in order not to disturb the subject<br />
being photographed.
Leaf/Foilage<br />
For shooting plants. Vivid reproduction of green.<br />
Sunset<br />
For shooting sunsets. Vivid reproduction of red and yellow.<br />
Glass<br />
Suitable for photographing objects behind glass or window.<br />
Landscape<br />
For shooting landscapes. Vivid reproduction of green and<br />
blue.<br />
Night portrait<br />
For shooting portraits with night scenes as background.<br />
Beach<br />
For taking pictures in areas with strong sunlight.<br />
Text<br />
For taking pictures of text, documents or white boards.<br />
<strong>AgfaPhoto</strong> <strong>AgfaPhoto</strong> <strong>OPTIMA</strong> <strong>OPTIMA</strong> <strong>147</strong> <strong>147</strong><br />
Gathering<br />
For taking pictures of large groups or in areas with uneven<br />
lighting.<br />
ID<br />
For shooting ID size photos.<br />
Fish eye<br />
Creates a fish-eye effect, by distorting the center of the<br />
image.<br />
Travel shooting<br />
Produces background image blur that emphasizes the<br />
motion of the main subject.<br />
Photo frame<br />
For adding interesting frame effects to the photo.<br />
Sketch<br />
For taking photos with pencil sketch effect.<br />
35
36<br />
<strong>AgfaPhoto</strong> <strong>OPTIMA</strong> <strong>147</strong><br />
1. After selecting the scene type, press the button to<br />
activate.<br />
2. After setting the option, press button to confirm<br />
the setting and enter the selected Scene Selection<br />
mode for shooting.<br />
The main function menu also allows you to adjust<br />
the image quality and image size. Please refer to the<br />
"Advanced Functions Menu" section on page 23 for<br />
detailed instructions.<br />
Stabilization mode<br />
This mode can help reduce photo blur caused by hand<br />
shake, low light and slow shutter speed<br />
Use stabilization mode in dark environments or when<br />
in slow shutter speed .<br />
Shooting in a windy or unstable environment (such<br />
as a moving vehicle) may cause blurred images.
PLAYBACK<br />
Viewing Photos and Videos<br />
To view the captured photos and video clips on the LCD<br />
screen:<br />
1. Press button to go to the Playback mode. The last<br />
recorded photo or video clip is displayed.<br />
2. Use the Left/Right navigation buttons to scroll through<br />
the photos or video clips stored in the internal memory<br />
or memory card.<br />
3. To play a selected video clip, press the button to<br />
enter the movie playback mode.<br />
During video playback, the operating instructions will appear<br />
on the screen. Press the Left/Right button, and press<br />
the button for confirmation.<br />
1<br />
2<br />
3<br />
4<br />
5<br />
<strong>AgfaPhoto</strong> <strong>OPTIMA</strong> <strong>147</strong><br />
The operating instruction icons are as follows.<br />
1 Return to the first<br />
frame and play<br />
4 Return to the first<br />
frame<br />
2 Play 5 Rewind<br />
3 Fast Forward 6 Pause<br />
6<br />
37
38<br />
<strong>AgfaPhoto</strong> <strong>AgfaPhoto</strong> <strong>OPTIMA</strong> <strong>OPTIMA</strong> <strong>147</strong> <strong>147</strong><br />
When playing a stored video, press the Up/Down arrow<br />
button to adjust the playback volume ; or to mute<br />
the volume .<br />
Thumbnail View<br />
In the playback mode, slide the zoom lever to , the<br />
photos and video thumbnails will display on the screen.<br />
1. Slide the zoom lever to switch between 3x3 and 4x4<br />
thumbnails.<br />
2. When displaying 3x3 and 4x4 thumbnails, press the<br />
Up/Down/Left/Right button to select a picture or video<br />
clip to view.<br />
When the icon appears on the LCD screen, a<br />
movie file is currently being displayed.<br />
Press the button to restore a preview icon to its<br />
original image size.
i button playback function<br />
In the playback mode, press the button for full screen<br />
playback or date folder selection.<br />
1. Press key to enter function menu.<br />
2. Press Up/Down button to select from the following two<br />
functions:<br />
•Full Screen Playback<br />
•Date Folder View<br />
3. Press the button to enter the corresponding<br />
function menu.<br />
<strong>AgfaPhoto</strong> <strong>AgfaPhoto</strong> <strong>OPTIMA</strong> <strong>OPTIMA</strong> <strong>147</strong> <strong>147</strong><br />
Full Screen Playback<br />
After entering the Full Screen Playback menu, press the<br />
Left/Right button to display the next photo.<br />
Date Folder View<br />
4. Select the Date Folder View, press the button to<br />
enter the following screen:<br />
5. Press the Up/Down to select Date Folder.<br />
6. Press the button to enter the Date Folder, press<br />
the Left/Right button to select the photos in the date<br />
folder.<br />
39
40<br />
<strong>AgfaPhoto</strong> <strong>AgfaPhoto</strong> <strong>OPTIMA</strong> <strong>OPTIMA</strong> <strong>147</strong> <strong>147</strong><br />
When selecting a date in the date folder, sliding the zoom<br />
lever to will zoom in on the picture; sliding the zoom<br />
lever to will first zoom out on the picture then enter<br />
into the date folder index. Press the button to return to<br />
the original scale.<br />
If it is a video, will display on the screen.
Using Zoom Playback (for still pictures only)<br />
In playback mode, the zoom wheel can be used to zoom in<br />
2x to 8x.<br />
1. Press button to go to the Playback mode.<br />
2. Use the Left/Right navigation buttons to select a photo<br />
to magnify.<br />
3. Slide the zoom wheel to to on zoom in on the<br />
picture.<br />
4. While zooming, the zoom indicator and photo frame<br />
icon will display on screen.<br />
<strong>AgfaPhoto</strong> <strong>AgfaPhoto</strong> <strong>OPTIMA</strong> <strong>OPTIMA</strong> <strong>147</strong> <strong>147</strong><br />
5. Use the navigation buttons to pan across the image.<br />
6. Press the button to return the image to its original<br />
scale.<br />
Movie images cannot be magnified.<br />
41
42<br />
<strong>AgfaPhoto</strong> <strong>OPTIMA</strong> <strong>147</strong><br />
Using the Delete Button<br />
In Playback mode, press Down/Delete/Self-timer button to<br />
delete photos and movies.<br />
To delete pictures or videos:<br />
1. Press button to go to the Playback Mode.<br />
2. Select a picture or video clip you want to delete with<br />
the Left/Right button.<br />
3. Press the Down/Delete button and the delete screen<br />
appears.<br />
4. Select Yes or Cancel with Up/Down button and press<br />
the button for confirmation.<br />
Erased photos/video clips cannot be recovered.<br />
Please refer to page 52 for instructions on the<br />
Delete Menu options.
USING THE MENUS<br />
Still Menu<br />
Mode: AUTO<br />
In any of the above Still Picture Modes, press the<br />
button to go to the Still Picture menu.<br />
To adjust each setting:<br />
1. In the Still Picture Menu, press Left/Right buttons to<br />
switch between different Photo and Camera Setup<br />
pages.<br />
2. Press the Up/Down buttons to select the function.<br />
3. Press or Right button to enter the submenu.<br />
<strong>AgfaPhoto</strong> <strong>OPTIMA</strong> <strong>147</strong><br />
4. Press Up/Down button to select an option, or press<br />
Left button to return to the menu.<br />
5. Press button to confirm the setting and return to<br />
the previous layer.<br />
After selecting a function, you can press the Up<br />
button to return to the Still Picture menu for other<br />
Photo Setup or Camera Setup pages. Or you can<br />
press the Down button several times to move to the<br />
next setup menu page.<br />
Refer to the following pages for more details about each<br />
setting.<br />
43
44<br />
<strong>AgfaPhoto</strong> <strong>AgfaPhoto</strong> <strong>OPTIMA</strong> <strong>OPTIMA</strong> <strong>147</strong> <strong>147</strong><br />
AF Mode (Auto-Focus mode)<br />
Use this setting to control the auto-focus mechanism while<br />
taking pictures.<br />
Two options are available:<br />
• Single-AF: The focus frame appears on the center of<br />
the LCD screen to focus on the subject.<br />
• Multi-AF: The camera shall focus correctly for multiple<br />
parts of the object.<br />
AF-assist Beam<br />
This option can turn the AF assist lamp on or off. In dark<br />
conditions, the AF assist lamp can strengthen the focus on<br />
the image.
Continuous AF<br />
After Continuous AF is turned on, the camera will adjust<br />
focus automatically in response to any camera or subject<br />
movement.<br />
<strong>AgfaPhoto</strong> <strong>AgfaPhoto</strong> <strong>OPTIMA</strong> <strong>OPTIMA</strong> <strong>147</strong> <strong>147</strong><br />
Expo Metering (Exposure Metering)<br />
Use this setting to select an area for the exposure to be<br />
obtained.<br />
Three options are available:<br />
• Spot<br />
• Center<br />
• AiAE (Artificial Intelligence AE)<br />
45
46<br />
<strong>AgfaPhoto</strong> <strong>AgfaPhoto</strong> <strong>OPTIMA</strong> <strong>OPTIMA</strong> <strong>147</strong> <strong>147</strong><br />
Continuous Shot<br />
Use this setting to perform continuous shooting. After<br />
entering this mode, you can shoot multiple images through<br />
operating the shutter button.<br />
There are five available options:<br />
• OFF: Turn off Continuous Shot function.<br />
• Unlimited: Press and hold the shutter to shoot continuously<br />
until you release the shutter or when the<br />
memory card has run out of space.<br />
• 3 shot: Capture up to 3 consecutive pictures.<br />
• 3 shots (Last): Capture pictures continuously until the<br />
Shutter button is released but only the last 3 shots<br />
are recorded.<br />
• Time-Lapse: Automatically capture pictures in a<br />
predefined interval.<br />
The flash is designed not to work in this mode in<br />
order to enable quick succession of shots.<br />
Date Imprint<br />
Include a Date/Time stamp in the photo image.<br />
• Off<br />
• Date<br />
• Date / Time
Quick Review<br />
This setting refers to the quick photo review immediately<br />
after taking a picture. The picture stays on the LCD screen<br />
for an adjustable period of time.<br />
Four options are available:<br />
• Off<br />
• 1 sec<br />
• 2 sec<br />
• 3 sec<br />
<strong>AgfaPhoto</strong> <strong>AgfaPhoto</strong> <strong>OPTIMA</strong> <strong>OPTIMA</strong> <strong>147</strong> <strong>147</strong><br />
Digital Zoom<br />
Use this setting to enable or disable the digital zoom<br />
function. When disabled, only the optical zoom is enabled.<br />
47
48<br />
<strong>AgfaPhoto</strong> <strong>AgfaPhoto</strong> <strong>OPTIMA</strong> <strong>OPTIMA</strong> <strong>147</strong> <strong>147</strong><br />
Slow Shutter ("B" or Bulb Mode)<br />
In Slow Shutter (B) mode, the shutter will remain open as<br />
long as the Shutter button is pressed. This gives you complete<br />
control over the duration of the exposure. (The slow<br />
shutter mode is available only in manual mode.)<br />
• <strong>Manual</strong> : To set a long exposure time between<br />
2~30 sec.<br />
The use of tripod is recommended for prolonged<br />
exposure.<br />
Movie Menu<br />
Mode : AUTO<br />
In the Movie Mode, press the button to access the<br />
Movie Setup menu.<br />
To configure each setting:<br />
1. In the Menu screen, switch between the Movie Setup<br />
or different Camera Setup pages using the Left/Right<br />
button, select the page with the function you want to<br />
adjust and press the Down button.<br />
2. Press the to enter the selection.
3. Press Up/Down button to select an option, or press<br />
Left button to return to the menu.<br />
4. Press button to confirm the setting and return to<br />
the previous layer.<br />
Refer to the following pages for more details about each<br />
setting.<br />
<strong>AgfaPhoto</strong> <strong>AgfaPhoto</strong> <strong>OPTIMA</strong> <strong>OPTIMA</strong> <strong>147</strong> <strong>147</strong><br />
Continuous AF<br />
After Continuous AF is turned on, the camera will adjust<br />
focus automatically in response to any camera or subject<br />
movement.<br />
49
50<br />
<strong>AgfaPhoto</strong> <strong>AgfaPhoto</strong> <strong>OPTIMA</strong> <strong>OPTIMA</strong> <strong>147</strong> <strong>147</strong><br />
Expo Metering (Exposure Metering)<br />
Set metering mode for various lighting conditions.<br />
Three options are available:<br />
• Spot<br />
• Center<br />
• AiAE (Artificial Intelligence AE)<br />
DIS<br />
Using this function can ensure the maximum stability of the<br />
screen when recording video.
Playback Menu<br />
Mode :<br />
In Playback mode, press the button to enter the<br />
Playback menu.<br />
Please refer to the following sections for detailed<br />
instructions on the various menu options.<br />
<strong>AgfaPhoto</strong> <strong>AgfaPhoto</strong> <strong>OPTIMA</strong> <strong>OPTIMA</strong> <strong>147</strong> <strong>147</strong><br />
Protect<br />
To prevent any pictures or videos from being accidentally<br />
erased, use this setting to lock one or all of the files.<br />
To protect/unprotect pictures or videos, press the MENU<br />
button while in playback.<br />
1. Use Up/Down arrow button to select Protection, press<br />
or Right button to enter the submenu.<br />
51
52<br />
<strong>AgfaPhoto</strong> <strong>AgfaPhoto</strong> <strong>OPTIMA</strong> <strong>OPTIMA</strong> <strong>147</strong> <strong>147</strong><br />
2. Use the Up/Down button to select One picture/video to<br />
protect or select ALL to protect all photos and movies<br />
stored on the active memory (memory card or internal<br />
memory - when memory card is inserted, the memory<br />
card is the active memory. Without the memory card,<br />
the internal memory is the active memory). Press<br />
button to confirm and enter photo/movie protection<br />
interface.<br />
3. Press the button to select Yes to lock. For locked<br />
picture/video, use Unlock option to unlock it.<br />
4. A key ( ) icon will appear on the top of the screen<br />
to indicate that the picture/video is protected.<br />
If you Reset the Settings in the menu option, all<br />
protection settings on pictures/videos will be<br />
cancelled.<br />
Delete<br />
There are three ways to delete files.<br />
• Delete One:<br />
1. In the Delete Option, select One and then press<br />
button.<br />
2. Press the Left/Right button to locate the photo or video<br />
to be deleted. Press the Up/Down button to select<br />
item (Yes: to delete the file, Back: to return to previous<br />
menu) and then press to confirm.
• Delete All:<br />
1. In the Delete option, select All and then press<br />
button.<br />
2. Use Up/Down button to select Yes to delete all files, or<br />
select Back to return to the menu.<br />
• Delete Date Folder:<br />
1. In the Delete Folder, press or button after selecting<br />
date folder.<br />
2. Use the Up/Down button to select Date Folder to be<br />
deleted, press to confirm, press the Up/Down<br />
button to select item (Yes: to delete the file, Back: to<br />
return to the menu) and then press to confirm.<br />
The “ ” indicator means a file is protected. File<br />
protection must be removed first before a file can be<br />
deleted.<br />
Deleting files will cause DPOF settings to be reset.<br />
DPOF (Digital Print Order Format)<br />
<strong>AgfaPhoto</strong> <strong>AgfaPhoto</strong> <strong>OPTIMA</strong> <strong>OPTIMA</strong> <strong>147</strong> <strong>147</strong><br />
DPOF allows you to record your selection of pictures that<br />
you would like to print, and will save your selection in the<br />
memory card, so that you can simply hand your memory<br />
card to a photo kiosk without having to tell them in person<br />
which photos you would like to print.<br />
53
54<br />
<strong>AgfaPhoto</strong> <strong>AgfaPhoto</strong> <strong>OPTIMA</strong> <strong>OPTIMA</strong> <strong>147</strong> <strong>147</strong><br />
Trim<br />
The Trim setting allows you select an area of the photo you<br />
want to keep and then save it as a new photo.<br />
To trim a picture:<br />
1. Select the Trim setting from the menu.<br />
2. Using the Left/Right buttons, locate the photo that you<br />
want to crop and have it displayed on the LCD.<br />
3. Select “Yes” to confirm cutting, use the zoom lever and<br />
direction key to select the part to be cut, then cut the<br />
photo you need.<br />
4. Press button and a ‘Save Changes?’ prompt will<br />
display. Select “O” to confirm changes and save it as a<br />
new image, or select “X” to cancel changes and return<br />
to the previous menu.<br />
The image can not be clipped again when it is clipped<br />
to 640X480.<br />
HDR-High Dynamic Range<br />
With the HDR function, pictures that may be overexposed<br />
may be corrected to optimize the highlights and lowlights<br />
captured to more accurately represent the real scene.<br />
1. Select HDR setting in<br />
while in Playback.<br />
menu by pressing Menu<br />
2. Press Left and Right button to find picture you want<br />
to optimize and then select Confirm to perform HDR<br />
optimization or select Return to go back to Playback<br />
menu.<br />
3. After HDR optimizing, the image will be saved as<br />
another file with the icon appearing as a prompt,<br />
the original file still remains in the memory.
Resize<br />
This setting allows you to resize a picture to a specified<br />
resolution, and saves it as a new picture.<br />
1. Select the Resize setting from the Playback menu as<br />
described previously.<br />
2. Use the Left/Right navigation buttons to select a<br />
picture to resize.<br />
3. Use the Up/Down navigation buttons to select a<br />
resolution (1024X768 or 640X480) to resize the image<br />
or Back to cancel and return to the Playback menu.<br />
4. Press the button to confirm the setting.<br />
Resizing an image creates a new file that contains<br />
the image in the size you select. The file with the<br />
original image also remains in memory.<br />
<strong>AgfaPhoto</strong> <strong>AgfaPhoto</strong> <strong>OPTIMA</strong> <strong>OPTIMA</strong> <strong>147</strong> <strong>147</strong><br />
Rotate<br />
You can use this setting to change the picture orientation<br />
of the picture.<br />
1. Select the Rotate setting from the Playback menu as<br />
described previously.<br />
2. Use the Left/Right navigation buttons to select a<br />
picture to rotate.<br />
3. Use the Up/Down navigation buttons to select the<br />
direction for rotation or Back to cancel and return to<br />
the Playback menu.<br />
4. Press the button to confirm the setting.<br />
The panorama picture and video cannot be rotated.<br />
Revolved file will replace the original one.<br />
55
56<br />
<strong>AgfaPhoto</strong> <strong>AgfaPhoto</strong> <strong>OPTIMA</strong> <strong>OPTIMA</strong> <strong>147</strong> <strong>147</strong><br />
Red-eye Reduction<br />
Use this setting to remove red-eyes in your photos.<br />
1. Select the Red-eye Reduction in Playback menu as<br />
described previously.<br />
2. Use the Left/Right button to select the picture from<br />
which the red-eye needs to be removed.<br />
3. Use the Up/Down navigation buttons to select Yes to<br />
fix the selected image or Back to cancel and return to<br />
the Playback menu.<br />
4. Press the button to confirm the setting.<br />
For best results, the face of the subject should be<br />
relatively large on the LCD screen, the subject should<br />
be facing the camera as front on as possible, and the<br />
red eyes should be as large as possible.<br />
If there is no red eyes in the image, press button<br />
after selecting “Yes”, such prompt will appear on the<br />
screen: red eye is not detected!<br />
Display Setup<br />
Mode:<br />
Press button in Playback mode to enter Display Setup<br />
menu.<br />
Refer to the following sections for details of every setting.
Slideshow<br />
This setting allows you to view all the stored pictures as a<br />
slideshow.<br />
1. Select Slide Show menu, press or Right button to<br />
enter the slide show setup interface.<br />
2. Press Up/Down button to select effect, interval, repeat<br />
or music, and press or Right button to enter and<br />
adjust settings. Press button to confirm settings.<br />
3. Use the Up/Down navigation buttons to select Start to<br />
run the slideshow or Cancel to return to the Playback<br />
menu.<br />
4. Press the button to confirm the setting.<br />
<strong>AgfaPhoto</strong> <strong>AgfaPhoto</strong> <strong>OPTIMA</strong> <strong>OPTIMA</strong> <strong>147</strong> <strong>147</strong><br />
Wallpaper Settings<br />
Use this setting to select your favorite picture to use as a<br />
background on the LCD screen.<br />
1. Press Down button to select the Wallpaper Setting menu.<br />
2. Press the or Right button to enter the background<br />
setup interface.<br />
57
58<br />
<strong>AgfaPhoto</strong> <strong>AgfaPhoto</strong> <strong>OPTIMA</strong> <strong>OPTIMA</strong> <strong>147</strong> <strong>147</strong><br />
Menu Wallpaper:<br />
Use Up/Down button to select the Menu Wallpaper option,<br />
press button to confirm or press Left button to return<br />
to last page, and press to exit the menu.<br />
• <strong>User</strong><br />
• <strong>AgfaPhoto</strong><br />
• Sparkling<br />
Startup Screen:<br />
Use Up/Down button to select the Startup Screen option,<br />
press to confirm or press Left button to return to last<br />
page, and press to exit the menu.<br />
• <strong>User</strong><br />
• <strong>AgfaPhoto</strong>
Set back to default:<br />
Use Up/Down button to select Back To Default, press<br />
to confirm or press Left button to return to last page, and<br />
press to exit the menu.<br />
• Yes<br />
• No<br />
<strong>AgfaPhoto</strong> <strong>AgfaPhoto</strong> <strong>OPTIMA</strong> <strong>OPTIMA</strong> <strong>147</strong> <strong>147</strong><br />
59
60<br />
<strong>AgfaPhoto</strong> <strong>AgfaPhoto</strong> <strong>OPTIMA</strong> <strong>OPTIMA</strong> <strong>147</strong> <strong>147</strong><br />
Setup Menu<br />
Mode : AUTO<br />
The Setup menu for the camera is available in all modes.<br />
Each menu page can be selected by pressing the<br />
button and switching between menus with the Left/Right<br />
button.<br />
To adjust the settings:<br />
1. Select the menu page with the function you want to<br />
adjust and press the Down button.<br />
2. Switch between different functions with the Up/Down<br />
button.<br />
3. Press the or the Right button to enter the<br />
submenu.<br />
After selecting a function option, you can press the<br />
Up button to return to the menu for other Camera<br />
Setup pages. Or you can press the Down button to<br />
switch to the next menu page.<br />
Refer to the following pages for more details about each<br />
setting.
Beep<br />
Use this setting to adjust the volume of beep when buttons<br />
are pressed and change the tones for Shutter button, selftimer,<br />
and power-on/power-off.<br />
To change this setting:<br />
1. Select the Beep setting from the Setup menu as<br />
described previously.<br />
2. Use the Up/Down navigation buttons to switch<br />
between volume, shutter, key, self-timer, and power<br />
fields.<br />
3. Press the or the Right button to enter, and Press<br />
the Up/Down button to adjust volume and change<br />
various sounds, then Press the button to confirm<br />
the setting.<br />
LCD Brightness<br />
<strong>AgfaPhoto</strong> <strong>AgfaPhoto</strong> <strong>OPTIMA</strong> <strong>OPTIMA</strong> <strong>147</strong> <strong>147</strong><br />
Use this setting to adjust the brightness of your LCD<br />
screen.<br />
1. Select the LCD Brightness setting from the Setup<br />
menu as described previously.<br />
2. Select auto or adjust the brightness level using the<br />
Left/Right button, and press the button to confirm<br />
the setting.<br />
61
62<br />
<strong>AgfaPhoto</strong> <strong>AgfaPhoto</strong> <strong>OPTIMA</strong> <strong>OPTIMA</strong> <strong>147</strong> <strong>147</strong><br />
Power Saver<br />
This setting allows you to save power and get the<br />
maximum possible running time for your battery. Follow<br />
the steps below to turn off the LCD screen and camera<br />
automatically after a period of inactivity.<br />
1. Select the Power Save setting from the Setup menu as<br />
described previously.<br />
2. Press the Up/Down button to select screen power and<br />
camera power, then Press the or the Right button<br />
to enter.<br />
3. Press the Up/Down button to adjust the selected item.<br />
Both items have the following options:<br />
• LCD Off :<br />
ON, 30 sec, 1 min, 2 min.<br />
• Camera Off :<br />
ON, 3 min, 5 min, 10 min.<br />
4. Press the button to confirm.<br />
Zone<br />
The Zone setting is a useful function on your overseas<br />
trips. This feature enables you to display the local time on<br />
the LCD screen while you are overseas.<br />
1. Select the Zone setting from the Setup menu as<br />
described previously. The world time screen appears.<br />
2. Use the Up/Down navigation buttons to switch<br />
between the hometown ( ) and travel destination<br />
( ) fields.<br />
3. Use the Left/Right navigation buttons to select a city<br />
close to the desired time zone. Then press the<br />
button to confirm.
Date/Time<br />
See “Setting the Date and Time“ section on page 16.<br />
Language<br />
See “Setting the Language“ section on page 15.<br />
File and Software<br />
<strong>AgfaPhoto</strong> <strong>AgfaPhoto</strong> <strong>OPTIMA</strong> <strong>OPTIMA</strong> <strong>147</strong> <strong>147</strong><br />
Format Memory<br />
Please note: formatting enables you to delete all contents<br />
in the memory card and built-in memory, including protected<br />
photo and movie files.<br />
To use this setting:<br />
1. Select the Format in File and Software menu.<br />
2. Use the Up/Down navigation buttons to select Yes or<br />
No. Then press the button to confirm.<br />
3. Select Yes, the camera will format the selected media.<br />
4. Please note that when you perform the Format<br />
Memory function, it only formats the active memory. If<br />
a memory card is inserted, the memory card is active<br />
and will be formatted. If there is no memory card, the<br />
internal memory is active and the internal memory will<br />
be formatted. Formatting the memory card will not<br />
automatically format the internal memory.<br />
63
64<br />
<strong>AgfaPhoto</strong> <strong>AgfaPhoto</strong> <strong>OPTIMA</strong> <strong>OPTIMA</strong> <strong>147</strong> <strong>147</strong><br />
File Numbering<br />
After you take a picture or video clip,the camera will save<br />
it in a sequential number. You can use this to reset the file<br />
numbering to 1. (When more than 999 images are on the<br />
memory card, the use of this features will have no effect.)<br />
1. Select the File Name in File and Software menu.<br />
2. Select the option with the Up/Down button and press<br />
the button for confirmation.<br />
Copy to Card (Copy internal memory to<br />
memory card)<br />
Use this setting to copy the files stored in the internal<br />
memory to the memory card.<br />
1. Select the Copy to memory card in File and Software<br />
menu.<br />
2. Use the Up/Down navigation buttons to select Yes or<br />
No. Then press the button to confirm.
Reset Settings<br />
Use this setting to restore the camera to its default<br />
settings.<br />
1. Select the Reset setting in File and Software menu.<br />
2. Use the Up/Down navigation buttons to select Yes or<br />
No. Then press the button to confirm.<br />
FW Version (Firmware Version)<br />
<strong>AgfaPhoto</strong> <strong>AgfaPhoto</strong> <strong>OPTIMA</strong> <strong>OPTIMA</strong> <strong>147</strong> <strong>147</strong><br />
Use this setting to view and update the current camera<br />
firmware version.<br />
1. Select the FW Version in File and Software menu.<br />
2. The screen will show the current firmware version.<br />
If there is a memory card with a firmware file, the<br />
camera will detect it and ask if you want to update the<br />
firmware.<br />
To update to the latest firmware version, you can go<br />
to the following website: www.reddotimaging.com<br />
and look under Support.<br />
65
66<br />
Transmission<br />
Connecting to a PC<br />
You can connect to the PC by using the USB interface on<br />
the camera or the USB cable. Once connected you can<br />
manually transfer the files or use software such as Arcsoft<br />
(included on disc).<br />
Setting the USB mode<br />
Since the camera’s USB port can be set to connect with<br />
either a PC or a Printer, the following steps will allow you to<br />
ensure that the camera is correctly configured to connect<br />
with a PC.<br />
1. Enter the camera setup menu and select USB Mode<br />
with the UP/Down button, then press the or the<br />
Right button to enter.<br />
2. Use the Up/Down navigation buttons to select PC.<br />
3. Press the button to confirm the setting.<br />
Transferring files to your PC<br />
The computer will automatically detect the camera as a<br />
removable drive. Double click on My Computer (or Computer)<br />
to access your computer drives. Locate the removable<br />
drive, browse the directory to locate your files and copy the<br />
folders/files as you normally do on a computer.<br />
To use the Arcsoft software to transfer files to your<br />
computer, please connect the camera to the computer and<br />
follow these steps:<br />
1. Start a computer to which ArcSoft software has been<br />
installed.<br />
2. Make sure both the camera and PC are turned on.<br />
3. Connect the camera with PC:<br />
• Connect USB interface of the camera with PC;<br />
• connect one end of attached USB cable with the<br />
camera, and connect another end with PC.
4. Please unplug USB after transmitting.<br />
If USB connection item is set as [Computer]:<br />
First remove the camera from the system as indicated<br />
below, then turn off and remove USB.<br />
If USB connection item is set as [Computer<br />
(PTP)]:<br />
Please operate according to the following steps: remove<br />
the camera from the system firstly, then turn off and<br />
remove USB.<br />
<strong>AgfaPhoto</strong> <strong>AgfaPhoto</strong> <strong>OPTIMA</strong> <strong>OPTIMA</strong> <strong>147</strong> <strong>147</strong><br />
Windows operating system (Windows 2000, Windows<br />
XP, Windows Vista, Windows 7.)<br />
Click [Remove hardware safely] icon in the taskbar, and<br />
remove USB according to the displayed menu.<br />
Macintosh<br />
Drag the untitled icon to the Trash. ("Untitled")<br />
67
68<br />
<strong>AgfaPhoto</strong> <strong>AgfaPhoto</strong> <strong>OPTIMA</strong> <strong>OPTIMA</strong> <strong>147</strong> <strong>147</strong><br />
Connecting to a PictBridge Compatible Printer<br />
PictBridge allows printing images from a<br />
memory card in a digital camera directly to a<br />
printer, regardless of brand. To find out if a<br />
printer is PictBridge compatible, simply look<br />
for the PictBridge logo on the packaging or<br />
check the manual for specifications.With<br />
the PictBridge function on your camera, you can print the<br />
captured photos directly with a PictBridge compatible<br />
printer using the supplied USB cable, without the need for<br />
a PC.<br />
Setting the USB mode<br />
Since the camera’s USB port can be set to connect with<br />
either a PC or a Printer, the following steps will ensure<br />
that the camera is correctly configured to connect with a<br />
Printer.<br />
1. Enter the camera setup menu and select USB cable<br />
with the Up/Down button, then press the or Right<br />
button to enter.<br />
2. Use the Up/Down button to select Printer.<br />
3. Press the button to confirm the setting.<br />
After the camera is reset, it will switch to PC mode<br />
automatically from USB mode.
Connecting the camera and printer.<br />
1. Make sure both the camera and printer are turned on.<br />
2. Connect one end of the supplied USB cable to the USB<br />
port on your camera.<br />
3. Connect the other end of the cable to the USB port on<br />
the printer.<br />
<strong>AgfaPhoto</strong> <strong>AgfaPhoto</strong> <strong>OPTIMA</strong> <strong>OPTIMA</strong> <strong>147</strong> <strong>147</strong><br />
If the camera is not connected to a PictBridge compatible<br />
printer, the following error message will appear on the LCD<br />
screen.<br />
The above error message will also appear if the USB<br />
mode were set incorrectly, in which case you should<br />
disconnect the USB cable, check the USB mode<br />
settings, ensure that the Printer is turned on, and<br />
then try connecting the USB cable again.<br />
69
70<br />
<strong>AgfaPhoto</strong> <strong>AgfaPhoto</strong> <strong>OPTIMA</strong> <strong>OPTIMA</strong> <strong>147</strong> <strong>147</strong><br />
Using the PictBridge Menu<br />
After setting the USB mode to Printer, the PictBridge menu<br />
will appear:<br />
Press the Up/Down button to select a menu item, then<br />
Press the or Right button to enter this item.<br />
Refer to the following sections for more detailed information<br />
on each setting.<br />
Print with date<br />
If you have set the date and time of your camera, the date<br />
and time will be recorded and saved with each photo you<br />
take.<br />
1. Select Print with date from the PictBridge menu. The<br />
following screen will appear:<br />
2. Use the Left/Right navigation buttons to scroll through<br />
the photos.
3. Use the Up/Down navigation buttons to select the<br />
number of prints for the current displayed photo.<br />
4. Press the button and the following screen will<br />
appear:<br />
5. Select Yes to confirm the printing, or Cancel. Then<br />
press the button.<br />
<strong>AgfaPhoto</strong> <strong>AgfaPhoto</strong> <strong>OPTIMA</strong> <strong>OPTIMA</strong> <strong>147</strong> <strong>147</strong><br />
Print without date<br />
Use this setting to print the photos without dates on them.<br />
1. Select Print without date from the PictBridge menu.<br />
The following screen will appear:<br />
2. Use the Left/Right navigation buttons to scroll through<br />
the images.<br />
3. Use the Up/Down navigation buttons to select the<br />
number of prints for the current displayed image.<br />
4. Press the button and the following screenwill<br />
appear:<br />
71
72<br />
<strong>AgfaPhoto</strong> <strong>AgfaPhoto</strong> <strong>OPTIMA</strong> <strong>OPTIMA</strong> <strong>147</strong> <strong>147</strong><br />
5. Select Yes to confirm the printing, or Cancel. Then<br />
press the button.<br />
Print index<br />
You can use this setting to print all indexes to show all the<br />
photos currently in your camera.<br />
1. Select Print index from the PictBridge menu. The<br />
following screen will appear:<br />
2. Select Yes to confirm the printing, or Cancel. Then<br />
press the button.
Print DPOF (Digital Print Order Format)<br />
To use DPOF printing, you must select the photos for printing<br />
using the DPOF settings before hand. see the “DPOF”<br />
section on page 53.<br />
1. Select Print DPOF from the PictBridge menu. The following<br />
screen will appear:<br />
2. Select Yes to confirm the printing, or Cancel. Then<br />
press the button.<br />
<strong>AgfaPhoto</strong> <strong>AgfaPhoto</strong> <strong>OPTIMA</strong> <strong>OPTIMA</strong> <strong>147</strong> <strong>147</strong><br />
Exit<br />
To exit the PictBridge menu, select Exit. The “Remove USB<br />
cable” message will be displayed.<br />
Disconnect the USB cable from the camera and printer.<br />
73
74<br />
<strong>AP</strong>PENDICES<br />
Specifications<br />
Design and specifications are subject to change without notice.<br />
Model name <strong>OPTIMA</strong> <strong>147</strong><br />
Active Image Sensor Pixels 14.14 Megapixels<br />
Total Image Sensor Pixels 14.48 Megapixels [1/2.3"CCD]<br />
Lens<br />
Focal Length 5.9mm (Wide) — 41.3mm (Tele)<br />
[35mm film equivalent] [32.9mm (Wide) — 230.3mm (Tele)]<br />
F number F3.4 (Wide) — F5.7 (Tele)<br />
Lens Construction 7 groups 9 elements<br />
Optical Zoom 7x<br />
Focusing Range<br />
Normal: (Wide) 60cm ~ ∞, (Tele) 80cm ~ ∞<br />
Macro: 5cm ~ ∞ (Wide Only)<br />
Anti-Handshake Digital Image Stabilization<br />
Digital Zoom 6x Digital Zoom (Combined Zoom: 42x)
Model name <strong>OPTIMA</strong> <strong>147</strong><br />
Number of<br />
Recording<br />
Pixels<br />
Still Image<br />
<strong>AgfaPhoto</strong> <strong>AgfaPhoto</strong> <strong>OPTIMA</strong> <strong>OPTIMA</strong> <strong>147</strong> <strong>147</strong><br />
14MP: 4320x3240, (3:2)12MP: 4320x2880, (16:9)10MP: 4320x2432, 8MP:<br />
3264x2448, 5MP: 2592x1944, 3MP: 2048x1536, 0.3MP: 640x480<br />
Movie 720p30, 720p15, VGA, QVGA<br />
Image Compression Best, Fine, Normal<br />
DCF, DPOF (Ver1.1) Support Yes<br />
File Format<br />
Shooting Modes<br />
Still Image Exif 2.2 (JPEG)<br />
Movie Movie Format: MOV (Motion JPEG), Audio: G.711 [Monaural]<br />
Detection Features Face, Smile, Blink<br />
Red-Eye Removal Yes<br />
HDR Yes (Post-Processing)<br />
Panorama<br />
Capture<br />
Still Image Yes (Horizontal)<br />
View Angle 0° ~ 135°<br />
Auto, <strong>Manual</strong>, Image Stabilization, Panorama, Movie, ASCN, Portrait, Scene<br />
(Sport, Landscape, Children, Indoor, Leaf, Beach, Text, Party, ID, Fisheye,<br />
Panning Shot, Photo Frame, Sketch, Snow, Sunset, Fireworks, Glass, Museum,<br />
Night Landscape, Night Portrait)<br />
75
76<br />
<strong>AgfaPhoto</strong> <strong>AgfaPhoto</strong> <strong>OPTIMA</strong> <strong>OPTIMA</strong> <strong>147</strong> <strong>147</strong><br />
Model name <strong>OPTIMA</strong> <strong>147</strong><br />
LCD Display 3.0inch (230k Pixels)<br />
ISO Sensitivity Auto, ISO64/100/200/400/800/1600<br />
AF Method Single AF, Multi-AF (TTL 9-point), Face-Detection, AF Assist Light (On/Off)<br />
Exposure Metering Method<br />
Exposure Control Method Program AE (AE-Lock Available)<br />
Exposure Compensation ±2EV in 1/3 Step Increments<br />
Artificial Intelligence AE (AiAE), Center-Weighted Average, Spot (Fixed to<br />
Center of Frame), Face AE<br />
Shutter Speed 1/2000 ~ 4 Seconds (<strong>Manual</strong>: 30 Seconds)<br />
Continuous Shooting Yes<br />
Playback Modes<br />
White Balance Control<br />
Single Photo, Index (9/16 Thumbnails), Slide Show, Movie, Date<br />
Zoom (Approx. 2x ~ 8x), Histogram Display<br />
Auto (AWB), Daylight, Cloudy, Fluorescent, Fluorescent CWF, Incandescent,<br />
<strong>Manual</strong>
Model name <strong>OPTIMA</strong> <strong>147</strong><br />
Internal Flash<br />
Flash Modes<br />
Shooting Range<br />
<strong>AgfaPhoto</strong> <strong>AgfaPhoto</strong> <strong>OPTIMA</strong> <strong>OPTIMA</strong> <strong>147</strong> <strong>147</strong><br />
Auto, Red-Eye Reduction, Forced Flash, No Flash, Slow Synchro, Red-Eye<br />
Reduction + Slow Synchro<br />
(Wide) Approx. 0.6 ~ 4.0m (ISO 800)<br />
(Tele) Approx. 0.8 ~ 2.5m (ISO 800)<br />
Internal Memory: Approx. 50 MB<br />
Recording Media<br />
Other Features<br />
SD/SDHC Card (Up to 32GB Support) [Nonsupport MMC Card]<br />
PictBridge, ExifPrint Support, Multi-Language Support (26 Languages)<br />
Jacks USB Arm<br />
Power Rechargeable Li-ion Battery SKL-50, 3.7V 880mAh, In-Camera Charging<br />
Shooting Capability (Battery Performance) Approx. 280 Shots (Based on CIPA Standards)<br />
Operation Environment Temperature: 0~40 o C, Humidity: 0~90%<br />
Dimensions (W x H x D) Approx. 101.5 x 56.9 x 24.0mm (Based on CIPA Standards)<br />
Weight Approx. 129g (Body only)<br />
Supplied Accessories<br />
Rechargeable Li-ion Battery, AC adapter, USB Extension Cable<br />
Wrist Strap, CD-ROM<br />
Quick Start Guide, Warranty Card<br />
77
78<br />
<strong>AgfaPhoto</strong> <strong>AgfaPhoto</strong> <strong>OPTIMA</strong> <strong>OPTIMA</strong> <strong>147</strong> <strong>147</strong><br />
Error messages<br />
Messages Explanation<br />
Card error • The memory card is not formatted.<br />
Card full • The memory card is full and cannot store any new images.<br />
Picture error<br />
• The picture was not captured correctly.<br />
• The picture is damaged.<br />
No picture • There are no images in the memory card or in the internal memory.<br />
Lens error • The lens is probably stuck and the camera will power off automatically.<br />
System error • Unexpected error encountered.<br />
Write protect • The write protection switch in the memory card is set to the “LOCK” position.<br />
Out of the range<br />
• When pictures were taken in Panorama mode, the direction of movement was<br />
incorrect or the angle was outside the range of the internal settings.
Messages Explanation<br />
Card is not formatted, format? • Confirm whether the memory card should be formatted.<br />
This image cannot be deleted • The picture or video you are trying to delete is protected.<br />
Warning!! Camera recording, please<br />
wait.<br />
Warning!! Battery exhausted. • The battery is out of charge.<br />
<strong>AgfaPhoto</strong> <strong>AgfaPhoto</strong> <strong>OPTIMA</strong> <strong>OPTIMA</strong> <strong>147</strong> <strong>147</strong><br />
• No other actions allowed to perform during video/audio recording.<br />
This file cannot be played back • The picture format cannot be recognized by the camera.<br />
No connection • The camera is not connected to the printer correctly.<br />
Print error • There is a problem with camera or printer.<br />
Cannot print<br />
• Check that the printer is out of paper or out of ink.<br />
• Check if the printer has a paper jam.<br />
79
80<br />
<strong>AgfaPhoto</strong> <strong>AgfaPhoto</strong> <strong>OPTIMA</strong> <strong>OPTIMA</strong> <strong>147</strong> <strong>147</strong><br />
Troubleshooting<br />
Problem Possible causes Solution<br />
Camera does not turn on.<br />
Camera turns off suddenly during<br />
operation.<br />
The picture is blurred.<br />
Images and video files cannot be<br />
saved.<br />
No picture is taken when pressing<br />
the Shutter button.<br />
• The battery has run out.<br />
• The battery is not inserted correctly.<br />
• Replace with a fully charged battery.<br />
• The battery has run out. • Replace with a fully charged battery.<br />
• The lens is dirty.<br />
• appears when taking<br />
pictures.<br />
• The memory card is full.<br />
• The memory card is full.<br />
• There is no available space to<br />
store the files.<br />
• The mode dial is in Playback<br />
mode.<br />
• Use a soft cloth to clean the lens on your<br />
camera<br />
• Use the Image Stabilization mode.<br />
• Replace the memory card with a new one.<br />
• Delete unwanted images from the memory<br />
card.<br />
• Unlock the memory card.<br />
• Replace the memory card with a new one or<br />
clean off current memory card.<br />
• Delete unwanted images.<br />
• The memory card is locked.<br />
• Change to Shooting mode.
Problem Possible causes Solution<br />
Images cannot print from the<br />
connected printer.<br />
• The camera is not connected to<br />
the printer correctly.<br />
• The printer is not PictBridge<br />
compatible.<br />
• The printer is out of paper or out<br />
of ink.<br />
• The paper is jammed.<br />
Write to memory card is slow • Movie recording is set in an HD<br />
format setting, but memory card is<br />
either not an HD capable memory<br />
card or not formatted properly.<br />
Cannot write to the memory card • Memory card is in write-protection<br />
state.<br />
• When shooting or recording,<br />
writeprotection interruption<br />
phenomenon in the memory card<br />
(such as due to too slow storage<br />
etc.) leads that you can not<br />
continue to shoot or record.<br />
Too many movies to process • The number of pictures or binders<br />
in the memory card exceeded the<br />
specifications, so the playback of<br />
data folder can not be displayed.<br />
Exceed maximum folder number in<br />
the memory card<br />
• “Yes” is selected for “File No”<br />
menu in the Menu (see P64 for<br />
detailed instructions)..<br />
<strong>AgfaPhoto</strong> <strong>AgfaPhoto</strong> <strong>OPTIMA</strong> <strong>OPTIMA</strong> <strong>147</strong> <strong>147</strong><br />
• Check the connection between the camera<br />
and printer.<br />
• Use a PictBridge compatible printer.<br />
• Load some paper in the printer.<br />
• Replace the ink cartridge in the printer.<br />
• Remove the jammed paper.<br />
• Ensure the memory card is an SDHC type<br />
card and ensure it has been formatted by<br />
this camera.<br />
• Please replace a memory card.<br />
• Please shoot again.<br />
• Delete needless files.<br />
• Transfer the files in the memory card to<br />
other area.<br />
• Transfer the files in the memory card to<br />
other area.<br />
• Set “No” for “File No”.<br />
81
82<br />
<strong>AgfaPhoto</strong> <strong>OPTIMA</strong> <strong>147</strong><br />
Customer Care<br />
More information on the complete <strong>AgfaPhoto</strong> digital<br />
camera product range can be found at<br />
www.reddotimaging.com. / www.agfaphoto.com.<br />
Service & Repair Hotline (USA):<br />
1-855-243-2937 (from a landline only)<br />
Service & Repair (UK):<br />
+44 1908 488676<br />
Online Service / International contact:<br />
customersupport@reddotimaging.com<br />
For repair and service in all other countries, please refer to<br />
the warranty pamphlet for additional information.<br />
Manufactured by<br />
RedDot Imaging, 2275 NW 84thAve, Doral, FL 33122.<br />
<strong>AgfaPhoto</strong> is used under license of Agfa-Gevaert NV & Co.<br />
KG or Agfa-Gevaert NV. Neither Agfa-Gevaert NV & Co KG<br />
nor Agfa-Gevaert NV manufacture this product or provide<br />
any product warranty or support. For service, support and<br />
warranty information, contact the distributor or manufacturer.<br />
All other brands and product names are registered<br />
trademarks of their respective owners. Product design and<br />
technical features can be changed without notice. Contact:<br />
<strong>AgfaPhoto</strong> Holding GmbH, www.agfaphoto.com
<strong>AgfaPhoto</strong> <strong>OPTIMA</strong> <strong>147</strong><br />
<strong>AgfaPhoto</strong> is used under license of Agfa-Gevaert NV & Co. KG or Agfa-Gevaert NV. Neither Agfa-Gevaert NV & Co. KG nor Agfa-Gevaert NV manufacture this product or provide any product warranty or support.<br />
For service, support and warranty information, contact the distributor or manufacturer. For service, support and warranty information, contact the distributor or manufacturer. All other brands and product<br />
names are registered trademarks of their respective owners. Product design and technical features can be changed without notice.<br />
<strong>AgfaPhoto</strong> Holding GmbH, www.agfaphoto.com<br />
83