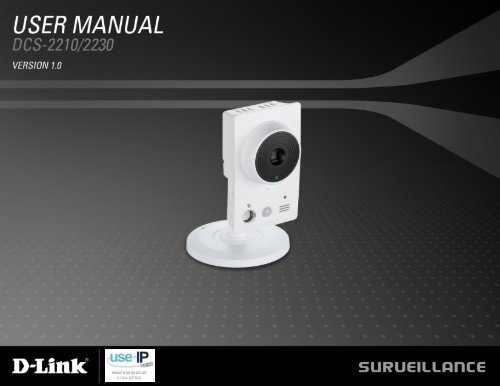
D-Link DCS-2210 Full HD Cube IP Camera User Manual - Use-IP
D-Link DCS-2210 Full HD Cube IP Camera User Manual - Use-IP
D-Link DCS-2210 Full HD Cube IP Camera User Manual - Use-IP
You also want an ePaper? Increase the reach of your titles
YUMPU automatically turns print PDFs into web optimized ePapers that Google loves.
<br />
Product Overview........................................................4<br />
Package Contents....................................................4<br />
System Requirements.............................................. 4<br />
Hardware Overview......................................................5<br />
Front...................................................................5<br />
Rear....................................................................6<br />
Side....................................................................7<br />
Configuration with Wizard........................................ 8<br />
Configuration..............................................................13<br />
Web-based Configuration Utility............................. 13<br />
D-ViewCam Setup Wizard................................15<br />
Live Video..............................................................17<br />
Setup...................................................................... 19<br />
Wizard..............................................................19<br />
Internet Connection Setup Wizard................... 19<br />
Motion Detection Setup Wizard........................ 22<br />
Network Setup.................................................. 24<br />
Wireless Setup(<strong>DCS</strong>-2230 only)...................... 27<br />
Dynamic DNS................................................... 29<br />
Image Setup..................................................... 30<br />
Audio and Video............................................... 32<br />
Preset............................................................... 34<br />
Motion Detection.............................................. 36<br />
Time and Date.................................................. 37<br />
Event Setup...................................................... 38<br />
Table of Contents<br />
Application.....................................................39<br />
Add Server.....................................................40<br />
Add Media.....................................................41<br />
Add Event......................................................43<br />
Add Recording...............................................45<br />
SD Card............................................................47<br />
Advanced...............................................................48<br />
Digital Input/Output........................................... 48<br />
ICR and IR........................................................ 49<br />
HTTPS..............................................................50<br />
Access List....................................................... 51<br />
Maintenance...........................................................52<br />
Device Management........................................ 52<br />
Backup and Restore......................................... 53<br />
Firmware Upgrade............................................ 54<br />
Status..................................................................... 55<br />
Device Info.......................................................55<br />
Logs..................................................................56<br />
Help..................................................................57<br />
Appendix.....................................................................58<br />
DI/DO Input Specifications..................................... 58<br />
Technical Specifications......................................... 59<br />
Technical Specifications......................................... 60<br />
D-<strong>Link</strong> <strong>DCS</strong>-<strong>2210</strong>/2230 <strong><strong>Use</strong>r</strong> <strong>Manual</strong><br />
2
<br />
Preface<br />
D-<strong>Link</strong> reserves the right to revise this publication and to make changes in the contents hereof without obligation to notify any person or<br />
organization of such revisions or changes.<br />
<strong>Manual</strong> Revisions<br />
Revision Date Description<br />
1.0 June 14, 2011 <strong>DCS</strong>-<strong>2210</strong>/2230 Revision A1 with firmware version 1.00<br />
Trademarks<br />
D-<strong>Link</strong> and the D-<strong>Link</strong> logo are trademarks or registered trademarks of D-<strong>Link</strong> Corporation or its subsidiaries in the United States or<br />
other countries. All other company or product names mentioned herein are trademarks or registered trademarks of their respective<br />
companies.<br />
Copyright © 2011 D-<strong>Link</strong> Corporation.<br />
All rights reserved. This publication may not be reproduced, in whole or in part, without prior expressed written permission from D-<strong>Link</strong><br />
Systems, Inc.<br />
D-<strong>Link</strong> <strong>DCS</strong>-<strong>2210</strong>/2230 <strong><strong>Use</strong>r</strong> <strong>Manual</strong><br />
3
Product Overview<br />
Package Contents<br />
• <strong>DCS</strong>-<strong>2210</strong> or <strong>DCS</strong>-2230 Network <strong>Camera</strong><br />
• CAT5 Ethernet cable<br />
• Power adapter<br />
• <strong>Camera</strong> stand<br />
• CD-ROM with <strong><strong>Use</strong>r</strong> <strong>Manual</strong> and software<br />
• Quick Installation Guide<br />
If any of the above items are missing, please contact your reseller.<br />
System Requirements<br />
• Existing 10/100 Ethernet-based network or 802.11n/g wireless network(Wireless for <strong>DCS</strong>-2230 )<br />
• Computer with Windows 7/Vista/XP for <strong>Camera</strong> Setup Wizard<br />
• Internet Explorer, Firefox, Opera, or other web browser for web interface (Internet Explorer<br />
recommended for full functionality)<br />
If any of the above items are missing, please contact your reseller.<br />
D-<strong>Link</strong> <strong>DCS</strong>-<strong>2210</strong>/2230 <strong><strong>Use</strong>r</strong> <strong>Manual</strong><br />
4
Hardware Overview<br />
Hardware Overview<br />
Front<br />
Status LED<br />
Indicates the camera's current status<br />
ICR Sensor<br />
The IR-Cut Removable sensor judges<br />
lighting conditions and switches from<br />
color to infrared accordingly<br />
<strong>Camera</strong> Lens<br />
Records video of the surrounding area<br />
Microphone<br />
Records audio from the surrounding<br />
area<br />
Infrared LED<br />
<strong>Use</strong>d to illuminate the camera's<br />
field of view at night<br />
WPS LED(<strong>DCS</strong>-2230 only)<br />
WPS status indicator LED<br />
PIR<br />
Passive Infrared sensor for motion<br />
detect<br />
Speaker<br />
Audio output<br />
D-<strong>Link</strong> <strong>DCS</strong>-<strong>2210</strong>/2230 <strong><strong>Use</strong>r</strong> <strong>Manual</strong><br />
5
Hardware Overview<br />
Rear<br />
Ethernet<br />
RJ45 connector for Ethernet (<strong>DCS</strong>-<strong>2210</strong><br />
support PoE which can also be used to<br />
power the camera)<br />
Power Connector<br />
Connects to the included DC 5 V<br />
power adapter<br />
I/O Connector<br />
I/O connectors for external devices<br />
WPS Button (<strong>DCS</strong>-2230 only)<br />
Press this button, then press the WPS<br />
button on your router to set up a wireless<br />
connection automatically<br />
Adjustment Ring<br />
Tighten or loosen the adjustment<br />
ring to adjust the camera's position<br />
Reset<br />
Press and hold this button for 10 seconds<br />
to reset the camera<br />
Base Holes<br />
Can be used with cable ties to<br />
attach camera to a surface<br />
D-<strong>Link</strong> <strong>DCS</strong>-<strong>2210</strong>/2230 <strong><strong>Use</strong>r</strong> <strong>Manual</strong><br />
6
Hardware Overview<br />
Side<br />
Micro SD Card slot<br />
Local storage for storing<br />
recorded image and video<br />
D-<strong>Link</strong> <strong>DCS</strong>-<strong>2210</strong>/2230 <strong><strong>Use</strong>r</strong> <strong>Manual</strong><br />
7
Hardware Overview<br />
Configuration with Wizard<br />
Insert the <strong>DCS</strong>-<strong>2210</strong>/<strong>DCS</strong>-2230 CD into your computer's CD-ROM drive to begin the installation. If the Autorun function on your<br />
computer is disabled, or if the D-<strong>Link</strong> Launcher fails to start automatically, click Start > Run. Type D:\autorun.exe, where D: represents<br />
the drive letter of your CD-ROM drive.<br />
Click Installation Wizard to begin the installation.<br />
After clicking Setup Wizard, the window on the right will open.<br />
Click Next to continue.<br />
D-<strong>Link</strong> <strong>DCS</strong>-<strong>2210</strong>/2230 <strong><strong>Use</strong>r</strong> <strong>Manual</strong><br />
8
Hardware Overview<br />
Click Yes to accept the License Agreement.<br />
To start the installation process, click Next.<br />
Note: The installation may take several minutes to finish.<br />
D-<strong>Link</strong> <strong>DCS</strong>-<strong>2210</strong>/2230 <strong><strong>Use</strong>r</strong> <strong>Manual</strong><br />
9
Hardware Overview<br />
Click Finish to complete the installation.<br />
Click on the D-<strong>Link</strong> Setup Wizard SE icon that was created in your Windows<br />
Start menu.<br />
Start > D-<strong>Link</strong> > Setup Wizard SE<br />
D-<strong>Link</strong> <strong>DCS</strong>-<strong>2210</strong>/2230 <strong><strong>Use</strong>r</strong> <strong>Manual</strong><br />
10
Hardware Overview<br />
The Setup Wizard will appear and display the MAC address and <strong>IP</strong> address of<br />
your camera(s). If you have a DHCP server on your network, a valid <strong>IP</strong> Address<br />
will be displayed. If your network does not use a DHCP server, the network<br />
camera's default static <strong>IP</strong> address 192.168.0.20 will be displayed.<br />
Click the Wizard button to continue.<br />
Enter the Admin ID and password. When logging in for the first time, the default<br />
Admin ID is admin with the password left blank.<br />
Click Next, to proceed to the next page.<br />
D-<strong>Link</strong> <strong>DCS</strong>-<strong>2210</strong>/2230 <strong><strong>Use</strong>r</strong> <strong>Manual</strong><br />
11
Hardware Overview<br />
Select DHCP if your camera obtains an <strong>IP</strong> address automatically when it boots up.<br />
Select static <strong>IP</strong> if the camera will use the same <strong>IP</strong> address each time it is started.<br />
Click Next, to proceed to the next page.<br />
Take a moment to confirm your settings and click Restart.<br />
D-<strong>Link</strong> <strong>DCS</strong>-<strong>2210</strong>/2230 <strong><strong>Use</strong>r</strong> <strong>Manual</strong><br />
12
Configuration<br />
Web-based Configuration Utility<br />
This section explains how to configure your new D-<strong>Link</strong> Network <strong>Camera</strong> using the Web-based Configuration Utility.<br />
Click on the D-<strong>Link</strong> Setup Wizard SE icon that was created in your Windows<br />
Start menu.<br />
Start > D-<strong>Link</strong> > Setup Wizard SE<br />
Select the camera and click the button labeled "<strong>Link</strong>" to access the web<br />
configuration.<br />
The Setup Wizard will automatically open your web browser to the <strong>IP</strong> address of<br />
the camera.<br />
Alternatively, you may manually open a browser and enter the <strong>IP</strong> address of the<br />
camera: 192.168.0.20<br />
D-<strong>Link</strong> <strong>DCS</strong>-<strong>2210</strong>/2230 <strong><strong>Use</strong>r</strong> <strong>Manual</strong><br />
13
Configuration<br />
Enter admin as the default username and leave the password blank. Click OK to<br />
continue.<br />
This section shows your camera’s live video. You can select your video profile and<br />
view or operate the camera. For additional information about web configuration,<br />
please refer to the user manual included on the CD-ROM or the D-<strong>Link</strong> website.<br />
D-<strong>Link</strong> <strong>DCS</strong>-<strong>2210</strong>/2230 <strong><strong>Use</strong>r</strong> <strong>Manual</strong><br />
14
Configuration<br />
D-ViewCam Setup Wizard<br />
D-ViewCam software is included for the administrator to manage multiple<br />
D-<strong>Link</strong> <strong>IP</strong> cameras remotely. You may use the software to configure all<br />
the advanced settings for your cameras. D-ViewCam is a comprehensive<br />
management tool for <strong>IP</strong> surveillance.<br />
Insert the CD-ROM into the CD-ROM drive. Click "Install D-ViewCam<br />
Software" from menu, and select "D-ViewCam" to install the VMS software.<br />
Follow the Installation Wizard to install D-ViewCam.<br />
D-<strong>Link</strong> <strong>DCS</strong>-<strong>2210</strong>/2230 <strong><strong>Use</strong>r</strong> <strong>Manual</strong><br />
15
Configuration<br />
Click Finish to complete the installation.<br />
To start D-ViewCam, select Start > All Programs > D-<strong>Link</strong> D-ViewCam ><br />
Main Console.<br />
For more detail operation of using D-ViewCam software, please refer to<br />
D-ViewCam <strong>Manual</strong>.<br />
D-<strong>Link</strong> <strong>DCS</strong>-<strong>2210</strong>/2230 <strong><strong>Use</strong>r</strong> <strong>Manual</strong><br />
16
Configuration<br />
Live Video<br />
This section shows your camera’s live video. You may select any of the available icons listed below to operate the camera. You may<br />
also select your language using the drop-down menu on the left side of the screen.<br />
You can zoom in and out on the live video image using your mouse. Right-click to zoom out or left-click to zoom in on the image.<br />
Digital Input<br />
Indicator<br />
Motion Trigger<br />
Indicator<br />
Recording<br />
Indicator<br />
This indicator will change color when a digital<br />
input signal is detected.<br />
This indicator will change color when a trigger<br />
event occurs.<br />
Note: The video motion feature for your<br />
camera must be enabled.<br />
When a recording is in progress, this indicator<br />
will change color.<br />
Video Profile 1<br />
Video Profile 2<br />
Video Profile 3<br />
<strong>Full</strong> screen mode<br />
Taking a Snapshot<br />
Recording a Video Clip<br />
Set a Storage Folder<br />
Listen/Stop Listening<br />
Talk/Stop Talking<br />
Start/Stop Digital Output<br />
Control Pad<br />
This control pad can be used to pan, tilt, and zoom<br />
within the camera's predefined view area, if one<br />
has been defined.<br />
D-<strong>Link</strong> <strong>DCS</strong>-<strong>2210</strong>/2230 <strong><strong>Use</strong>r</strong> <strong>Manual</strong><br />
17
Configuration<br />
Go To:<br />
(Preset List)<br />
SD Status:<br />
IO Status:<br />
PTZ Control:<br />
ePTZ Speed:<br />
Global View:<br />
Language:<br />
If any presets have been defined, selecting a preset from this list<br />
will display it.<br />
This option displays the status of the SD card. If no SD card has<br />
been inserted, this screen will display the message "Card Invalid."<br />
This option displays the status of your I/O device if a device has<br />
been connected.<br />
This camera uses electronic pan/tilt/zoom (ePTZ) to select and<br />
view areas of interest in the field of view. Please see page 32 for<br />
information about setting the frame size and view window area.<br />
You may select a value between 0 and 64. 0 is the slowest and 64<br />
is the fastest.<br />
This window indicates the total field of view (FOV) of the camera.<br />
The red box indicates the visible region of interest (ROI).<br />
You may select the interface language using this menu.<br />
Auto Pan<br />
Stop<br />
Preset Path<br />
Starts the automatic<br />
panning function. The<br />
ROI will pan from back<br />
and forth within the<br />
FOV<br />
Stops the camera<br />
ePTZ motion<br />
Starts the camera's<br />
motion along the<br />
predefined path<br />
D-<strong>Link</strong> <strong>DCS</strong>-<strong>2210</strong>/2230 <strong><strong>Use</strong>r</strong> <strong>Manual</strong><br />
18
Configuration<br />
Setup<br />
Wizard<br />
To configure your Network <strong>Camera</strong>, click Internet Connection<br />
Setup Wizard. Alternatively, you may click <strong>Manual</strong> Internet<br />
Connection Setup to manually configure your Network <strong>Camera</strong> and<br />
skip to page 22.<br />
To quickly configure your Network <strong>Camera</strong>’s motion detection<br />
settings, click Motion Detection Setup Wizard. If you want to<br />
enter your settings without running the wizard, click <strong>Manual</strong> Motion<br />
Detection Setup and skip to page 27.<br />
Internet Connection Setup Wizard<br />
This wizard will guide you through a step-by-step process to<br />
configure your new D-<strong>Link</strong> <strong>Camera</strong> and connect the camera to the<br />
internet. Click Next to continue.<br />
Note: Select DHCP if you are unsure of which settings to choose.<br />
Click Next to continue.<br />
D-<strong>Link</strong> <strong>DCS</strong>-<strong>2210</strong>/2230 <strong><strong>Use</strong>r</strong> <strong>Manual</strong><br />
19
Configuration<br />
Select Static <strong>IP</strong> if your Internet Service Provider has provided you with<br />
connection settings, or if you wish to set a static address within your<br />
home network. Enter the correct configuration information and click Next<br />
to continue.<br />
If you are using PPPoE, select Enable PPPoE and enter your user name<br />
and password, otherwise click Next to continue.<br />
If you have a Dynamic DNS account and would like the camera to update<br />
your <strong>IP</strong> address automatically, Select Enable DDNS and enter your host<br />
information. Click Next to continue.<br />
Enter a name for your camera and click Next to continue.<br />
D-<strong>Link</strong> <strong>DCS</strong>-<strong>2210</strong>/2230 <strong><strong>Use</strong>r</strong> <strong>Manual</strong><br />
20
Configuration<br />
Configure the correct time to ensure that all events will be<br />
triggered as scheduled. Click Next to continue.<br />
If you have selected DHCP, you will see a summary of your<br />
settings, including the camera's <strong>IP</strong> address. Please write down<br />
all of this information as you will need it in order to access your<br />
camera.<br />
Click Apply to save your settings.<br />
D-<strong>Link</strong> <strong>DCS</strong>-<strong>2210</strong>/2230 <strong><strong>Use</strong>r</strong> <strong>Manual</strong><br />
21
Configuration<br />
This wizard will guide you through a step-by-step process to configure your<br />
camera's motion detection functions.<br />
Click Next to continue.<br />
Motion Detection Setup Wizard<br />
Step 1<br />
This step will allow you to enable or disable motion detection, specify the<br />
detection sensitivity, and adjust the camera’s ability to detect movement.<br />
You may specify whether the camera should capture a snapshot or a video<br />
clip when motion is detected.<br />
Please see the Motion Detection section on page 27 for information about<br />
how to configure motion detection.<br />
Step 2<br />
This step allows you to enable motion detection based on a customized<br />
schedule. Specify the day and hours. You may also choose to always<br />
record motion.<br />
D-<strong>Link</strong> <strong>DCS</strong>-<strong>2210</strong>/2230 <strong><strong>Use</strong>r</strong> <strong>Manual</strong><br />
22
Configuration<br />
Step 3<br />
This step allows you to specify how you will receive event notifications<br />
from your camera. You may choose not to receive notifications, or to<br />
receive notifications via e-mail or FTP.<br />
Please enter the relevant information for your e-mail or FTP account.<br />
Click Next to continue.<br />
Step 4<br />
You have completed the Motion Detection Wizard.<br />
Please verify your settings and click Apply to save them.<br />
Please wait a few moments while the camera saves your settings and<br />
restarts.<br />
D-<strong>Link</strong> <strong>DCS</strong>-<strong>2210</strong>/2230 <strong><strong>Use</strong>r</strong> <strong>Manual</strong><br />
23
Configuration<br />
Network Setup<br />
<strong>Use</strong> this section to configure the network connections for your camera. All relevant information must be entered accurately. After<br />
making any changes, click the Save Settings button to save your changes.<br />
LAN Settings:<br />
DHCP:<br />
Static <strong>IP</strong> Address:<br />
This section lets you configure settings for your local<br />
area network.<br />
Select this connection if you have a DHCP server<br />
running on your network and would like your camera<br />
to obtain an <strong>IP</strong> address automatically.<br />
You may obtain a static or fixed <strong>IP</strong> address and<br />
other network information from your network<br />
administrator for your camera. A static <strong>IP</strong> address<br />
may simplify access to your camera in the future.<br />
<strong>IP</strong> Address:<br />
Enter the fixed <strong>IP</strong> address in this field.<br />
Subnet Mask:<br />
Default Gateway:<br />
Primary DNS:<br />
Secondary DNS:<br />
This number is used to determine if the destination<br />
is in the same subnet. The default value is<br />
255.255.255.0.<br />
The gateway used to forward frames to destinations<br />
in a different subnet. Invalid gateway settings may<br />
cause the failure of transmissions to a different<br />
subnet.<br />
The primary domain name server translates names<br />
to <strong>IP</strong> addresses.<br />
The secondary DNS acts as a backup to the primary<br />
DNS.<br />
D-<strong>Link</strong> <strong>DCS</strong>-<strong>2210</strong>/2230 <strong><strong>Use</strong>r</strong> <strong>Manual</strong><br />
24
Configuration<br />
Enable UPnP:<br />
Enable UPnP Port Forwarding:<br />
Enabling this setting allows your camera to be<br />
configured as a UPnP device on your network.<br />
Enabling this setting allows the camera to add port<br />
forwarding entries into the router automatically on a<br />
UPnP capable network.<br />
Enable PPPoE:<br />
Enable this setting if your network uses PPPoE.<br />
<strong><strong>Use</strong>r</strong> Name / Password:<br />
Enter the username and password for your PPPoE<br />
account. Re-enter your password in the Confirm<br />
Password field. You may obtain this information<br />
from your ISP.<br />
HTTP Port:<br />
The default port number is 80.<br />
Access Name for Stream 1~3:<br />
HTTPS Port:<br />
RTSP Port:<br />
The default name is video#.mjpg, where # is the<br />
number of the stream.<br />
You may use a PC with a secure browser to<br />
connect to the HTTPS port of the camera. The<br />
default port number is 443.<br />
The port number that you use for RTSP streaming<br />
to mobile devices, such as mobile phones or PDAs.<br />
The default port number is 554. You may specify the<br />
address of a particular stream. For instance, live1.<br />
sdp can be accessed at rtsp://x.x.x.x/video1.sdp<br />
where the x.x.x.x represents the ip address of your<br />
camera.<br />
D-<strong>Link</strong> <strong>DCS</strong>-<strong>2210</strong>/2230 <strong><strong>Use</strong>r</strong> <strong>Manual</strong><br />
25
Configuration<br />
Maximum Upload/Download<br />
Bandwidth:<br />
Specifying the maximum download/upload bandwidth<br />
for each socket can be useful when connecting your<br />
device to a busy or heavily loaded network. Entering<br />
a value of '0' indicates that the camera should not<br />
monitor bandwidth. Specifying other values will limit<br />
the camera's transfer speed to the specified number<br />
of kilobytes per second.<br />
D-<strong>Link</strong> <strong>DCS</strong>-<strong>2210</strong>/2230 <strong><strong>Use</strong>r</strong> <strong>Manual</strong><br />
26
Configuration<br />
Wireless Setup(<strong>DCS</strong>-2230 only)<br />
This section allows you to set up and configure the wireless settings on your camera. After making any changes, click the Save<br />
Settings button to save your changes.<br />
Site Survey:<br />
SSID:<br />
Wireless Mode:<br />
Channel:<br />
Authentication:<br />
Encryption:<br />
Click the Rescan button to scan for available wireless<br />
networks. After scanning, you can use the dropdown<br />
box to select an available wireless network. The<br />
related information (SSID, Wireless Mode, Channel,<br />
Authentication, Encryption) will be automatically<br />
filled in for you.<br />
Enter the SSID of the wireless access point you<br />
wish to use.<br />
<strong>Use</strong> the dropdown box to select the mode of the<br />
wireless network you wish to connect to.<br />
Infrastructure is normally used to connect to an<br />
access point or router. Ad-Hoc is usually used to<br />
connect directly to another computer.<br />
If you are using Ad Hoc mode, select the channel<br />
of the wireless network you wish to connect to, or<br />
select Auto.<br />
Select the authentication you use on your wireless<br />
network - Open, Shared, WPA-PSK, or WPA2-PSK.<br />
If you use WPA-PSK or WPA2-PSK authentication,<br />
you will need to specify whether your wireless<br />
network uses TK<strong>IP</strong> or AES encryption. If you use<br />
Open or Shared authentication, WEP encryption<br />
should be setting.<br />
D-<strong>Link</strong> <strong>DCS</strong>-<strong>2210</strong>/2230 <strong><strong>Use</strong>r</strong> <strong>Manual</strong><br />
27
Configuration<br />
Key: If you use WEP, WPA-PSK, or WPA2-PSK<br />
authentication, enter the Key (also known as<br />
password) used for your wireless network.<br />
D-<strong>Link</strong> <strong>DCS</strong>-<strong>2210</strong>/2230 <strong><strong>Use</strong>r</strong> <strong>Manual</strong><br />
28
Configuration<br />
Dynamic DNS<br />
DDNS (Dynamic Domain Name Server) will hold a DNS host name and synchronize the public <strong>IP</strong> address of the modem when it has<br />
been modified. A user name and password are required when using the DDNS service. After making any changes, click the Save<br />
Settings button to save your changes.<br />
Enable DDNS:<br />
Select this checkbox to enable the DDNS function.<br />
Server Address:<br />
Select your Dynamic DNS provider from the pull<br />
down menu or enter the server address manually.<br />
Host Name:<br />
Enter the host name of the DDNS server.<br />
<strong><strong>Use</strong>r</strong> Name:<br />
Password:<br />
Enter the user name or e-mail used to connect to<br />
your DDNS account.<br />
Enter the password used to connect to your DDNS<br />
server account.<br />
Timeout:<br />
Enter the DNS Timeout values you wish to use.<br />
Status:<br />
Indicates the connection status, which is<br />
automatically determined by the system.<br />
D-<strong>Link</strong> <strong>DCS</strong>-<strong>2210</strong>/2230 <strong><strong>Use</strong>r</strong> <strong>Manual</strong><br />
29
Configuration<br />
Image Setup<br />
In this section, you may configure the video image settings for your camera. A preview of the image will be shown in Live Video.<br />
Enable Privacy<br />
Mask:<br />
The Privacy Mask setting allows you to specify upto 3 rectangular areas<br />
on the camera's image to beblocked/excluded from recordings and<br />
snapshots.<br />
You may click and drag the mouse cursor over thecamera image to draw<br />
a mask area.Right clicking on the camera image brings up thefollowing<br />
menu options:<br />
Disable All: Disables all mask areas<br />
Enable All: Enables all mask areas<br />
Reset All: Clears all mask areas.<br />
Anti Flicker:<br />
Mirror:<br />
Flip:<br />
Power Line:<br />
White Balance:<br />
If the video flickers, try enabling this setting.<br />
This will mirror the image horizontally.<br />
This will flip the image vertically. When turning Flip on, you may want to<br />
consider turning Mirror on as well.<br />
Select the frequency used by your power lines to avoid interference or<br />
distortion.<br />
<strong>Use</strong> the dropdown box to change white balance settings to help balance colors for different environments. You can choose<br />
from Auto, Outdoor, Indoor, Fluorescent, and Push Hold.<br />
Exposure<br />
Mode:<br />
Changes the exposure mode. <strong>Use</strong> the dropdown box to set the camera for Indoor, Outdoor, or Night environments, or to<br />
Moving to capture moving objects. The Low_Noise option will focus on creating a high-quality picture without noise. You can<br />
also create 3 different custom exposure modes. The Max Gain setting will allow you to control the maximum amount of gain<br />
to apply to brighten the picture.<br />
Denoise:<br />
Brightness:<br />
This setting controls the amount of noise reduction that will be applied to the picture.<br />
Adjust this setting to compensate for backlit subjects.<br />
D-<strong>Link</strong> <strong>DCS</strong>-<strong>2210</strong>/2230 <strong><strong>Use</strong>r</strong> <strong>Manual</strong><br />
30
Configuration<br />
Contrast:<br />
Saturation:<br />
Sharpness:<br />
Reset Default:<br />
Adjust this setting to alter the color intensity/strength.<br />
This setting controls the amount of coloration, from grayscale to fully saturated.<br />
Specify a value from 0 to 8 to specify how much sharpening to apply to the image.<br />
Click this button to reset the image to factory default settings.<br />
D-<strong>Link</strong> <strong>DCS</strong>-<strong>2210</strong>/2230 <strong><strong>Use</strong>r</strong> <strong>Manual</strong><br />
31
Configuration<br />
Audio and Video<br />
You may configure up to 3 video profiles with different settings for your camera. Hence, you may set up different profiles for your<br />
computer and mobile display. In addition, you may also configure the two-way audio settings for your camera. After making any<br />
changes, click the Save Settings button to save your changes.<br />
Number of active profiles:<br />
Aspect ratio:<br />
Mode:<br />
Frame size / View window<br />
area:<br />
Maximum frame rate:<br />
You can use the dropdown box to set up to 3 active<br />
profiles.<br />
Set the aspect ratio of the video to 4:3 standard or<br />
16:9 widescreen.<br />
Set the video codec to be used to JPEG, MPEG-4,<br />
or H.264.<br />
Frame size determines the total capture resolution,<br />
and View window area determines the Live Video<br />
viewing window size. If the Frame size is larger than<br />
the Live Video size, you can use the ePTZ controls<br />
to look around.<br />
16:9 1920x1080, 1280x720, 800x450,<br />
640x360, 480x270, 320x176, 176x144<br />
4:3 1024x768, 800x600, 640x480, 480x 360,<br />
320x240, 176x144<br />
Note: If your View window area is the same as your<br />
Frame size, you will not be able to use the ePTZ<br />
function.<br />
A higher frame rate provides smoother motion for<br />
videos, and requires more bandwidth. Lower frame<br />
rates will result in stuttering motion, and requires<br />
less bandwidth.<br />
D-<strong>Link</strong> <strong>DCS</strong>-<strong>2210</strong>/2230 <strong><strong>Use</strong>r</strong> <strong>Manual</strong><br />
32
Configuration<br />
Video Quality:<br />
Constant bit rate:<br />
Fixed quality:<br />
This limits the maximum frame rate, which can be<br />
combined with the "Fixed quality" option to optimize<br />
the bandwidth utilization and video quality. If fixed<br />
bandwidth utilization is desired regardless of the<br />
video quality, choose "Constant bit rate" and select<br />
the desired bandwidth.<br />
The bps will affect the bit rate of the video recorded<br />
by the camera. Higher bit rates result in higher<br />
video quality.<br />
Select the image quality level for the camera to<br />
try to maintain. High quality levels will result in<br />
increased bit rates.<br />
Audio in off:<br />
Ticking this checkbox will mute incoming audio.<br />
Audio in gain level:<br />
This setting controls the amount of gain applied to<br />
incoming audio to increase its volume.<br />
Audio out off:<br />
Ticking this checkbox will mute outgoing audio.<br />
Audio out volume level:<br />
This setting controls the amount of gain applied to<br />
outgoing audio to increase its volume.<br />
D-<strong>Link</strong> <strong>DCS</strong>-<strong>2210</strong>/2230 <strong><strong>Use</strong>r</strong> <strong>Manual</strong><br />
33
Configuration<br />
Preset<br />
This screen allows you to set preset points for the ePTZ function of the camera, which allows you to look around the camera's viewable<br />
area by using a zoomed view. Presets allow you to quickly go to and view a specific part of the area your camera is covering, and you<br />
can create preset sequences, which will automatically change the camera's view between the different presets according to a defined<br />
order and timing you can set.<br />
Note: If your View window area is the same as your Frame size, you will not be able to use the ePTZ function. For more details, refer to<br />
"Audio and Video" on page 32.<br />
Video Profile:<br />
ePTZ Speed:<br />
Arrow Buttons and Home<br />
Button:<br />
Input Preset Name:<br />
Preset List:<br />
This selects which video profile to use. For more<br />
information, refer to "Audio and Video" on page 32.<br />
Select your Dynamic DNS provider from the pull<br />
down menu or enter the server address manually.<br />
<strong>Use</strong> these buttons to move to a specific part of the<br />
viewing area, which you can then set as a preset.<br />
Click the Home button to return to the center of the<br />
viewing area.<br />
Enter the name of the preset you want to create,<br />
then click the Add button to make a new preset.<br />
If an existing preset has been selected from the<br />
Preset List, you can change its name by typing in a<br />
new name, then clicking the Rename button.<br />
Click this dropdown box to see a list of all the<br />
presets that have been created. You can select one,<br />
then click the GoTo button to change the displayed<br />
camera view to the preset. Clicking the Remove<br />
button will delete the currently selected preset.<br />
D-<strong>Link</strong> <strong>DCS</strong>-<strong>2210</strong>/2230 <strong><strong>Use</strong>r</strong> <strong>Manual</strong><br />
34
Configuration<br />
Preset Sequence: This section allows you to create a preset<br />
sequence, which automatically moves the camera's<br />
view between a set of preset views.<br />
To add a preset to the sequence, select it from the<br />
dropdown box at the bottom of this window, set the<br />
Dwell time to determine how long the camera view<br />
will stay at that preset, then click the Add button.<br />
The preset name will appear in the list, followed by<br />
the dwell time to view that preset for.<br />
You can rearrange your presets in the sequence<br />
by selecting a preset in the sequence, then clicking<br />
the arrow buttons to move it higher or lower in the<br />
current sequence.<br />
Clicking the trash can button will remove the<br />
currently selected preset from the sequence.<br />
If you want to change the dwell time for a preset,<br />
select it from the list, enter a new dwell time, then<br />
click the Update button.<br />
D-<strong>Link</strong> <strong>DCS</strong>-<strong>2210</strong>/2230 <strong><strong>Use</strong>r</strong> <strong>Manual</strong><br />
35
Configuration<br />
Motion Detection<br />
Enabling Video Motion will allow your camera to use the motion detection feature. You may draw a finite motion area that will be used<br />
for monitoring. After making any changes, click the Save Settings button to save your changes.<br />
Enable Video Motion:<br />
Sensitivity:<br />
Percentage:<br />
Draw Motion Area:<br />
Erase Motion Area:<br />
Select this box to enable the motion detection<br />
feature of your camera.<br />
Specifies the measurable difference between two<br />
sequential images that would indicate motion. Please<br />
enter a value between 0 and 100.<br />
Specifies the amount of motion in the window being<br />
monitored that is required to initiate an alert. If this<br />
is set to 100%, motion is detected within the whole<br />
window will trigger a snapshot.<br />
Draw the motion detection area by dragging your<br />
mouse in the window (indicated by the red square).<br />
To erase a motion detection area, simply click on the<br />
red square that you wish to remove.<br />
Right clicking on the camera image brings up the<br />
following menu options:<br />
Select All: Draws a motion detection area over<br />
the entire screen.<br />
Clear All: Clears any motion detection areas that<br />
have been drawn.<br />
Restore: Restores the previously specified motion<br />
detection areas.<br />
D-<strong>Link</strong> <strong>DCS</strong>-<strong>2210</strong>/2230 <strong><strong>Use</strong>r</strong> <strong>Manual</strong><br />
36
Configuration<br />
Time and Date<br />
This section allows you to automatically or manually configure, update, and maintain the internal system clock for your camera. After<br />
making any changes, click the Save Settings button to save your changes.<br />
Time Zone:<br />
Enable Daylight Saving:<br />
Select your time zone from the drop-down menu.<br />
Select this to enable Daylight Saving Time.<br />
Auto Daylight Saving:<br />
Set Date and Time <strong>Manual</strong>ly:<br />
Offset:<br />
Synchronize with NTP Server:<br />
NTP Server:<br />
Set the Date and Time<br />
<strong>Manual</strong>ly:<br />
Select this option to allow your camera to configure<br />
the Daylight Saving settings automatically.<br />
Selecting this option allows you to configure the<br />
Daylight Saving date and time manually.<br />
Sets the amount of time to be added or removed<br />
when Daylight Saving is enabled.<br />
Enable this feature to obtain time automatically from<br />
an NTP server.<br />
Network Time Protocol (NTP) synchronizes the<br />
<strong>DCS</strong>-2230 with an Internet time server. Choose the<br />
one that is closest to your location.<br />
This option allows you to set the time and date<br />
manually.<br />
Copy Your Computer's Time<br />
Settings:<br />
This will synchronize the time information from your<br />
PC.<br />
D-<strong>Link</strong> <strong>DCS</strong>-<strong>2210</strong>/2230 <strong><strong>Use</strong>r</strong> <strong>Manual</strong><br />
37
Configuration<br />
Event Setup<br />
The Event Setup page includes 4 different sections.<br />
• Event<br />
• Server<br />
• Media<br />
• Recording<br />
1. To add a new item - "event, server or media," click Add. A screen will appear and<br />
allow you to update the fields accordingly.<br />
2. To delete the selected item from the pull-down menu of event, server or media, click<br />
Delete.<br />
3. Click on the item name to pop up a window for modifying.<br />
Note: You can add up to four events, five servers, and five media fields.<br />
D-<strong>Link</strong> <strong>DCS</strong>-<strong>2210</strong>/2230 <strong><strong>Use</strong>r</strong> <strong>Manual</strong><br />
38
Configuration<br />
Application<br />
In a typical application, when motion is detected, the <strong>DCS</strong>-2230 Network <strong>Camera</strong> sends images to a FTP server or via e-mail as<br />
notifications. As shown in the illustration below, an event can be triggered by many sources, such as motion detection or external<br />
digital input devices. When an event is triggered, a specified action will be performed. You can configure the Network <strong>Camera</strong> to send<br />
snapshots or videos to your e-mail address or FTP site.<br />
Event Condition<br />
Action<br />
ex.<br />
Motion detection,<br />
Periodically, Digital input,<br />
System reboot<br />
Media<br />
(what to send)<br />
ex.<br />
Snapshot, Video Clips<br />
Server<br />
(where to send)<br />
ex.<br />
Email, FTP<br />
To start plotting an event, it is suggested to configure server and media columns first so that the Network <strong>Camera</strong> will know what action<br />
shall be performed when a trigger is activated.<br />
D-<strong>Link</strong> <strong>DCS</strong>-<strong>2210</strong>/2230 <strong><strong>Use</strong>r</strong> <strong>Manual</strong><br />
39
Configuration<br />
Add Server<br />
You can configure up to 5 servers to save snapshots and/or video to. After making any changes, click the Save Settings button to save<br />
your changes.<br />
Server Name:<br />
Enter the unique name of your server.<br />
E-mail:<br />
FTP:<br />
Network Storage:<br />
Enter the configuration for the target e-mail server<br />
account.<br />
Enter the configuration for the target FTP server<br />
account.<br />
Specify a network storage device. Only one network<br />
storage device is supported.<br />
SD Card:<br />
<strong>Use</strong> the camera's onboard SD card storage.<br />
D-<strong>Link</strong> <strong>DCS</strong>-<strong>2210</strong>/2230 <strong><strong>Use</strong>r</strong> <strong>Manual</strong><br />
40
Configuration<br />
Add Media<br />
There are three types of media, Snapshot, Video Clip, and System Log. After making any changes, click the Save Settings button to<br />
save your changes.<br />
Media Name:<br />
Enter an unique name for media type you want to<br />
create.<br />
Snapshot:<br />
Select this option to set the media type to snapshots.<br />
Source:<br />
Send pre-event image(s) [0~4]:<br />
Send post-event image(s)<br />
[0~7]:<br />
Set the video profile to use as the media source.<br />
Refer to "Audio and Video" on page 32 for more<br />
information on video profiles.<br />
Set the number of pre-event images to take. Preevent<br />
images are images taken before the main<br />
event snapshot is taken.<br />
Set the number of post-event images to take. Postevent<br />
images are images taken after the main event<br />
snapshot is taken. You can set up to 7 post-event<br />
images to be taken.<br />
File name prefix:<br />
The prefix name will be added on the file name.<br />
Add date and time suffix to file<br />
name:<br />
Check it to add timing information as file name suffix.<br />
D-<strong>Link</strong> <strong>DCS</strong>-<strong>2210</strong>/2230 <strong><strong>Use</strong>r</strong> <strong>Manual</strong><br />
41
Configuration<br />
Video clip:<br />
Select this option to set the media type to video clips.<br />
Source:<br />
Pre-event recording:<br />
Maximum duration:<br />
Maximum file size:<br />
File name prefix:<br />
System log:<br />
Set the video profile to use as the media source.<br />
Refer to "Audio and Video" on page 32 for more<br />
information on video profiles.<br />
This sets how many seconds to record before the<br />
main event video clip starts. You can record up to 4<br />
seconds of pre-event video.<br />
Set the maximum length of video to record for your<br />
video clips.<br />
Set the maximum file size to record for your video<br />
clips.<br />
This is the prefix that will be added to the filename<br />
of saved video clips.<br />
Select this option to set the media type to system<br />
logs. This will save the event to the camera system<br />
log, but will not record any snapshots or video.<br />
D-<strong>Link</strong> <strong>DCS</strong>-<strong>2210</strong>/2230 <strong><strong>Use</strong>r</strong> <strong>Manual</strong><br />
42
Configuration<br />
Add Event<br />
Create and schedule up to 3 events with their own settings here. After making any changes, click the Save Settings button to save<br />
your changes.<br />
Event name:<br />
Enable this event:<br />
Enter a name for the event.<br />
Select this box to activate this event.<br />
Priority:<br />
Delay:<br />
Set the priority for this event. The event with higher<br />
priority will be executed first.<br />
Select the delay time before checking the next event.<br />
It is being used for both events of motion detection<br />
and digital input trigger.<br />
Trigger:<br />
Specify the input type that triggers the event.<br />
Video Motion Detection:<br />
Periodic:<br />
Motion is detected during live video monitoring.<br />
Select the windows that need to be monitored.<br />
The event is triggered in specified intervals. The<br />
trigger interval unit is in minutes.<br />
Digital input:<br />
System Boot:<br />
The external trigger input to the camera.<br />
Triggers an event when the system boots up.<br />
Network Lost:<br />
Passive Infrared:<br />
Triggers an event when if the network connection is<br />
lost.<br />
Triggers an event when the PIR sensor is activated<br />
by moving infrared objects even in dark environment.<br />
D-<strong>Link</strong> <strong>DCS</strong>-<strong>2210</strong>/2230 <strong><strong>Use</strong>r</strong> <strong>Manual</strong><br />
43
Configuration<br />
Time:<br />
Select Always or enter the time interval.<br />
Trigger D/O:<br />
Server:<br />
Select to trigger the digital output for a specific<br />
number of seconds when an event occurs.<br />
Specify the location where the event information<br />
should be saved to.<br />
D-<strong>Link</strong> <strong>DCS</strong>-<strong>2210</strong>/2230 <strong><strong>Use</strong>r</strong> <strong>Manual</strong><br />
44
Configuration<br />
Add Recording<br />
Here you can configure and schedule the recording settings. After making any changes, click the Save Settings button to save your<br />
changes.<br />
Recording entry name:<br />
Enable this recording:<br />
The unique name of the entry.<br />
Select this to enable the recording function.<br />
Priority:<br />
Set the priority for this entry. The entry with a higher<br />
priority value will be executed first.<br />
Source:<br />
Recording schedule:<br />
Recording settings:<br />
The source of the stream.<br />
Scheduling the recording entry.<br />
Configuring the setting for the recording.<br />
Destination:<br />
Total cycling recording size:<br />
Select the folder where the recording file will be<br />
stored.<br />
Please input a <strong>HD</strong>D volume between 1MB and<br />
200GB for recording space. The recording data will<br />
replace the oldest record when the total recording<br />
size exceeds this value. For example, if each<br />
recording file is 6MB, and the total cyclic recording<br />
size is 600MB, then the camera will record 100 files<br />
in the specified location (folder) and then will delete<br />
the oldest file and create new file for cyclic recording.<br />
Please note that if the free <strong>HD</strong>D space is not enough,<br />
the recording will stop. Before you set up this option<br />
please make sure your <strong>HD</strong>D has enough space, and<br />
it is better to not save other files in the same folder<br />
as recording files.<br />
D-<strong>Link</strong> <strong>DCS</strong>-<strong>2210</strong>/2230 <strong><strong>Use</strong>r</strong> <strong>Manual</strong><br />
45
Configuration<br />
Size of each file for recording:<br />
File Name Prefix:<br />
File size for each recording file. You may input the<br />
value in the range of 200-5000.<br />
The prefix name will be added on the file name of<br />
the recording file(s).<br />
D-<strong>Link</strong> <strong>DCS</strong>-<strong>2210</strong>/2230 <strong><strong>Use</strong>r</strong> <strong>Manual</strong><br />
46
Configuration<br />
SD Card<br />
Here you may browse and manage the recorded files which are stored on the SD card.<br />
Format SD Card:<br />
View Recorded Picture:<br />
Playback Recorded Video:<br />
Refresh:<br />
Click this icon to automatically format the SD card<br />
and create "picture" & "video" folders.<br />
If the picture files are stored on the SD card, click<br />
on the picture folder and choose the picture file you<br />
would like to view.<br />
If video files are stored on the SD card, click on the<br />
video folder and choose the video file you would like<br />
to view.<br />
Reloads the file and folder information from the SD<br />
card.<br />
D-<strong>Link</strong> <strong>DCS</strong>-<strong>2210</strong>/2230 <strong><strong>Use</strong>r</strong> <strong>Manual</strong><br />
47
Configuration<br />
Advanced<br />
Digital Input/Output<br />
This screen allows you to control the behavior of digital input and digital output devices. The I/O connector provides the physical<br />
interface for digital output (DO) and digital input (DI) that is used for connecting a variety of external alarm devices such as IR-Sensors<br />
and alarm relays. The digital input is used for connecting external alarm devices and once triggered images will be taken and e-mailed.<br />
After making any changes, click the Save Settings button to save your changes.<br />
Select D/I or D/O Mode:<br />
LED:<br />
The camera will send a signal when an event is<br />
triggered, depending upon the type of device connected<br />
to the DI circuit.<br />
N.C. stands for Normally Closed. This means that<br />
the normal state of the circuit is closed. Therefore<br />
events are triggered when the device status changes<br />
to "Open."<br />
N.O. stands for Normally Open. This means that the<br />
normal state of the circuit is open. Therefore events<br />
are triggered when the device status changes to<br />
"Closed."<br />
You may specify whether or not to illuminate the LED<br />
on the side of the camera.<br />
D-<strong>Link</strong> <strong>DCS</strong>-<strong>2210</strong>/2230 <strong><strong>Use</strong>r</strong> <strong>Manual</strong><br />
48
Configuration<br />
ICR and IR<br />
Here you can configure the ICR and IR settings. An IR(Infrared) Cut-Removable(ICR) filter can be disengaged for increased sensitivity<br />
in low light environments.<br />
Automatic:<br />
The Day/Night mode is set automatically.<br />
Generally, the camera uses Day mode and<br />
switches to Night mode when needed.<br />
Day Mode:<br />
Night Mode:<br />
Day mode enables the IR Cut Filter.<br />
Night mode disables the IR Cut Filter.<br />
Schedule Mode:<br />
IR Light Control:<br />
Set up the Day/Night mode using a schedule.<br />
The camera will enter Day mode at the starting<br />
time and return to Night mode at the ending<br />
time.<br />
The camera can enable or disable the IR<br />
(infrared) light according to your preferences.<br />
This setting provides additional controls<br />
depending on your specific application.<br />
Off:<br />
On:<br />
Sync:<br />
The IR light will always be off.<br />
The IR light will always be on.<br />
The IR light will turn on when the ICR sensor is on.<br />
Schedule: The IR light will turn on or off according to the schedule that you specify below.<br />
D-<strong>Link</strong> <strong>DCS</strong>-<strong>2210</strong>/2230 <strong><strong>Use</strong>r</strong> <strong>Manual</strong><br />
49
Configuration<br />
HTTPS<br />
This page allows you to install and activate an HTTPS certificate for secure access to your camera. After making any changes, click the<br />
Save Settings button to save your changes.<br />
Enable HTTPS Secure<br />
Connection:<br />
Create Certificate Method:<br />
Enable the HTTPS service.<br />
Choose the way the certificate should be created.<br />
Three options are available:<br />
Create a self-signed certificate automatically<br />
Create a self-signed certificate manually<br />
Create a certificate request and install<br />
Status:<br />
Displays the status of the certificate.<br />
Note:<br />
The certificate cannot be removed while the HTTPS<br />
is still enabled. To remove the certificate, you must<br />
first uncheck Enable HTTPS secure connection.<br />
D-<strong>Link</strong> <strong>DCS</strong>-<strong>2210</strong>/2230 <strong><strong>Use</strong>r</strong> <strong>Manual</strong><br />
50
Configuration<br />
Access List<br />
Here you can set access permissions for users to view your D<strong>DCS</strong>-<strong>2210</strong>/2230.<br />
Allow list:<br />
Start <strong>IP</strong> address:<br />
End <strong>IP</strong> address:<br />
The list of <strong>IP</strong> addresses that have the access right<br />
to the camera.<br />
The starting <strong>IP</strong> Address of the devices (such as a<br />
computer) that have permission to access the video<br />
of the camera. Click Add to save the changes made.<br />
Note: A total of seven lists can be configured for<br />
both columns.<br />
The ending <strong>IP</strong> Address of the devices (such as a<br />
computer) that have permission to access the video<br />
of the camera.<br />
Delete allow list:<br />
Remove the customized setting from the Allow List.<br />
Deny list:<br />
The list of <strong>IP</strong> addresses that have no access rights<br />
to the camera.<br />
Delete deny list:<br />
Remove the customized setting from the Delete List.<br />
For example:<br />
When the range of the Allowed List is set from<br />
1.1.1.0 to 192.255.255.255 and the range of the<br />
Denied List is set from 1.1.1.0 to 170.255.255.255.<br />
Only users with <strong>IP</strong>s located between 171.0.0.0 and<br />
192.255.255.255 can access the Network <strong>Camera</strong>.<br />
Alowed<br />
List<br />
Denied<br />
List<br />
D-<strong>Link</strong> <strong>DCS</strong>-<strong>2210</strong>/2230 <strong><strong>Use</strong>r</strong> <strong>Manual</strong><br />
51
Configuration<br />
Maintenance<br />
Device Management<br />
You may modify the name and administrator’s password of your camera, as well as add and manage the user accounts for accessing<br />
the camera. You may also use this section to create a unique name and configure the OSD settings for your camera.<br />
Admin Password Setting:<br />
Add <strong><strong>Use</strong>r</strong> Account:<br />
<strong><strong>Use</strong>r</strong> Name:<br />
Password:<br />
Set a new password for the administrator’s account.<br />
Add new user account.<br />
The user name for the new account.<br />
The password for the new account.<br />
<strong><strong>Use</strong>r</strong> List:<br />
<strong>Camera</strong> Name:<br />
Enable OSD:<br />
All the existing user accounts will be displayed here.<br />
You may delete accounts includes in the list, but<br />
please reserve at least one as guest.<br />
Create a unique name for your camera that will<br />
be added to the file name prefix when creating a<br />
snapshot or a video clip.<br />
Select this option to enable the On-Screen Display<br />
feature for your camera.<br />
Label:<br />
Enter a label for the camera.<br />
Show Time:<br />
Select this option to enable the time-stamp display<br />
on the video screen.<br />
D-<strong>Link</strong> <strong>DCS</strong>-<strong>2210</strong>/2230 <strong><strong>Use</strong>r</strong> <strong>Manual</strong><br />
52
Configuration<br />
Backup and Restore<br />
In this section, you may backup, restore and reset the camera configuration, or reboot the camera.<br />
Save To Local Hard Drive:<br />
Local From Local Hard Drive:<br />
Restore to Factory Default:<br />
You may save and document your current settings<br />
into your computer.<br />
Locate a pre-saved configuration by clicking<br />
Browse and then restore the pre-defined settings to<br />
your camera by clicking Load Configuration.<br />
You may reset your camera and restore the factory<br />
settings by clicking Restore Factory Defaults.<br />
Reboot Device: This will restart your camera.<br />
D-<strong>Link</strong> <strong>DCS</strong>-<strong>2210</strong>/2230 <strong><strong>Use</strong>r</strong> <strong>Manual</strong><br />
53
Configuration<br />
Firmware Upgrade<br />
The camera's current firmware version will be displayed on this screen. You may visit the D-<strong>Link</strong> Support Website to check for the latest<br />
available firmware version.<br />
To upgrade the firmware on your <strong>DCS</strong>-<strong>2210</strong>/2230, please download and save the latest firmware version from the D-<strong>Link</strong> Support<br />
Page to your local hard drive. Locate the file on your local hard drive by clicking the Browse button. Select the file and click the Upload<br />
button to start upgrading the firmware.<br />
Current Firmware Version:<br />
Current Product Name:<br />
Displays the detected firmware version.<br />
Displays the camera model name.<br />
File Path:<br />
Locate the file (upgraded firmware) on your hard<br />
drive by clicking Browse.<br />
Upload: Uploads the new firmware to your camera.<br />
D-<strong>Link</strong> <strong>DCS</strong>-<strong>2210</strong>/2230 <strong><strong>Use</strong>r</strong> <strong>Manual</strong><br />
54
Configuration<br />
Status<br />
Device Info<br />
This page displays detailed information about your device and network connection.<br />
D-<strong>Link</strong> <strong>DCS</strong>-<strong>2210</strong>/2230 <strong><strong>Use</strong>r</strong> <strong>Manual</strong><br />
55
Configuration<br />
Logs<br />
This page displays the log information of your camera. You may download the information by clicking Download. You may also click<br />
Clear to delete the saved log information.<br />
D-<strong>Link</strong> <strong>DCS</strong>-<strong>2210</strong>/2230 <strong><strong>Use</strong>r</strong> <strong>Manual</strong><br />
56
Configuration<br />
This page provides helpful information regarding camera operation.<br />
Help<br />
D-<strong>Link</strong> <strong>DCS</strong>-<strong>2210</strong>/2230 <strong><strong>Use</strong>r</strong> <strong>Manual</strong><br />
57
Appendix<br />
DI/DO Input Specifications<br />
Pin 1 Pin 4<br />
Pin 2<br />
Pin 3<br />
PIN FUNCTION NOTE<br />
1 Digital Out (DO) <strong>Use</strong>s an open-drain NFET transistor with the source connected to GND in camera.<br />
If used with an external relay, a diode must be connected in parallel with the load<br />
for protection against voltage transients. Max loading is 100 mA.<br />
2 Digital In (DI) A switch from DI to DC 5 V, activated by setting NO. or NC.<br />
3 DC5V OUTPUT DC 5 V Output / Max. 100 mA<br />
4 GND GND<br />
Internal 5V Power<br />
DND<br />
External 3~12V Power<br />
DND<br />
DC Power 5V<br />
DC Power 5V<br />
5V<br />
5V<br />
DC Power 3V~12V<br />
N.C / N.O<br />
DI<br />
Reed switch<br />
N.C / N.O<br />
DI<br />
Reed switch<br />
R<br />
R<br />
100 mA<br />
DO<br />
Diode<br />
100 mA<br />
DO<br />
Diode<br />
ALARM<br />
ALARM<br />
D-<strong>Link</strong> <strong>DCS</strong>-<strong>2210</strong>/2230 <strong><strong>Use</strong>r</strong> <strong>Manual</strong><br />
58
Appendix<br />
Technical Specifications<br />
<strong>Camera</strong><br />
<strong>Camera</strong> Hardware<br />
Profile<br />
Image Features<br />
Video Compression<br />
Video Resolution<br />
Audio Support G.726<br />
External Device<br />
Interface<br />
• 1/2.7” 2 Megapixel progressive CMOS sensor<br />
• IR illumination distance: 5 m<br />
• Minimum illumination 0 lux with IR illumination<br />
• Built-in Infrared-Cut Removable (ICR)<br />
• lter module<br />
• Built-in PIR sensor<br />
• Built-in microphone and speaker<br />
• 10x digital zoom<br />
• Fixed length 4.37 mm<br />
• Configurable image size, quality, frame rate, and bit rate<br />
• Time stamp and text overlays<br />
• Configurable motion detection windows<br />
• Simultaneous H.264/MPEG-4/MJPEG format compression<br />
• JPEG for still image<br />
• H.264/MPEG-4 multicast streaming<br />
• Aperture F2.0<br />
• Angle of view:<br />
(H) 67.4°<br />
(V) 40.8°<br />
(D) 75°<br />
• 3 configurable privacy mask zones<br />
• Configurable shutter speed, brightness, saturation, contrast, and<br />
sharpness<br />
16:9 - 1920 x 1080 (up to 15 fps), 1280 x 720, 800 x 450, 640 x 360, 480 x 270, 320 x 176, 176 x 144 up to 30 fps<br />
4:3 - 1440 x 1080 (up to 15 fps), 1280 x 960, 1024 x 768, 800 x 600, 640 x 480, 320 x 240, 176 x 144 up to 30 fps<br />
• 1 DI / 1 DO<br />
• Micro SD card slot<br />
Network Network Protocols <strong>IP</strong>v4, TCP/<strong>IP</strong>, UDP, ICMP, DHCP Client, NTP Client (D-<strong>Link</strong>), DNS Client, DDNS Client (D-<strong>Link</strong>), SMTP Client, FTP Client, HTTP / HTTPS,<br />
Samba Client, PPPoE, UPnP Port Forwarding, RTP / RTSP/ RTCP, <strong>IP</strong> filtering, 3GPP, IGMP, ONVIF Compliant<br />
Security<br />
• Administrator and user group protection<br />
• Password authentication<br />
• HTTP and RTSP digest encryption<br />
D-<strong>Link</strong> <strong>DCS</strong>-<strong>2210</strong>/2230 <strong><strong>Use</strong>r</strong> <strong>Manual</strong><br />
59
Appendix<br />
Technical Specifications<br />
System<br />
Management<br />
System<br />
Requirements for<br />
Web Interface<br />
Event Management<br />
Remote Management<br />
Mobile Support<br />
D-ViewCam<br />
System<br />
Requirements<br />
D-ViewCam<br />
Software Functions<br />
• Operating System: Microsoft Windows 7/Vista/XP/2000<br />
• Browser: Internet Explorer, Firefox, Netscape, Opera<br />
• Motion detection<br />
• Event notification and upload snapshots/video clips via HTTP,<br />
SMTP, or FTP<br />
• Configuration accessible via web browser<br />
• Take snapshots/video clips and save to local hard drive or NAS via web browser<br />
Windows 7/Vista/XP system, Pocket PC, or mobile phone with 3GPP playback support<br />
• Operating System: Microsoft Windows 7/Vista/XP<br />
• Web Browser: Internet Explorer 6 or higher<br />
• Remote management/control of up to 32 cameras<br />
• Viewing of up to 32 cameras on one screen<br />
General Power Input 5 V DC 1.2 A, 50/60 Hz, PoE ( <strong>DCS</strong>-<strong>2210</strong> only )<br />
Max. Power<br />
Consumption<br />
Operating<br />
Temperature<br />
Storage Temperature<br />
Humidity<br />
Weight<br />
Certifications<br />
<strong>DCS</strong>-<strong>2210</strong>: 3.5 watts<br />
<strong>DCS</strong>-2230: 4 watts<br />
0 to 40 ˚C (32 to 104 ˚F)<br />
-20 to 70 °C (-4 to 158 °F)<br />
20% to 80% non-condensing<br />
<strong>DCS</strong>-<strong>2210</strong>: 80 g<br />
<strong>DCS</strong>-2230: 75 g<br />
CE, CE LVD, FCC(Class B), C-Tick<br />
* This device complies with part 15 of the FCC Rules.<br />
Operation is subject to the following two conditions:<br />
(1) This device may not cause harmful interference.<br />
(2) This device must accept any interference received, including interference that may cause undesired operation.<br />
• Supports multiple HTTP, SMTP, and FTP servers<br />
• Multiple event notifications<br />
• Multiple recording methods for easy backup<br />
• Protocol: Standard TCP/<strong>IP</strong><br />
• Supports all management functions provided in web interface<br />
• Scheduled motion triggered, or manual recording options<br />
D-<strong>Link</strong> <strong>DCS</strong>-<strong>2210</strong>/2230 <strong><strong>Use</strong>r</strong> <strong>Manual</strong><br />
60
Appendix<br />
<strong>DCS</strong>-<strong>2210</strong>/2230<br />
Dimensions<br />
97<br />
38.7<br />
58<br />
82.3<br />
128.6<br />
95<br />
82<br />
D-<strong>Link</strong> <strong>DCS</strong>-<strong>2210</strong>/2230 <strong><strong>Use</strong>r</strong> <strong>Manual</strong><br />
61


