DCS-2210/DCS-2230 Quick Install Guide - D-Link
DCS-2210/DCS-2230 Quick Install Guide - D-Link
DCS-2210/DCS-2230 Quick Install Guide - D-Link

You also want an ePaper? Increase the reach of your titles
YUMPU automatically turns print PDFs into web optimized ePapers that Google loves.
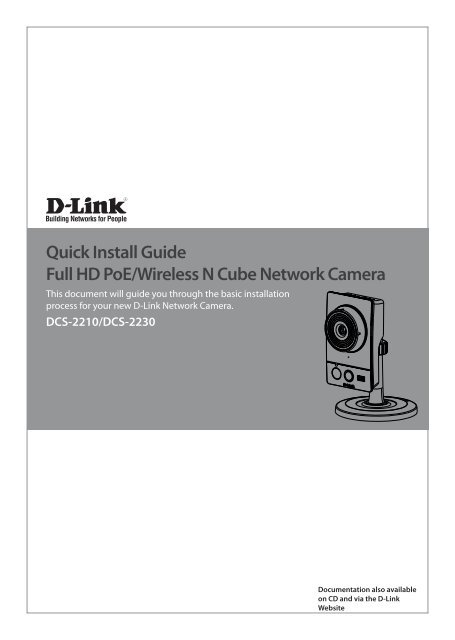
<strong>Quick</strong> <strong>Install</strong> <strong>Guide</strong><br />
Full HD PoE/Wireless N Cube Network Camera<br />
This document will guide you through the basic installation<br />
process for your new D-<strong>Link</strong> Network Camera.<br />
<strong>DCS</strong>-<strong>2210</strong>/<strong>DCS</strong>-<strong>2230</strong><br />
Documentation also available<br />
on CD and via the D-<strong>Link</strong><br />
Website
2<br />
<strong>DCS</strong>-<strong>2210</strong>/<strong>DCS</strong>-<strong>2230</strong> <strong>Quick</strong> <strong>Install</strong> <strong>Guide</strong><br />
This installation guide provides basic instructions for installing the <strong>DCS</strong>-<strong>2210</strong>/<strong>DCS</strong>-<strong>2230</strong><br />
Network Camera on your network. For additional information about how to use the camera,<br />
please see the User’s Manual which is available on the CD include in this package or from the<br />
D-<strong>Link</strong> support website.<br />
<strong>Install</strong>ation Steps<br />
1. Verify the package contents against the list below.<br />
2. Hardware Overview<br />
3. Hardware <strong>Install</strong>ation<br />
4. Configuration with Wizard<br />
1. Package Contents<br />
<strong>DCS</strong>-<strong>2210</strong> or <strong>DCS</strong>-<strong>2230</strong> Full HD PoE Network Camera<br />
Camera Stand<br />
Manual and Software on CD-ROM<br />
CAT5 Ethernet Cable<br />
Power Adapter<br />
<strong>Quick</strong> <strong>Install</strong> <strong>Guide</strong><br />
If any of the above items are missing, please contact your reseller.<br />
D-<strong>Link</strong> <strong>DCS</strong>-<strong>2210</strong>/<strong>DCS</strong>-<strong>2230</strong> <strong>Quick</strong> <strong>Install</strong> <strong>Guide</strong>
Ethernet<br />
The RJ45 connector for<br />
Ethernet (<strong>DCS</strong>-<strong>2210</strong> supports<br />
PoE which can also be used to<br />
power the camera)<br />
WPS button (<strong>DCS</strong>-<strong>2230</strong> only)<br />
Press this button, then press<br />
the WPS button on your router<br />
to set up a wireless connection<br />
automatically<br />
Status LED<br />
Indicates the camera's<br />
current status<br />
ICR Sensor<br />
The IR-Cut Removable sensor<br />
monitors lighting conditions and<br />
switches between color and infrared<br />
accordingly<br />
Infrared LED<br />
Used to illuminate the camera's field<br />
of view at night<br />
PIR<br />
Passive Infrared<br />
sensor for motion<br />
detect<br />
2. Hardware Overview<br />
Reset<br />
Press and hold this button<br />
for 10 seconds to reset the<br />
camera<br />
Rear Panel<br />
Front Panel<br />
Power Connector<br />
Connects to the included<br />
DC 5V power adapter<br />
I/O Connector<br />
I/O connectors for<br />
external devices<br />
Adjustment Ring<br />
Tighten or loosen the<br />
adjustment ring to adjust<br />
the camera's position<br />
Base Holes<br />
Can be used with cable ties to<br />
attach camera to a surface<br />
Camera Lens<br />
Records video of the surrounding<br />
area<br />
Microphone<br />
Records audio from the<br />
surrounding area<br />
WPS LED<br />
(<strong>DCS</strong>-<strong>2230</strong> only)<br />
WPS status indicator<br />
LED<br />
Speaker<br />
Audio output<br />
D-<strong>Link</strong> <strong>DCS</strong>-<strong>2210</strong>/<strong>DCS</strong>-<strong>2230</strong> <strong>Quick</strong> <strong>Install</strong> <strong>Guide</strong> 3
4<br />
Left Panel<br />
Micro SD Card slot<br />
Local storage for storing<br />
recorded image and video<br />
D-<strong>Link</strong> <strong>DCS</strong>-<strong>2210</strong>/<strong>DCS</strong>-<strong>2230</strong> <strong>Quick</strong> <strong>Install</strong> <strong>Guide</strong>
3. Hardware <strong>Install</strong>ation<br />
Basic Connection<br />
Connect the camera to your switch or router via Ethernet cable.<br />
Connect the supplied power cable from the camera to a power outlet.<br />
Connection Using a PoE Switch (<strong>DCS</strong>-<strong>2210</strong> only)<br />
If using a PoE switch or router, connect the network camera via Ethernet cable.<br />
PoE will transmit both power and data over a single cable.<br />
Note: Once power has been established, the LED will turn red. When the device has obtained<br />
an IP address and is accessible, the LED will turn green.<br />
D-<strong>Link</strong> <strong>DCS</strong>-<strong>2210</strong>/<strong>DCS</strong>-<strong>2230</strong> <strong>Quick</strong> <strong>Install</strong> <strong>Guide</strong> 5
6<br />
4. Configuration with Wizard<br />
Insert the <strong>DCS</strong>-<strong>2210</strong>/<strong>DCS</strong>-<strong>2230</strong> CD into your computer's CD-ROM drive to begin the installation.<br />
If the Autorun function on your computer is disabled, or if the D-<strong>Link</strong> Launcher fails to start<br />
automatically, click Start > Run. Type D:\autorun.exe, where D: represents the drive letter of<br />
your CD-ROM drive.<br />
Click Setup Wizard to begin the installation.<br />
After clicking Setup Wizard, the following window will<br />
open.<br />
Click Next to continue.<br />
Click Yes to accept the License Agreement.<br />
To start the installation process, click Next.<br />
Note: The installation may take several minutes to finish.<br />
Click Finish to complete the installation.<br />
D-<strong>Link</strong> <strong>DCS</strong>-<strong>2210</strong>/<strong>DCS</strong>-<strong>2230</strong> <strong>Quick</strong> <strong>Install</strong> <strong>Guide</strong>
Click on the D-<strong>Link</strong> Setup Wizard SE icon that was created<br />
in your Windows Start menu.<br />
Start > D-<strong>Link</strong> > Setup Wizard SE<br />
The Setup Wizard will appear and display the MAC address<br />
and IP address of your camera(s). If you have a DHCP server<br />
on your network, a valid IP Address will be displayed. If your<br />
network does not use a DHCP server, the network camera's<br />
default static IP 192.168.0.20 will be displayed.<br />
Click the Wizard button to continue.<br />
Enter the Admin ID and password. When logging in for<br />
the first time, the default Admin ID is admin with the<br />
password left blank.<br />
Click Next, to proceed to the next page.<br />
Select DHCP if your camera obtains an IP address<br />
automatically when it boots up. Select static IP if the<br />
camera will use the same IP address each time it is<br />
started.<br />
Click Next, to proceed to the next page.<br />
Take a moment to confirm your settings and click Restart.<br />
D-<strong>Link</strong> <strong>DCS</strong>-<strong>2210</strong>/<strong>DCS</strong>-<strong>2230</strong> <strong>Quick</strong> <strong>Install</strong> <strong>Guide</strong> 7
8<br />
Viewing Camera via Web Browser<br />
Click on the D-<strong>Link</strong> Setup Wizard SE icon that was created<br />
in your Windows Start menu.<br />
Start > D-<strong>Link</strong> > Setup Wizard SE<br />
Select the camera and click the button labeled "<strong>Link</strong>" to<br />
access the web configuration.<br />
The Setup Wizard will automatically open your web browser<br />
to the IP address of the camera.<br />
Enter admin as the default username and leave the<br />
password blank. Click OK to continue.<br />
This section shows your camera’s live video. You can select<br />
your video profile and view or operate the camera. For<br />
additional information about web configuration, please<br />
refer to the user manual included on the CD-ROM or the<br />
D-<strong>Link</strong> website.<br />
D-<strong>Link</strong> <strong>DCS</strong>-<strong>2210</strong>/<strong>DCS</strong>-<strong>2230</strong> <strong>Quick</strong> <strong>Install</strong> <strong>Guide</strong>
Notes<br />
D-<strong>Link</strong> <strong>DCS</strong>-<strong>2210</strong>/<strong>DCS</strong>-<strong>2230</strong> <strong>Quick</strong> <strong>Install</strong> <strong>Guide</strong> 9
10<br />
Notes<br />
D-<strong>Link</strong> <strong>DCS</strong>-<strong>2210</strong>/<strong>DCS</strong>-<strong>2230</strong> <strong>Quick</strong> <strong>Install</strong> <strong>Guide</strong>
Notes<br />
D-<strong>Link</strong> <strong>DCS</strong>-<strong>2210</strong>/<strong>DCS</strong>-<strong>2230</strong> <strong>Quick</strong> <strong>Install</strong> <strong>Guide</strong> 11
12<br />
Technical Support<br />
D-<strong>Link</strong>’s website contains the latest user documentation and software<br />
updates for D-<strong>Link</strong> products.<br />
U.S. and Canadian customers can contact D-<strong>Link</strong> Technical Support<br />
through our website or by phone.<br />
United States<br />
Telephone<br />
(877) 354-6555<br />
World Wide Web<br />
http://support.dlink.com<br />
Canada<br />
Telephone<br />
(877) 354-6560<br />
World Wide Web<br />
http://support.dlink.ca<br />
Version 1.0<br />
October 13, 2011<br />
Copyright ©2011 D-<strong>Link</strong> Corporation/D-<strong>Link</strong> Systems, Inc. All rights reserved. D-<strong>Link</strong> and the D-<strong>Link</strong> logo are registered trademarks<br />
of D-<strong>Link</strong> Corporation or its subsidiaries in the United States and other countries. Other trademarks are the property of their<br />
respective owners. Actual data throughput will vary. Network conditions and environmental factors, including volume of network<br />
traffic, building materials and construction, and network overhead lower actual data throughput rate. Product specifications,<br />
size and shape are subject to change without notice, and actual product appearance may differ from that depicted on the<br />
packaging. Visit www.dlink.com for more details.<br />
D-<strong>Link</strong> <strong>DCS</strong>-<strong>2210</strong>/<strong>DCS</strong>-<strong>2230</strong> <strong>Quick</strong> <strong>Install</strong> <strong>Guide</strong>