Wadkin PP Panel Dimension Saw Manual and Parts List
Wadkin PP Panel Dimension Saw Manual and Parts List
Wadkin PP Panel Dimension Saw Manual and Parts List
- No tags were found...

You also want an ePaper? Increase the reach of your titles
YUMPU automatically turns print PDFs into web optimized ePapers that Google loves.
"WADKIN" DIMENSION SAWTYPE IIpp lIINSTRUCTION BOOK NO: 987www.wadkin.cominfo@wadkin.com
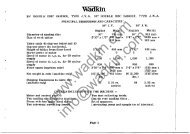
Waakin OPERATING AND MAINTENANCE INSTRUCTIONSSt<strong>and</strong>ard size of saw ..Maximum depth of cut .Depth of cut with saw canted to 45°<strong>Wadkin</strong>DIMENSION SAW TYPE P. P.PRINCIPAL DIMENSIONS AND CAPACITIES :-Throat opening between fixed <strong>and</strong> sliding tables ..<strong>Saw</strong> cants up to "" .. " "" .. " ". .... ... .... .. ..Maximum distance between saw <strong>and</strong> ripping fenceon st<strong>and</strong>ard table .. " .. " .. .. .. ..Will crosscut on st<strong>and</strong>ard table with saw at 90 0 ••Length cut off using stop on mitre fence ..Ripping fence cants up to ..Horse power of motor.. ..Speed of saw spindle 50 <strong>and</strong> 60 cycles. .'Details included with the machine.One pair saw collars <strong>and</strong> nut.Motor <strong>and</strong> control gear.<strong>Saw</strong> guard <strong>and</strong> riving knife.Single mitre fence with stop bar <strong>and</strong> stop.Page 118" 450 mm.5t" 140 mm.3. 7/8" 100 mm.6" 150 mm.45 0 45 030" 760 mm.5t'; x 29t"140 x 750 mm.1 i1 x36" 25 x 915 mm.36" 915 mm.45 0 45 05 52800 r.p.m. 2800 r.p.m.www.wadkin.comCanting Ripping fence.Set of spanners.Tin of lubricant.info@wadkin.com
<strong>Wadkin</strong> OPERATINGANDMAINTENANCEINSTRUCTIONSDust Deflector. ----Foot Brake embodyingAutomatic Electric StopSwitch for Motor.FIG.!.www.wadkin.cominfo@wadkin.comLocking h<strong>and</strong>le "A"H<strong>and</strong>wheel tocant the saw.H<strong>and</strong>wheel toraise <strong>and</strong> lowerthe saw.Page 2
<strong>Wadkin</strong> OPERATING AND MAINTENANCE INSTRUCTIONSREMOVAL OF SAW SPINDLE CARRIAGE.Isolate machine electrically. Remove guard <strong>and</strong> fence assemblies. Remove complete slidingtable unit by removing locking h<strong>and</strong>les marked "A" Fig. 1 <strong>and</strong> lifting table clear of tenonmarked "B" Fig. 1 <strong>and</strong> brackets marked "C" Fig. 1. Remove tee slot filling in strips frommain table <strong>and</strong> knock through two dowel pins from the top <strong>and</strong> remove four hexegon head screwsfrom underside of body flange, lift table clear. Remove electrical leads to motor <strong>and</strong> brakecable from brake shoe. Remove four hexegon head screws marked "C" Fig. 3 from each armcarrying h<strong>and</strong>wheel these can now be withdrawn from both gearboxes. Wedge saw spindlecarriage in 90 degrees position using wood blocks, then remove canting gearbox pivot pin,gearbox complete with canting screw can now be withdrawn from canting nut see Fig. 3. Removedust deflector <strong>and</strong> exhaust extension, canting pOinter from lip plate <strong>and</strong> remove lip plates seeFig. 2. Spindle carriage can now be removed from its position in the main frame. Reassemblein the reverse order of the above.Maintenance that can be carried out with saw spindle carriage removed.www.wadkin.comChanging of motor.Changing of spindle bearings, see special instructions. Page 6.info@wadkin.comAdjustment to wear strip of vertical slide.Page 4
WciOKin OPERATING AND MAINTENANCEINSTRUCTIONSol§~~~o.111)J-~ DIA. Q8) H01.1!.S1'01'. sie 01A.. (,,)FOUNDATIONIDJSOL.TB.MOV'!'ME.-1:----------14~ aItXHAUaT DItP"1.I!.CTOR.WH!.N CONNECTING TOItXTRACTrON PLANT,DISCARD DUST Dl.FL.ltCTOR&. CONNE-CT DIRltCT TO04-¥4 ~tl) DUTSI!:!1t DIA... E.XHAUST ItXT£.N,sroN BY.. MEANS OF P"L.!'l(IBL.1!.!2 '"CONNECTION TO PIt ... MIT l-+F=l~:J...LfII-_--U-fL""':~ ____-..l-'~'~~"j 04-5· CANTING. --o'.:t;'11)I.,..~s~~~~~ QUTLI!.T(48&) X (rOi)Ji\JE.XHAUST E.XTE.N&ION.TAr..,~oMDVRI&1t.. 'ALLHANDWHUL.z.o" soaFOUNDATIONPLANFIG. 4.CAHTINe HANDWH~L..www.wadkin.com-Joo.--III---MAINSRIIII!. .. FA1.I.. L.OC/C.IN1.I!.T.COHTACTOR 6£AR&. ISOL.ATINEI SWITCH.(1401.ATIHS SWITCHTO lIPltC IA1. 01lDu.)info@wadkin.comPage 5
WadKin OPERATING AND MAINTENANCE INSTRUCTIONSThe ripping fence is initially pitched. 004" this is measured at the front <strong>and</strong> rear of the saw,w'ith UH~' 1,f,ii.~iW r:l~llf 1!"~~j~f.~!d, The' dlir:n~mi!ili~Gm at the rear of the saw being . 004" greaterU1!j~;,n ~~.t the front of the saW. Should this pitching require'iLUiE!i!~i!.ng the grubscrew locking the eccentric pivot pin,~lh:m~lid be slackened off <strong>and</strong> the eccentric pivot pin turned:!:i!;} j~l:1:i to increase or decrease the pitching.Fig. 9.~J.:"~:), ~~,djust the fence pointer measure dimension betweenl:iu:"t.: 4:d' saw nearest fence <strong>and</strong> fence plate, then slackenfJ~'f F.,().inter locking grubs crew , set pointer to dimensiono1i:J.;taiJl'Y,ed between <strong>Saw</strong> set <strong>and</strong> fence, lock pointer in~1(J;s.;i,Ul[)n.oom:3,LE MITRE FENCE. Fig. 8. is in two parts1:J.ut.hnn.ade to pivot from a central pin fixed in.§:U.dhujg table. Degree angles are marked on thet.:1lb~,~ for accurately setting the fences, the principalanli!i]~~a being positively located by spring plunger.MUl:"~~s can be cut giving accurately squared frames'ii'fl;h(!:ji~ asSembled a bar <strong>and</strong> stop determines the exactl!E!in~:th of material cut off. Front leaf is supplied as.If:'i;n:~.l]ldard, rear leaf optional extra.C'r.'Olllf.!!: cutting fence Fig. 9. is used for both square:ili,ndi ~~,ngular work <strong>and</strong> can be used either side of theI:!l~~:~~ hl the table grooves. A bar <strong>and</strong> stop determines1;~,~~,~:;:t length of material cut off. ThiS fence is anopU!:).'nal extra.www.wadkin.cominfo@wadkin.comPage 9
<strong>Wadkin</strong> OPERATINGANDMAINTENANCEINSTRUCTIONSFIG. 10STANDARD MACHINESingle mitre fencequickly set for anyangle.FIG. 11 LARGER CAPACITY TABLETABLEwww.wadkin.cominfo@wadkin.comAdjustable rear cover of guardto enable fence to be set closeto saw. Also rear cover swingsover to permit fence to beadjusted forward <strong>and</strong> set closeto saw.Principal angle locationfor Mitre Fence.Should a larger capacity maintable be supplied of either 51"or 72" between saw <strong>and</strong> rippingfence. A guard carried fromthe riving knife will be suppliedin addition to st<strong>and</strong>ard guard,16" dia. saws can only be usedwith riving knife guard, <strong>and</strong> upto 30" wide can be ripped whenusing st<strong>and</strong>ard guard <strong>and</strong> 18"dia. saw.Page 10
WaaKin OPERATING AND MAINTENANCE INSTRUCTIONSSLIDING TABLE ASSEMBLYLock h<strong>and</strong>les marked "E" fig. 6. With rails carrying linear bearings in position, <strong>and</strong> hexegon head screws holdingadjustable rail finger tight, lower table on to intermediate slide <strong>and</strong> insert four pi.eces of i" diameter steel; twoeach end, <strong>and</strong> adjust hexegon hole grubscrew at each end of table to trap i" diameter rods in position as shownin fig. 1.Insert wooden wedges at one end of table only <strong>and</strong> remove i" diameter rods at this end as shown in fig. 2.Enter two-thirds of the steel bridge between table <strong>and</strong> intermediate slide as shown in fig. 3.Nylon cages <strong>and</strong> i" diameter steel balls can now be inserted by holding each ball in nylon cage with one fingerof each h<strong>and</strong> <strong>and</strong> feeding into slide-way as shown in fig. 4.With bridge piece complete with nylon cages in position, remove wooden wedges <strong>and</strong> i" diameter rods <strong>and</strong> placein position end retaining plates at each end of slide-way.Traverse table to its full extent in one direction, fig. 5, <strong>and</strong> using an allen key adjust slide with screws marked"A" fig.6 until table moves freely in this position. Now traverse table to its full extent in the opposite direction<strong>and</strong> repeat adjustment with screwS marked "C". Centralise table <strong>and</strong> adjust slide with screws marked "Bit. Withtable traversed to its full extent check for slackness in the slide in both directions <strong>and</strong> if necessary re-adjust toeliminate. Check sliding table for alignment with main table by traversing table to its full extent <strong>and</strong> checkingwith straight edge across main <strong>and</strong> sliding tables; repeat this operation at the opposite end. ShoUld sliding tableneed re-aligning with main table, first remove dowel pins in brackets marked "D", slacken hexegon head screws<strong>and</strong> adjust table in required direction as shown in fig. 6.www.wadkin.cominfo@wadkin.comPage 11
<strong>Wadkin</strong> OPERATINGANDMAINTENANCEINSTRUCTIONS18 il RI<strong>PP</strong>ING SAW FOR GENERALWORK. PART No QS10.16" FLAT CROSS CUT QS816" HOLLOW GROUND QS91 8" HOLLOW GROUND QS1218" FLAT CROSS CUT SAW QS1114" HOLLOW GROUND SAW QS33for cutting Bakelite, Tufnol <strong>and</strong>similar materials.18" NOVELTY TYPE SAW QS84for cutting Plywood.www.wadkin.comSPINDLE AND PIN HOLES IN SAWS.SA WS FOR USE ONTHE P. P. TYPE DIMENSION SAWThe saws illustrated are specially manufactured <strong>and</strong>tensioned to run at high speed: it is thereforerecommended they are obtained from us. The teethare designed to give the best possible finish to thework.Always keep the teeth sharp with an even set onboth sides. Before putting a new saw to use it mustbe ranged down when running at normal speed <strong>and</strong>each tooth brought to a sharp cutting edge.TUNGSTEN CARBIDE TI<strong>PP</strong>ED SAWS14" TUNGSTEN CARBIDE TI<strong>PP</strong>ED QS174for cutting Plywood, Hardwood &Asbestos.14" NOVELTY TUNGSTEN CARBIDETI<strong>PP</strong>ED QS176for cutting Plastics <strong>and</strong> Plywood.16" TUNGSTEN CARBIDE TI<strong>PP</strong>ED QS175for cutting Hardwoods <strong>and</strong> Plywood.info@wadkin.comPage 12
Waakin OPERATINGANDMAINTENANCEINSTRUCTIONSTWO-KNIFE WEDGE TYPE CIRCULARCUTTERBLOCK, PLAIN BORE, Q. R. TYPE.8" dia. x 15/16" thick x 1~" bore, Part No.QR.16.These cut t e r b 10 c k s aredesigned to take 5/32" up to~" thick cutters: this permitstungsten car bid e tip pe d-t---f--t-i--+- cutters to be supplied whennecessary.The cutters can be used formouldings requiring not morethan !" cutter projection whenLlsing tIt thick cutters.Our st<strong>and</strong>ard VZ range ofcutter s can be used in thesecutterblocks, also existingWhitehill head cutters.See Section D Tools Catalogue.mGH SPEED STEEL INSERTED TOOTHGROOVING SAWS.c~q:i ::::::: =:J,When enquiring please givewidth <strong>and</strong> maximum depth ofcut required. These saws areused for accurate high gradework. They are fairlyexpensive<strong>and</strong> require good h<strong>and</strong>ling.They are available in sizesfrom 10" to 12" diameter,<strong>and</strong> in varying widths on cut.See Section A Tools CataloguePage 134. 1/16" SQUARE 1~" BORE DOVETAIL CUTTERBLOCKS. 2" LONG.m-,illDJ'lII IThese cutterblocks are used forlonger runs, cutters working inpairs; several pairs may be mountedon a single block to bUild up mould.The cutters on these cutterblockshave. a very good cuttillg angle. Theyare l" thick <strong>and</strong> are securely heldby dovetail bolts. It is thereforepossible to have a large overhangallowing deep moulds to be workedwith safety.A limited range of Tungsten CarbideTipped cutters are available. Shapedcutters can be provided to specialorder.For st<strong>and</strong>ard cutters see Section Cof our Tools <strong>and</strong> Sundries Catalogue.HEAVY TYPE WOBBLE SAW UNIT ON SCREWEDSLEEVEIIiIiJ1Once set, the saw <strong>and</strong> collarsremain tightly locked on sleeve.This type may be set <strong>and</strong> keptat its setting when not on machine.It is a self-contained unit.A special spindle locknut is EUppliedwith this unit.www.wadkin.com12" Diam. ~"to 2i" groovesinfo@wadkin.comSee Section A Tools Catalogue
Waakin OPERATING AND MAINTENANCE INSTRUCTIONSEXP ANDING GROOVING SAWS OR DAOO HEADS12" DiameterThis tool is recommended for glvmg asmooth finish, both with <strong>and</strong> across thegrain in hard or soft woods. It is madeup in sets aIld each set consists of twooutside cutters, j" thick, <strong>and</strong> severalinside cutters of various thicknesses,1/16", j" or tIt thick, so that by addingOutside Cutter Inside Cutter Outside Cuttsr to or taking away, any width of groovewithin the range of the set, measured in eighths or sixteenths of an inch, can be cut.No.1. For grooves j" to i" wide, rising by jths. No. 3. For grooves i" to ~tt wide, rising by 1/16ths.No. 2. For grooves j" to a" wide, rising by jths. No. 4. For grooves i" to 1" wide, rising by 1/16ths.EXP ANDING TRENCHING AND GROOVING HEADSThis type is exp<strong>and</strong>able <strong>and</strong> made in two sizes 13" diameter.Accurate spacing collars give the desired width of cut risingby 1/16" up to the maximum. It is arranged to give a shearingcut <strong>and</strong> provided with side or spur cutters to produce clean cutting.The head is mounted on a loose sleeve <strong>and</strong> locked tightby a fine thread nut. One sleeve only is l'equired for the twosizes of head.Sleeve for either head P. P.135 complete with special spindlenut.J. P. 550 for grooves ! 11 to 1" wide <strong>and</strong> I!" deepJ. P. 558 for grooves 1.1/16" to 2" wide <strong>and</strong> 1~" deepwww.wadkin.comTo iD1niDilse the throat between filled <strong>and</strong> sliding tables.both spacing collar <strong>and</strong> rear saw collar are removedftomthe spindle, this permile the trencblng or grooving headto be set back Into the main table as shown to the accompanyingphotograph.The head illustrated opposite can be used with equal facilitybut is not capable of such fine adjustment for width of grooveas the one shown above. The widthof cut is varied by changingthe cutters. Side or spur cutters in addition to the groovingcutters effect clean cutting.info@wadkin.comHead J. P. 215 is 11" diameter <strong>and</strong> will groove ~" to 2" wide 1" deep.Page 14
OPERATING AND MAINTENANCE INSTRUCTIONSELECTRICAL INSTALLATION INSTRUCTIONSThe cabUng between the motor <strong>and</strong> the control gear has been carried out by <strong>Wadkin</strong> Ltd. , <strong>and</strong> itis only necessary to bring the line leads to the machine fOr it to be put into service. This shouldbe done as follows:FAILURE TO START1. Fit triple pole isolating switch near the machine unless it has been suppliedto special order by <strong>Wadkin</strong> Ltd .. when it will be fitted <strong>and</strong> connected to themachine.2. Connect the line lead to the appropriate terminals. See diagram of connections.The cables should be taken to the machine in conduit <strong>and</strong> secured to thecontrol gear by locknuts.3. Connect solidly to earth.4. Close isolating switch <strong>and</strong> press start button. If motor does not rotate in theright direction, interchange any two incoming line leads.1. Electric supply is not available at the machine.2; Fuses have blown or have not been fitted.3. Isolating switch has not been closed.4. Lock-off or stop button has not been released.5. Micro switch open, due to foot brake lever depressing switch (see separatefoot brake adjustment instructions)STO<strong>PP</strong>AGE DURING OPERATION AND FAILURE TO RESTART1. Fuses have blown.2. Overloads have tripped. They will reset automatically after a short time <strong>and</strong>the motor can be restarted in the usual manner.ADJUSTMENTSFor a finer overload setting, set the load indicator to a lower value <strong>and</strong> vice-versa for a less finesetting.GENERALwww.wadkin.cominfo@wadkin.comCheck the earth connection from time to time. Users are recommended to display in an appropriateposition in the maintenance department a <strong>Wadkin</strong> Electrical Maintenance Instruction Card, No. 356,which is issued gratis on application.Page 15
<strong>Wadkin</strong> OPERATING AND MAINTENANCEINSTRUCTIONS0.1149 DIMENSION SAWBENCH MODEL P. P.•o OrroEoU:e_,SbSee cl \Q.carcunOVE.RL..OAOS. ---:::::~~~~"VPE e.ls ~CONTACTO".IOL."TIN~ SWITCI-l----a ....'&uptlD\..lED TO ... EctAL.ORCE." ONI-V).L ......---.i.---.......II_...1"E.'iAINCONTACT.tNTE.R.LOCK SWliCH.(O"E"p."T~C ay BfVoo.I
· . . blow away harmful dust,chips <strong>and</strong> dirt with a<strong>Wadkin</strong> Electric BlowerNo motor can run at its maximum efficiency with its ventilatingduct or control gear covered with dust <strong>and</strong> dirt. Sooner or laterthe resultant overheating will cause serious trouble.Similarly, accumulations of chips <strong>and</strong> dust, in the mechanical parts ofthe machine can interfere with its efficiency. A few minutes a weekfor blowing down all Woodworking Machinery will be amply repaidin better <strong>and</strong> easier running, in increased life, <strong>and</strong> freedom frombreakdown.Blowers can be supplied for single phase A.C. or Direct Currentfor any voltage up to 250.Please state voltage when ordering.www.wadkin.cominfo@wadkin.com
www.wadkin.cominfo@wadkin.com
SAMPLE TYPE ORDERMACHINE:<strong>PP</strong>MACHINE NO: 1407TEST NO: 68975PARTS REQUIRED1 - <strong>PP</strong>100l/<strong>PP</strong>9 QUADRANT1 - <strong>PP</strong>1001/<strong>PP</strong>39 SPACING COLLAR1 - <strong>PP</strong>1001/<strong>PP</strong>503 SLIDING TABLE1 - <strong>PP</strong>1001/<strong>PP</strong>546 FENCE1 - <strong>PP</strong>1001/<strong>PP</strong>595 EXHAUST NOZZLEwww.wadkin.cominfo@wadkin.com
pp SPARE PARTS LIST<strong>PP</strong>I001/<strong>PP</strong>8<strong>PP</strong>I001/<strong>PP</strong>9<strong>PP</strong>IOO1/<strong>PP</strong>IO<strong>PP</strong>IOOl/<strong>PP</strong>18<strong>PP</strong>I001/<strong>PP</strong>21QUADRANTQUADRANTLIP PLATE FOR QUADRANTCOVER FOR SPIRAL GEARBOXCOVER FOR SPIRAL GEARBOX<strong>PP</strong>I001/<strong>PP</strong>23<strong>PP</strong>I001/<strong>PP</strong>26<strong>PP</strong>I001/<strong>PP</strong>39<strong>PP</strong>I001/<strong>PP</strong>43<strong>PP</strong>I001/<strong>PP</strong>67<strong>PP</strong>I001/<strong>PP</strong>81<strong>PP</strong>I001/<strong>PP</strong>82<strong>PP</strong>I001/<strong>PP</strong>86<strong>PP</strong>I001/<strong>PP</strong>87<strong>PP</strong>I001/<strong>PP</strong>88<strong>PP</strong>I001/<strong>PP</strong>93<strong>PP</strong>I001/<strong>PP</strong>98<strong>PP</strong>I001/<strong>PP</strong>99SCALE FOR CANTING<strong>PP</strong>l 001/<strong>PP</strong>l 01<strong>PP</strong>l 001/<strong>PP</strong>l 02<strong>PP</strong>I001/<strong>PP</strong>I05<strong>PP</strong>I001/<strong>PP</strong>121<strong>PP</strong>l 001/<strong>PP</strong>12 9<strong>PP</strong>I001/<strong>PP</strong>130<strong>PP</strong>I001/<strong>PP</strong>131RISE AND FALL NUTREAR END CAPSPACING COLLARSTOP HOLDER FOR EXTENSION TABLESPIRAL GEARADJ. SCREW FOR MOTORNUT FOR MOTOR PLATEFILLING IN STRIP(MAIN TABLE)FILLING IN STRIP (SLIDING TABLE)ARM CARRYING RIVING KNIFE BRACKETBRAKE LEVERFILLING IN PIECE (SLIDING TABLE)RIVING KNIFERIVING KNIFE MOUNTING PLATEPLATE CARRYING MOTOR ADJ. SCREWwww.wadkin.comSLIDING TABLE STOP SCREWSPIRAL GEARinfo@wadkin.comLIP PLATEWEAR STRI<strong>PP</strong>PI001/<strong>PP</strong>140<strong>PP</strong>I001/<strong>PP</strong>149<strong>PP</strong>I001/<strong>PP</strong>158<strong>PP</strong>I001/<strong>PP</strong>159<strong>PP</strong>I001/<strong>PP</strong>164<strong>PP</strong>IOOl/<strong>PP</strong>165RULE FOR STANDARD TABLERIVING KNIFE BRACKETARM CARRYING POINTERPOINTERPLUNGER CAP~PER PLUNGER FOR SLIDING TABLE
<strong>PP</strong>iOOl/<strong>PP</strong>169<strong>PP</strong>iOOl/<strong>PP</strong>172<strong>PP</strong>i OOl/<strong>PP</strong>i 7 5<strong>PP</strong>i OOl/<strong>PP</strong>i 7 6<strong>PP</strong>i00l/<strong>PP</strong>206<strong>PP</strong>iOOl/<strong>PP</strong>2i2REAR FLANGE FOR STUB ARBORFRONT FLANGE FOR it" DIAMETER STUB ARBORit" DIAMETER STUB ARBOR FOR SAWLOCKNUT FOR STUB ARBORCRANK HANDLERAIL FOR EXTENSION TABLE<strong>PP</strong>iOOi/<strong>PP</strong>222<strong>PP</strong>iOOi/<strong>PP</strong>225<strong>PP</strong>iOOl/<strong>PP</strong>227<strong>PP</strong>iOOi/<strong>PP</strong>229<strong>PP</strong>iOOl/<strong>PP</strong>230<strong>PP</strong>iQOi/<strong>PP</strong>23i<strong>PP</strong>iOOl/<strong>PP</strong>232<strong>PP</strong>iOOi/<strong>PP</strong>24i<strong>PP</strong>iOOl/<strong>PP</strong>243<strong>PP</strong>iOOl/<strong>PP</strong>244<strong>PP</strong>iOOl/<strong>PP</strong>245<strong>PP</strong>iOOl/<strong>PP</strong>246<strong>PP</strong>i 00l/<strong>PP</strong>256LOCKING PAD FOR FENCE<strong>PP</strong>iOOl/<strong>PP</strong>257<strong>PP</strong>i 00l/<strong>PP</strong>2 58<strong>PP</strong>i 00l/<strong>PP</strong>2 59<strong>PP</strong>iOOl/<strong>PP</strong>50l<strong>PP</strong>iOOl/<strong>PP</strong>502<strong>PP</strong>iOOl/<strong>PP</strong>503<strong>PP</strong>i Ool/<strong>PP</strong> 505FENCE SLIDEFENCE ADJ. SCREWOOVETAIL BOLTLOCKING NUTLOCKING HANDLECLAMP NUTPOINTER FOR FENCELOCKNUT FOR STUB ARBORPILLAR CARRYING GUARDSU<strong>PP</strong>ORT ARMARM CARRYING GUARDRAISING SCREWPIVOT PIN FOR TURNOVER STOPROLLER FOR EXTENSION TABLE·:PIVOT PIN FOR FENCEwww.wadkin.comMAIN FRAMEMAIN TABLEinfo@wadkin.comSLIDING TABLESPINDLE SLIDE HOUSING<strong>PP</strong>iOOl/<strong>PP</strong>506<strong>PP</strong>iOOl/<strong>PP</strong>508<strong>PP</strong>iOOl/<strong>PP</strong>509<strong>PP</strong>iOOl/<strong>PP</strong>5i0<strong>PP</strong>iOOl/<strong>PP</strong>5i2<strong>PP</strong>iOOl/<strong>PP</strong>5i3SPIRAL GEARBOX FOR CANTING MOTIONBRACKET CARRYING INTERMEDIATE SLIDEBRACKET CARRYING INTERMEDIATE SLIDEEXTENSION FOR GEARBOXQUADRANT SEATINGQUADRANT SEATING
<strong>PP</strong>lOOl/<strong>PP</strong>515<strong>PP</strong>IOOl/<strong>PP</strong>522<strong>PP</strong>I001/<strong>PP</strong>523<strong>PP</strong>I001/<strong>PP</strong>524<strong>PP</strong>l Ool/<strong>PP</strong> 525<strong>PP</strong>I001/<strong>PP</strong>526EXHAUST DEFLECTORSPINDLE PULLEYMOTOR PULLEYFRONT END CAPCOVER CARRYING BRAKE LEVERPUSH BUTTON HOUSING<strong>PP</strong>I001/<strong>PP</strong>530<strong>PP</strong>I001/<strong>PP</strong>531<strong>PP</strong>IOOl/<strong>PP</strong>532<strong>PP</strong>IOOl/<strong>PP</strong>533<strong>PP</strong>IOOl/<strong>PP</strong>534<strong>PP</strong>IOOl/<strong>PP</strong>536<strong>PP</strong>IOOl/<strong>PP</strong>539<strong>PP</strong>IOOl/<strong>PP</strong>545<strong>PP</strong>IOOl/<strong>PP</strong>546<strong>PP</strong>IOOl/<strong>PP</strong>551<strong>PP</strong>I001/<strong>PP</strong>552<strong>PP</strong>l Ool/<strong>PP</strong> 553BRAKE LEVER<strong>PP</strong>IOOl/<strong>PP</strong>554<strong>PP</strong>IOOl/<strong>PP</strong>556<strong>PP</strong>IOOl/<strong>PP</strong>557<strong>PP</strong>I001/<strong>PP</strong>559<strong>PP</strong>I001/<strong>PP</strong>561<strong>PP</strong>l Ool/<strong>PP</strong> 564<strong>PP</strong>IOOl/<strong>PP</strong>566<strong>PP</strong>I001/<strong>PP</strong>567SPINDLE HOUSING AND MOTOR SLIDEOUTER RAI L OF EXTENSION TABLEINNER RAIL OF EXTENSION TABLEBRAKE SHOEBRAKE SHOEFENCE PIVOT BRACKETCOWL FOR FANCENTRE RAIL OF EXTENSION TABLEFENCENUT FOR CANTING SCREWPIVOT SHAFT FOR CANTING GEARBOXBRAKE DRUMSCREW FOR CANTINGRETAINING PLATES FOR INTERMEDIATE SLIDEwww.wadkin.comFILBOE FOR BRAKE CABLEBALL BEARING LOCKNUTinfo@wadkin.comLOCKING STUDLIP PLATE FOR MAIN TABLELIP PLATE FOR MAIN TABLE<strong>PP</strong>IOOl/<strong>PP</strong>570<strong>PP</strong>IOOl/<strong>PP</strong>571<strong>PP</strong>l Ool/<strong>PP</strong> 576<strong>PP</strong>IOOl/<strong>PP</strong>579BELT DRIVEN SPINDLEBELT DRIVEN SPINDLE WITH LOOSE ARBORKEY FOR SPINDLEPIVOT PIN FOR BRAKE LEVER
<strong>PP</strong>I001/<strong>PP</strong>580<strong>PP</strong>IOOl/<strong>PP</strong>581<strong>PP</strong>IOOl/<strong>PP</strong>582<strong>PP</strong>IOOl/<strong>PP</strong>583<strong>PP</strong>IOOl/<strong>PP</strong>591<strong>PP</strong>IOOl/<strong>PP</strong>592FI LEOE FOR BRAKE CABLEFILBOE FOR BRAKE CABLEBRAKE SHOE PIVOT PINEND RETAINING PLATES FOR SLIDE RODSRAIL CARRYING LINEAL BEARINGSRETAINING PLATE FOR SLIDE RODS<strong>PP</strong>IOOl/<strong>PP</strong>594<strong>PP</strong>IOOl/<strong>PP</strong>595<strong>PP</strong>l Ool/<strong>PP</strong> 596<strong>PP</strong>IOOl/<strong>PP</strong>599<strong>PP</strong>l 00l/<strong>PP</strong>600<strong>PP</strong>IOOl/l<strong>PP</strong>IOOl/IA<strong>PP</strong>IOOl/2<strong>PP</strong>IOOl/2<strong>PP</strong>IOOl/2<strong>PP</strong>IOOl/2ABALL BEARING LOCKNUT<strong>PP</strong>I001/2AFRONT SAW COLLAR<strong>PP</strong>IOOl/2CSAW COLLAR<strong>PP</strong>IOOl/60<strong>PP</strong>IOOl/EJ49<strong>PP</strong>IOOl/EKA525LEG CARRYING EXT. TABLE RAILEXHAUST NOZZLEREAR COVER FOR MAIN FRAMECOVER FOR SPINDLE SLIDE HOUSINGCOVER FOR SLIDING TABLEFORM HANDLEDRIVING PEGCOLLARHORN HANDLESPRINGGREASE RETAINERwww.wadkin.cominfo@wadkin.comSTOPLOCKING BOSS<strong>PP</strong>IOOl/EKA526<strong>PP</strong>IOOl/FC217<strong>PP</strong>IOOl/FD8338<strong>PP</strong>IOOl/FM654<strong>PP</strong>I001/M1833<strong>PP</strong>I001/PJ93LEVER FOR LOCKING BOSSCLAMPING BOLT FOR OUTFEED GUIDESGUARD FOR AIR INLETHANDLE FOR CLAMP NUTDUST COVER FOR THRUST BEARINGNUT FOR SPINDLE
<strong>PP</strong>1001/PK16<strong>PP</strong>100l/PT22<strong>PP</strong>100l/SG255<strong>PP</strong>1001/SG256<strong>PP</strong>1001/SG257<strong>PP</strong>100l/SG264FRONT FENCE PLATEPAD FOR FOOT LEVERARM BRACKETBASECAP FOR RAISING SCREWLOCKING HANDLE<strong>PP</strong>100l/SKF1306<strong>PP</strong>1001/SKF6309<strong>PP</strong>1 00l/WT1326<strong>PP</strong>100l/XG3<strong>PP</strong>100l/ZE1<strong>PP</strong>100l/ZE3<strong>PP</strong>1001/ZZ14BEARINGBEARING1 0" HANlliHEELSU<strong>PP</strong>ORT BRACKETS TA TOR FRAMEREAR BEARING HOUSINGROTOR FANwww.wadkin.cominfo@wadkin.com
<strong>PP</strong>1001/<strong>PP</strong>99<strong>PP</strong>1001/PT22<strong>PP</strong>1001/<strong>PP</strong>5,5www.wadkin.cominfo@wadkin.comHEAVY DUTY HIGH PRECISION SLIDING TABLE DIMENSION SAW -IpprpP1001/<strong>PP</strong>596
<strong>PP</strong>1 001/P1'1 7 5<strong>PP</strong>1001/ <strong>PP</strong>52pp10()1/<strong>PP</strong>51<strong>PP</strong>100l/<strong>PP</strong>530001/1'P168<strong>PP</strong>1001/2Cpp1 001/ <strong>PP</strong>39P1001/<strong>PP</strong>1001/PJ93<strong>PP</strong>1001/P1001/<strong>PP</strong>576<strong>PP</strong>1001/<strong>PP</strong>5242C<strong>PP</strong>1 OOl/<strong>PP</strong> 561<strong>PP</strong>1001/2£1www.wadkin.cominfo@wadkin.com2A001/SKF13
<strong>PP</strong>IOOl/<strong>PP</strong>101<strong>PP</strong>100l/<strong>PP</strong>51<strong>PP</strong>IOOl/<strong>PP</strong>595P1001/<strong>PP</strong>501i1 J j ill I ,t i/ _ I r Lt~U?1f:\lli.'".\ 1:' '..\\
<strong>PP</strong>10Ol/<strong>PP</strong>522)P1 OOl/<strong>PP</strong> 523P100l/<strong>PP</strong>26AE:KND 184 53,000 R.P .• !"!.<strong>PP</strong>1001/<strong>PP</strong>92<strong>PP</strong>1001/<strong>PP</strong>88<strong>PP</strong>10Ol/<strong>PP</strong>8<strong>PP</strong>10Ol/<strong>PP</strong>14<strong>PP</strong>1001/<strong>PP</strong>10<strong>PP</strong>1001/<strong>PP</strong>51P10Ol/<strong>PP</strong>130+Ino::--'-I'-1"www.wadkin.com______ <strong>PP</strong>1001/<strong>PP</strong>564info@wadkin.com2C<strong>PP</strong>1 OOl/PJ
<strong>PP</strong>1001/<strong>PP</strong>592<strong>PP</strong>1001/<strong>PP</strong>87<strong>PP</strong>1001/<strong>PP</strong>165'- ",<strong>PP</strong>1001/<strong>PP</strong>600 J ;I'- .POLLi'.RD g" DIA 3" LGSECTIONS LINEAL BRG. &3/16" DIA BALL BRGS.I0 10 01/ 2) t ,ill, ~<strong>PP</strong>1001/<strong>PP</strong>164<strong>PP</strong>1001/<strong>PP</strong>508'PlASTIC KNOBP PI 00l/Blb5 ... -~..----.:;:..-. -.-~-.•. - .. ~~www.wadkin.cominfo@wadkin.com_,1'i-<strong>PP</strong>100l/<strong>PP</strong>591P100l/<strong>PP</strong>503<strong>PP</strong>1 Ool/<strong>PP</strong> 566<strong>PP</strong>1 OOl/<strong>PP</strong> 502" ?:!-----t1001/<strong>PP</strong>120,... <strong>PP</strong>1 OOl/<strong>PP</strong>9..., <strong>PP</strong>1 OOl/.<strong>PP</strong>ll~<strong>PP</strong>1001/<strong>PP</strong>512
·----------------=. - .. ------------:----..--......-~~~-~<strong>PP</strong>1001/ 1 <strong>PP</strong>} OOl/<strong>PP</strong>567<strong>PP</strong>1001/<strong>PP</strong>206<strong>PP</strong>1001/SG257r-________ ~~~~<strong>PP</strong>1001/ 2Q::P1001/ <strong>PP</strong>24r--i.-E=t1~~~~~=====~==~~~~• G"P1001/<strong>PP</strong>24r--==i~--.~Pl00l/SG25~~-:::j~~~~~~~~~~~~~~~~~~~~~~=~,<strong>PP</strong>1001/<strong>PP</strong>502<strong>PP</strong>10Ol/<strong>PP</strong>552P1001/<strong>PP</strong>1HP Pl OOl/<strong>PP</strong>67www.wadkin.cominfo@wadkin.com
L.. 22dd/TOO TddOVTdd/TOOTddwww.wadkin.cominfo@wadkin.com+.'I
<strong>PP</strong>1001/<strong>PP</strong>531<strong>PP</strong>10Ol/<strong>PP</strong>256www.wadkin.cominfo@wadkin.com