
Quick and Easy Light Trails Stacking
Hei guys! I’m back with another video. For this video, I’ll be shooting some light trails over an expressway, and then I’ll show you guys a super quick and easy technique to stack all those light trails together with the sunset. With super quick and easy stacking technique, you only need Photoshop and Lightroom. No additional plugins are required.
Light trails make wonderful compositional elements because they’re dramatic, and they can be used as leading lines to lead the viewer’s eyes into scene. To start off you need to find yourself a good vantage point with lots of traffic, such as over a bridge or at the entrance of a tunnel.
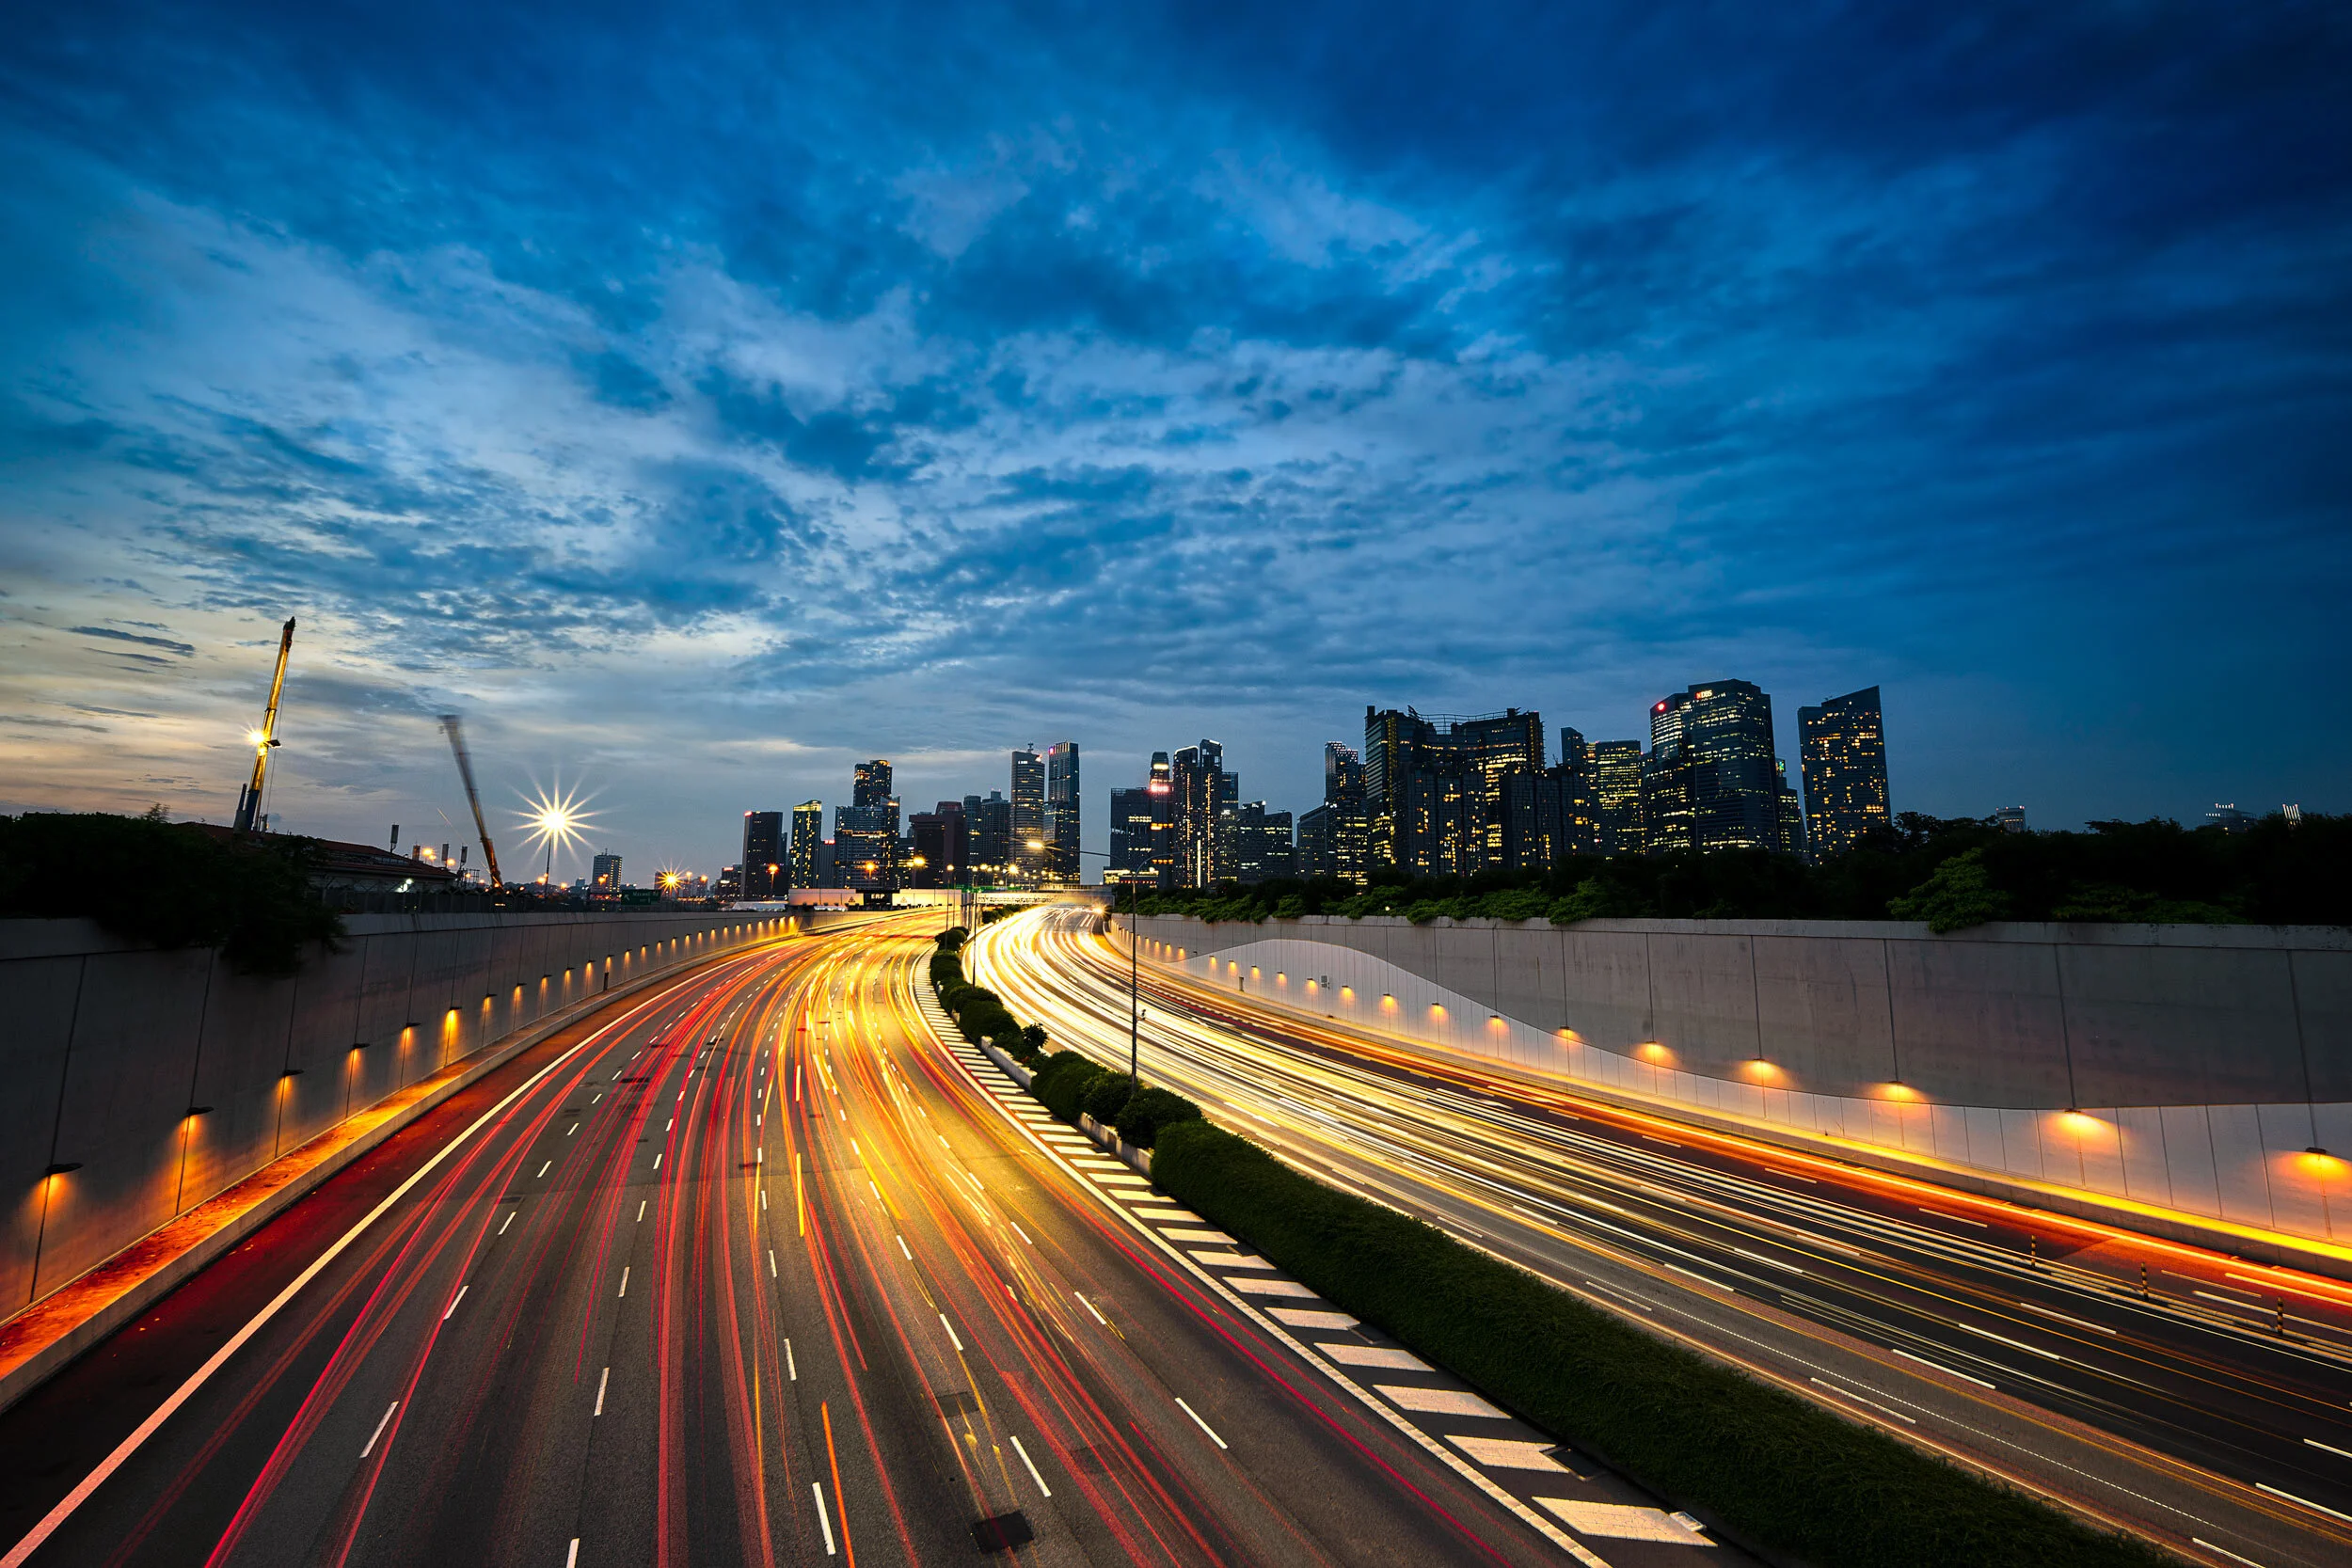
One sunset exposure merged with five light trail exposures.
Shooting Technique
Step 1: Set your camera on a tripod. It is important not to move your tripod or change your composition once you have it fixed. You need to have your tripod at the exact same spot for as long as you taking photos.
Step 2: Take your sunset exposure as usual. During this time, disregard the moving traffic. We’ll get to that later on.
Step 3: Wait for the skies to get darker so that the ambient light in the scene is darker. The idea is that you want the lights to be more obvious than the surrounding areas. This technique wouldn’t work as well if the ambient light is too strong.
Step 4: Start taking a few long exposures. Your shutter speed will depend on how many seconds it takes the vehicles to travel the entire length of the road. For this example, it takes around 13 seconds for the vehicles to light up the road.
Editing Technique
I’ve prepared a sunset exposure (edited beforehand), and four more exposures of light trails taken to be stacked.

To start off, go to the Develop module of any one of the light trail exposures. Lower the Highlights, Shadows, Blacks, and bring up the Whites. Increase the Texture, Clarity and Blacks as well.

Lower the Highlights, Shadows, Blacks, and bring up the Whites. Increase the Texture, Clarity and Blacks
Next, select all the light trail exposures and synchronise all changes by press Cmd Shift + S on Mac, or Ctrl Shift + S for Windows.

Sync the settings on all light trail images.
Once that is done, select all the images and Right Click > Edit In > Open as Layers in Photoshop.
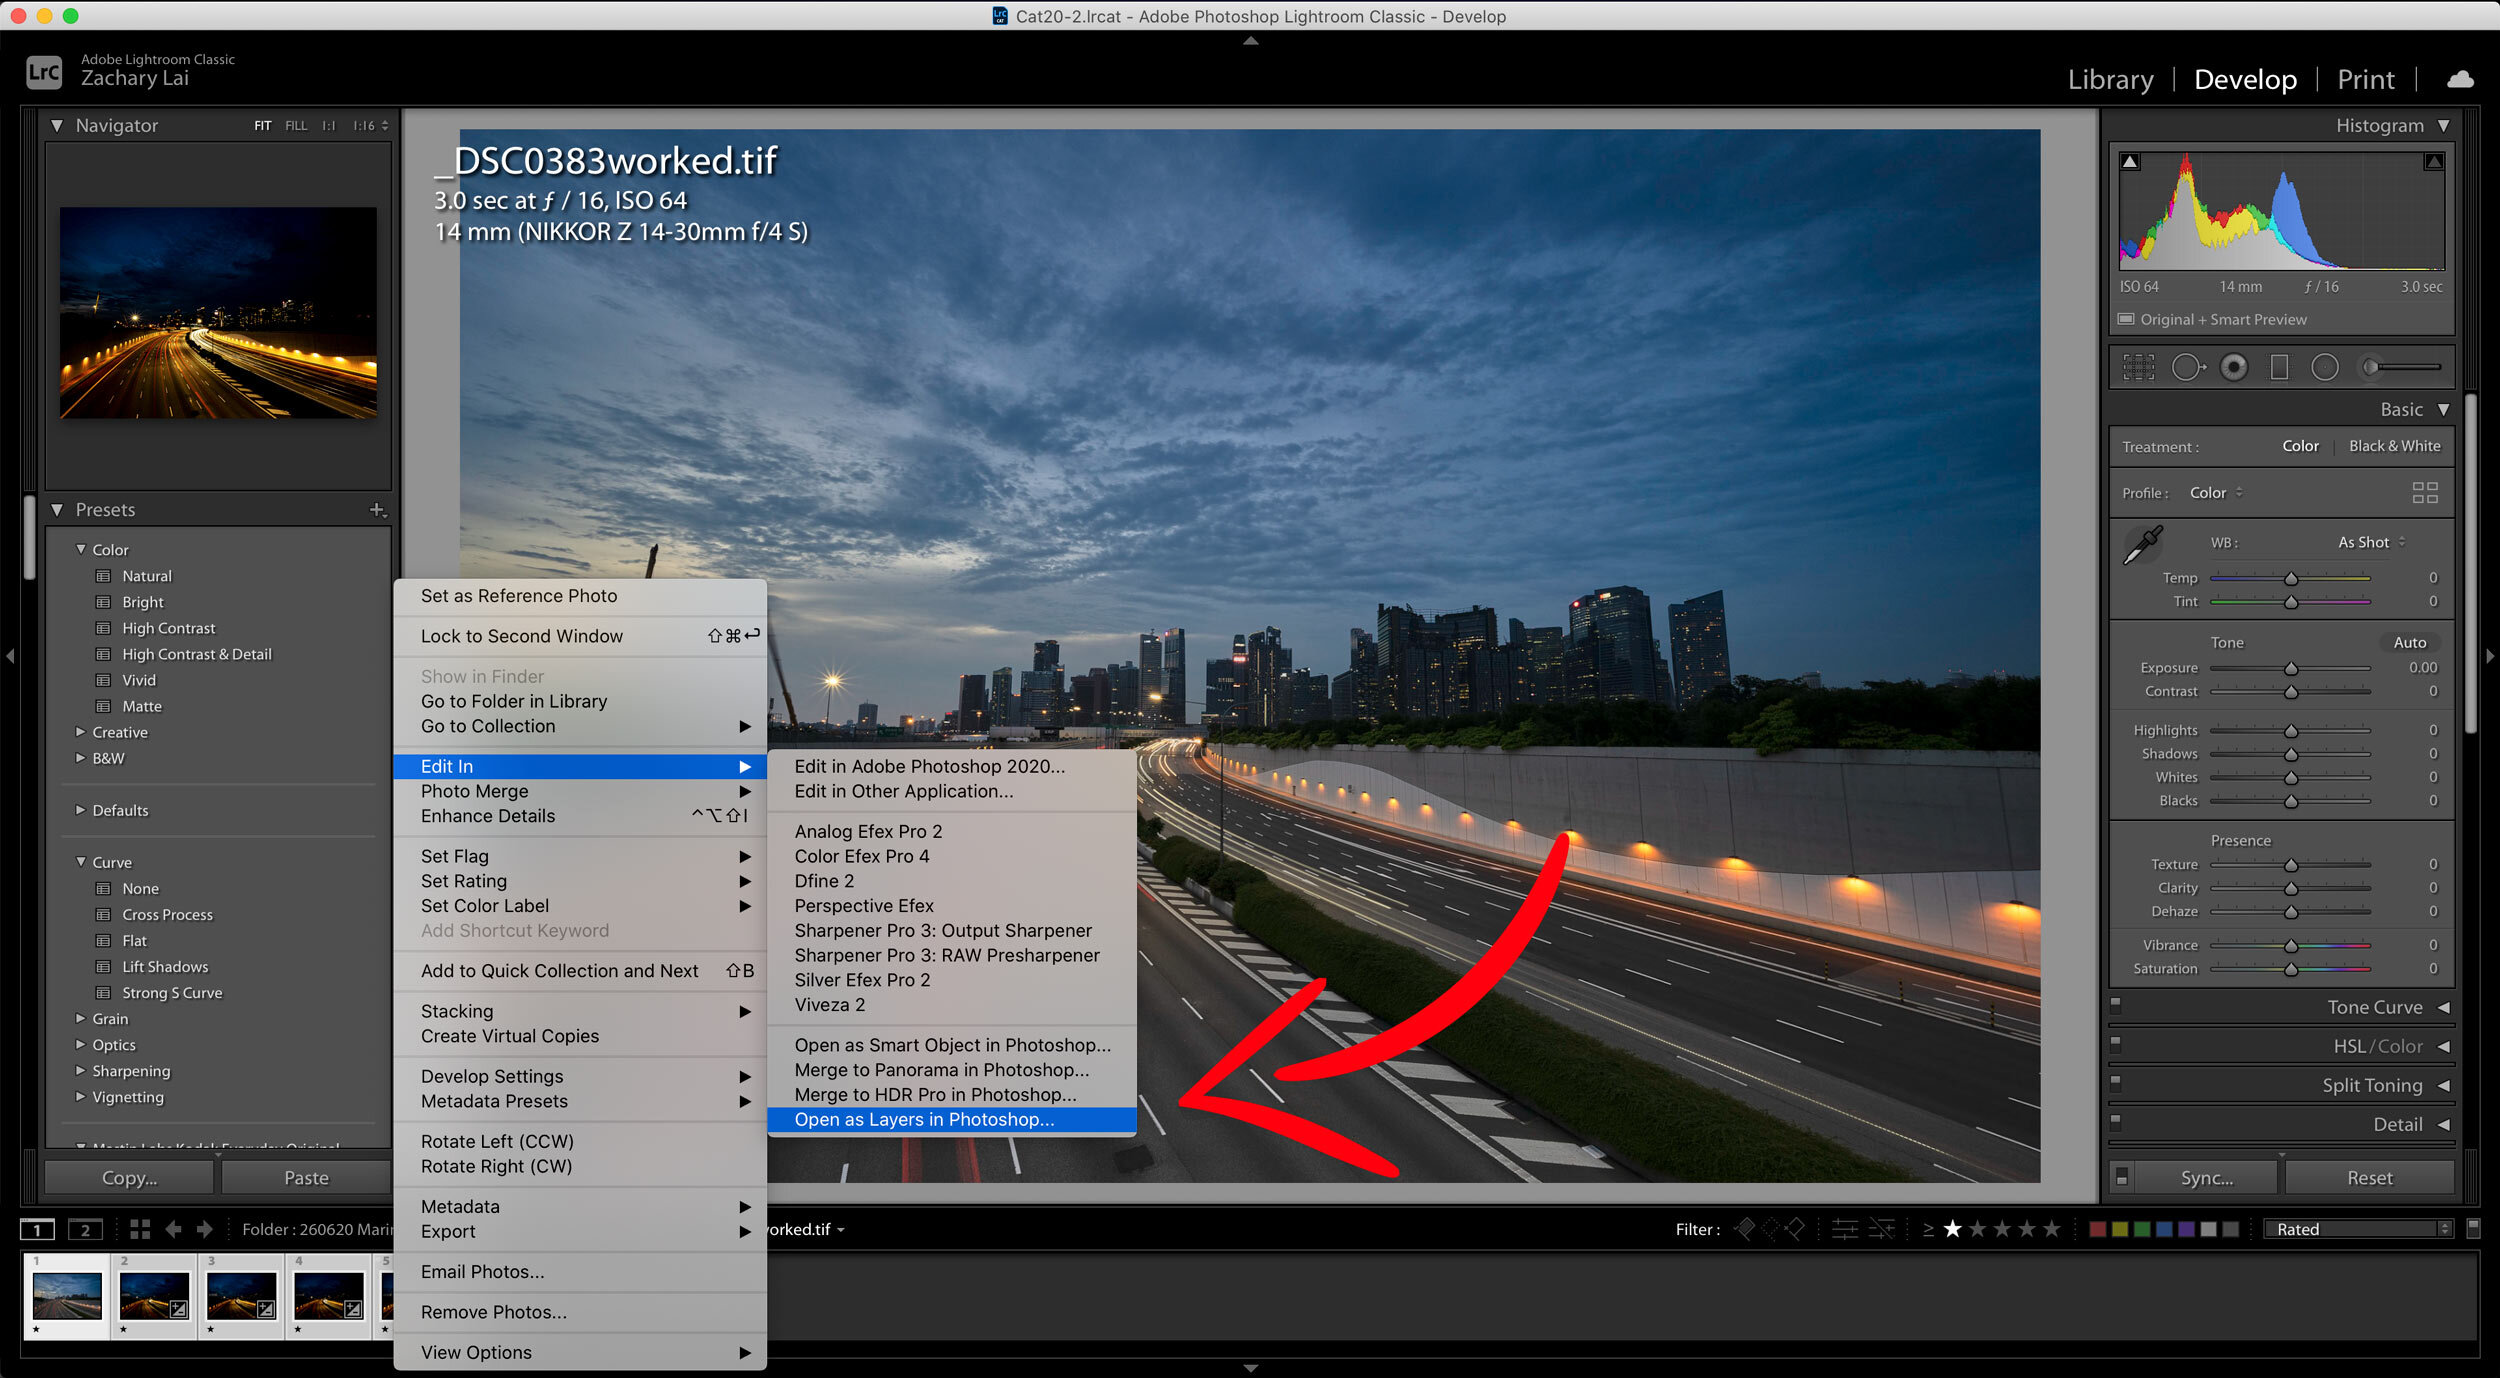
Load images stacked as layers in PS
Photoshop will automatically open and load the layers as a stack. Since we took care not to touch our tripod while shooting, the exposures should be perfectly aligned.
Click on the sunset layer and drag it to the bottom of the stack.
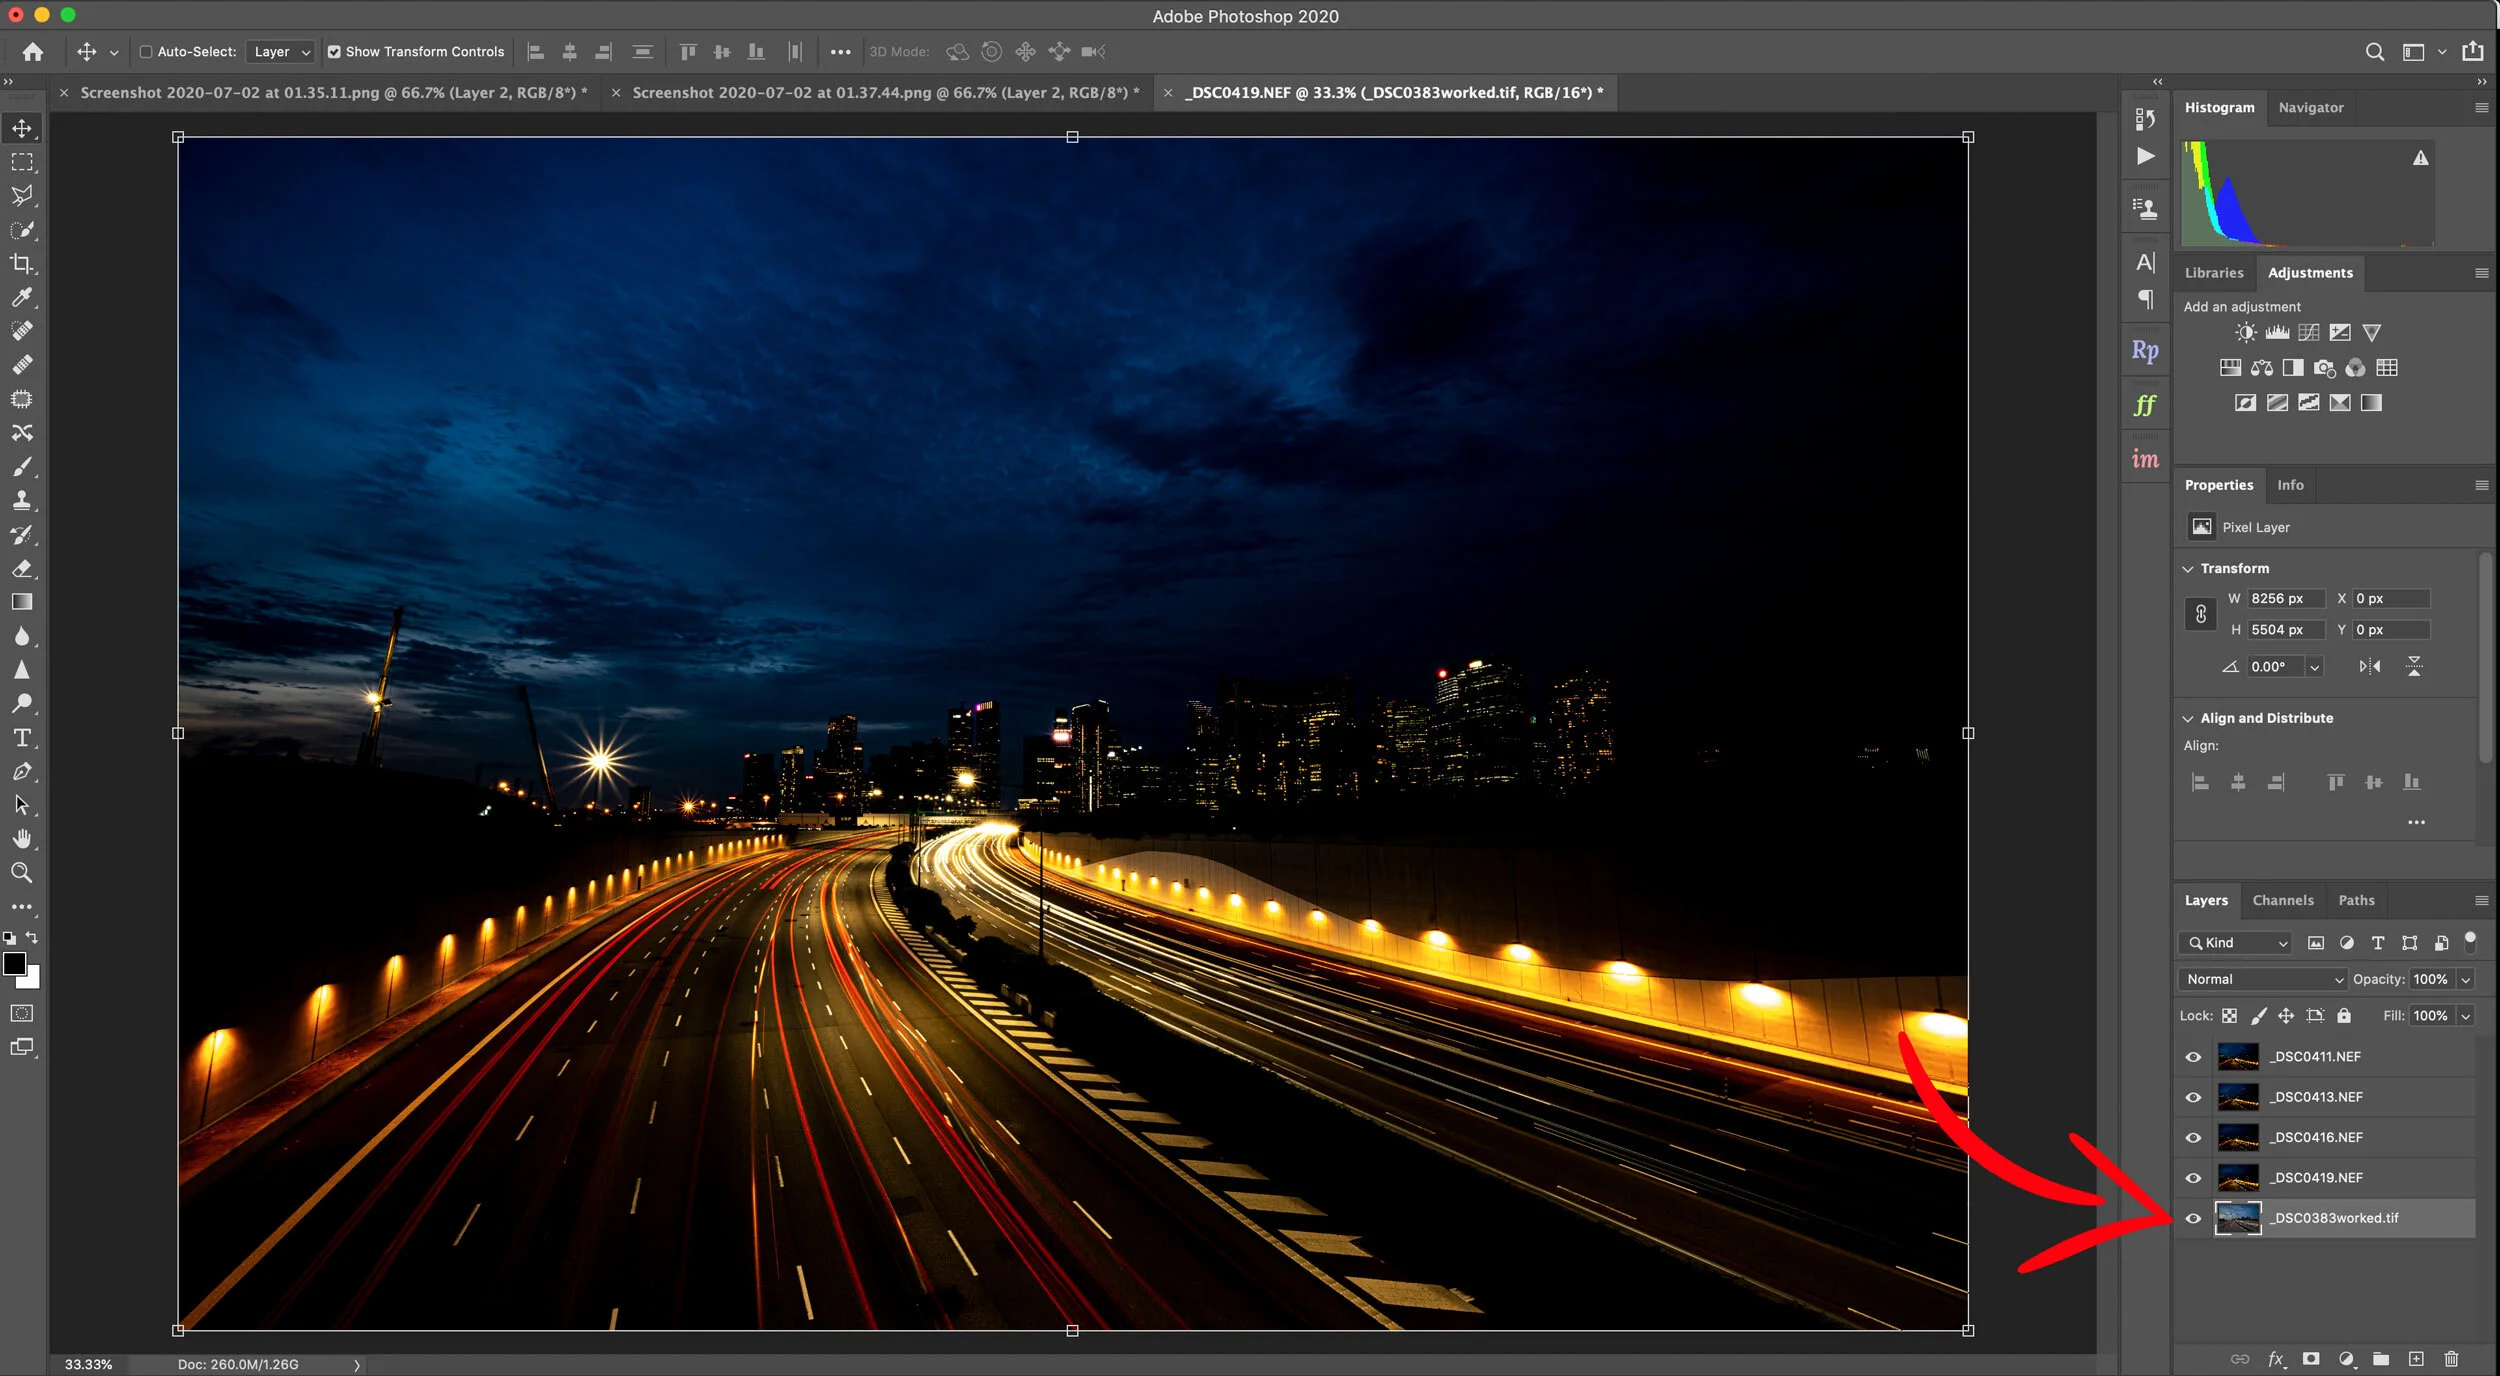
Set the sunset exposure as the bottom layer. The light trails should now be the visible layer.
Next, select the layer above the sunset layer and change the Blend mode to “Lighten”

The light trails are starting to appear.
“Lighten” overlays the brightest parts of the layer on the layer below.
Turn off the visibility of the layers above to see the difference. You can do so by clicking on the “Eye” next to the layers.

Some parts of the image look too bright now, so I’m to remove those parts of the layer by masking it off. Click on Layer Mask, then use a black brush (press “B), make sure the foreground colour is set to Black, then drag it over the areas that are too bright to paint it out.

After creating the Layer Mask, manually paint off the areas you don’t want with a black brush.
Repeat the same process for the next few layers. Instead of painting out a new mask each time, you can Right Click on the mask, then click on “Subtract Mask from Selection”, then select the next layer and click on Layer Mask. It’ll automatically create the same mask again.

Check out the video to help you with this step.
For the last layer that’s on the top, use “Screen” as your blend mode instead of “Lighten”. “Screen” will allow pixels that are not only the brightest, but those slightly less bright as well to be overlay on the image.

All light trail exposures are now stacked.
That’s the end of our light trail stacking tutorial. The rest of video will elaborate further on enhancing the image as well as sharpening using Nik Color Efex and High Pass filter, which has already been covered in my earlier tutorial, How I Edited That Seletar Tree.


Since some of my viewers has requested for it, here’s the rough location circled in black.
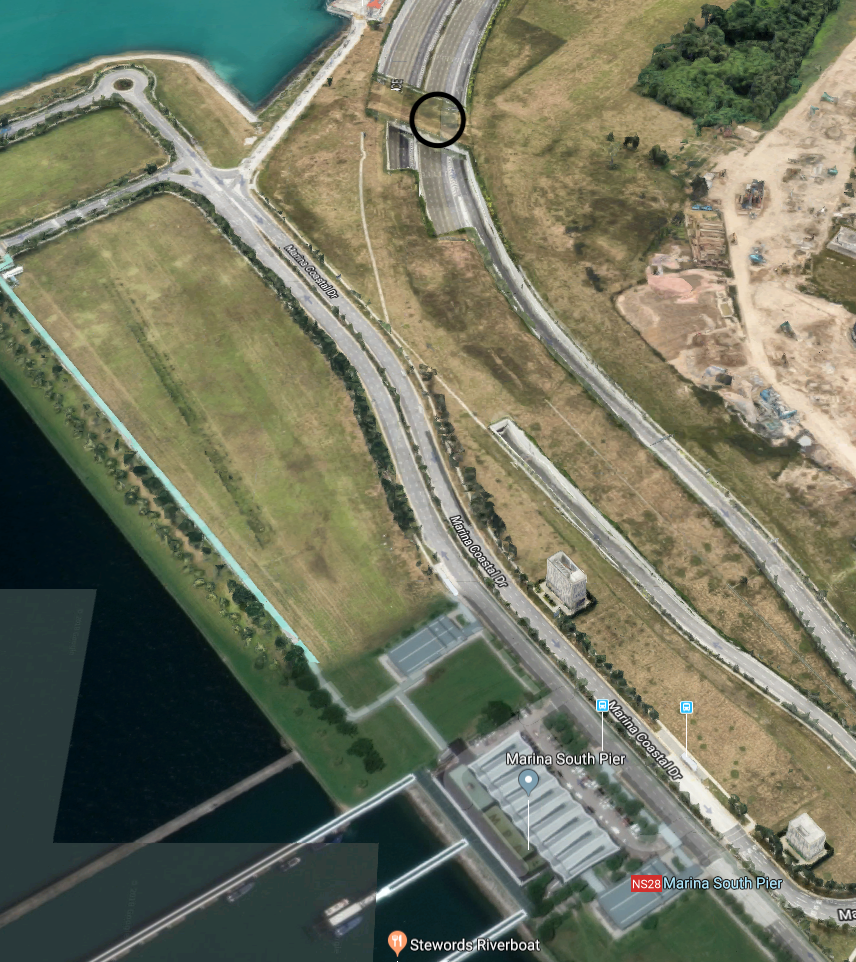
Rough location. Warning: Some bush wracking might be needed, and bring insect repellent!