————————————————
2 monsters with the same Level
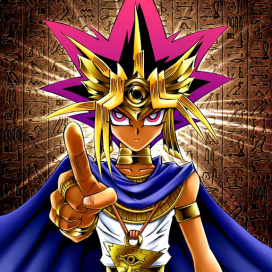
Cannot be used as Link Material. You can only use each of the following effects of “Bujinki Ahashima” once per turn.
● If this card is Link Summoned: You can Special Summon 2 monsters with the same Level, 1 from your hand and 1 from your GY, but negate their effects, and immediately after this effect resolves, Xyz Summon 1 Xyz Monster using those 2 monsters only.
● If an Xyz Monster this card points to activates an effect by detaching material(s) (except during the Damage Step): You can target 1 Spell/Trap your opponent controls; destroy it.
————————————————
Currently Found In: Duel Overload (DUOV-EN018)
Many current Decks spend long turns on several summons and Extra Deck preparatives to obtain the strongest board as soon as possible, but that doesn’t mean every strategy has to follow this playstyle. A good example of this is the Bujin archetype, which only requires a single monster from the Main Deck to already become a main threat against any opponent. Thanks to the Bujingi subgroup a monster of this archetype can stay alive and even punish the opponent’s actions, which with some backrow for further support it can turn into an Anti-Meta strategy without no much effort. Despite its passive nature doesn’t mean that Bujin won’t take the offensive at any chance given, as will look for the right opening to bring their Xyz Monsters to either beat the opponent or rearrange our resources.
“Bujinki Ahashima” is the Link Monster addition many classic archetypes gained in recent years, not only able to support its own kind but any Xyz Summons in general. With the drawback where cannot become a Link material, the Link Summon of “Ahashima” will allow us to immediately follow with a Xyz Summon by summoning two monsters sharing equal Levels from our hand and Graveyard respectively with their effects negated. “Ahashima” continues the support with its second effect, where a Xyz Monster pointed by its arrows detaches a material to activate an effect it will allow us to destroy an opponent’s Spell or Trap. “Ahashima” might not have a high ATK, but can become a reasonable investment in any Xyz focused strategy which wants some field pressence and backrow removal all together.
The summoning conditions of “Ahashima” are quite odd, as pretty much shares the same as a Xyz Monster by needing monsters with the same Level. Because of that “Ahashima” must be played as if we were aiming for a Xyz Summon (Specially due its effects), and all will vary of the Deck is interacting with. Bujin although often a passive strategy they won’t hesitate on bringing materials to summon “Ahashima” in no time, as from a mere “Rescue Rabbit” summoning copies of “Bujin Hiruko” from inside our Deck, to gaining additional summons by the likes of “Bujin Hirume” and “Fire Formation – Tensu”, the archetype can easily go from a simple field to one with “Ahashima” and the following Xyz Monster by its effect. This same outcome can be replicated by pretty much any Deck that has even some basics arround Xyz Monsters given the effects and summon of “Ahashima” isn’t exclusive to its archetype, ranging from being easily accessible by Decks that swarms the board with materials such as Frogs or Burning Abyss, to those that slightly mix Levels like Gagaga. One major advantage “Ahashima” has on its summon over Xyz Monsters is that is capable of using Tokens for its arrival, therefore we can instead use way simpler resources such as “Scapegoat” and “Photon Sanctuary” to obtain all the materials needed for its Link Summon. Lastly, its arrows’ locations and several restrictions to be a material makes “Ahashima” not a favorable revival target, but unless there’s a Xyz Monster in the Extra Monster Zone it can become a material for a Tribute or Fusion Summon in some particular cases.
At first might seem rebundant to Link Summon “Ahashima” to simply follow with a Xyz Summon we could’ve used the materials of the former into, but there are various advantages no matter if involves other Bujins or not. First of all is field pressence, as even though “Ahashima” might not be the strongest monster out there and will often rely on the likes of “Honest” and/or “Bujingi Crane” to survive, the mere fact we obtained two monsters at cost of technically one summon it can create a strong setup by little effort. Because “Ahashima” requires monsters with matching Levels in our hand and Graveyard for its Xyz Summon ability can lead to a very expensive summon if not careful, but in many cases it will potentially use one of the materials of its Link Summon and thus pretty much become a card that requires three monsters to work with (In other words, the two Link materials plus a monster in our hand). Another important trait of “Ahashima” is the potential to rearrange our setups if stuck, as while its Link Summon has more liberties than a Xyz Summon the latter can be prepared with monsters in our hand and Graveyard which otherwise wouldn’t find a way to be brought together (For example, using cheap Level 3 monsters on “Ahashima” so can summon Level 5 monsters). The removal effect is much simpler on its usage, as the very same Xyz Monster we just brought or any other pointed by “Ahashima” will trigger this ability once detaches one of its materials. This also can include opponent’s Xyz Monsters, as given the upper arrow of “Ahashima” it can punish reckless players which didn’t consider card location during their plays.
“Bujinki Ahashima” is not like many other Link Monsters which often provides straightforward assist effects towards other summons, but can truly stand out among the competition due many of its unique traits. With the right material management “Ahashima” is a card that will require three monsters at most, leading to not only its own Link Summon but also a Xyz Monster which isn’t limited to other Bujins. This also gives us the opportunity to slightly diversify our monsters’ Levels when working arround its effect, taking advantage of the simple investment of Link Summons to then aim for a Xyz Summon by this monster’s shortcuts. The backrow removal although might not be as prominent against various Decks is nonetheless powerful, leading to a strong board with two Extra Deck monsters immediately taking over the field. While in the right hands “Ahashima” grants a lot of benefits no other Link Monster will easily replicate, both its low ATK and the fact the opponent might gain an additional Zone for their Link and Pendulum Summons due its upper arrow it leads to a major risk that will affect the overall usage of this monster. While this alone damages its pressence in many Extra Decks, “Ahashima” offers a strong balance of benefits for the overall investment required.
Personal Rating: A-
+ When Link Summoned it will perform a Xyz Summon by summoning a monster in our hand and Graveyard with matching Levels
+ If a Xyz Monster pointed by its arrows detaches a material to activate an effect we can destroy an opponent’s Spell or Trap
+ Easy to handle its summon and effects arround Xyz strategies
– Cannot be used as Link material
– Low stats and an upper arrow carries several risks to be aware of
