Protocol optimization is essential for clear, reproducible results
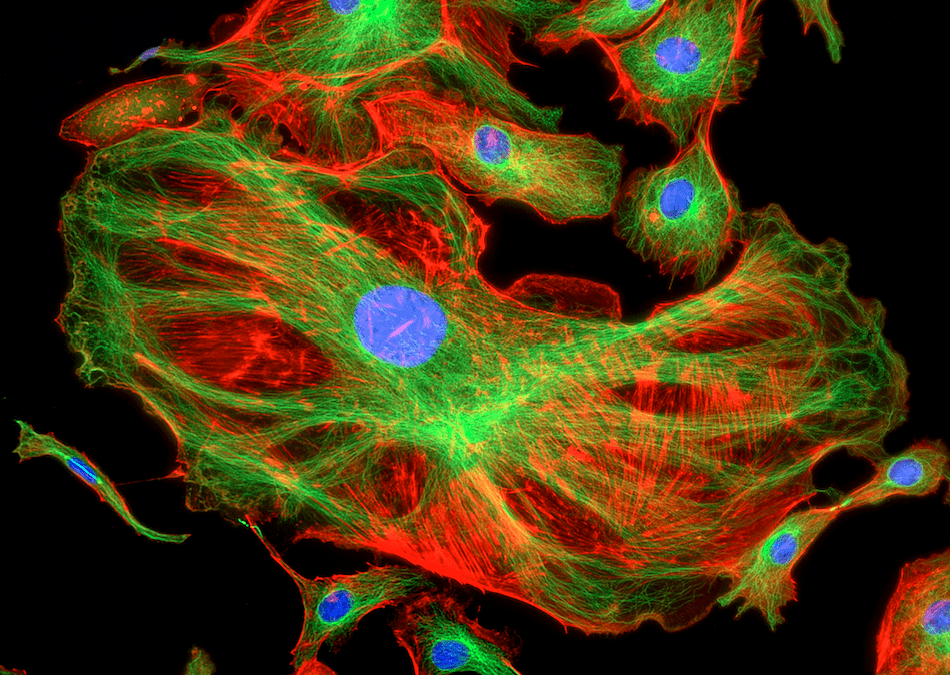
Fluorescence microscopy uses fluorophore-labeled antibodies and other fluorescent reagents to visualize targets of interest in cells and tissues. Experiments can be as simple as detecting one analyte in an immortalized cell line or as complex as measuring a combination of extracellular and intracellular markers by multiplexed immunohistochemistry (IHC). Regardless of your research goal, it is essential to carefully optimize your fluorescence microscopy protocol. Here, Cell Signaling Technology and Jackson ImmunoResearch share tips for fluorescence microscopy success.
Know Your Target
To generate high-quality fluorescence microscopy images, start by thoroughly understanding your target of interest. We recommend researching its abundance, location, and whether treatment is necessary to stimulate target expression. “A key factor to consider is where your target of interest is expressed within the cell,” reports Virginia Bain, Ph.D., Immunofluorescence Group Leader at Cell Signaling Technology. “Because certain subcellular locations require specific processing steps, you may need to identify multiple protocols during experimental design. First, consider if you need to capture excreted proteins which may not be detectable in untreated cells. Then, confirm the cellular location of other targets. While proteins found at the membrane may be easily accessible, some form of fixation and permeabilization will be required to access intracellular proteins, which can vary by target even within the same location. Therefore, if you intend to study a combination of locations within the cell, you may have to attempt iterative protocol optimization with different types of fixative and buffer components, as well as factor in antibody-specific requirements like no BSA, no detergent, or methanol fixation only.”
Optimize the Fixation Method
Fixation serves to capture a natural snapshot of the sample and prevent degradation by cellular enzymes. Aldehyde-based fixatives like formaldehyde and glutaraldehyde are most commonly used, although alcohol fixatives, such as methanol, may be preferred for some analytes with hidden epitopes that may be exposed by alcohol denaturation. “Whichever fixative you choose to use, optimization is vital,” cautions Miranda Lewis, Ph.D., Marketing Manager at Jackson ImmunoResearch. “Over-fixation can prevent antibodies from recognizing their epitopes, leading to false negative results, while under-fixation can allow the target of interest to diffuse from its native site, resulting in blurred images and incorrect interpretation of staining.” Thus, factors like fixative concentration, incubation time, and temperature require careful optimization.
Consider the Need for Permeabilization
While alcohols simultaneously fix and permeabilize samples, aldehyde-based fixatives leave cell membranes mostly intact. Consequently, if the aim of the experiment is to detect intracellular analytes in aldehyde-fixed material, permeabilization is necessary for antibodies to access their targets. A dilute solution of Triton® X-100 in phosphate buffered saline (PBS) is often recommended for permeabilizing cells and tissue sections, although detergents such as NP-40, TWEEN®, and digitonin are also widely used. “When permeabilization is required, it is common practice for researchers to include the permeabilizing agent in the buffers used for blocking and antibody staining,” notes Bain. “This can help to improve the efficiency of blocking as well as minimize non-specific antibody binding.”
Choose the Right Blocking Agent
Blocking is essential to minimize unwanted background signal from non-specific antibody binding. However, blocking procedures differ between immunocytochemistry (ICC) and immunohistochemistry (IHC). “For ICC, blocking typically involves incubating samples in normal serum from the same host species as the secondary antibody,” says Lewis. “Alternatively, bovine serum albumin (BSA) may be used, although researchers are advised to choose a source of BSA that is certified as being free of contaminating bovine IgG which can otherwise act as a target for antibodies with reactivity to bovine, goat or sheep material.” For IHC, researchers should consider additional blocking steps including mouse-on-mouse blocking when using mouse monoclonal antibodies with mouse tissues and Fc receptor blocking to prevent antibodies from binding to Fc receptors on the surface of immune cells.
Take Caution with Antibody Selection
Antibody selection is critical to achieve accurate results. “Researchers should always look for antibodies that have been validated in the application they intend to use,” says Bain. “However, it is important to scrutinize validation data closely. For example, IHC is often used as a catch-all term to include tissue that is either paraffin-embedded or frozen, yet an antibody may only have been proven to work with one of these sample types. In addition, seeing just a single example of validation data is insufficient, since an antibody’s validity cannot be determined by one assay alone. At CST, we validate our antibodies according to The Hallmarks of Antibody Validation™, a set of six complementary strategies for determining the functionality, specificity, and sensitivity of an antibody in any given assay, meaning researchers can have confidence in their results.”
Selecting the Right Fluorophores
Of course, selecting the right fluorophores is critical. This includes matching fluorophore excitation and emission spectra to the microscope’s light sources and detectors, respectively, and considering key fluorophore characteristics such as brightness and Stokes shift. “General recommendations include using brighter fluorophores for detecting low abundance targets, and selecting dyes with larger Stokes shifts to help prevent excessive background fluorescence,” says Lewis. For multiplexing, additional optimization is necessary to avoid spectral overlap, particularly when multiple fluorophores are co-localized within the same cell area. FluoroFinder’s Spectra Viewer for microscopy is a great resource for multiplexing and visualizing your fluorophores in the context of your microscope’s laser and filter configuration.
Supporting Your Research
Whatever the goal of your fluorescence microscopy-based research, FluoroFinder offers a suite of tools to simplify fluorophore selection and experiment design. Our Fluorescent Dye Database is a great resource to discover new fluorophores and their spectral properties, or check out our Spectra Viewer for microscopy to visualize fluorophores compatible with your laser and filter configuration.
You can also leverage the resources developed by our partners. Cell Signaling Technology has developed a four-part series on successful immunofluorescence and a blog on intracellular marker selection, while Jackson ImmunoResearch offers a Guide to Immunostaining.
Sign-up for our eNewsletter to receive regular updates about a broad range of fluorescence-based research techniques and discover the latest fluorophore offerings from our partners.