-
Go to
Querypage in top menu bar, then clickManage Projects.
-
Click the
+ Projectbutton to add a new project.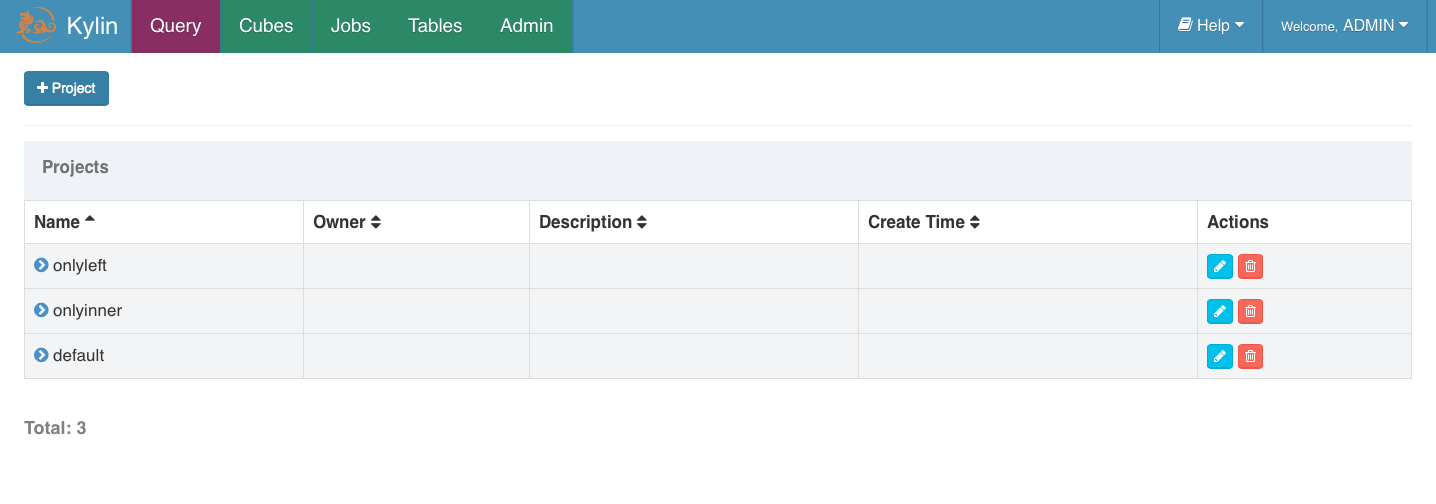
-
Fulfill the following form and click
submitbutton to send a request.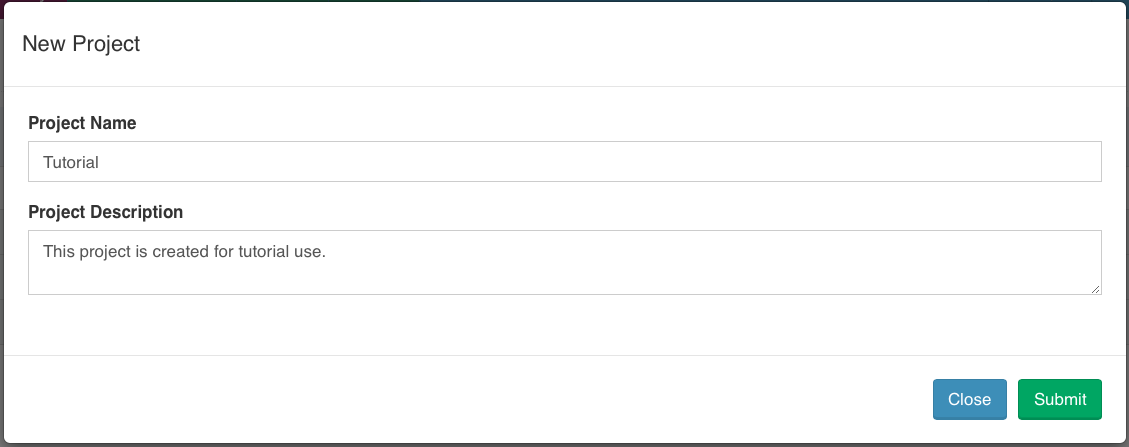
-
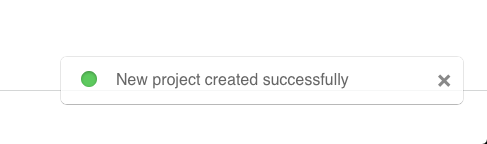
After success, there will be a notification show in the bottom.
-
Click
Tablesin top bar and then click the+ Syncbutton to load hive table metadata.
-
Enter the table names and click
Syncto send a request.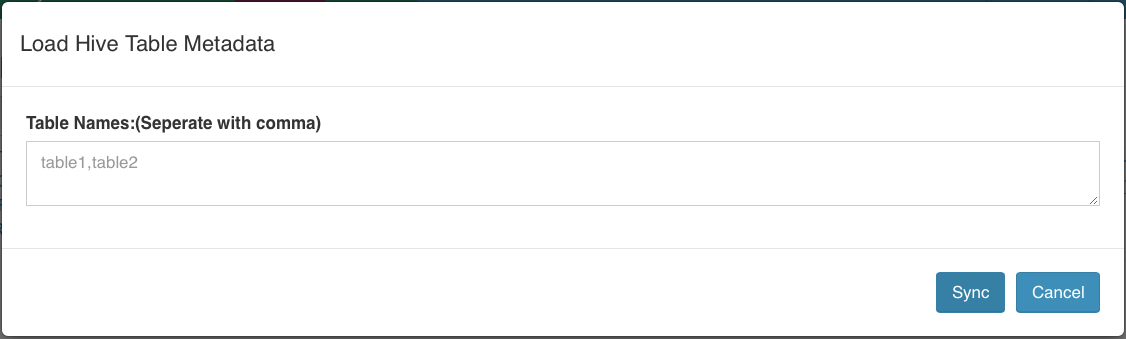
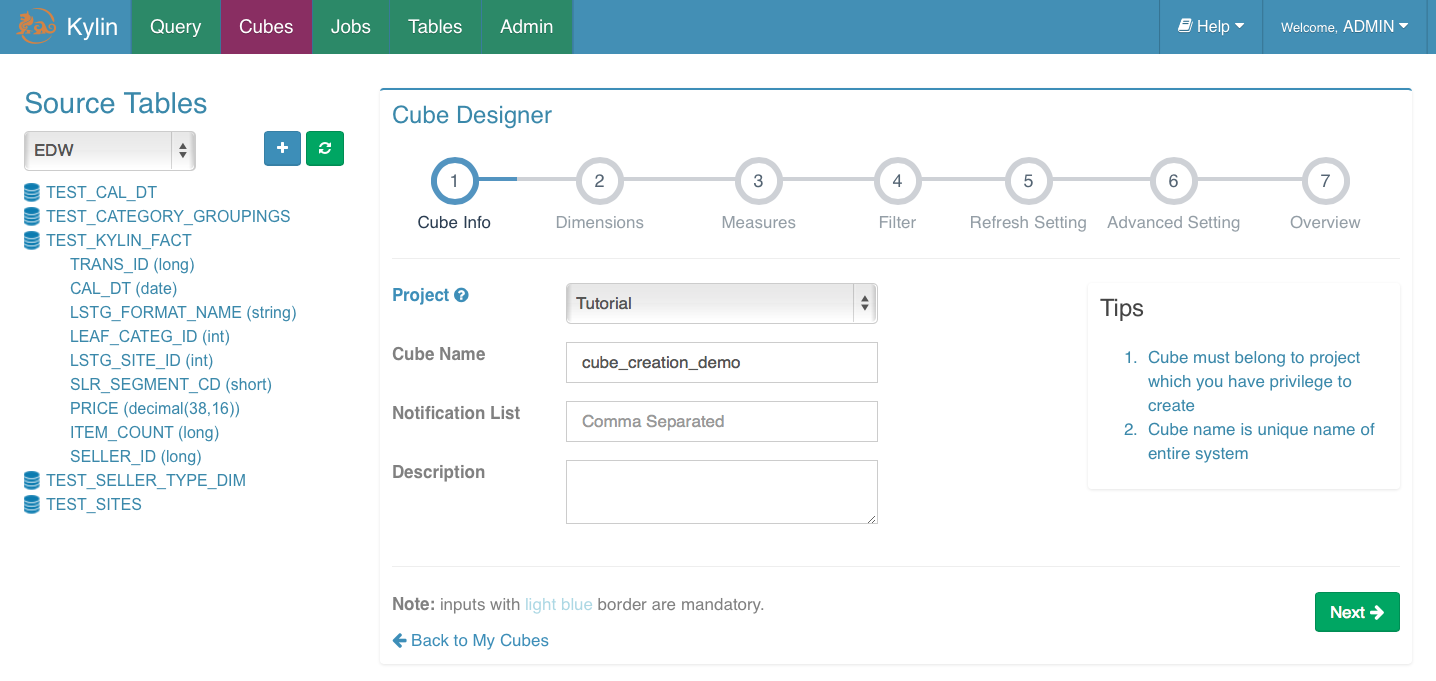
To start with, click Cubes in top bar.Then click +Cube button to enter the cube designer page.

Step 1. Cube Info
Fill up the basic information of the cube. Click Next to enter the next step.
You can use letters, numbers and '_' to name your cube (Notice that space in name is not allowed).
Step 2. Dimensions
-
Set up the fact table.

-
Click
+Dimensionto add a new dimension.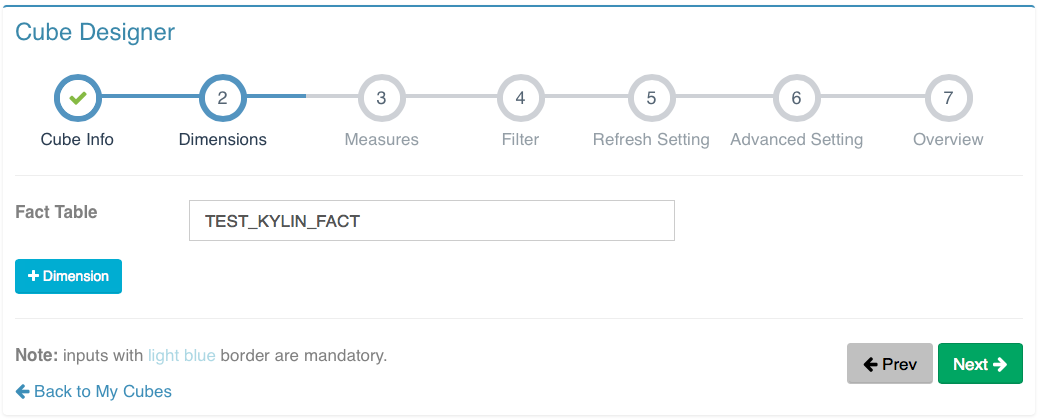
-
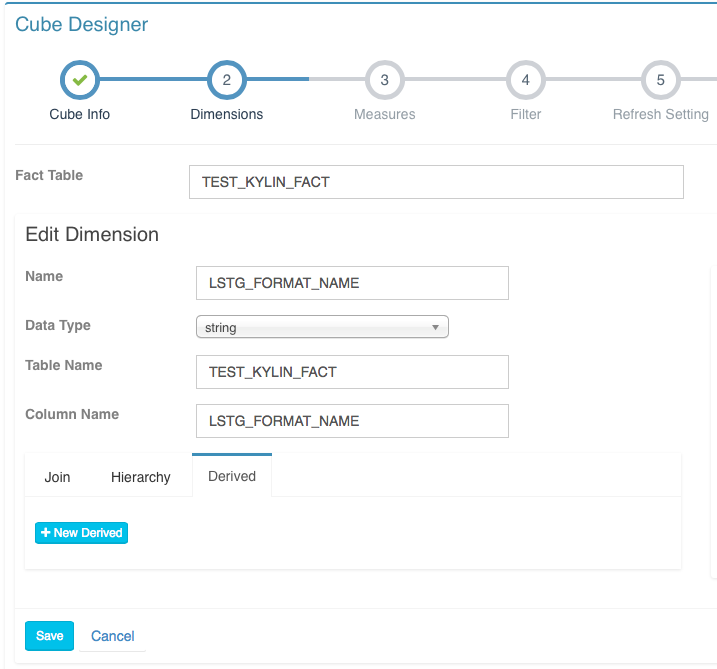
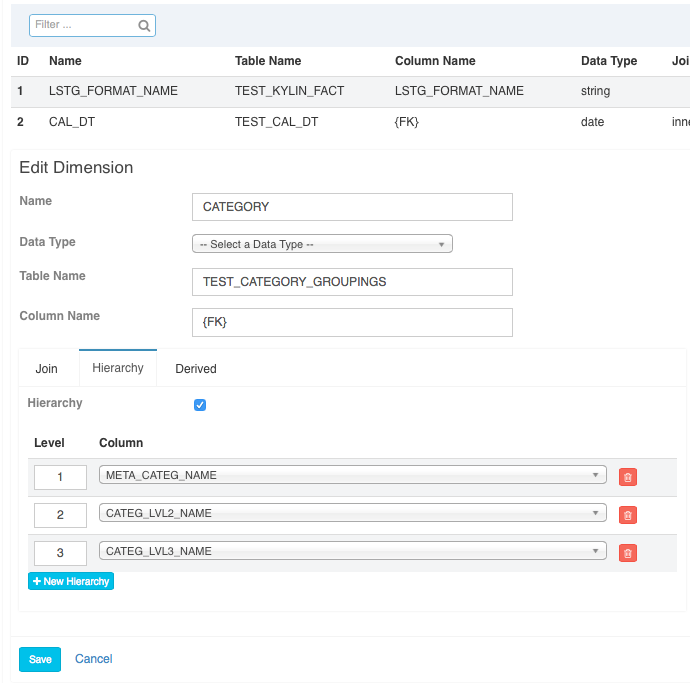
There are different types of dimensions that might be added to a cube. Here we list some of them for your reference.
-
Dimensions from fact table.
-
Dimensions from look up table.

 -
Dimensions from look up table with hierarchy.
-
Dimensions from look up table with derived dimensions.

-
-
User can edit the dimension after saving it.

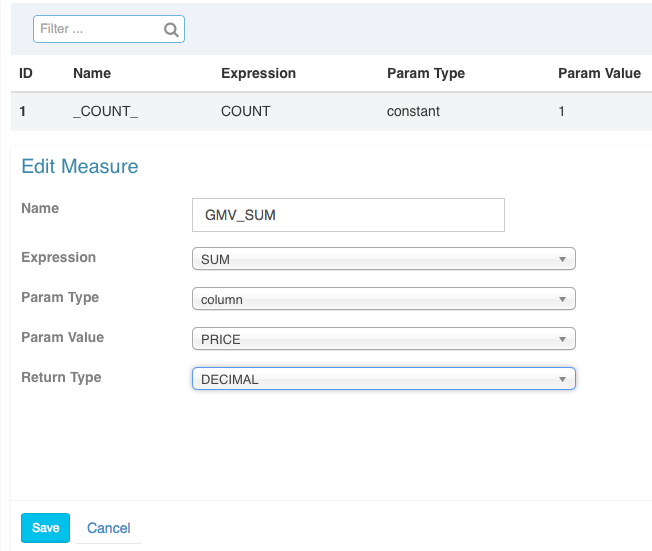
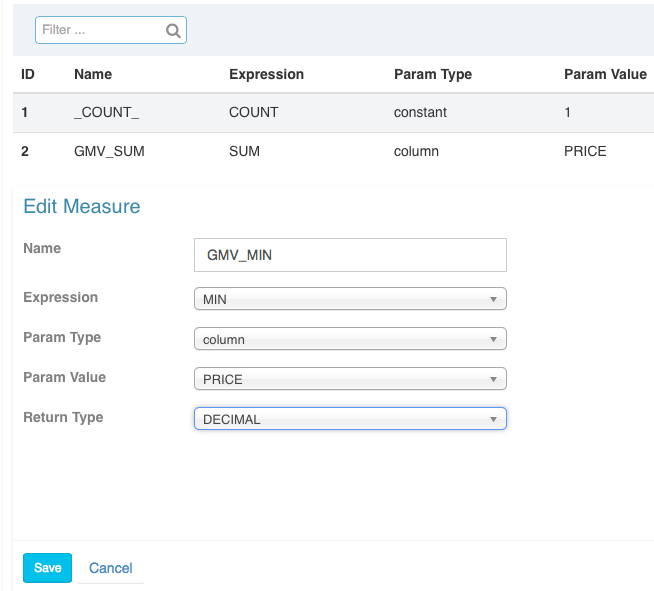
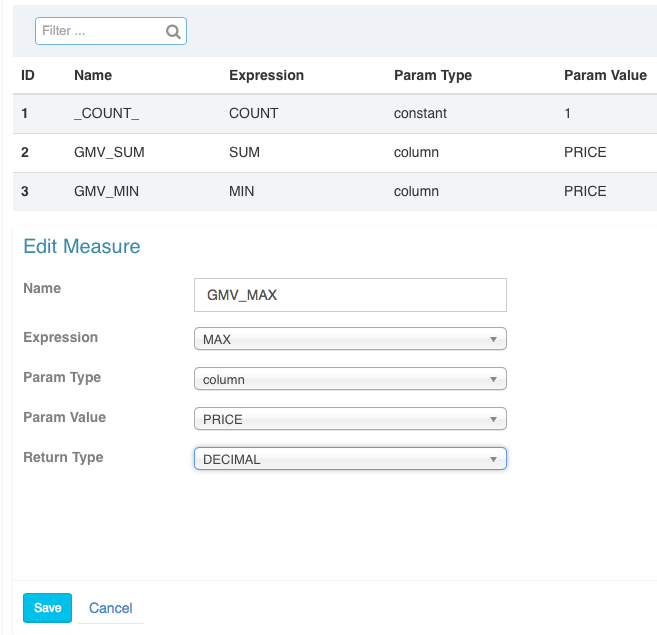
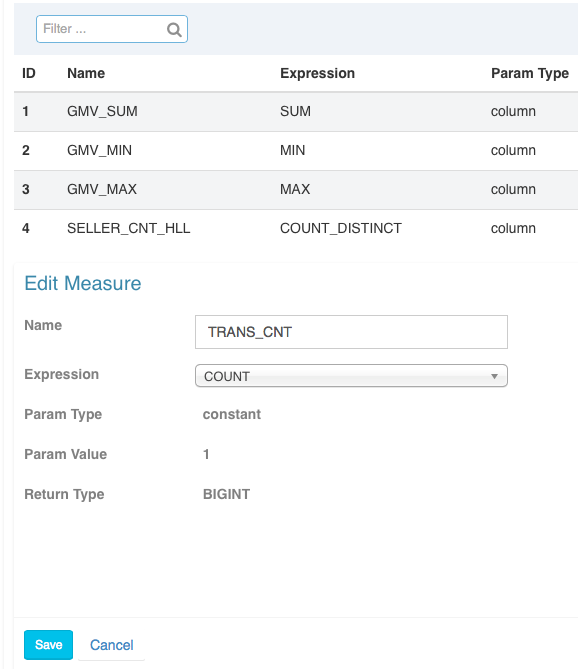
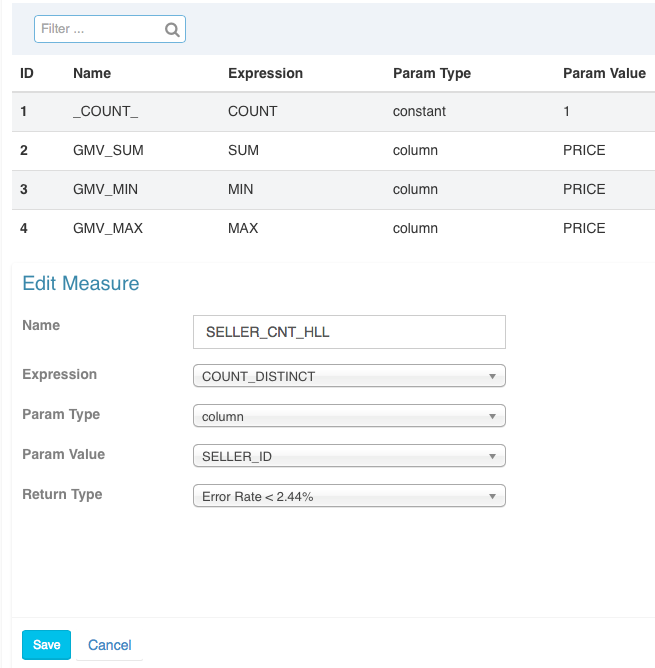
Step 3. Measures
-
Click the
+Measureto add a new measure.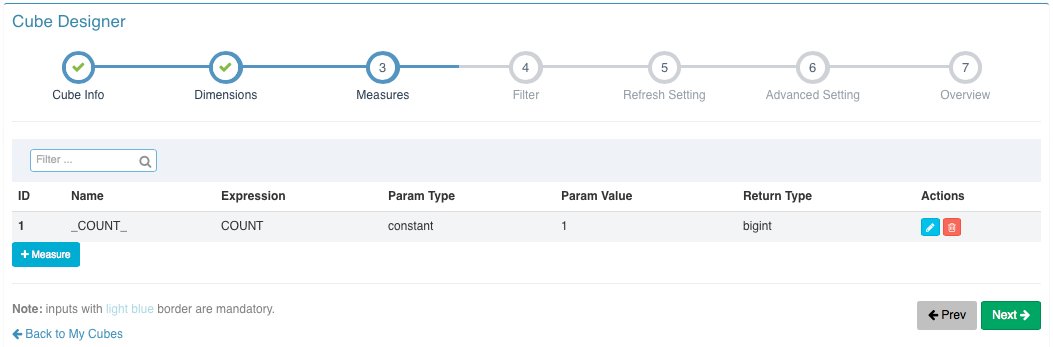
-
There are 5 different types of measure according to its expression:
SUM,MAX,MIN,COUNTandCOUNT_DISTINCT. Please be carefully to choose the return type, which is related to the error rate of theCOUNT(DISTINCT).-
SUM
-
MIN
-
MAX
-
COUNT
-
DISTINCT_COUNT
-
Step 4. Filter
This step is optional. You can add some condition filter in SQL format.

Step 5. Refresh Setting
This step is designed for incremental cube build.

Choose partition type, partition column and start date.

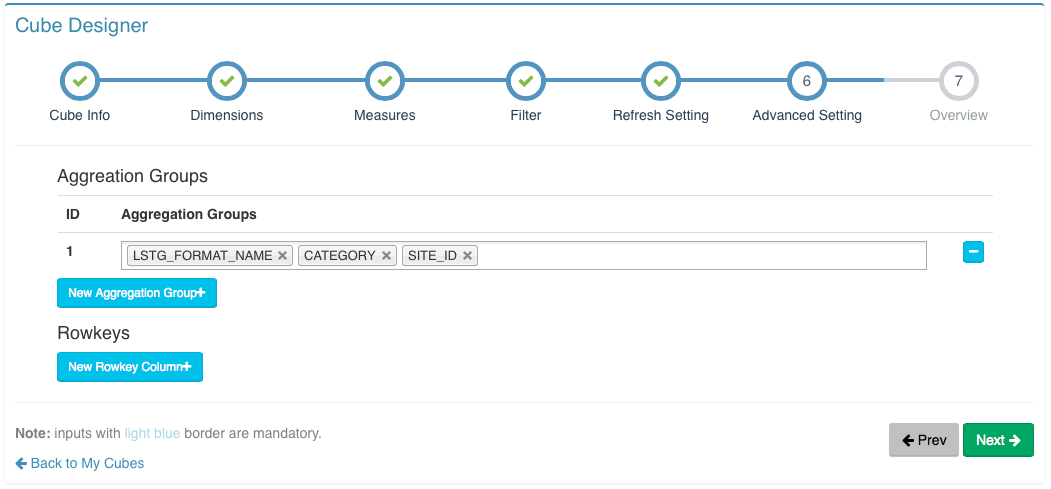
Step 6. Advanced Setting
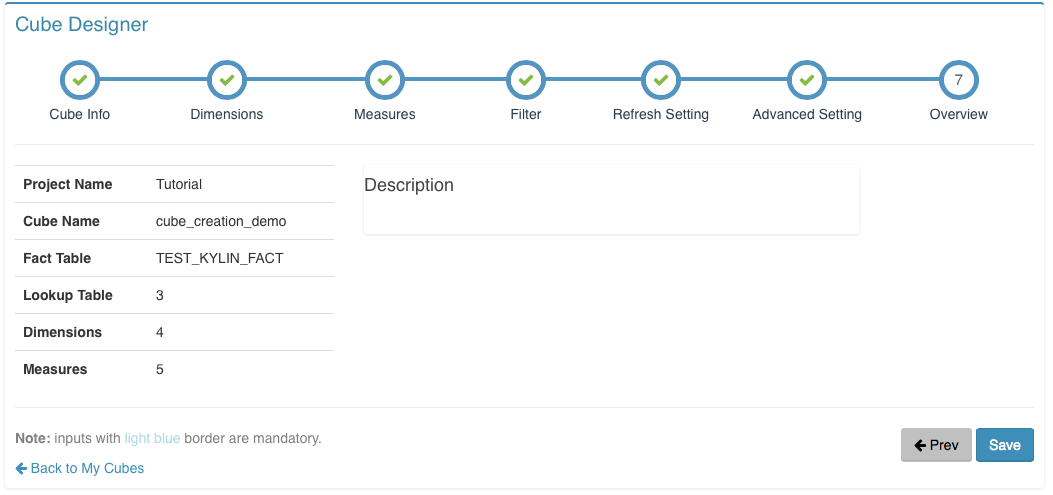
Step 7. Overview & Save
You can overview your cube and go back to previous step to modify it. Click the Save button to complete the cube creation.
After cube being created, you might need to:
- [Build the cube so that it can be queried](Kylin Cube Build and Job Monitoring Tutorial.md)
- [Grant permission to cubes](Kylin Cube Permission Grant Tutorial.md)