Life Science Potluck

1.5M ratings
277k ratings

See, that’s what the app is perfect for.

Sounds perfect Wahhhh, I don’t wanna

Cytolysins and Actinoporins

It’s kinda funny that it took me five posts before I started writing about actual anemone toxins, but I thought proving context was important before I dive into the really juicy bits. Compared to other cnidarians (e.g. Jellyfish), anemones have more variety in the types of toxins they use.

Here is a short (but by no means comprehensive) list of all the goodies in anemone venom: cytolysins, actinoporins, potassium channel toxins, sodium channel toxins, phosolipases, metalloproteases, serine protease inhibitors/Kunitz peptides, ASIC (acid sensing ion channel) inhibitors, TRPV1 inhibitors and small cysteine rich peptides (SCRiPs). In this post, I’ll focus on the ‘ripper toxins’ AKA your cytolysins and actinoporins.

image

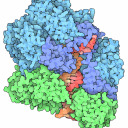
Figure 1: “Ripper” toxins in action

Almost every cnidarian species has a “ripper toxin” or a psychotic molecular chainsaw that rips through the cell membrane and causes water to flood into the cell, until it swells and bursts due to osmotic pressure. There are two contradictory parts to our pore forming toxin: one part is hydrophilic (or water loving/water soluble) and it binds to the receptors of our poor cell. The second part is the membrane bound structure which is more hydrophobic since it plays a part in pore formation. There are two main categories of pore forming toxins: actinoporins and cytolysins.

Actinoporins (~20 kDa) have a really simple structure which really shows when you realize that they don’t even have any disulphide bridges. Some actinoporins will only bind to sphingomyelin while others can bind to phosphatidylcholine in membranes (E.g. Sticholysin II). Actinoporins plan of attack involves using their aromatic loops to bind to the membrane, aligning themselves in the perfect position for cellular murder, oligomerising and then shoving the N-terminus of their alpha helix into the membrane like a tiny drill. Some studies suggest that the amphiphilic alpha helix actually detaches from the main body of toxin before drilling into the membrane. Since actinoporins can causes cardiovascular and respiratory problems, you can usually use a hemolytic assay to experimentally figure out if you have actinoporins or cytolysins in samples.

image

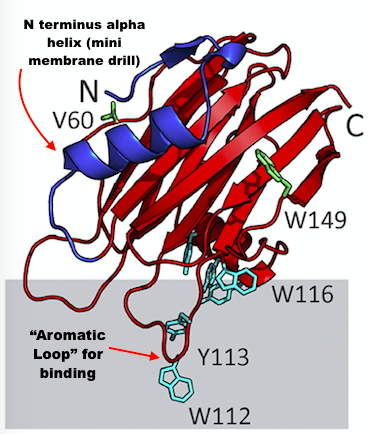
Figure 2: A diagram of pore forming toxin with our two key components

One of the appeals of studying anemone toxins, is using toxins to mess with ion channels or cell membranes in order to get an understanding of how cell membranes and ion channels work. A lot of times in Biology we learn about how things work by screwing up specific parts of proteins, cells, genomes etc. Cytolysins have been used in studies to study cell membrane dynamics and structure. Since biologists are a bunch of pedantic nerds who have to classify everything they categorize cytolysins based on molecular weights and other commonalities.

image

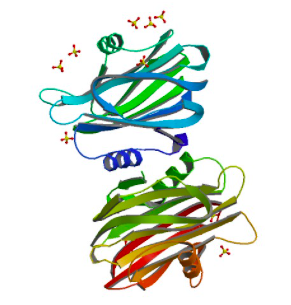
Figure 3: 3D stcrure of EQUINATOXIN II

  1. Type I, cytolysins tend to have a molecular weight of 5–8 kDa peptides and they tend to form pores in phosphatidylcholine containing membranes. They have antihistamine activity (plays a part in the nervous and cardiovascular system). Some type I cytolysins have no cysteine residues and they tend to have high as hell isoelectric points.
  2. Type II (~20 kDa) cytolysins are really common and well-studied. They tend to target phospholipid domains, get inhibited by sphingomyelin and they oligomerise to form pores. One of the key structural features is the cation selective hydrophobic core which can cause haemolysis.
  3. Type III (30–40 kDa) cytolysins can have PLA (phosolipases A) activity in some cases. 
  4. The largest type of cytolysins are Type IV cytolysins (~80 kDa) and they are thiol-activated. 

Why do you need to know about these types of cytolysins? 

FOR FUN! And also, because, knowing the size of your toxin helps with isolation and identification of specific toxins. For example, you get your crude anemone venom (through some magical miracle) and do SDS PAGE to get a rough venom profile. If you know the approximate sizes you can guess what kind of toxins are in the anemone’s venom.

This post is a brief introduction to actinoporins and cytolysins. I could showcase specific cytolysins or dive into the structure-function relationships in future posts. (Even more foreshadowing….)

Citations

  1.  Norton, R. S. (2009). Structures of sea anemone toxins. Toxicon, 54(8), 1075–1088. http://doi.org/10.1016/j.toxicon.2009.02.035
  2. Norton, R. S. (2006). Sea Anemone Venom Peptides. Handbook of Biologically Active Peptides. Elsevier Inc. http://doi.org/10.1016/B978-012369442-3/50056-8
  3. Jouiaei, M., Yanagihara, A. A., Madio, B., Nevalainen, T. J., Alewood, P. F., & Fry, B. G. (2015). Ancient venom systems: A review on cnidaria toxins. Toxins, 7(6), 2251–2271. http://doi.org/10.3390/toxins7062251
  4. Rojko, N., Dalla Serra, M., Maček, P. & Anderluh, G. Pore formation by actinoporins, cytolysins from sea anemones. Biochim. Biophys. Acta - Biomembr.1858, 446–456 (2016).
anemones are awesome anemone toxins Anemone toxins 101 sea anemones marine biology actinoporins cytolysins

Venom extraction and you!

For most venous animals like snakes and bees, once you find the venom gland you have your gold mine of toxins. However, because Cnidarians have such a weird way of storing toxins, venom extraction with sea anemones is a bit more complicated. Trying to extract the venom from a sea anemone is like trying to pool a thousand microscopic drops of gold together in the hopes of having enough venom to study the actual toxins. Which is why a lot of desperate scientists with a thirst for anemone poison have come up with some pretty creative ways of extracting venom. I am going to put some of these techniques into two board categories: ones where the anemone lives and the ones where you have to be an anemone assassin.  

Approach 1: Pray that you hit the right magic button and the anemone gods give you their sweet venom

These techniques involve keeping the anemone alive and annoying the hell out of them until they give you a bit of venom.  One approach involves poking the anemones throat with a rod, until exports out a bit mucus from its mouth. You can get your anemone mucus by squeezing the column until the mucus oozes out. You can also try shocking your anemone into firing cnidae by tossing it into distilled water or a sodium citrate solution. Doing either of this things causes the anemone stress due to the change is osmotic pressure, but if your species of anemone is too sensitive it will die. One of the funniest methods that I read about involved making the anemone your cow. Basically, you stuff the anemone with shrimp or crab (it depends on the typical diet for that species of anemone) and then you starve it for a few months. The ‘milking stage’ involves squeezing the stressed-out anemone, for you guessed it—the mucus. Maybe you have secret sadistic urges. Well, you can live out your fantasies by putting an electrode inside of the anemone’s gastrovascular cavity and giving it a mild shock. Yes, this is an actual venom extraction technique, even though it sounds a cross between a marine biology and a medieval torture device.

Most of these methods involve stressing or shocking the anemone because sudden stress acts as a stimulus for the cnidae to fire and release some of the venom. The type of technique you use for the living specimen really depends on the anatomy and physiology of your species of anemone. Some of these methods are too harsh for certain species of anemones. Most of these methods can give you very good purity for the venom but the yield tends to be on the lower side. Maybe you are tired of nagging your anemone for venom, well this where the second approach comes in.

Approach 2: Throw the sucker in a blender and make a sea anemone smoothie

In general, this approach involves homogenizing your anemone and then purifying the crude extract with a combination of different chromatography techniques (like Size Exclusion and Reverse phase) or using a gel to separate the proteins (E.g. SDS PAGE). It is probably one of the most commonly used approaches due to how convenient and fast it is. It is also, one of the older venom extraction techniques. The advent of reliable purification techniques like gel filtration was pivotal for not only getting partially purified venom extracts in the 1960’s but also for isolating and identifying one of the first anemone neurotoxins toxins from Anemonia viridis in 1975. Some studies homogenise the anemone by literally throwing the anemone in a blender, other techniques use cycles of thawing and freezing the anemone for homogenisation or a simple magnetic stirring to break up those tantalising tentacles.

After that you have separate your toxin peptides with size exclusion chromatography or reverse phase or anion exchange chromatography. Once you figure out which fractions have the toxin (you can use a crab assay where you poison adorable crabs with a sample from the fraction and see which fractions ‘hurts’ them) you have to purify it again with another round of reverse phase so you have pure enough sample for protein sequencing. The problem with this approach is that you will get a high yield but the purify of the crude venom extract will be pathetic (hence the billion purification steps).

One of more the recent modifications to this approach involves isolating the nematocysts (stinging cells) from the anemone and extracting the venom from the cnidae. Basically, the author suggests taking the tentacles or acontia and the using a salt gradient to separate the different types of nematocysts based on size (with spirocysts being adorably small and p-mastigophores being huge as hell).  Then you check what kind of nematocyst you have with a microscope and you can use a sodium citrate solution to cause the cnidae to swell up and fire. That’s how you get your venom at the end and this method allows you to get a purer sample. 

I may sound a bit frustrated in this post but it’s because extracting the venom from cnidarians is a genuine challenge. I love how people have come up with a variety of weird but inventive ways of extracting venom from anemones. Hopefully, the development of new technologies makes it easier to extract venom from cnidarians in the future.

Citations

Greenwood, P. G., Balboni, I. M., & Lohmann, C. (2003). A sea anemone’s environment  affects discharge of its isolated nematocysts. Comparative Biochemistry and Physiology - A Molecular and Integrative Physiology, 134(2), 275–281. http://doi.org/10.1016/S1095-6433(02)00262-3

Eno, A. E., Konya, R. S., & Ibu, J. O. (1998). Biological properties of a venom extract from the sea anemone, Bunodosoma cavernata. Toxicon, 36(12), 2013–2020. http://doi.org/10.1016/S0041-0101(98)00003-8 

Marino, A., Valveri, V., Muià, C., Crupi, R., Rizzo, G., Musci, G., & La Spada, G. (2004). Cytotoxicity of the nematocyst venom from the sea anemone Aiptasia mutabilis. Comparative Biochemistry and Physiology - C Toxicology and Pharmacology, 139(4), 295–301. http://doi.org/10.1016/j.cca.2004.12.008

Ramkumar, S., S, A. S., & Venkateshvaran, K. (2012). Bioactivity of venom extracted from the sea anemone Anthopleura asiatica (Cnidaria: Anthozoa): Toxicity and Histopathological studies. International Journal of Fisheries and Aquaculture, 4(4), 71–76. http://doi.org/10.5897/IJFA11.019

MALPEZZI, E. L. A., FREITAS, J. C., MURAMOTO, K., & KAMIYA, H. (1993). Characterization of Peptides in Sea Anemone Venom Collected By a Novel Procedure. Toxicon, 31(7), 853–8

Romero, L., Marcussi, S., Marchi-Salvador, D. P., Silva, F. P., Fuly, A. L., Stábeli, R. G., … Soares, A. M. (2010). Enzymatic and structural characterization of a basic phospholipase A 2 from the sea anemone Condylactis gigantea. Biochimie, 92(8), 1063–1071. http://doi.org/10.1016/j.biochi.2010.05.007

 Sánchez-Rodríguez, J., Zugatsi, A., Santamarı, A., Galva-Arzate, S., & Segura-Puertas, L. (2006). Isolation, partial purification and characterization of active polypeptide from the sea anemone Bartholomea annulata. Basic & Clinical …, 99, 116–121. http://doi.org/10.1111/j.1742-7843.2006.pto_428.x 

sea anemones anemone toxins Anemone toxins 101 anemones are awesome marine biology venom extraction

Size Exclusion Chromatography

Compared to Reverse-phase, Size Exclusion Chromatography (SEC) or Gel Filtration is a bit more straightforward. As stated in the name it separates proteins based on size (or hydrodynamic volume). Imagine that you want to get the molecular weight of your peptide but there is a butt load of salt which will interfere with mass spectrometry since it relies on the mass: charge ratio.

Gel Filtration is a great for removing salt from your sample. Since you don’t use harsh reagents you don’t lose the biological activity of your protein. As usual there is a stationary phase and mobile phase. The stationary phase is made of particles or beads with pores of a specific size. The mobile phase is the buffer flowing through the particles and it carries the salts, proteins and everything else in the sample that you apply to the column. The smaller particles (or your tiny salt ions) will flow into the beads and get retained but the larger molecules (the proteins that you actually care about) will flow past the beads and get eluted. It’s harder for the column to retain larger proteins so those proteins get eluted at a smaller buffer volume or retention time. The smaller proteins will get eluted with a larger volume of buffer or higher retention time. Since there is a linear relationship between the molecular weight of a protein and the elution volume, so you can use size exclusion to get a rough estimate of protein’s molecular weight.

image

Figure 1: Chromatogram with elution volumes for proteins of different sizes.  

image

Figure 2: This is a bead of particle found in a typicla gel filtration column. The bead has tiny pores where small and adorabe solutes (like salt) can actually flow through the resin. Most of the proteins are too big to pass through these tiny pores so they actually flow through the column a lot faster, that’s why you need to less of your buffer to elute larger proteins.

image

Figure 3: Molecular weight vs Kav (or binding affinity of the protein for column)

A short list of boring but important jargon:

  1. Void volume (V0): This the elution volume of stuff that doesn’t enter the pores or interact with the chromatography resin. These solutes just pass by the particles in the packed bed.
  2. Internal volume (Vi): The volume of the pores within the gel. 
  3. Total volume (Vt): This is the total volume of your column. (It is usually the sum of internal and void volume)
  4. Elution Volume (Ve): The volume of the buffer needed to elute a specific solute. 

Stuff you need to keep in mind

Type of column and pore size: A longer column can give you a better separation of proteins, but it is the improvement in resolution is only proportional to the square root of the column length. Connecting columns with different pore sizes can help separate proteins with a wider range of molecular weights. You have to select your column based on the size of the target protein. Some columns can separate proteins with wide range of sizes (100-10 Kda) others are more suitable for separating smaller proteins (<10 Kda). The uniformity of the pore size is just important as pore size. Generally, if the pore size of the particles is larger you get poorer resolution.

Flow rate: Usually a slower flow rate leads to leads to better resolution or separation of proteins. However, one of the biggest drawbacks of size exclusion is the ridiculously long run time, since the flow rate tends to be slower than other forms like HPLC like Reverse-phase. The typical flow rate is usually between 0.5 ml/min and 1 ml/min. 

Another time-consuming aspect of SEC is the equilibrating the column before use and washing it after use. Sometimes the more hydrophobic proteins end up aggregating and sticking to the particles in the column (like an annoying piece of gum) and you have to use really hydrophobic reagents to wash those proteins out (like Acetonitrile).

Reagents: The buffer you use doesn’t affect resolution that much but you want to pick a buffer with low ionic strength and ideal for storing proteins (e.g. ammonium bicarbonate buffer). Usually the beads in the column are silica based so they are a bit hydrophobic and have a weak negative charge.  So, what can happen is that proteins can end up getting retained by the anionic and hydrophobic beads, which gets in the way of eluting and collecting the proteins. Since you don’t want any kind of ionic or hydrophobic interactions between the column and the solutes/proteins, adding a bit of salt to the solvent or mobile phase reduces these interactions and makes it easier to elute your proteins.

Another thing to keep in mind is that the shape of the protein affects how it moves through the column. A more rod like protein can move more easily than a more globular protein. BUT we want the column to separate the proteins based soley on size, so a tiny bit of a denaturing reagent (like SDS and guanidine hydrochloride) is added to the buffer. All of the proteins end up with a rod like shape and they are only separated based on size. 

Primary sources

  1. Barth, H. G., Jackson, C. & Boyes, B. E. Size Exclusion Chromatography. Anal. Chem. 66, 595–620 (1994).
  2. Nagy, K. & Vékey, K. Separation methods. Med. Appl. Mass Spectrom. 61–92 (2008). doi:10.1016/B978-044451980-1.50007-0

Recommended readings

  1. GE Healthcare. Size exclusion chromatography: Principles and Methods. GE Heal. Handbooks 139 (2012).
  2. GE Healthcare. Size exclusion chromatography columns and media Selection guide. 1–10 (2016).
Protein chemistry 101 protein purification biochemistry size exclusion gel filtration Lab techniques hplc protein science

Undergrad Research Tips: Literature Review

When you start a brand new research project you look at the vast expanse of possibilities in front of you and think, “Where the hell am I suppose to start?” There is where the literature review comes in. You have to do a butt load of reading so you actually have a chance to understand the research you’re conducting. If you’re lucky enough your prof will give you a list of recommended readings, but I urge you to go beyond. Start hoarding important studies, manuals and textbooks like a paranoid squirrel preparing for a neverending winter.

1. Find a solid review study that provides a good introduction to your field and gives a bit of context. If you look a scientific journal they have a variety of pieces ranging from research papers to editorials to opinion pieces to review studies. A review study is a kind of like the voice-over narrator in a trailer. They’re like: In a world with anemone toxins…blah blah blah. For me when I was started learning about anemone toxins, Sea Anemone (Cnidaria, Anthozoa, Actiniaria) Toxins: An Overview was a great introduction to the field. Once you get the basics down you can look at specific things in that field in more detail (e.g. later on, you could find more studies on potassium channel toxins). You can also go the citations section of a review study to find even more studies that relevant to specific concepts.

2. Get all of your manuals and protocols! If you are using a lab technique that’s new to you like peptide synthesis or FRET get your hands on the manual or protocol for the equipment or reagent that you’re using. Sometimes the manual for the equipment you’re using provides the best introduction to a technique. When I was learning about peptide synthesis I didn’t get the clearest explanation from a textbook or study, I got it from the manual for the peptide synthesizer in my lab. Most manufacturers have the PDF version of the manual online (FOR FREE! GRAB ALL OF THE FREE STUFF!). Pay special attention to the troubleshooting section because everything will go to hell eventually and at least you’ll know why nothing worked.

3. Read studies effectively. Based on my experience you need to read a study at least twice to really understand it. There is a typical reading order: Abstract–>Introduction–> Results–> Discussion–> Methods and materials. When you read the results pay close attention to the captions for each figure because they will help you understand the data better. Passively reading a study is a great way to ensure that you remember absolutely nothing. It’s a good idea to read and annotate the important studies. I use Mendeley to annotate and highlight my studies, but you can also use Acrobat Reader. 

image

Side note: The real reason I use Mendeley is because it lets me highlight everything in lots of pretty colors. I have and always will—love pretty colors. 

I have one comment summarising each section (e.g. Introduction, different parts of the results etc.) 

4. Sometimes you look at a method used in a study and it has an intimidatingly long and complex sounding name, you think, “The hell is THIS? Did they just throw a bunch of sciency words into a hat and use convoluted satanic rituals to get their results?” If you don’t really understand or know about a technique find the original study where the researcher discovered the method. The OG study provides you with context and applications for that technique.

5. Are you daydreaming during a long train ride or waiting for a reagent to arrive or you’re running an experiment that takes forever? Do your reading! When you’re stuck waiting for results don’t waste your time! Keep reading and reviewing literature.

6. Ask for help. Sometimes you try your best to understand a concept and it still doesn’t sink in. Ask the Ph.D. students, post-docs and other equally clueless undergrads in your lab for help.

Those are my tips for doing all the reading and background research for a research project, but next time we will dive into writing and editing hell. 

image

The fate of your first draft.

undergrad research research tips lab work tips literature review how to read a research paper studyblr
neurosciencestuff

Seeing sounds: researchers uncover molecular clues for synaesthesia

neurosciencestuff

1 in 25 people have synaesthesia, perceiving the world in unusual ways. An experience with one sense automatically leads to perception in another sense: for example, seeing colours when listening to music. Now researchers at the Max Planck Institute for Psycholinguistics and the University of Cambridge report clues into biological origins of such variations in human perception. They studied families with synaesthesia, and describe genetic changes that might contribute to their differences in sensory experience.

Some people with synaesthesia may see sounds, while others may taste them or feel them as shapes. This kind of sensory cross-talk comes in many forms, and develops during early childhood. It has been known for over a century that synaesthesia runs in families, giving a strong hint that inherited factors are important.

“Brain imaging of adults with synaesthesia suggests that their circuits are wired a little differently compared to people who don’t make these extra sensory associations. What we don’t know yet is how these differences develop,” said Dr. Amanda Tilot, a geneticist at the Max Planck Institute for Psycholinguistics. “We suspect some of the answers lie in people’s genetic makeup.”

A genetic window into sensory experience

In a report published in the journal Proceedings of the National Academy of Sciences, scientists from the Max Planck Institute for Psycholinguistics and the University of Cambridge report new genetic clues that could help explain the biology of synaesthesia. The researchers carefully analysed the DNA of three families in which multiple members, across several different generations, experience colour when listening to sounds.

The team took advantage of advances in genome sequencing, enabling them to identify genetic variants in the synaesthesia families and track how they were passed on from one generation to the next. In particular, they focused attention on rare DNA changes that altered the way genes code for proteins, and that perfectly matched the inheritance of synaesthesia in each of the three families.

While the highlighted DNA variants differed between the three families, a common theme emerged to connect them: an enrichment for genes involved in axonogenesis and cell migration. Axonogenesis is a key process enabling brain cells to wire up to their correct partners.

Combining families to uncover biological processes

Professor Simon Fisher, Director of the Max Planck Institute, who led the research, said, “We knew from earlier studies by the Cambridge team that no single gene can account for this intriguing trait; even families who experience the same form of synaesthesia are likely to differ in terms of specific genetic explanations. Our hope was that the DNA data might point to shared biological processes as candidates for involvement in synaesthesia.”

Professor Simon Baron-Cohen, Director of the Autism Research Centre, Cambridge University, commented, “This research is revealing how genetic variation can modify our sensory experiences, potentially via altered connectivity in the brain. Synaesthesia is a clear example of neurodiversity which we should respect and celebrate.”

In search of synaesthetes

To better understand these findings, the team is looking for new families and individuals to join their study. To learn more about their research and take a short test to find out if you experience a common form of synaesthesia, go to www.mpi.nl/synaesthesia.

lifesciencepotluck

I don’t know but I have a bizarre fascination with synaesthesia. 

Source: mpi.nl
synaesthesia Neuroscience reblog

Reverse Phase Chromatography

The ability to purify samples and isolate specific proteins is an important first step for studying proteins. If you want to get the 3D structure of a protein or an amino acid sequence or gain any understanding of how a protein interacts with something, then a basic requirement is having a pure sample. But let’s face it your sample has a bunch of other undesirable junk, because nothing can be too convenient in science. Even if you chemically synthesize the protein instead of stealing it from the original source (like a dead anemone) you still have to purify the sample and get your target protein.

How do you do this?

There are a variety of liquid chromatography techniques used for purifying proteins such as anion exchange chromatography (separates proteins based on charge), affinity chromatography (this is really specific since the column will only bind to the antibody or ligand you choose, not just any randy that passes by), Size Exclusion Chromatography (separates proteins based on size) and Reverse-phase chromatography. These techniques exploit a specific property of the protein such as charge, size, isoelectric points etc. to separate proteins. Reverse-phase liquid chromatography (RP-HPLC) is one the most important and commonly used forms of liquid chromatography. It separates proteins based on how hydrophobic (water hating) or hydrophilic (water loving) a protein is. 

There are two phases in all types of chromatography. The stationary phase (or the lazy phase which clings to things) and the mobile phase, which slowly seeps through the stationary phase. For Reverse-phase the stationary phase is non-polar (or hydrophobic). The interaction between the stationary phase and analyte is mostly hydrophobic. So, if your protein is really hydrophobic (i.e. it has a lot of valine and alanine resides) then it will cling to stationary phase for its dear life until it is eluted by something more hydrophobic. Typically, the stationary phase in Reverse-phase columns have little beads made of silica gel and you have alkyl groups (hexyl, butyl, or ethyl groups) covalently linked to the beads. These little extensions are non-polar and they play a part in the hydrophobic interaction with your sample. The types of alkyl groups attached vary depending on the type of column you’re using and the kind of protein you’re purifying. Of course, there are other types of beads like polymer based beads, which are better if you have the pH of your sample or solvent is above 7. BUT they are not as efficient at separating things.

image

Figure 1: Silica resin with C18 chains. 

Source: http://chem-net.blogspot.com/2013/11/reversed-phase-chromatography.html

The second player is the mobile phase or the hydrophobic solvent you will use to elute your protein. Usually as reverse phase happens you increase the hydrophobicity of the solvent and over time the proteins are eluted based on hydrophobic they are. The hydrophilic proteins come out first and the most hydrophobic proteins come out last because you need a higher concentration of your non-polar solvent. Most of the time, a mix of acetonitrile and trifluoroacetic acid (TFA) is used for the mobile phase. 

Acetonitrile (ACN) is a non-polar solvent. If you want to make the mobile phase more hydrophobic to elute the more hydrophobic proteins, then you increase the concentration of ACN. TFA is a weak hydrophobic ion-pairing reagent which helps maintain a low pH for our silica resin and helps reduce ionic interactions between the peptide/protein and the stationary phase (because there is always a small chance of something annoying like this happening). You can use other non-polar solvents like methanol, ethanol and isopropanol. Isopropanol works better for ridiculously large and hydrophobic proteins but it places a lot of pressure on the column. If the pressure is too high, your incredibly expensive column will die a horrible and resin-crushing death (Pro-tip: Always check the manual for the maximum pressure limit!).

You can tell how well your purification went based on the chromatogram. A chromatogram shows the UV absorbance for your sample against the retention time. Acetonitrile absorbs UV light very well which is why it’s a great solvent for reverse phase. The peptide bonds in proteins absorb UV light at 215 nm whereas, aromatic amino acids like tryptophan absorb UV light at 280nm.  UV absorbance can be used to find the concertation of your protein or it can help determine the resolution for your feeble attempts at purification. 

If you have ‘peaks’ or ‘mini mountains’ that are well separated then your peptides are probably separated pretty well. But if your all of peaks on the chromatogram merge into an indistinguishable and horrifying blob—you have very poor resolution and the eluted sample you get at the end won’t be that pure. You can take all of the eluted samples and try purifying them with even more reverse phase or other methods, but you will lose a bit of protein at each purification step. Or you can tweak your method to improve the resolution for reverse phase. 

image

Figure 2: What a chromatogram looks like in an ideal world where the experiment actually works. The “peaks” are sharp, narrow and distinct. 

image

Figure 3: A blob monster of my own making. I have probably spent more time doing Reverse phase than socialising at this point and I still get chromatograms like this. 


Stuff you need to worry about:

  1. What kind of column your using: Sometimes you want to purify lots of your proteins in one go so you have to pick a column that can handle a high load. Other times you are analysing the purity of your sample and using a sensitive analytical column makes more sense.  If you want to isolate a really hydrophilic protein then using a c18 column is a solid option because it has more alkyl chains that can bind better to proteins that are not so hydrophobic. BUT since you are introducing a really strong hydrophobic interaction it can mess up the structure of your protein to the point where it loses its bioactivity. If you want to protect the bioactivity of your protein using a C4 or C5 column is a decent option.
  2. Pore size: Each column will have its own pore size (the size of the gap between the beads) and you have pick the pore size based on the size of the target protein. Small pore sizes work for smaller proteins (<10kDa) but it most cases a pore size 300 Å works for a wide variety of protein sizes.
  3. Temperature: A high temperature can speed up chromatography and give you better resolution (AKA the sharp and sexy peaks). All of this will come at the cost of your protein being denatured—of course.
  4. pH: Proteins are pH sensitive since the amine, carboxylic and R groups of the amino acids can change charge depending on the pH.  Silica columns have a pH of 2-7, so the basic amino acids exist as positive ions. You need a hydrophobic anionic (negatively charged) ion-pairing reagent (like TFA) that will pair up with the positively charged basic amino acids, since you don’t want any electrostatic interaction between the column and the peptide. (remember we only want to separate the proteins based on how hydrophobc they are)
  5. Flow rate: A faster flow rate will allow a better separation. (Pro-Tip: Check the manual for the maximum flow rate. Usually the big, thick columns tend to have a higher flow rate than the thin, small and dainty columns)
  6. Gradient: This is the most important factor which impacts the resolution. If you have a gradual increase in ACN concentration or hydrophobicity of your solvent (AKA a shallower gradient), you tend to get better resolution and higher peaks. However, if the run time is too long then your protein can get damaged since it’s being exposed to harsh chemicals (e.g. Acetonitrile) for a longer period of time.

There are other applications for Reverse-phase aside from protein purification. It isn’t just used to purify and analyse proteins but it can work for drugs, metabolites, fatty acids, aldehydes and ketones. I hope this was a helpful introduction to Reverse-phase for anyone who is interested in the technique or actually has to use this technique. 

Next time, I’ll dive into Size Exclusion Chromatography (SEC).

Primary sources:

  1. Dorsey, J. G. & Dill, K. A. The Molecular Mechanism of Retention in Reversed-Phase Liquid Chromatography. Chem. Rev. 89, 331–346 (1989).
  2. Nagy, K. & Vékey, K. Separation methods. Med. Appl. Mass Spectrom. 61–92 (2008). doi:10.1016/B978-044451980-1.50007-0

Recommended readings:

  1. Chromatography, R. Reverse-Phase Chromatography. Proteins 26–34 (2009). doi:10.1201/NOE1420084597.ch409
  2. Bradshaw, T. P. A Users Guide: Introduction to Protein and Peptide HPLC. (2006).
Protein chemistry 101 Reverse phase RP-HPLC Lab techniques liquid chromatography protein purification biochemistry

Protein chemistry 101

Aside from obsessing over anemone toxins I have a soft spot for protein chemistry and protein biophysics in my heart. Luckily for me, I ended up in the protein chemistry lab at my university and I got to pick up some the techniques in protein chemistry. In my series of posts tagged #Proteinchemistry101 I hope to provide a basic introduction to some of the most common and useful techniques in protein chemistry like mass spectrometry, reverse phase, peptide synthesis etc. If you want to gain a more in depth understanding of some of these techniques then hop to the recommended readings section for the posts. If you are a student who actually has to do this stuff, it helps to get the manual for whatever equipment you’re using (E.g. Jupiter C18 column) because those manuals also provide an introduction to these techniques plus troubleshooting tips.

I’m starting out with Reverse-phase Liquid Chromatography (RP-HPLC) and Size exclusion chromatography (SEC). If there any specific protein chemistry techniques you want me to cover, drop me an ask.

announcement Protein chemistry 101
neurosciencestuff
neurosciencestuff:
“ (Image caption: New neurons in an adult brain. Credit: © Mariana Alonso and Pierre-Marie Lledo – Institut Pasteur)
New neurons in the adult brain are involved in sensory learning
Although we have known for several years that the...
neurosciencestuff

(Image caption: New neurons in an adult brain. Credit: © Mariana Alonso and Pierre-Marie Lledo – Institut Pasteur)

New neurons in the adult brain are involved in sensory learning

Although we have known for several years that the adult brain can produce new neurons, many questions about the properties conferred by these adult-born neurons were left unanswered. What advantages could they offer that could not be offered by the neurons generated shortly after birth? Scientists from the Institut Pasteur and the CNRS have demonstrated that the new neurons produced in adults react preferentially to reward-related sensory stimuli and help speed up the association between sensory information and reward. Adult-born neurons therefore play an important role in both the identification of a sensory stimulus and the positive value associated with that sensory experience. The neurons generated shortly after birth are unable to perform this function. These findings were published in the journal PNAS on February 19, 2018.

Although most neurons are generated during embryogenesis, some brain regions in mammals are capable of constantly regenerating their neurons in adulthood. The existence of these adult-born neurons has been proven, but many questions about their function and the way in which they integrate into their target areas remain unanswered.

Research carried out by the Perception and Memory team (Institut Pasteur/CNRS), directed by Pierre-Marie Lledo, a CNRS Director of Research, has recently revealed the specific role of these neurons produced in the adult brain. This study demonstrates that assigning positive values to sensory experiences is closely based on the activity of adult-born neurons, and not the neurons formed shortly after birth. It is these new neurons that may enable individuals to anticipate the delivery of a reward.

The scientists focused on the production of new neurons in adult mice, in particular those neurons that integrate into the olfactory bulb, the brain region responsible for analyzing odors. These new neurons are thought to play a major role in providing flexibility for learning and memorizing olfactory sensory experiences.

The scientists from the Institut Pasteur and the CNRS observed that the new neurons were able to react differently to an odor depending on the consequences associated with that sensory experience, such as whether or not there would be a reward. They also demonstrated that olfactory learning, in which the mice had to associate an odor with positive reinforcement, became easier once the new neurons had been activated. Finally, simply activating these adult-born neurons could be assimilated with a reward-predicting odor.

In short, this research shows that adult-born neurons are involved in the value associated with sensory stimuli rather than just the identification of the nature of a given sensory stimulus. It demonstrates that reward-motivated learning depends largely on adult neurogenesis.

Transferred to humans, these findings could improve our understanding of the role played by new neurons in the adult hippocampus in associative learning processes.

neuroscience sensory learning

Exploding poison capsules

One of the biggest reasons why I developed a deep obsession with anemones is because of my fascination with cnidae. Cnidae are subcellular structures that can do a bunch of stuff. They can play a part in aggression, adhesion and even building tubes for burrowing anemones. Cnidae are usually secreted by the Golgi apparatus, go through some fabulous modifications before moving to the surface of tentacle (or other tissues). There are three major type of cnidae: spirocysts, ptychocysts and nematocysts. They usually have a thin hollow tube that can be discharged. Spirocysts look like little corkscrews and they help anemones to stick to things. They are also unique to Anthozoans. Ptychocysts are specific to tube anemones (which aren’t technically anemones but that’s a conversation for another day) and well, they help the tube anemones make adorable tubes that help them burrow into the sand. Nematocysts are the ones that involved in storing and injecting toxins.

The mechanism injecting toxins is straight out of a Michael Bay movie. Basically, the capsule (nematocysts), swells up and explodes. The thin hollow tube is shot out like a harpoon and it injects the venom into whatever poor fool is contact with the anemone or jellyfish. The actual mechanism of cnidae discharge is still a bit hazy because this entire process happens within nano seconds. 

Step 1: Have some kind of chemical or mechanical stimulation. (AKA piss off the anemone by poking it or drastically change its environment) 

Step 2: A bunch of cations (or positively charged ions) will flood the cnidae and due to the magic of osmosis, the capsule swells up as the osmotic pressure increases.

Step 3: At some point the pressure will be too damn high and the nematocysts will burst. 

Step 4: The thin hollow tube is flung out, it penetrates the target and the venom flows through the hollow tube. Congrats you have successfully injected venom into target! Yay!

Step 5: Slaughter your foes with your exploding poison capsules.

Do you finally see why I’m obsessed with these things?  

image

There are other theories of how the cnidae discharges (which I will cover later on), but this a general summary of what happens. The type and distribution of cnidae is impacted by a bunch of factors such as: anemone species, prey size, salinity, types of thirsty predators the anemone has to deal with, etc. Of course, there are different types of nematocysts as well. There are two main types of nematocysts: haplonemes and heteronemes. Haplonemes have tubes and spines on nematocysts that are not divided into different parts. On the other hand, heteronemes have spines, plus there is a distal basal shaft and distal tube combo. You can identify the type of cnidae through light microscopy of tissue samples from cnidarians. Sometimes you have to look at the discharged or fired nematocysts so you can see the threads/tubes in order to differentiate between different types of cnidae.

Atrichs: Haploneme. They are usually found in catch tentacles (they are extra pair of tentacles used to fight other or even the same species of anemones). Have smooth threads without nay shafts or barbs.

Holotrichs: Haploneme. There is no distinct basal shaft but there are barbs on the threads.

Basitrichs: Heteroneme. They have threads without shafts but they have barbs at the base only.

Microbasic b-mastigophores: Heteroneme. They have a shaft and the threads are not well distinguished from the shaft. The shaft contains barbs. 

Microbasic p-mastigophores: Heteroneme. The shaft is distinct from the base and has funnel shape when the nematocyst is unfired. Sometimes the thread is armed (hoplotelic).

Microbasic a-mastigophores: Heteroneme. The thread is smaller and only the barbed shaft is present. This shaft is three times as long as the capsule.

Macrobasic a-mastigophores are similar to microbasic amastigophors, but the shaft is more than three times as long as the capsule. In unexploded capsules the shaft forms coils. So, you need to have fired cnidae to tell the difference between microbasic and macrobasic a-mastigophores.

image

I wish my drawings of cnidae were this beautiful—but they aren’t.  So here you go. (Source: http://www.meghanrocktopus.com

image

Everyone knows that flow charts make evyerthing better! (This is from Shick’s A functional Biology of Sea anemones)

image

This is how nematocysts look like under a microscope. 

Cnidae aren’t the only parts of an anemone that can contain toxins, some anemones have ectodermal and endodermal gland cells which can secrete and store toxins. Understanding the cnidae composition for each tissue for your anemone is important for venom extraction. Trust me you will need all the information you can get because venom extraction is a special kind of purgatory, which I will cover in my next post.

Citations:

  1. Wei, N., Yap, L., Fautin, D. G., Ramos, D. A. & Tan, R. Sea anemones of Singapore: Synpeachia temasek new genus, new species, and redescription of Metapeachia tropica (Cnidaria: Actiniaria: Haloclavidae). Source Proc. Biol. Soc. Washingt. 127, 439–454
  2. Yanagi, Kensuke & Fujii, Takuma. (2015). Redescription of the Sea Anemone Exocoelactis actinostoloides (Cnidaria: Anthozoa: Actiniaria) Based on a Topotypic Specimen Collected from Tokyo Bay, Japan. Species Diversity. 20. 209. 10.12782/sd.20.2.199.
  3. Jouiaei, M. et al. Ancient venom systems: A review on cnidaria toxins. Toxins (Basel). 7, 2251–2271 (2015).
  4. Shick JM (1991), A functional Biology of Sea anemones, Springer Science+ Business xMedia Dordrecht, 395 pp. 
Anemone toxins 101 anemones are awesome cnidae nematocysts marine biology sea anemones spirocysts Ptychocysts cnidae firing

The anatomy of an evil mastermind

Even though this series of posts is called ‘Anemone toxins 101’, I haven’t really discussed anemone toxins yet because it’s important to provide context about the phylogeny and anatomy of anemones. When I was trying to find novel toxins, I realized that a) There are not that many anemone toxins in the database compared to toxins from other animals (ahem…snakes) b) The types of toxins that you find vary depending on the type of tissue. If you compare the transcriptome for tentacles with mesenterial filaments, you’re more likely to find neurotoxins in tentacles. It is connected to the role each body part plays. Tentacles are involved in aggression which is why it makes more sense to store and express your powerful and debilitating neurotoxins in tentacle tissue. Since mesenterial filaments play a role in digesting prey, why not add a butt load of metalloproteases and cytolysins to make it easier to break down things? This is why I want to provide a basic introduction to the anatomy of an anemone.

There are some parts that are common in all anemones. Some anemones opt for fabulous body mods like acrorhagi and nematospheres depending on the species. Let’s start with the basic body parts


image
image
  1. Oral disc: The mouth or the hellmouth with tentacles.
  2. The column: This is the body wall. In some cases, the column wall can have glands that secrete venom. Even though the cnidae tend to be the main source of toxins, some species of anemones have glands. Some anemones can have a capitulum which is like a thin wall on top of the column.
  3. Tentacles: They usually surround the oral disc and tend to have a butt load of cnidae.  We have a two in one deal where it helps feeding (i.e. stuffing some poor creature into the hellmouth) and it plays a role in aggression. Some really aggressive and territorial as hell anemones have catch tentacles as well.
  4. Pedal disc: This is the bottom part of the anemone which allows it to stick to rocks. If you have an anemone that prefers burrowing in the sand then they can have a rounded and swollen physa to anchor them (and it makes collecting anemones a nightmare). These kinds of anemones look like possessed carrots with tentacles.
  5. Sphincter muscle: It’s found near the oral disc and it helps the oral disc to contract.
  6. Actinopharynx: It allows the anemone to sing cheesy ‘I want songs’. Actually, it just lies after the oral disc and it leads into the gastrovascular cavity.
  7. Mesentery and mesenterial filaments: They are the infoldings of the endoderm and they increase surface area for digestion and respiration. Some of the mesenteries between the muscle and filaments contain gonads.

Some anemones have acontia which look like thick white threads and they protrude from the mesenteries. Since they play a part in aggression of course they are packed with cnidae. Usually disturbing or pissing off an anemone causes anemones to fire acontia. Let’s talk about intraspecific and interspecific competition. Or what I like to call anemone dramas where possessive anemones shred other anemones who dare to inch into their territory. 

We have the acrorhagi, that are outgrowths of the column and they have a spherical branched or frondose shape. Just like acontia they are packed with cnidae. Recently a group of researchers extracted very potent toxins from the acrohagi. (Don’t worry, I will write about Acrorhagins eventually). Acrospheres (which sounds more like Pokémon move) are tiny globs at the ends of tentacles packed with nematocysts. Sometimes you find cnidae filled globs all over the tentacles AKA nematospheres. If the pedal disc isn’t doing a good enough job to make anemones stick to places why not add a bunch of adhesive verrucae on the column? In terms of the protein sequence Acrorhagins differ radically from other anemone toxins. Acrospheres and acrohagi are involved in the battle against other anemones which makes them a great source for potent and novel toxins.

If you’re going to extract venom from anemones to find new toxins, it’s important to know about the anatomical features for that specific species. If the species you’re dealing with has acontia or acrohagi then getting the transcriptome for proteome for those tissues is a good idea. You should also know what type of cnidae you will find in certain tissues. If you don’t want your skin to feel like it’s constantly on fire for two weeks, then it helps to know if your anemone is covered in nematospheres that sting like hell. Then you can wear cartoonishly large gloves to protect your hands.

This post is a very basic introduction to the anatomy of a sea anemone. I may write about certain features in more depth later on (Is this foreshadowing?) 

Pro-tip: If you have to dissect anemones it helps to have the anatomical diagram and a physical description of the species you’re dealing with. You can hunt down the original study which describes and classifies your species of interest. It should have a description of the anemone’s anatomy (e.g. the color of the actinopharynx). If you can access a picture of the dissected anemone, it’s even better.


Citations:

Honma, T. et al. Novel peptide toxins from acrorhagi , aggressive organs of the sea anemone Actinia equina. 46, 768–774 (2005).

Shick JM (1991), A functional Biology of Sea anemones, Springer Science+ Business xMedia Dordrecht, 395 pp.

Anemone toxins 101 anemones are awesome cnidae anemone toxins marine biology sea anemones anemone anatomy