

Introduction: Magnetic Apron Tie


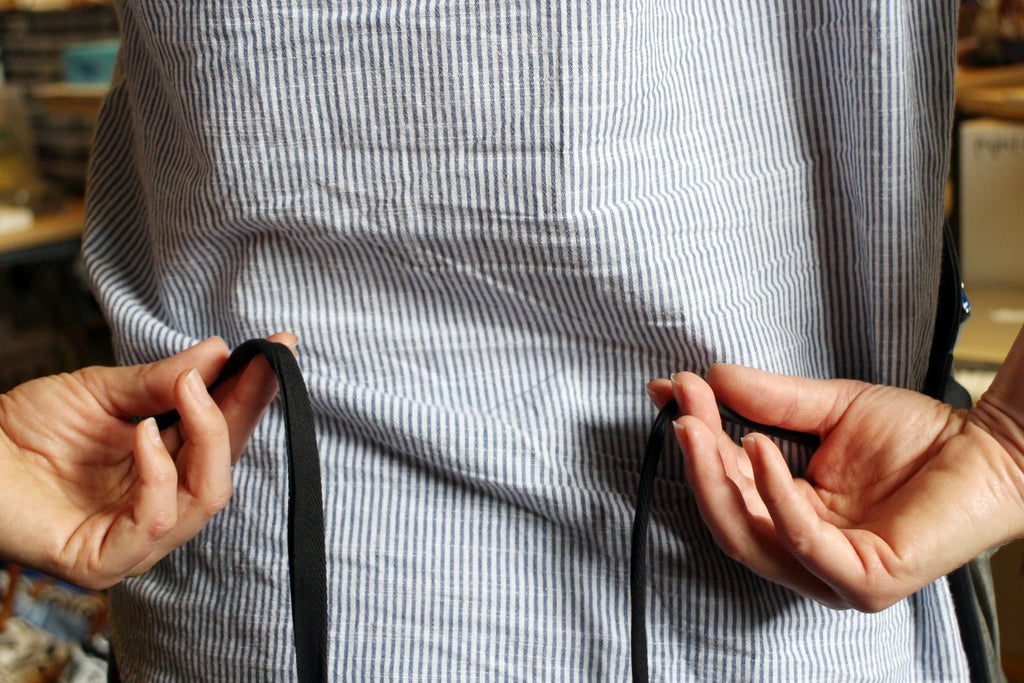
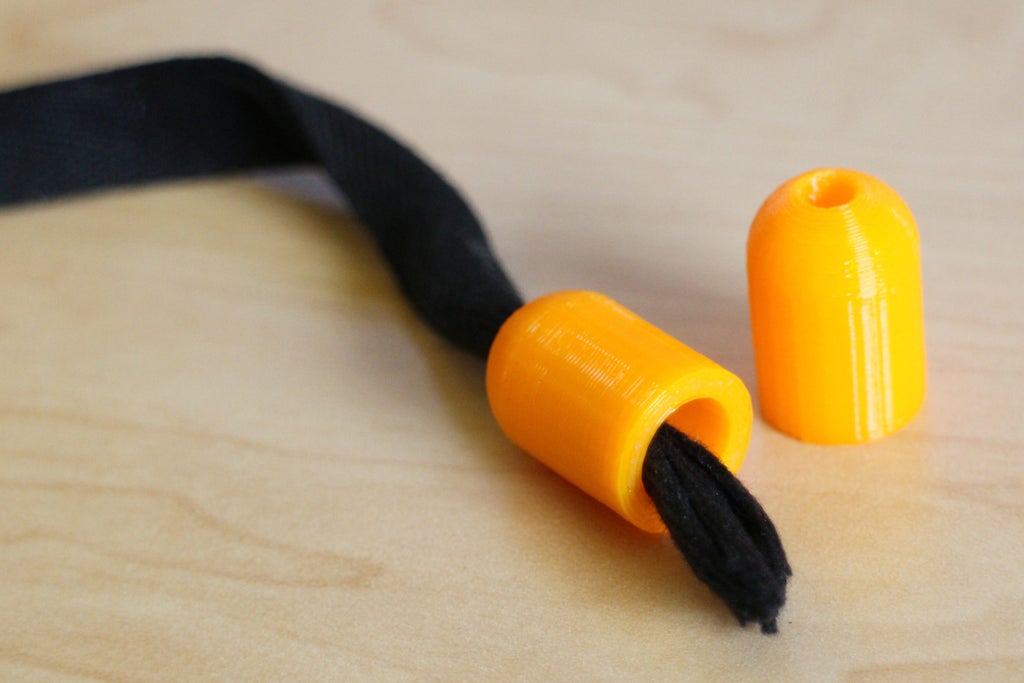
Whether you can't reach behind your back to tie a knot, or (like me) you're constantly taking your apron on and off with questionable substances on my hands, a magnetic apron tie is an elegant solution to keeping your overgarment in order. Simply bring the two magnet ties close to each other to connect the apron ties. Though the strong neodymium magnets can hold tight against a linear pull, they can be easily slipped apart to take the apron off.
I made these magnetic ties in about an hour, from design to finished product. I designing the model using easy to use browser based software, Tinkercad. It's powerful, fun, and best of all, free!
Leave your boring apron ties behind, and attach yourself to magnetic ties. I'll walk you through how they were made, and even included the model files in case you want to modify my design or print your own.
Ready? let's make!
Step 1: Measure
I used 10mm neodymium magnets, which are small enough to be unobtrusive but strong enough to hold the apron ties together.
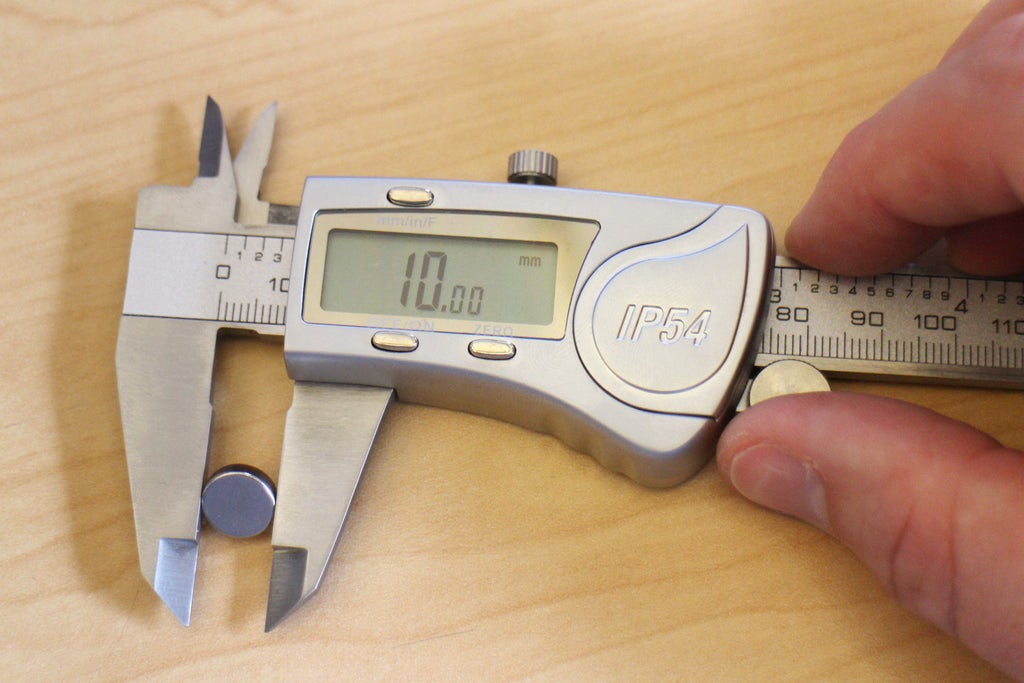
To make sure things are accurate I used digital calipers to measure the magnet, which was 10mmx3mm.
Step 2: Open Tinkercad + Place Shapes

Tinkercad is a browser-based design tool. It's completely free, and since it does all the heavy lifting in the cloud it can run on any computer with an internet connection.
Start a new design and you'll see a blank workplane in the center, with a list of shapes on the right side of the screen. Tinkercad combines simple shapes to make complex things. Here's some basic rules of Tinkercad:
- Default units in Tinkercad is millimeters - perfect for precision
- Shapes can easily be clicked and dragged around to change their location
- Actions can easily be undone using the undo command (crtl+z), just like every other application
Easy-peasy. Let's start!
Magnet Reference Shape
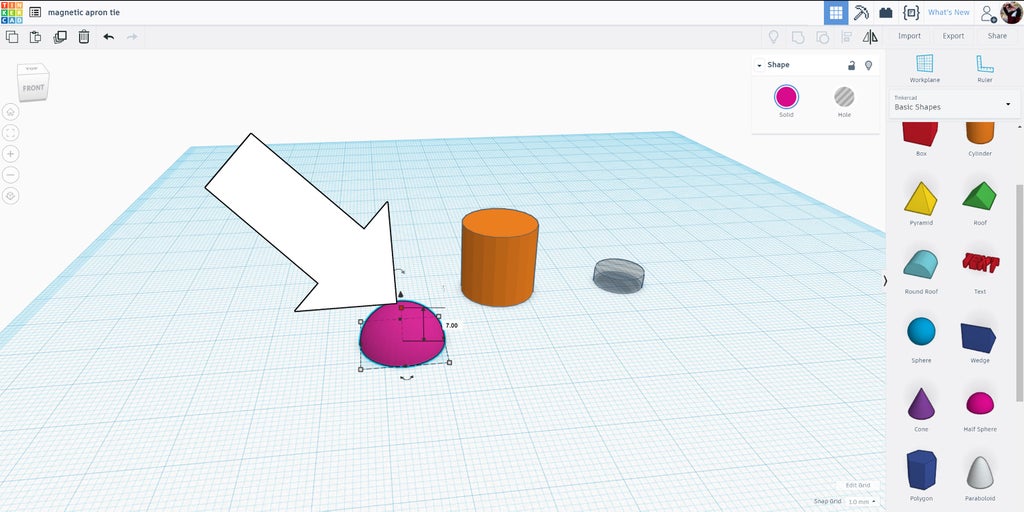
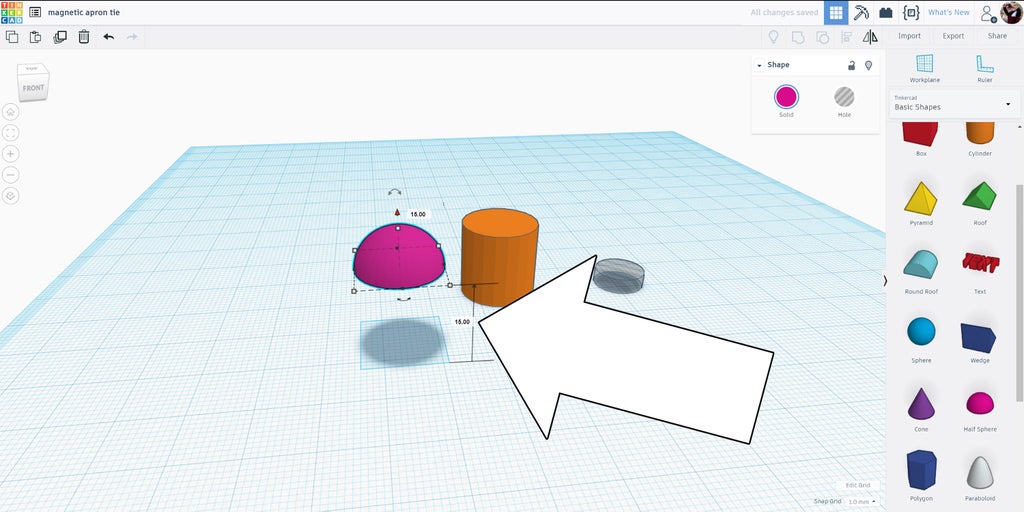
For reference I made a shape to represent the neodymium magnet I was using. This shape won't be part of the model, but helped me visualize the scale of the ties I was modeling.
I started by draging a hole cylinder (the translucent grey shape) from the shape bar on the right side onto the workplane. Click on the placed shape and see white handles on the shape, these can be clicked and dragged to change the shape, or you can enter in a value for a specific dimension. Based on my measurements I changed the diameter to 10mm and the height to 3mm.
Apron Tie Model
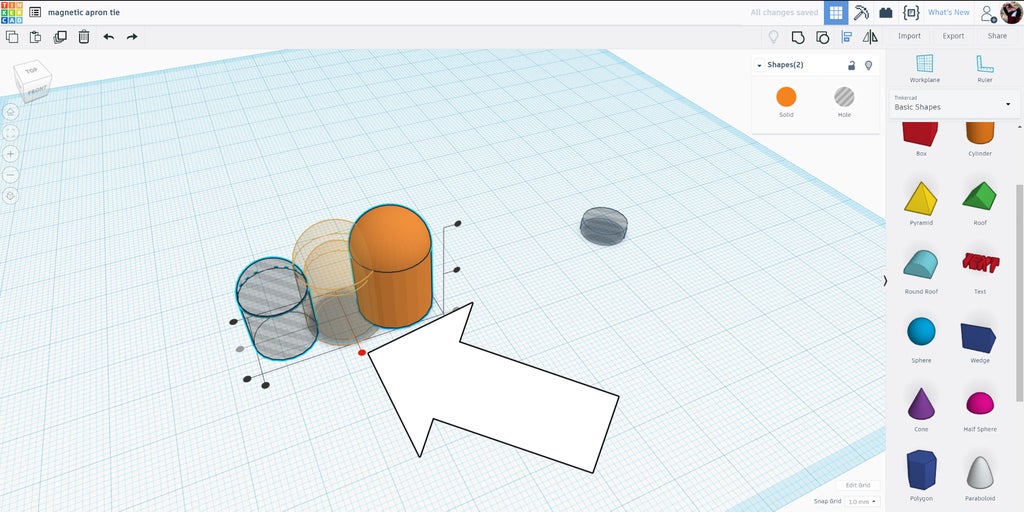
For the apron tie I dragged a solid cylinder from the shape bar into the workplane. Clicking on the shape I changed the dimensions to 15mm in diameter and the height to 15mm.
Step 3: Add Dome Shape

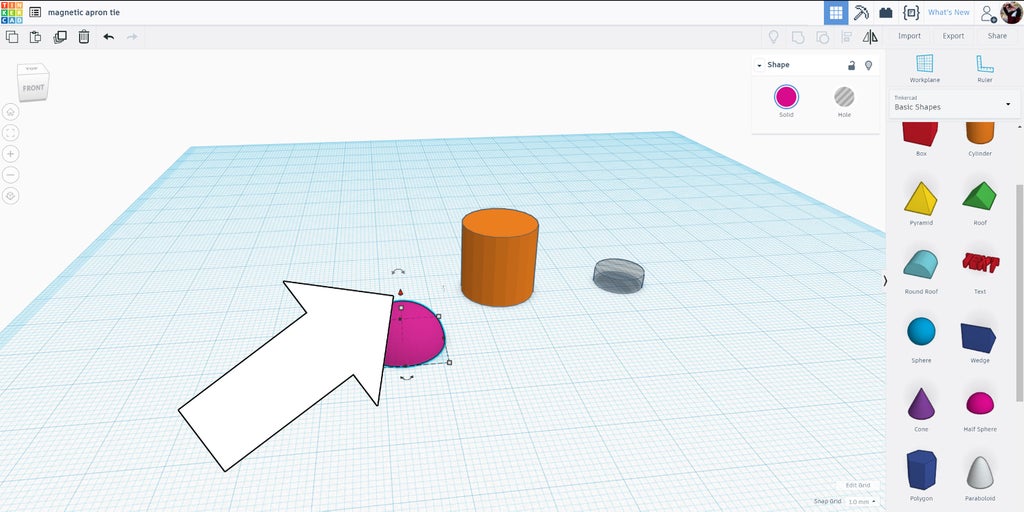
To make a rounded top for the apron tie I dragged a dome from the shape bar on the right onto the workplane. Using the white handles that appear when a shape is clicked on I resized the dome diameter to match the cylinder, 15mm.
Clicking on the single top white handle stretches the height of the dome shape, in this case I went for a height of 7mm.
Above the white handle is a small arrow. Moving your mouse over this arrow will turn it red, indicating you can click on it. Click and drag upwards to change the distance the dome is from the workplane.
Dragging upwards there will be a dimension tag showing how far off the workplane the dome is, you can either drag upwards to height you want or simply type a numerical value for the distance. I wanted the dome to sit on top of the cylinder, which is 15mm tall, so I typed 15mm for the height of the dome off the workplane.
Step 4: Align Dome to Cylinder

Drag a selection window around the dome and cylinder to select them both. Find the align tool in the top toolbar on the right side. Clicking align will bring up a grid around the selected pieces.
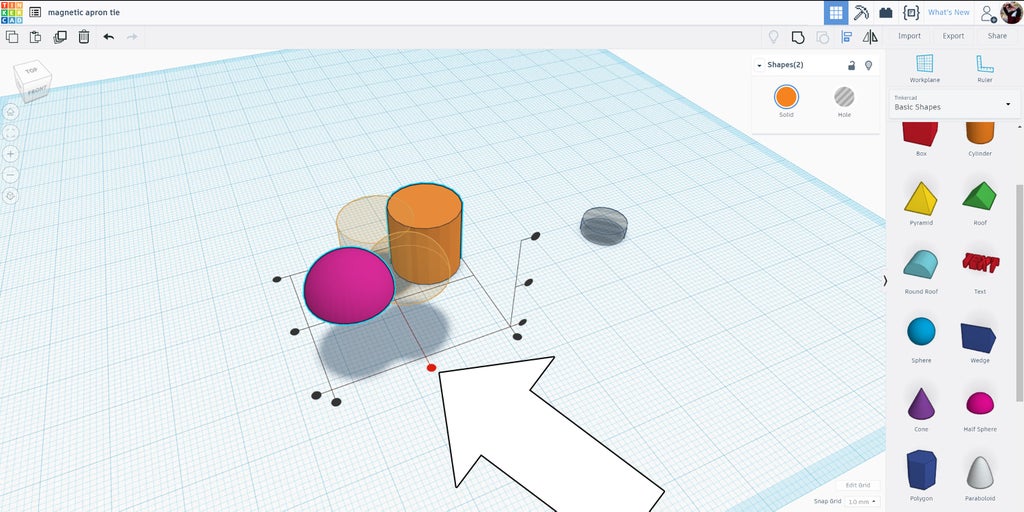
The nodes on the grid indicate how you want the pieces aligned on the axis. Since we want the two shapes to be aligned to each other we'll use the middle mode on the bottom to line them up in the X-axis.
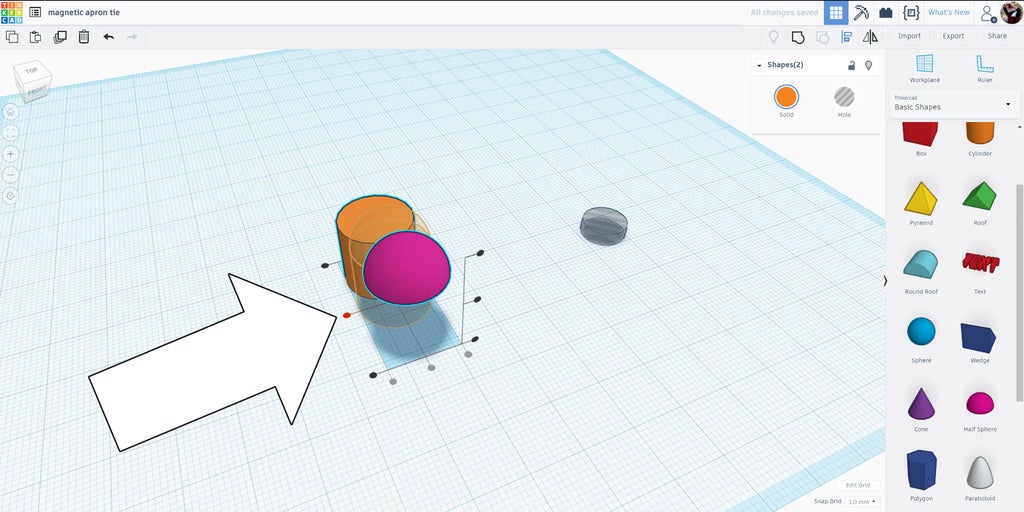
Once clicked the shapes will move and accept another alignment. This time we'll align them along the Y-axis, moving the two shapes in line with each other. There's no need to align the pieces vertically since we already have the dome at the right height, on top of the cylinder.
Click in any blank space on the workplane to clear the selection and keep the pieces aligned.
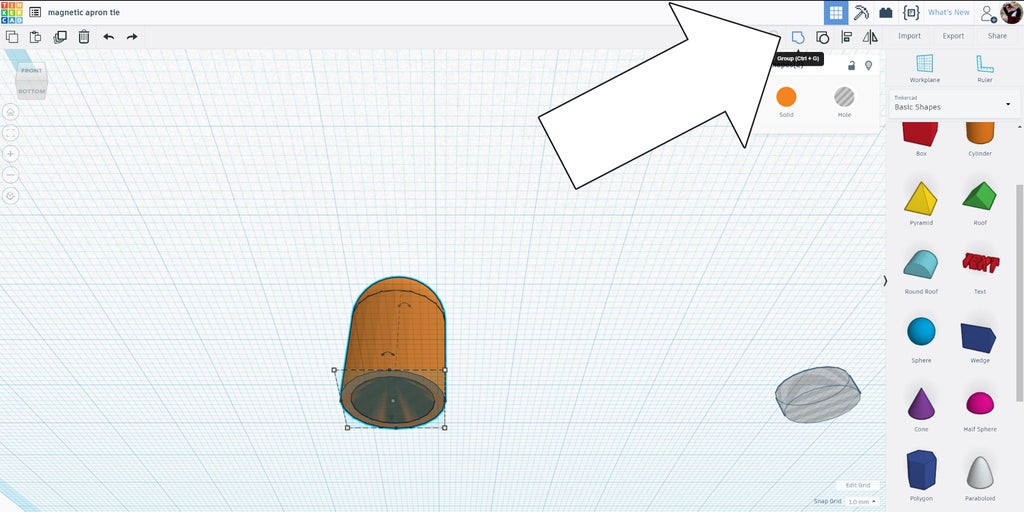
Step 5: Group

Drag a selection window around the aligned shapes and find the Group button on the top toolbar on the right side. You can use the keyboard shortcut ctrl+g if you like.
Grouping the shapes combines them into one solid shape. You can click the Ungroup button if you want to turn them back into separate shapes at any time.
Step 6: Make a Copy

Select the grouped shape and make a copy by using the Copy and Paste buttons on the top tool bar on the left side, or the keyboard shortcuts ctrl+c and then ctrl+v. Alternatively you can use the Duplicate button (ctrl+d) to make a duplicate on top of the existing model that you can drag to separate.
Move your copy so that it's next to the original. We'll use this copy to hollow out a cavity inside the original.
Step 7: Scale Copy and Make Into a Hole

Click on the copy to show the white handles. Holding down the shift key while you click on one of the corners will constrain the dimensions to scale uniformly. Slowly move the mouse towards the center of the copy while holding shift to make the shape smaller. I dragged the copy shape until it was scaled down to 10mmx10mm.
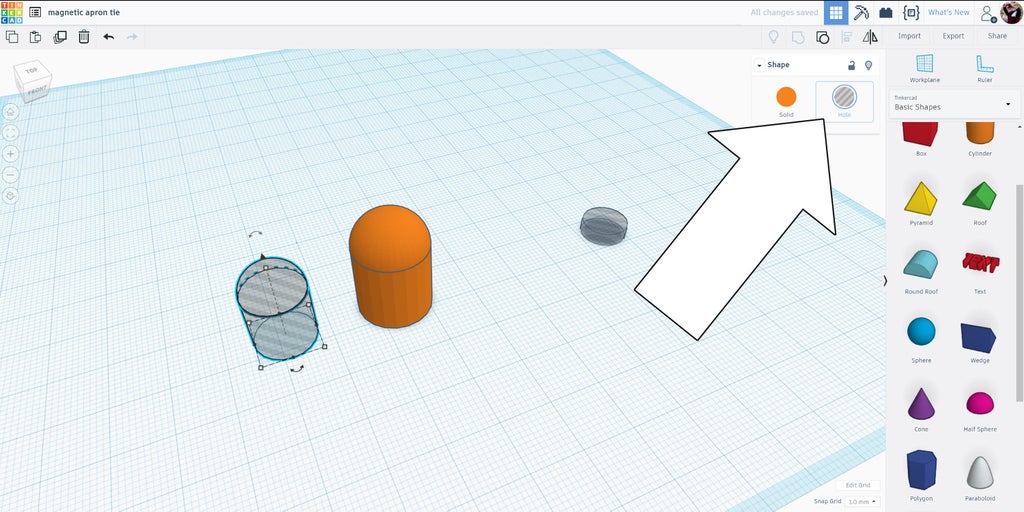
Once the copy was scaled down I made it into a hole by clicking on the hole button next to the shape list on the right side of the screen.
Step 8: Make Cavity

Now that we have a hole shape we need to put it inside the solid shape. We'll use the align tool again to complete this. Drag a selection window around the solid and hole shapes and click the align button on the top toolbar.
When the align grid appears over the two shapes use the center node to bring the two shapes in line with each other.
To see how they are lined up you can look underneath the model by using the mouse to navigate under the workplane, or you can click on the view cube on the upper left of the screen.
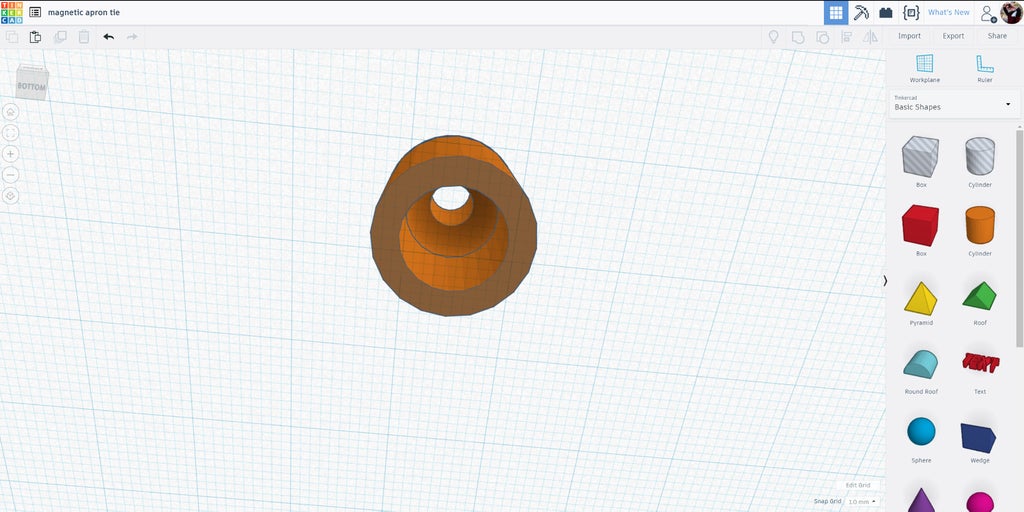
Once the two shapes are centered together they can be grouped. This will make the hole shape carve out in inside of the solid shape.
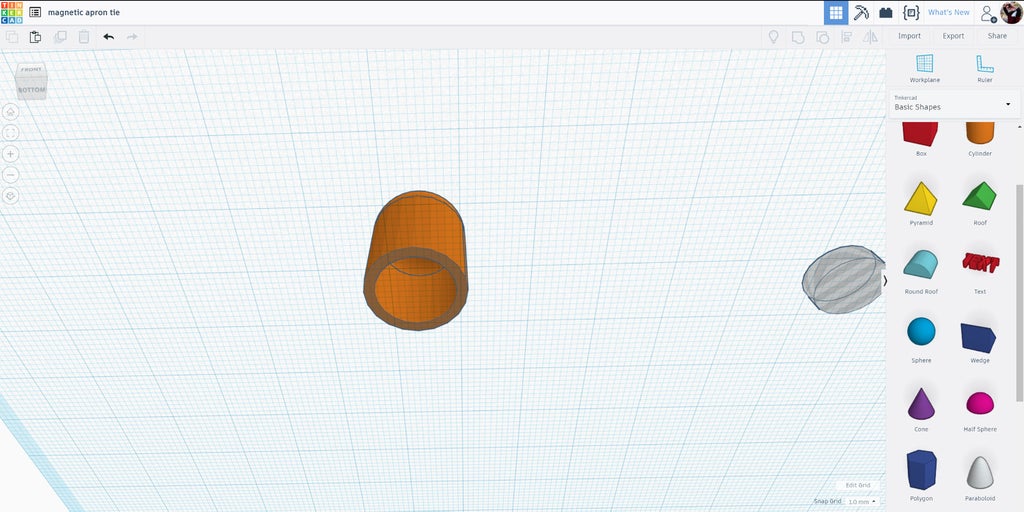
Once the shapes are grouped there will be a neat cavity inside the solid piece.
Step 9: Pass Through Opening

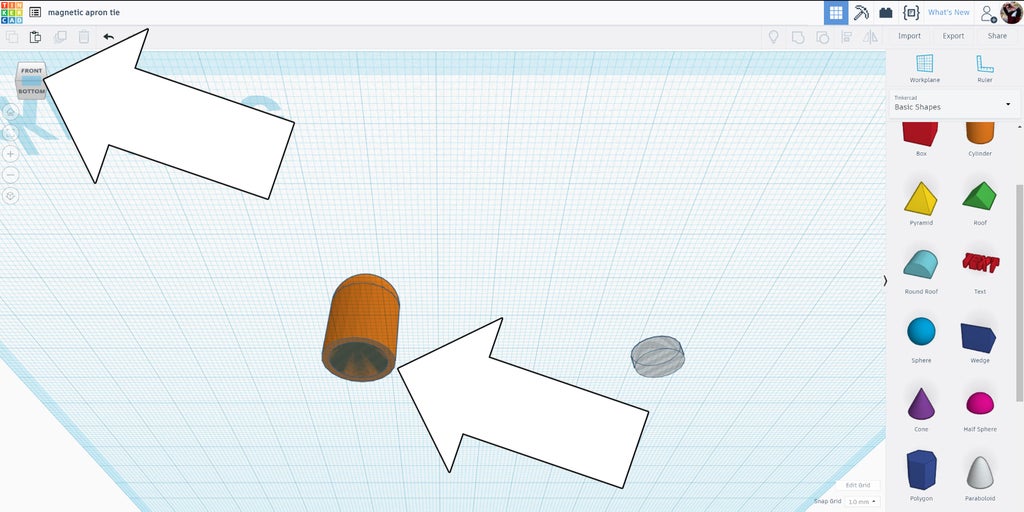
A small opening needs to be made at the top of the domed shape to allow the apron ties to pass through. I dragged a new cylinder hole from the library on the right and placed it on the workplane.
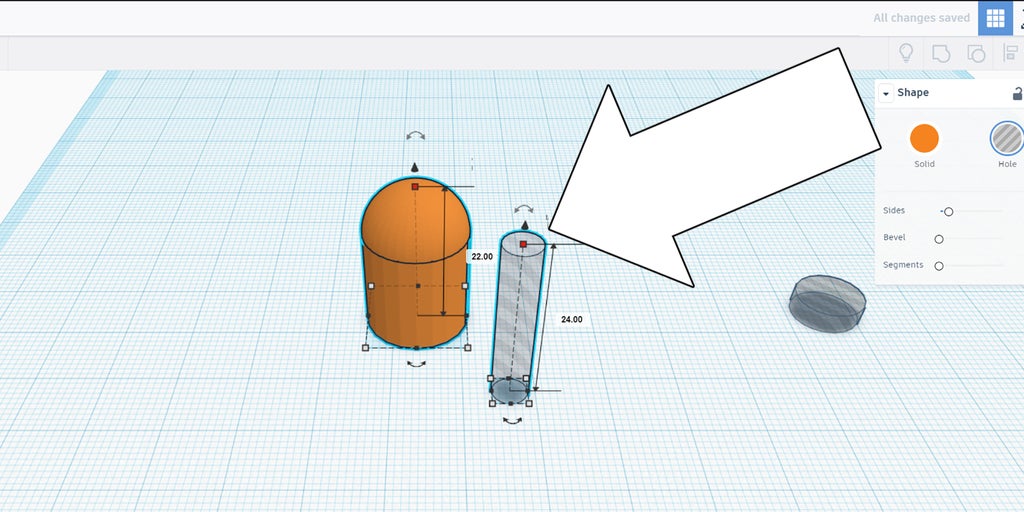
I made the cylinder hole taller than the solid shape by clicking on the cylinder and using the white handle near the top to drag upwards. THe solid shape is 22mm high, so I made the cylinder hole slightly taller at 24mm.
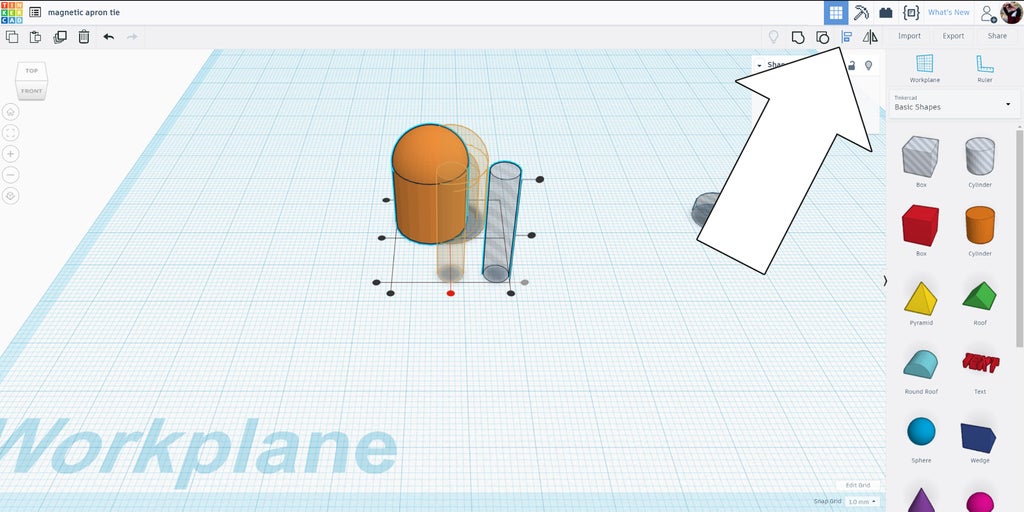
Using the align tool again I located the tall cylinder hole in the middle of the solid shape.
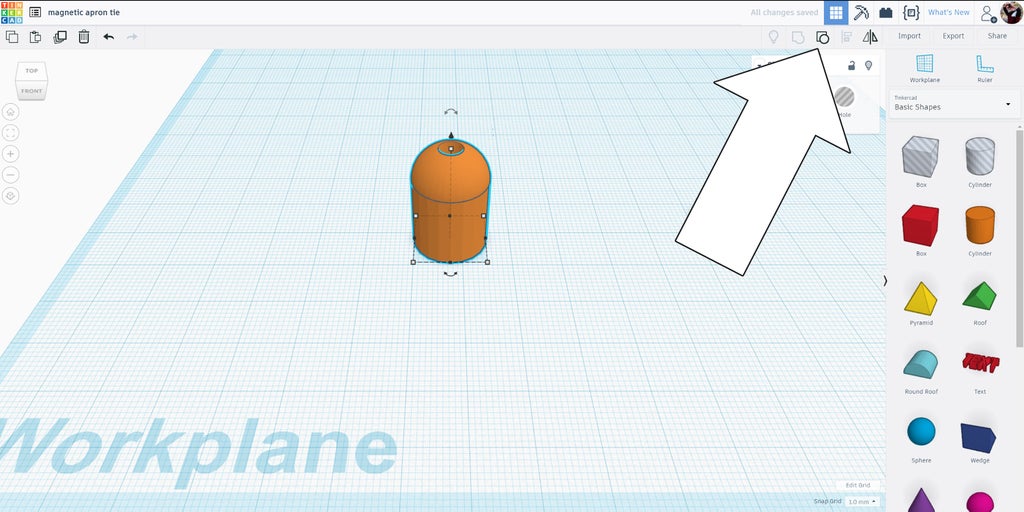
Selecting both I used the group tool to combine the tall cylinder hold with the solid piece to make the opening.
Step 10: Duplicate + Export

To make a second model use the duplicate button (ctrl+d), then drag the two models so they are side by side.
The export button on the top right will open up a window and ask you what you'd like to export, and in which file format.
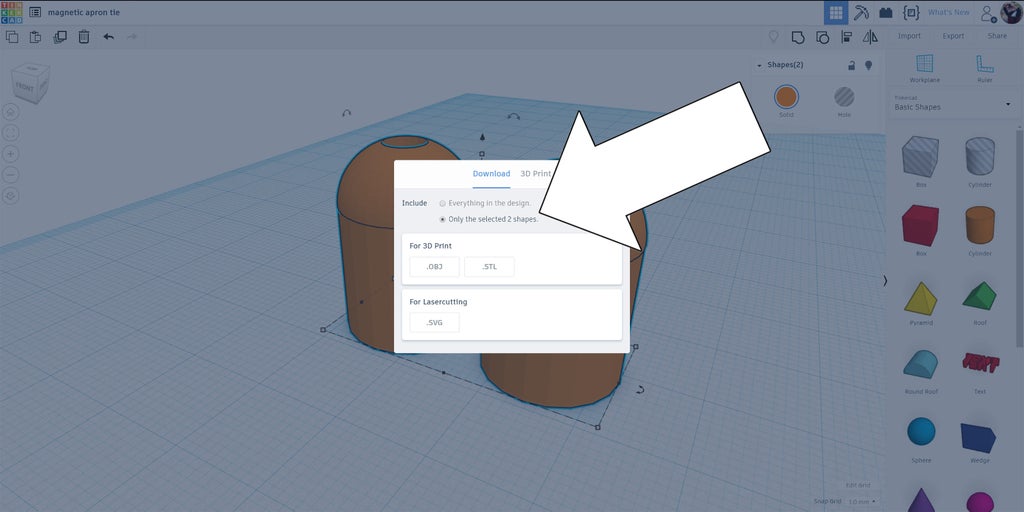
I've included the STL file for this model below, or you can take my model and modify it in Tinkercad.
Attachments

Step 11: Print

A 3D printer doesn't need to be expensive. I use a Creality CR-10, an inexpensive printer that has really good results.
I used standard settings, with no supports or raft. The prints took about 30 minutes to finish.
Attachments

Step 12: Attach Apron

Before adding the magnets into the large opening, the existing apron ties need to be inserted through the small opening.
I twisted the frayed end of the apron tie forming a point, then guided that through the small opening in one of the prints. After measuring where I wanted the ties to connect, a knot was tied to prevent the apron tie from escaping out the small opening.
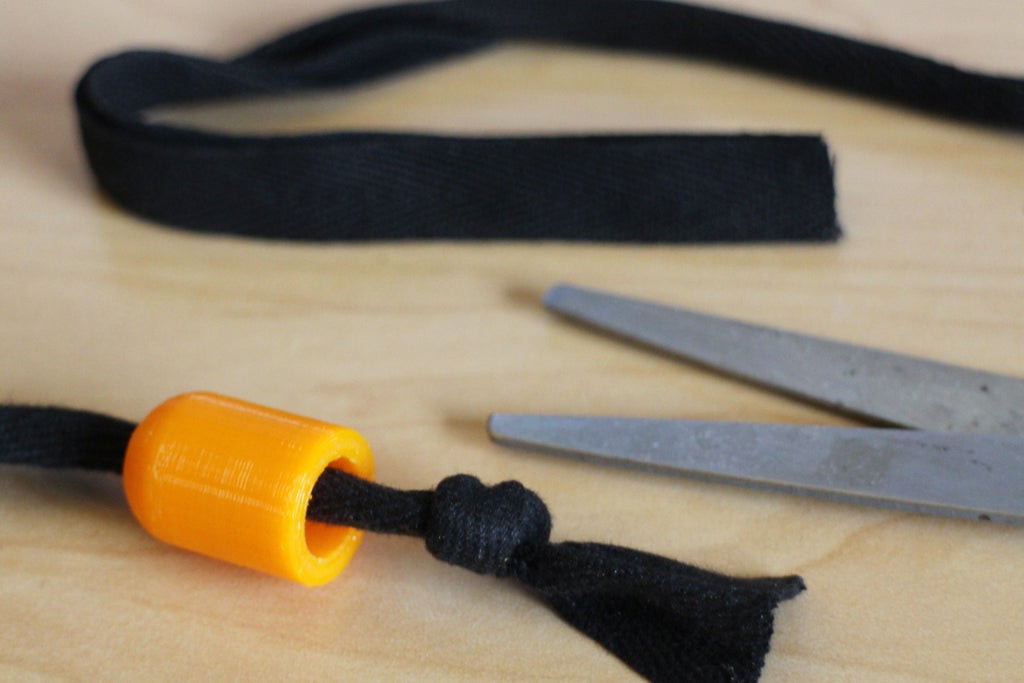
The excess apron tie was trimmed close to the knot, but not too close so that the knot might come undone.
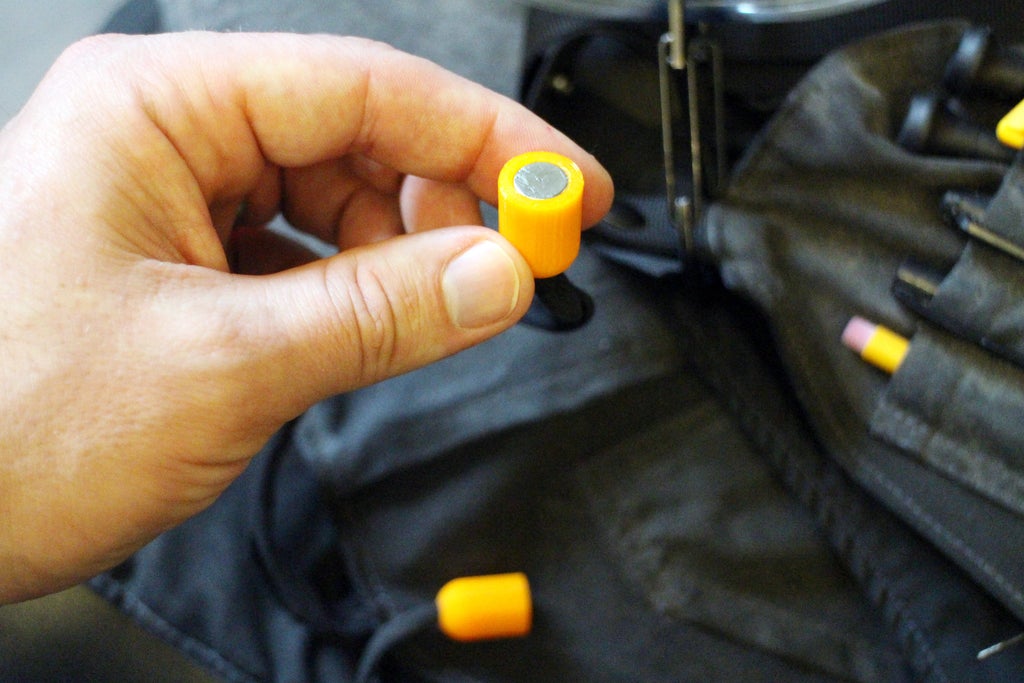
Step 13: Insert Magnets

The last step is to bunch any leftover apron tie into the 3D print and force a magnet into the large opening to seal it shut.
I designed the large opening to be the exact same diameter as the magnet, so it's a very tight fit. I didn't want to use glue to hold the magnet in place, but needed the magnet to stay tightly in place. An interference fit was a good choice.
I use my apron every day in the shop and having a magnetic apron tie makes putting it on a little easier. There's also no extra fabric hanging down that can be pulled into a machine. Bonus!
Have you made your own magnetic apron ties? I want to see it!
Happy making :)


